• ABOUT
  • COLLABORATE
  • CONTACT

Life is Beautiful

Motherhood, Sewing, Family

  • SEW
  • HOME
  • PARTY
  • TRAVEL
  • SHARING MY HEART
  • SHOP

My Son’s Bunk Bed Dream Came True!

July 19, 2023~ Etc.

My son has always wanted a bunk bed with a slide and his dream finally came true!

What child wouldn’t want a bunkbed, am I right? But what makes it even better is if the bunkbed had a slide! I think that is every kid’s ultimate dream, I know mine would have been!

So I am living vicariously through my son and I am not going to lie, I have slid down the slides countless times and have enjoyed sleeping on the bunkbed with my son on more than one occasion.

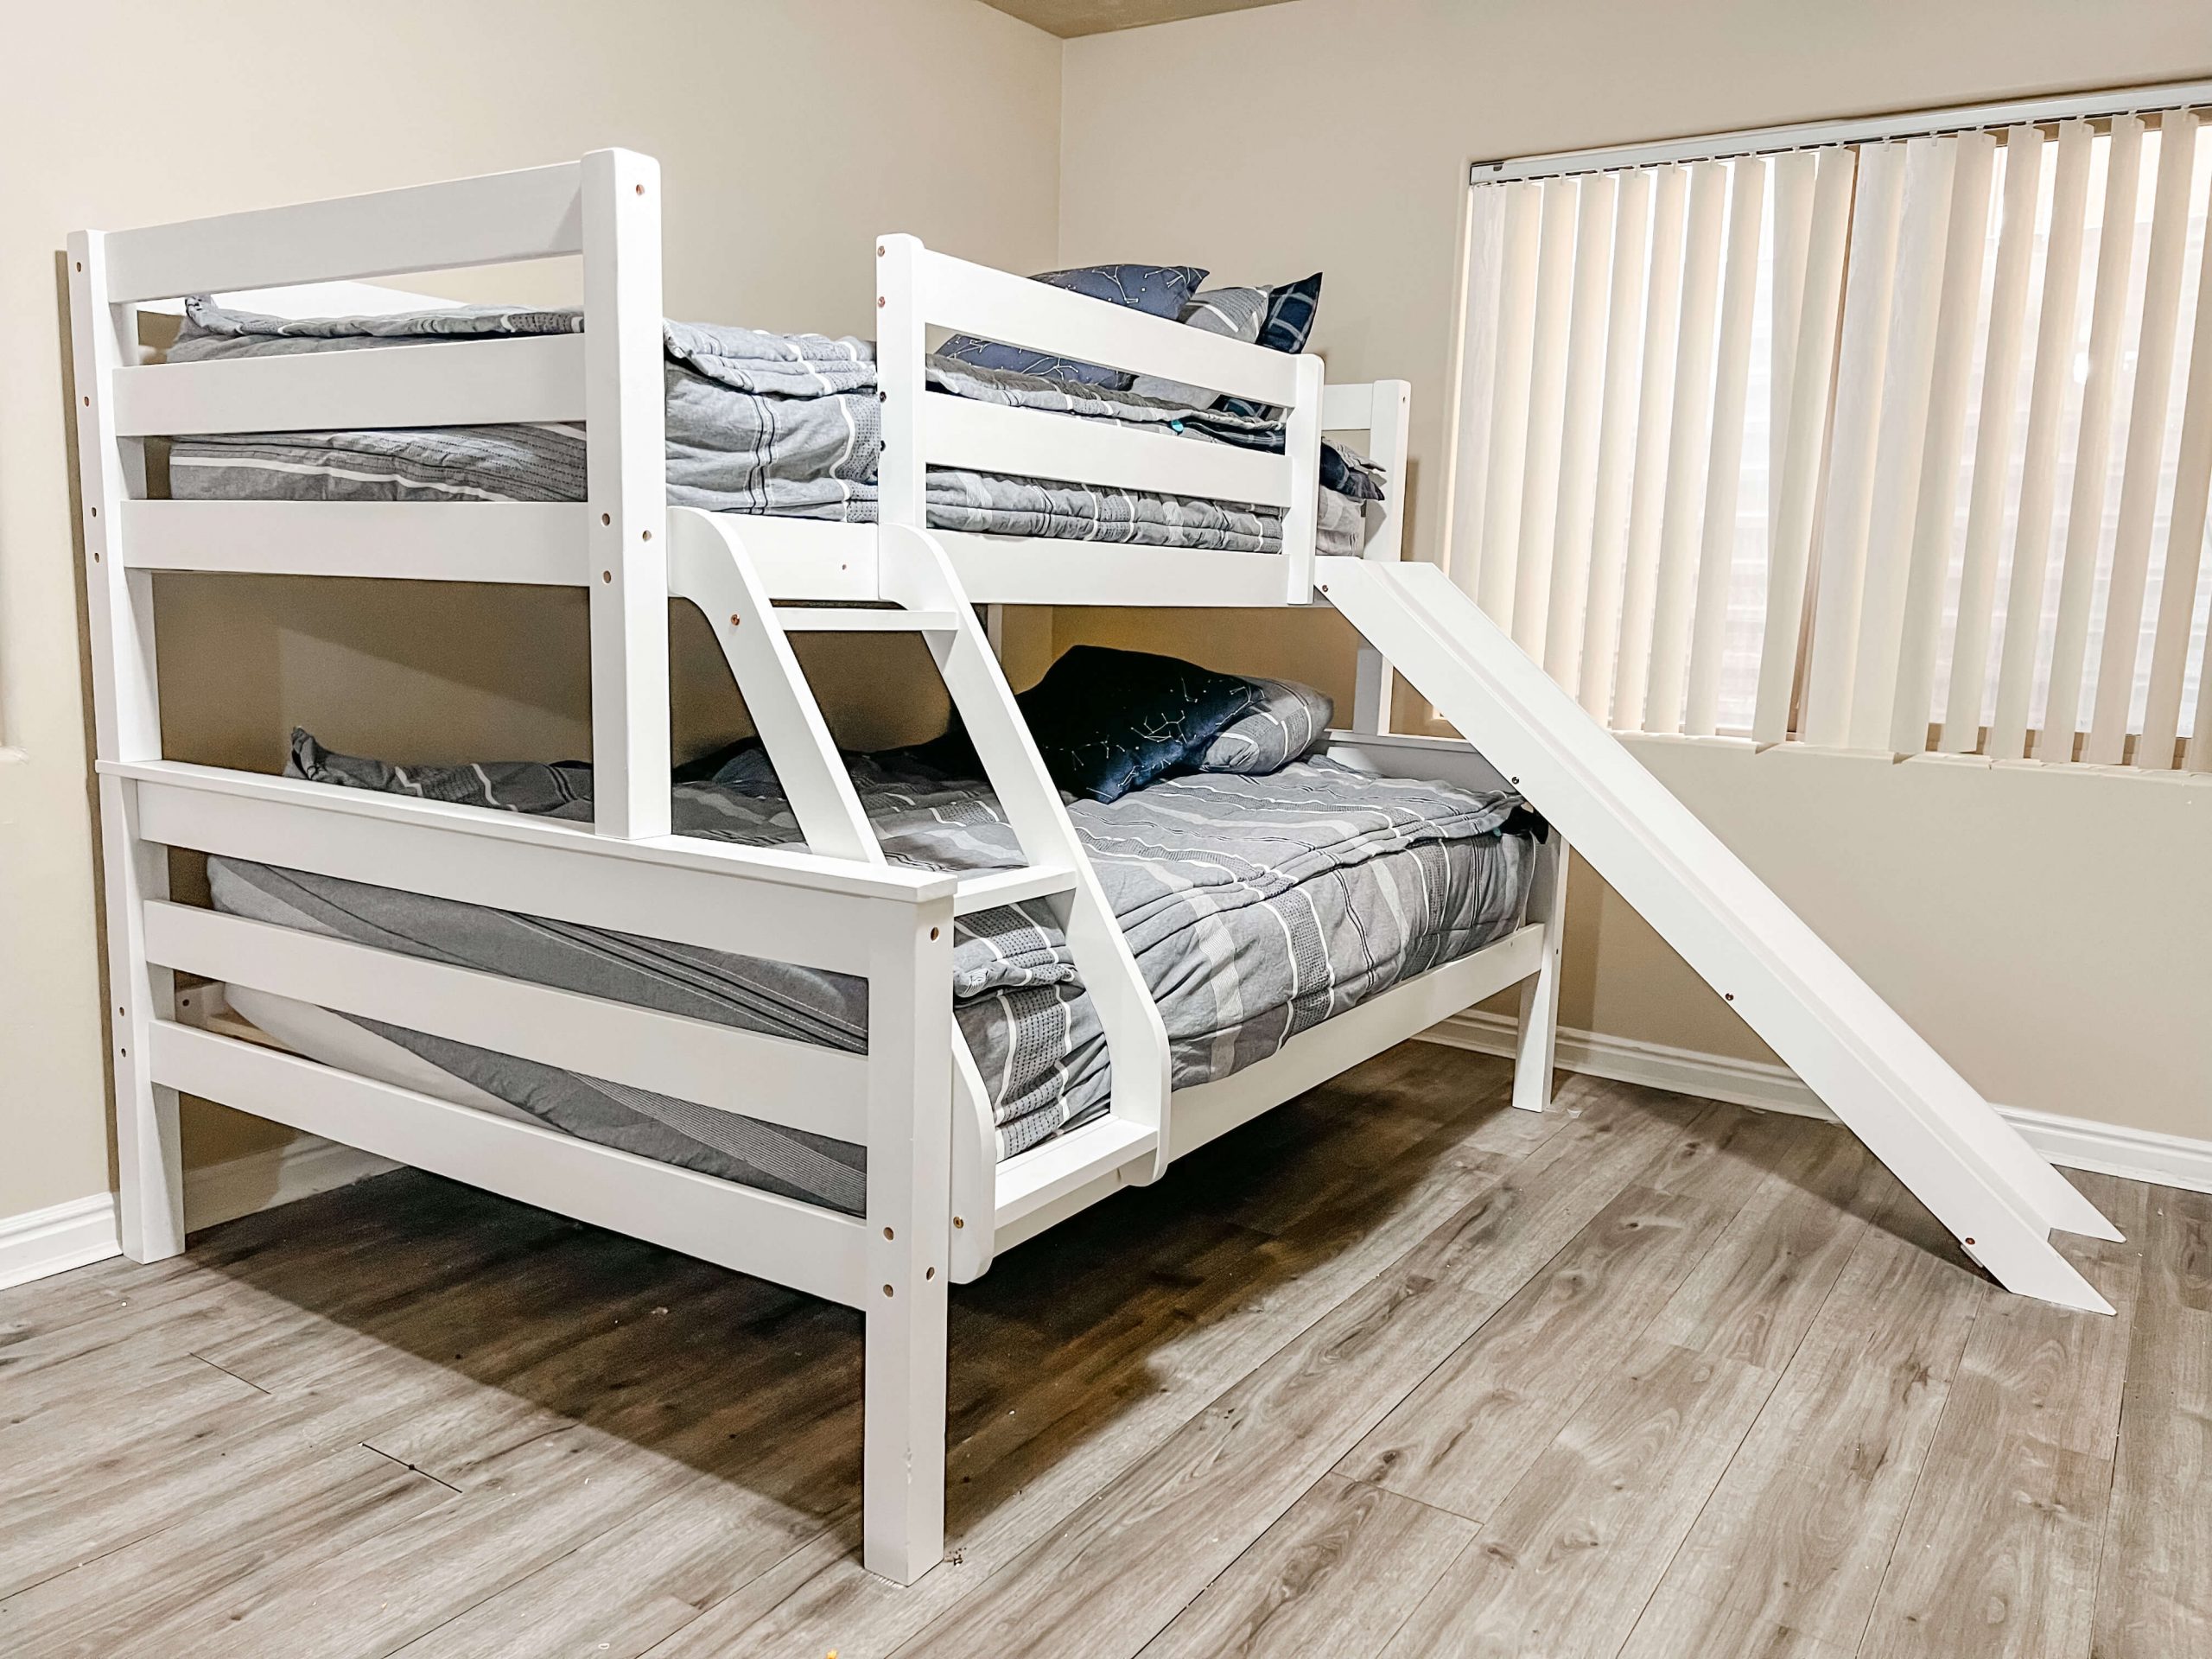
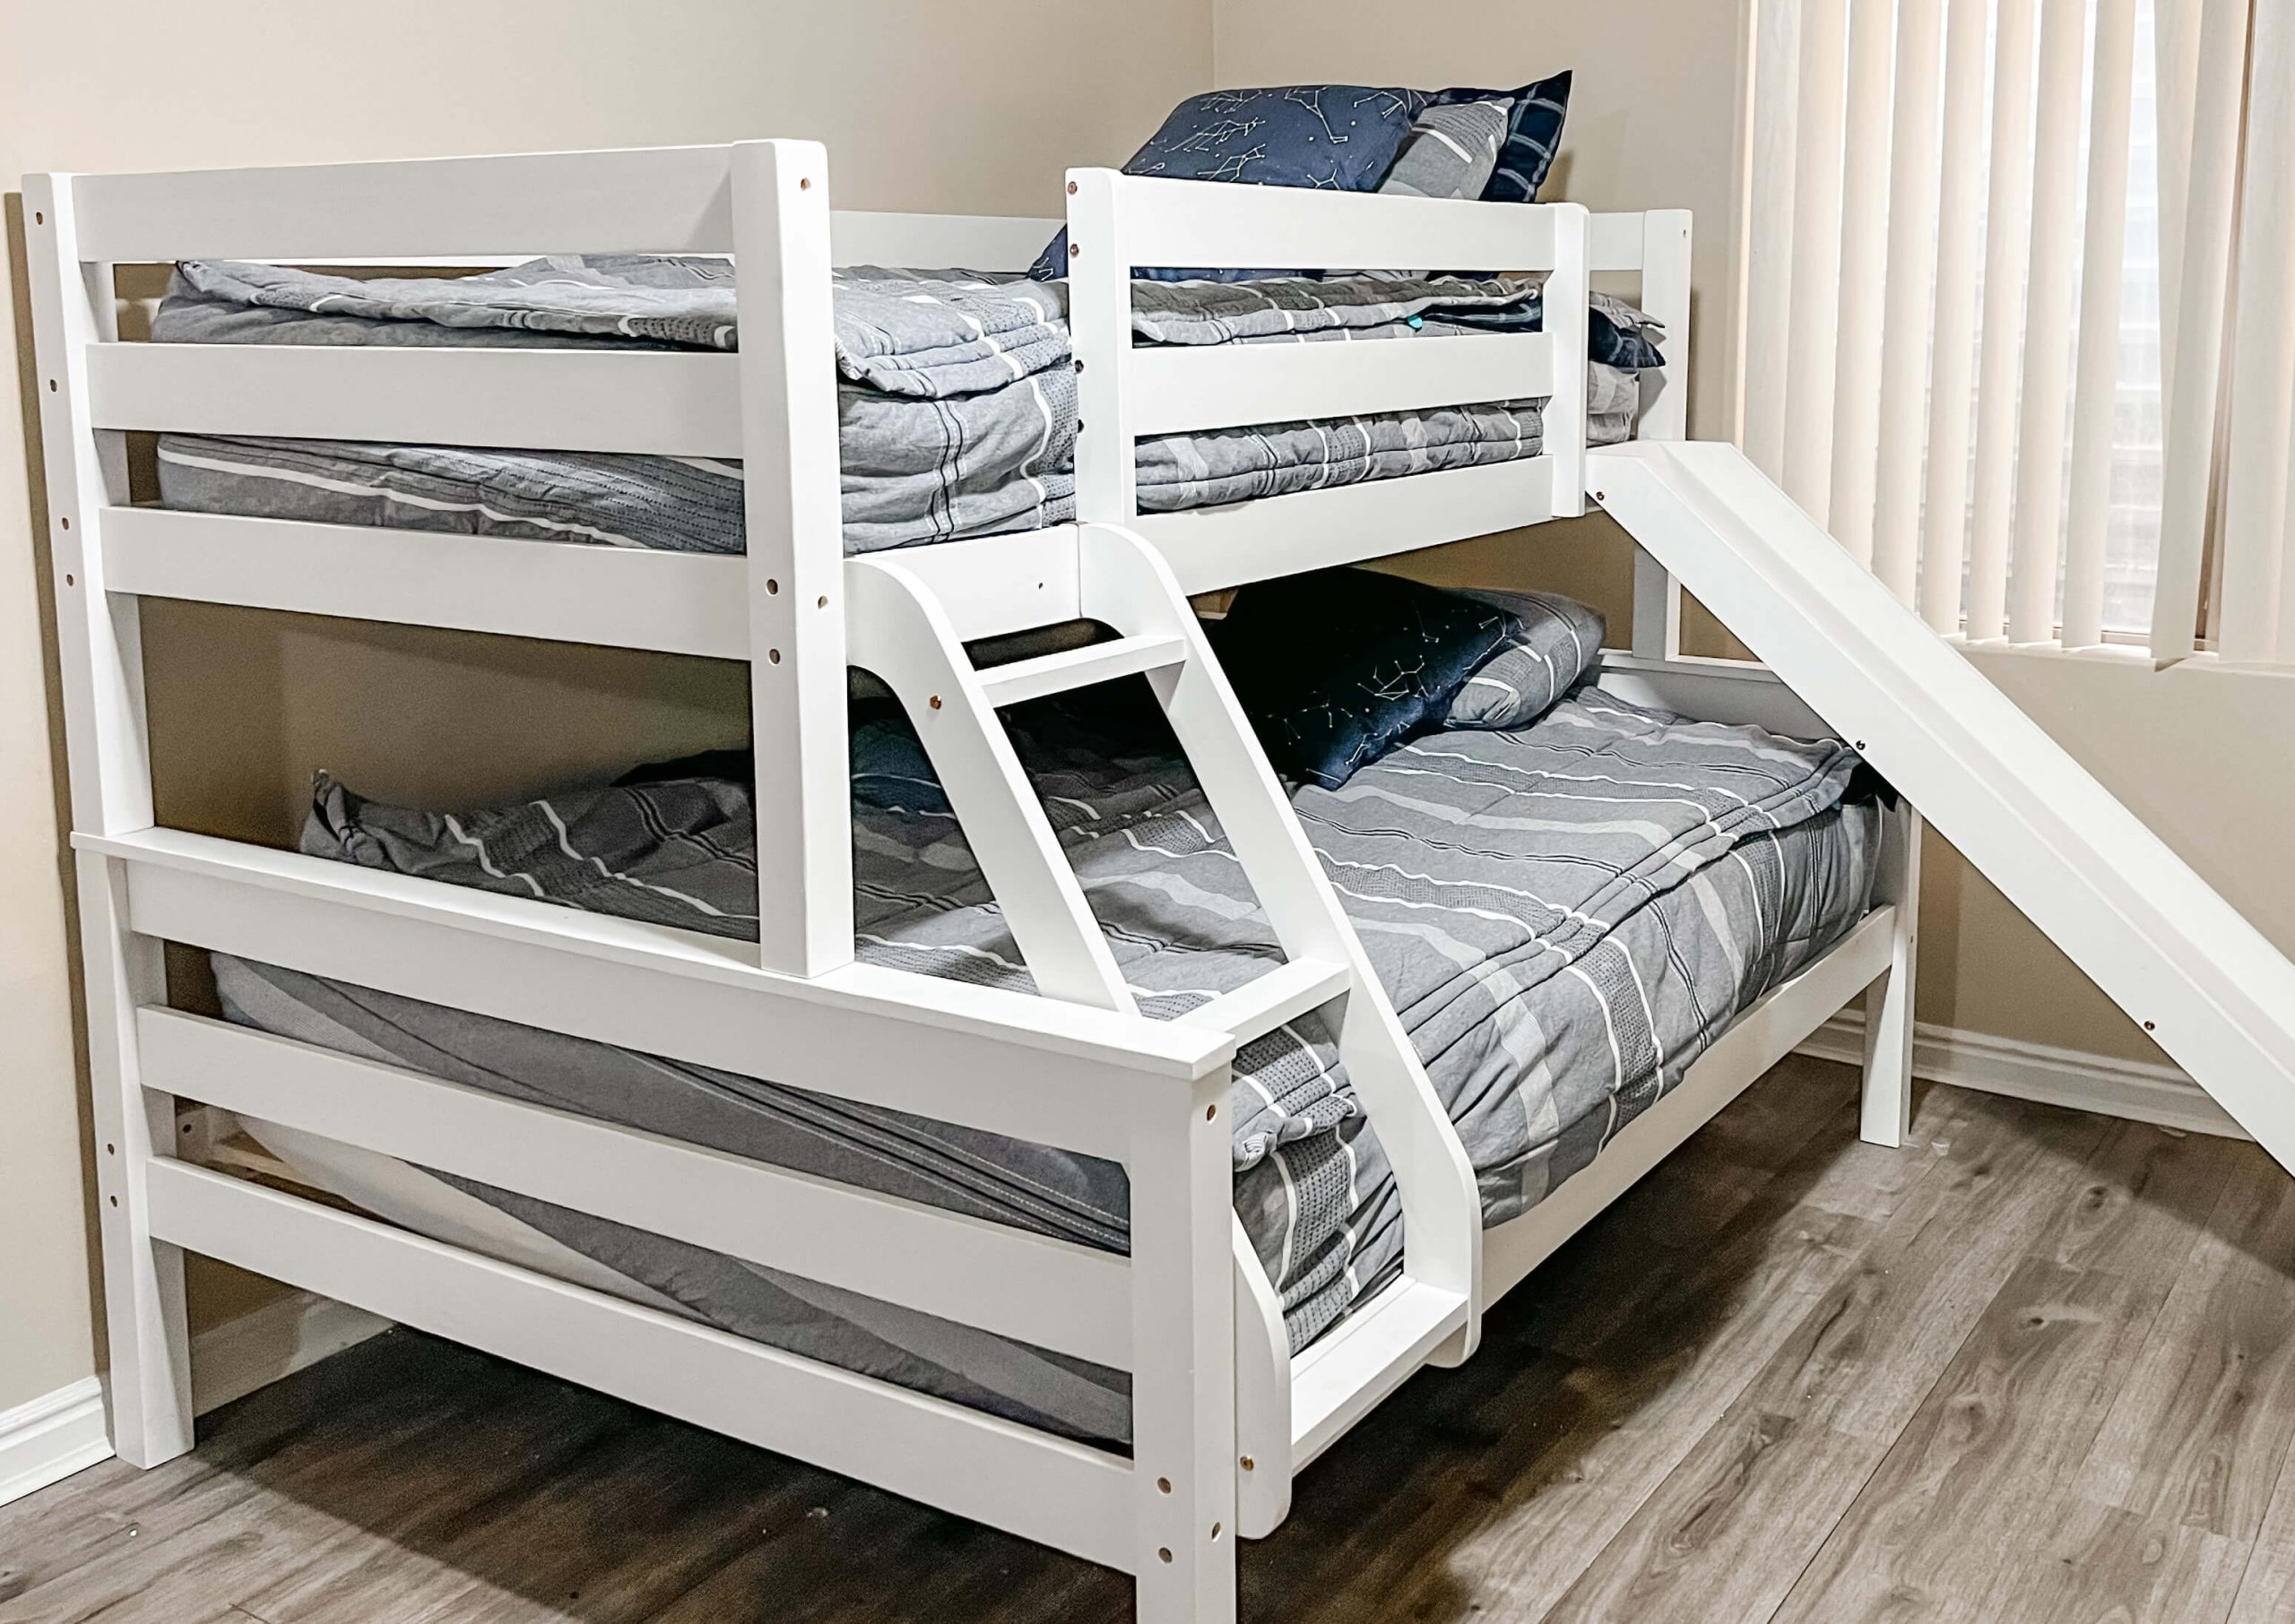
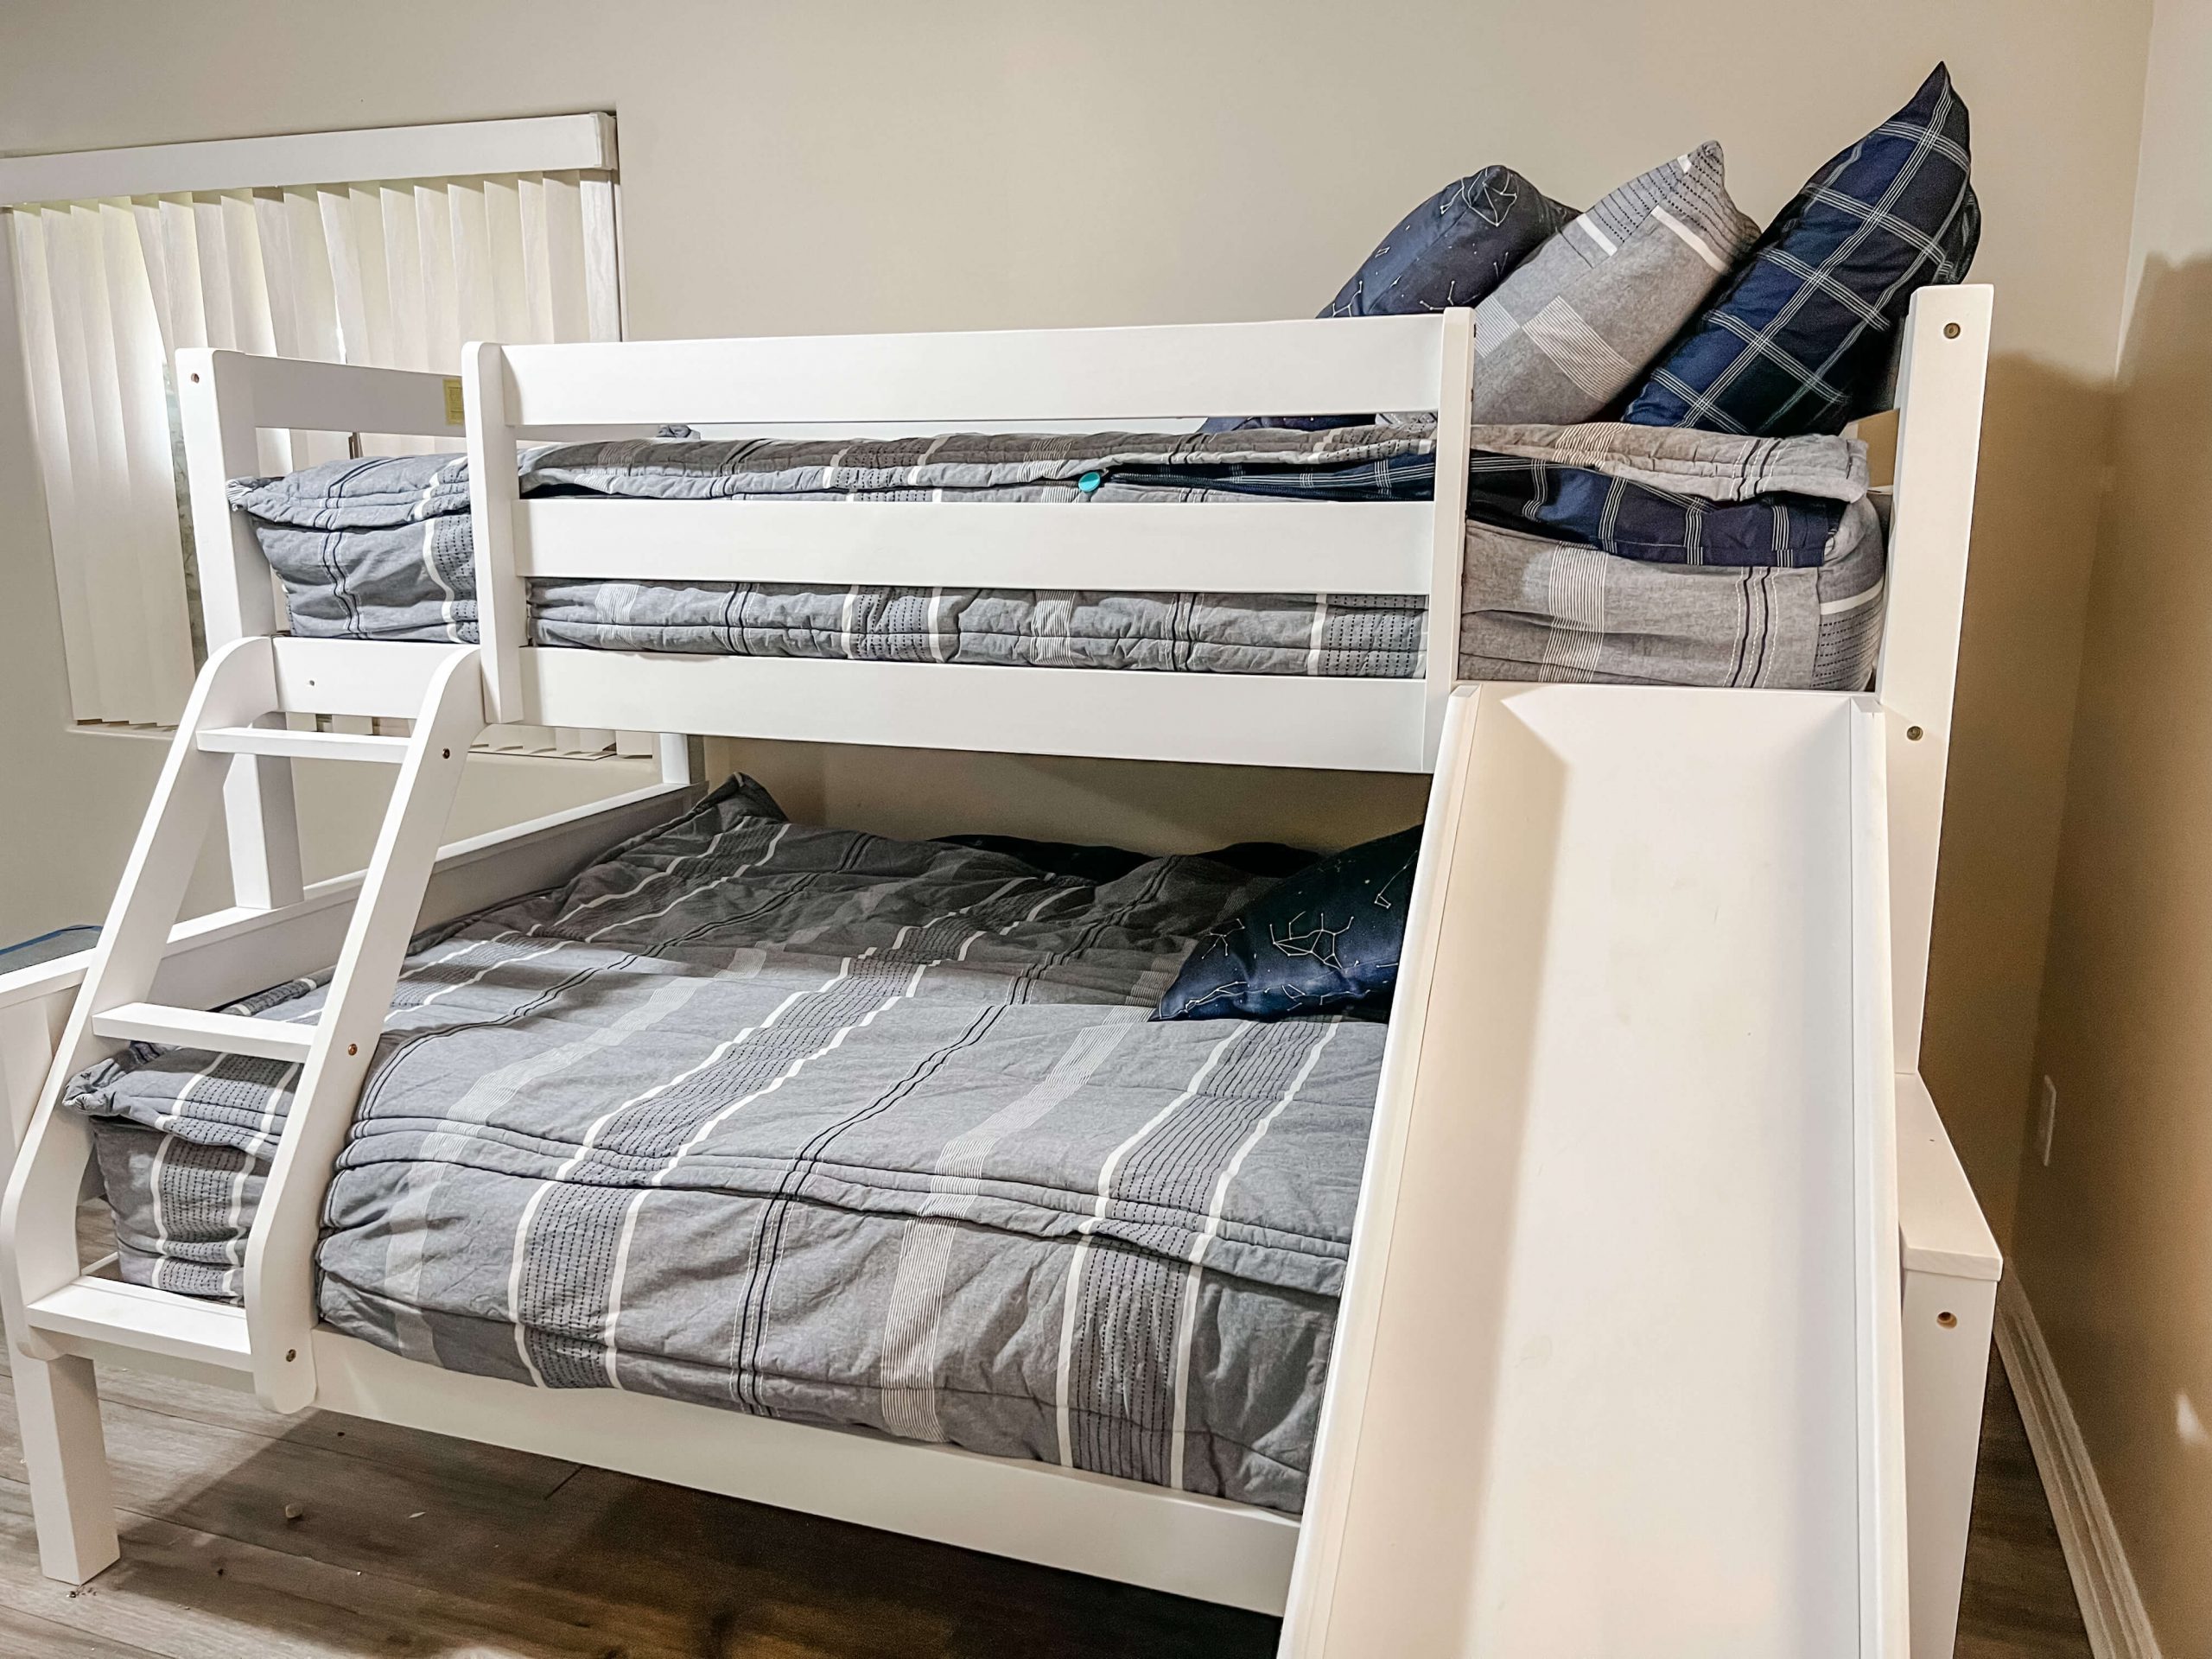
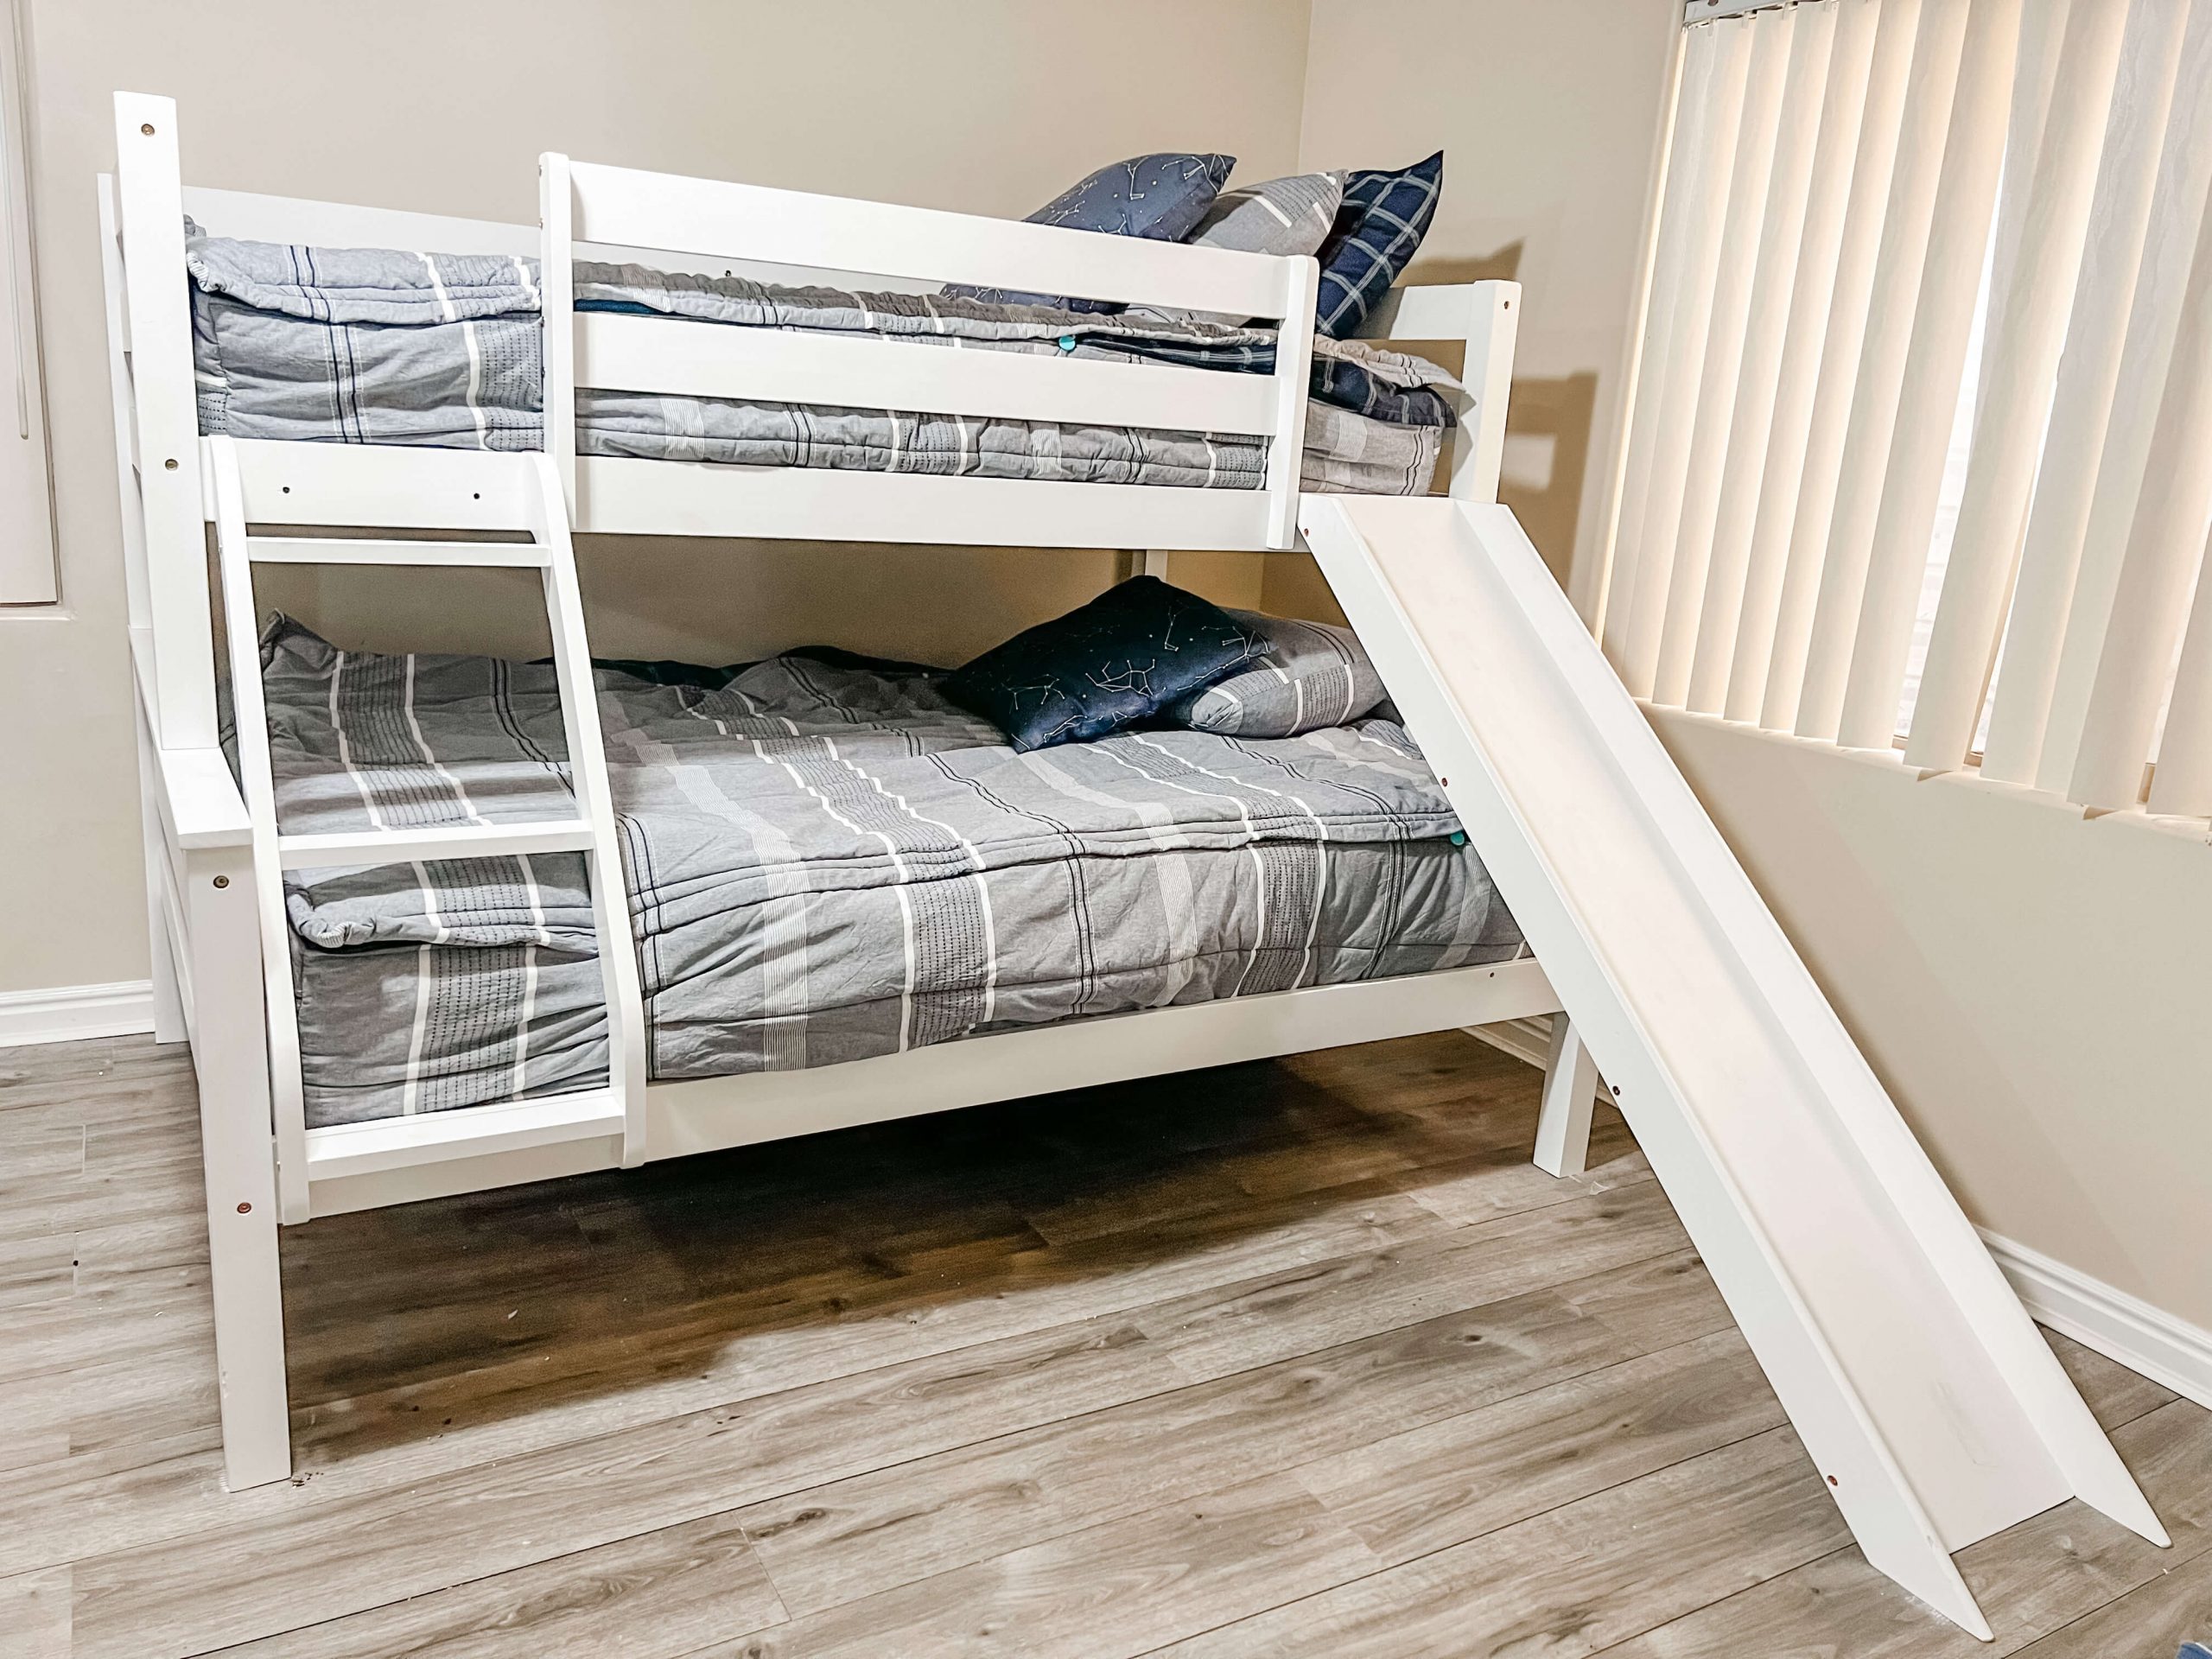
I got this white bunkbed set with a full size bed on the bottom and a twin size on the top from Custom Kids Furniture and I am very satisfied with it! It is high-quality, beautifully made and very sturdy. I love that it doesn’t need any box springs since it has support slats for the mattresses!

I also love that it has a slide and also a ladder so you have both options for going up and down, depending on the kid’s mood or preference at any given moment.

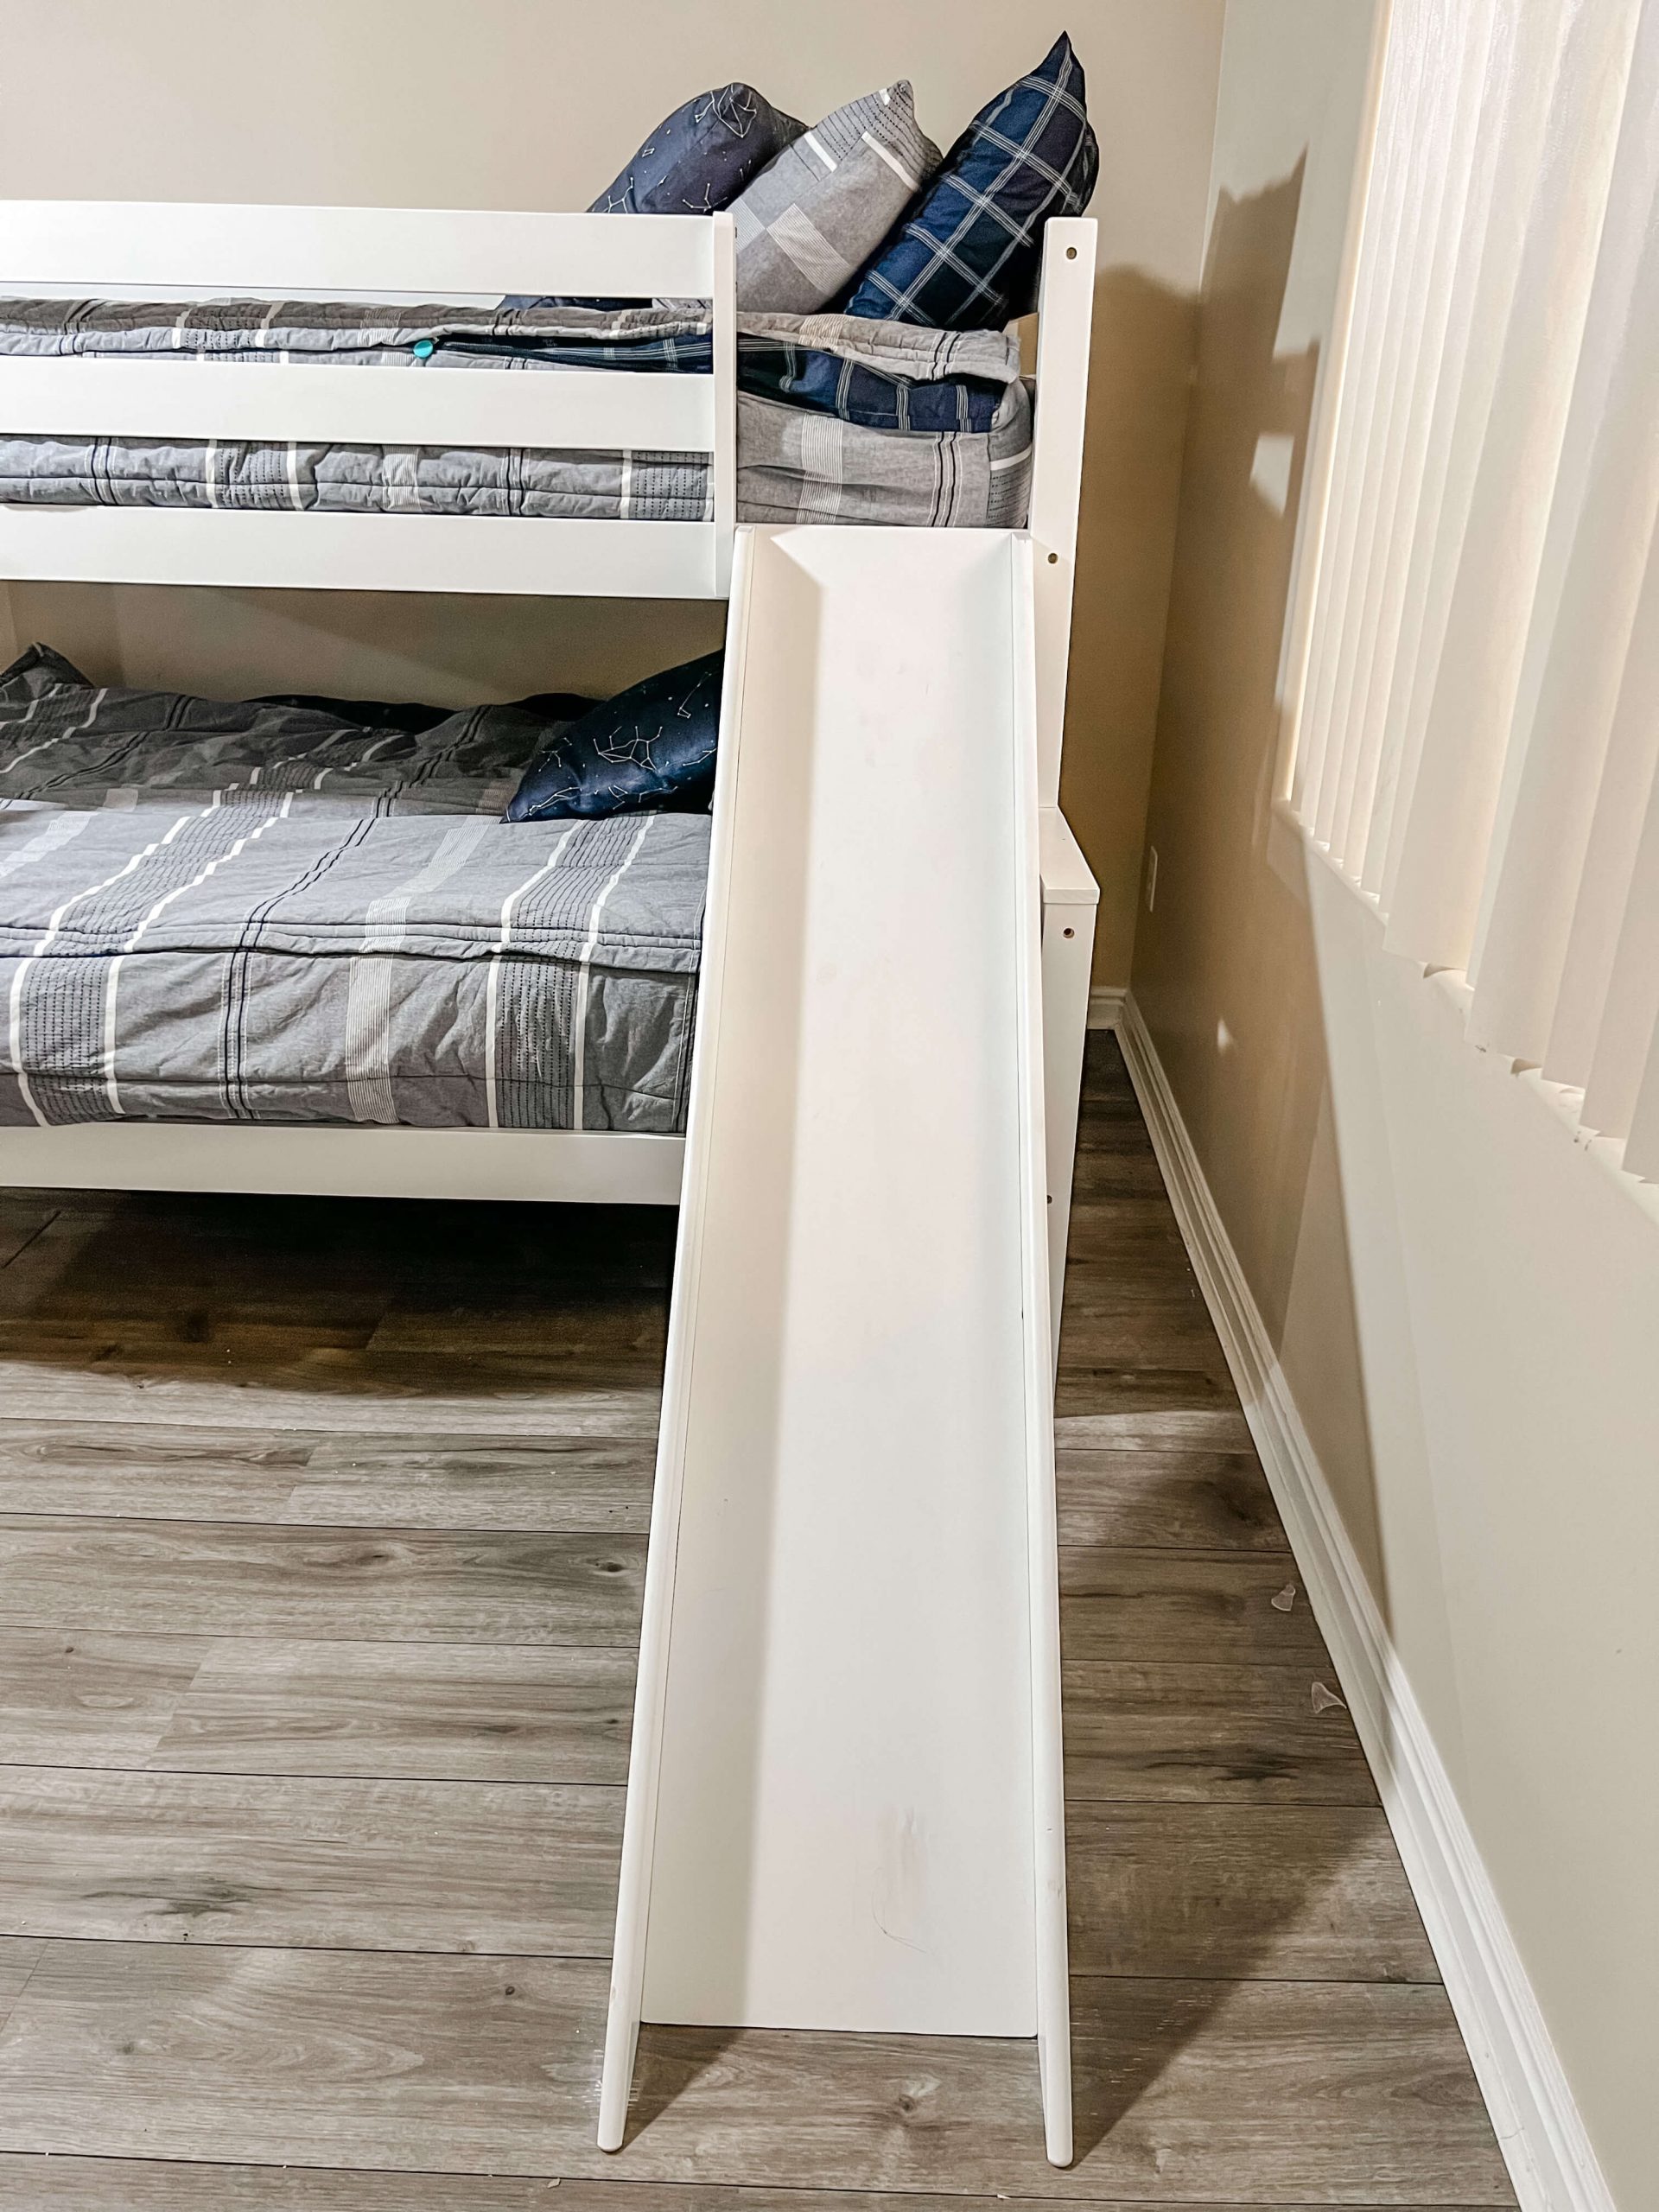
The slide goes down pretty fast and my son and his friends have a blast going down it over and over and over again. I make sure to put a cushion in the corner at the end so they can have a soft landing. This paranoid mother can never be too safe.

My life has changed dramatically in the past 10 months(which I will announce very, very soon!) and purchasing thoughtful items for their bedrooms has helped the transition to be easier for my children as well. Seeing the excitement and happiness on my son’s face says it all!

Check out other beds from Custom Kids Furniture, they have many other options and styles. Some of my favorites are this Triple Bunk Bed that would be perfect for twins, Cottage Loft Bed that I would love for myself haha, and this simple yet pretty Montessori Bed.

Did you dream of a bunkbed growing up? Did any of you actually have a bunkbed?

10

TAGGED: home decor 3 Comments

Sneak Peek of the Guest Bedroom

October 17, 2018~ HOME, Home Decor


link to this bed here


Here is a little sneak peek of the guestroom makeover before the full reveal! When I wanted to give our basement guestroom a makeover, I immediately knew I wanted a Purple mattress. Not just because they have that awesome video that went viral on Facebook and my kids wanted Purple just from watching Mallory from Studio C(which they’re avid fans of) in that commercial, even though that was my first impression of Purple and a good one at that, I have a few friends who have Purple mattresses and they love it.

Then my friend Janet who reviews mattresses on her site and has reviewed plethora of mattresses, told me her favorite mattress out of all the ones she’s tried is the Purple. I read somewhere that you need to hear or see the product 6 times before making the purchase and that sounds about right! Because that sealed the deal for me. So I am so excited to share my experience with the Purple mattress and so thankful they agreed to send me one to review!


One big worry I had though even before I even received the mattress was, “Would my mom like it?” You see, this makeover is solely inspired by my mom. After selling her house earlier this year, she stayed with us for several months and I felt bad our guestroom was so sad, with just a single mattress on the floor and nothing else in the room. So I wanted this room to look beautiful and inviting for my mom, not sad and cold like it was.

But the thing is, she hates mattresses. In her 70+ years in her life, she has never met a single mattress she likes. She’s tried numerous ones but she hates it and says it hurts her back. So every single night of her life so far, she’s slept on the hard floor! She did have this Korean stone bed once that had a thick layer of stone that heats up and is suppose to be good for your blood circulation, that she’d lay a thin blanket on top and sleep on. So I take that back, every single night of her life so far, she has never slept a night on a mattress.

But then I thought, oh, we will just move it to our bedroom if she doesn’t end up liking it.

So we visited their warehouse and tried every single Purple bed ourselves, before making the purchase. We tried their Original Purple, Purple 2, Purple, 3 and Purple 4. Here are the Instastories I took during our visit that explains more the differences, Ruthie was the absolute sweetest and such a huge help. I am a very visual person and like to see it visually instead of reading about it so I think you’ll find it helpful.


You might wonder what the difference is between the original Purple vs. Purple 2 when they are both 2 inches of the purple polymer. The biggest difference is, see how there is that nude color edge of foam around the new Purple? That makes it so that you can sit on the edge of the bed. Without it, like in the original Purple, if you try to sit on the edge of the bed to put socks on or to hang out, you will slowly slide down towards the floor.


So which one did we decide to get? We got the Purple 4. I thought it would be best for Jay to have less pressure on his joints and I loved how I felt so light and as if I was floating! So what do I think of the Purple? I LOVE it. But I am very easy to please, I can sleep anywhere(except a hard floor) and I would sleep all through the night and my back would be completely fine the next morning. So I wasn’t worried about me but Jay, being a super skeptic about everything and a person that’s very hard to please, I was curious to see what he’d think.

I heard from some people that you might need a few days to a couple of weeks before your body gets used to it but from night one, it got Jay’s approval! This is huge, guys! He never “approves” anything. I honestly thought his body would need some time to adjust to but from night one, he slept really well. And in his own words, “Yeah, I like it.”, is a HUGE compliment!


What did my mom think of it though? I expected her to just sleep on the floor, next to the mattress on the first night. But the next morning when I went to her room to ask her how the mattress was, she surprised me, no, I mean shocked me and told me as she rolled her shoulders back and felt her back, how she slept on the mattress all night and slept the whole night through and how her back doesn’t hurt one bit and is completely fine! What??? This is insane! She was just as shocked as I was! We literally starred at each other with our mouths gaping open the whole time we had this conversation. A part of me was a little bummed because I expected her not to like it and we were going to move it to our bedroom to use for ourselves, but mostly I was so happy and glad!

She’s slept on her Purple mattress every night since then and she loves it. She still can’t believe it and still keeps saying how could this be? It really is mind boggling to me, for her to find a mattress that doesn’t hurt her back, after 70+ years. Crazy!!! I guess that’s how awesome the Purple mattresses are!

Purple has a new bed for pets now and I want one for my dog, Achilles! We also got the Mattress protector that is waterproof and very sturdy material, Purple sheets that are very stretchy to match the stretchiness of the purple polymer, Purple pillow that is very, very heavy but Jay loves it, he does put another pillow under it though to level his big, broad shoulders(he’s a side sleeper), and the seat cushions.

Jay has the seat cushion in his office and I am sitting on it right now as I write this. The first time I used the seat cushion, my butt was a little sore! I guess my butt was getting used to it? But after the soreness went away, it is so nice and comfortable. I can sit in front of my computer for hours and not feel any discomfort.

So Purple gets my approval, Jay’s approval and my mom’s approval! I would recommend this to my sister and my best friends, which is why I recommend it to you, just like all the other products I feature on this blog and on my other channels. In order to share a product with you, I have to love it enough to recommend it to my own sister and my best friends. That’s how I judge which brands or products I decide to work with.

I will also be giving away two Purple pillows + other products on my Instagram on Oct. 18th, so make sure you go and enter!

Let me know if you have any questions about Purple or if you have one or tried it, let me know what you think! They also have specials going on quiet frequently so watch out for those, like right now they’re offering a FREE SHEET SET WITH ANY MATTRESS PURCHASE (UP TO $129 VALUE!)


Links to the products I’ve mentioned:

Tufted wingback bed

Check out the new Purple here

Original Purple mattress

Buy the new Purple here.

seat cushion

Purple pillow

Mattress protector

Purple sheets


CLICK HERE to go see the full guest room makeover reveal! 


*While I received no compensation, I received Purple products in exchange for this blog post.


0

TAGGED: bedroom makeover, home decor, purple Leave a Comment

Designing our Basement Guestroom

October 4, 2018~ HOME, Home Decor


This post is in partnership with Modsy, an awesome interior-design service I know you’ll love because I’m obsessed with it! Keep reading for a 20% discount code!


This is our guestroom right now. Sad, isn’t it? I have been somewhat embarrassed of sending people downstairs to this dark room in the basement whenever we had people staying at our house. It wasn’t inviting one bit so I’ve been wanting to give our guestroom a makeover that it desperately needed so I am so excited to share with you our 3-D rendering of our basement guestroom and our process of giving our guestroom a makeover!

While I am good at sewing and have a good eye for style and fashion, when it comes to interior design? It is one of my weaknesses. I have no vision for interior design, whatsoever! I don’t have the talent and the eye to mix and match a variety of furniture and decor to make it look all cohesive and tied-in together, it would be a disaster if I tried. So when I met the lovely people behind Modsy at Haven Conference this past Summer, I was very intrigued.

You take a style quiz, take measurements and photos of your room, then one of the many interior designers at Modsy will cater to your style and give you two room design ideas, complete with a 3-D rendering and with the exact products you can shop right from their site. Sounds super cool right? So I was willing to try it to see if it was as good as the website seemed to promise.

Modsy complimented me with a Modsy Premium to try it for myself and I’ll take you along my journey of my design process with them.


First, I took the style quiz. It’s very quick, you pick which 3 rooms you like the best, then mark which items you do like and don’t like and then they tell you what style you are. My style was an Elegant Connoisseur and it was spot on, I was pretty shocked to be honest with you! I’ve never even heard of that term for a design style before but that photo you see above of the living room? I literally gasped because it was perfect. It is so me. I want my living room to look exactly like that!

How did they know so well from such a simple quiz? Was my exact thought. Check out the other beautiful rooms fit for an elegant connoisseur.


I love every one of them. It is so my style; simple, elegant, feminine, with a touch of artsy, unique items that stand out. Click here to take your own style quiz to see which style you are! Then leave a comment letting me know, I’d love to know which style you are.


The current state of our guestroom

I then measured my room from floor to ceiling, side to side, in different areas of the room to get the exact measurements and also took various photos of the room. This is so that they can get an exact rendering of my room for the 3D rendering. Then that’s it!

Once they approve your photos, they’ll send you the two design ideas and the 3D rendering of your room within 14-21 days. They can design around a furniture(s) you already own, want to buy, and the best part is, you can revise it and ask for changes as many times as you want, without an added cost. They’ll send you a 3D rendering with each changes every time so you know exactly what your room will look like beforehand.

So would you like to see the two designs they sent me? Here is design #1 and design #2.


Design 1


Design #2

Which one do you like better? I decided to go with design #2. I gasped(again) when I saw it because I love it so much! Don’t you love it or what? I did want to see it with a different choice of decorative pillows, with a different color scheme so I asked them to switch out the pillows and choose something else and they did, as shown below.

I love the blue and the pink combo so much! I like it with these pillows better, how about you? Just like how they switched out the pillows, they can switch out any of the products and revise as much as you need to get the exact design you want, no matter which design package you choose. Some of the items they chose for this room are out of my budget so they also helped me to find ones that were more in budget.

I think the 360 view is so cool, I wish you could see it too.


I have been nothing but very impressed and happy with Modsy and they have offered a discount for you! Use code: OURLIFE20 for 20% off any design package. With the code, you can get a Modsy interior designer to design two different options for you with unlimited revisions for only $47! SO worth it and such an amazing price. I definitely plan on using Modsy when we design our new house.


Here are the links to the items to purchase:

Tufted tall bed(shown in bronze nailheads in color twill cream)
King size mattress
Comforter 
Duvet cover
Art above the bed
Rug(in color cream)
Chandelier(in antique brass)
Lamps(in brass/ivory)
Side wall art #1(size 18×24)
Side wall art #2(size 18×24)
Peony wall art
Gold oval mirror
Nightstands
Faux cowhide rug
Blue linen pillows
Blush pillow
14×22 pillow insert(for blush pillow)
alarm clock
plant holder 
plant
basket


Click here to see the final reveal of the guest room makeover! 


0

TAGGED: home decor, modsy Leave a Comment

DIY: Outdoor Serving Station

June 17, 2015~ DIY DREAM HOUSE

This post is sponsored by The Home Depot. As a second DIY project(the first being the paver planters), this project was faster and not as complicated. I am in love with white and gold so I painted the wood white and used gold chains and I am so proud of myself! #DIHWorkshop
Just like how I feel a sense of accomplishment when I finish a sewing project, I get quite proud of myself after finishing these DIY projects! It doesn’t mean I enjoy every single step of it however; there were some tools that I was scared to use such as the nail gun(that thing is so loud and powerful!), and this time there were bugs flying around the shed constantly, but it’s much like sewing where I mess up and I have to start over or I get frustrated and just want to be done.  But when I’m all done and I look back at what I had just made, the sense of accomplishment and the confidence I feel makes it all worth it! I do have to give a shout out to my husband who guided me every step of the way, thank you Jay!
And guess what? You can go to Home Depot’s DIH workshop and learn to make an outdoor serving station too! Every third Thursday of the month the Home Depot offers workshops for women where they’ll have all the supplies ready for you and you can start making your own DIY project to take home. There is a class this Thursday, June 18th at a local Home Depot near you so grab your girlfriends and make it a girls night out! You can register for the class here. You can also ask for tips and advice from the pros for all of your home improvement projects. I did take my girlfriends to Home Depot in April to make the paver planters but my local Home Depot didn’t have the workshop, so I would call your Home Depot store before the workshop to make sure the class will be held. I don’t want you to sign up for it because you heard it from me and show up and be disappointed! 😉

To cut down on time, I used a fan to make the paint dry faster.

And the result:

HOW TO MAKE A SERVING STATION

TOOLS

• Circular saw

• Level

• Drill with driving bits

• Safety goggles

MATERIALS

• A two-foot by two-foot, three-quarter-inch

 project panel

• A ten-foot long one-by-six pine board

• A nailer and one-and-a-quarter inch nails

• Wood glue

• Paint or stain

• Four 5⁄8 inch screws

• Tape measure

• Pencil

• Paint brush

• Gloves

NOTE: If using these projects outdoors where contact with water could occur,

use either pressure treated, cedar, or redwood boards depending on availability.

• A two-inch hook & eye kit

• A five-foot jack chain and pliers

• And a two-pack of three-inch utility hinges

• Four three-inch deck screws

• And two three-inch corner braces 2 ́x 4 ́ x 1⁄2 ̋

STEP 1

CUT THE BOARD AND PROJECT PANELS

Using a circular saw, cut the one-by-six into two 18 3 ⁄4 inch pieces, two 22 1 ⁄2 inch pieces, one 17 1⁄4 inch piece, and one 10 7 ⁄8 inch piece. Then cut the project panel into a 2-foot by 18-inch rectangle. This is also the optimal time to paint or stain the wood.

STEP 2

BUILD THE BOX

Next, create a box using the 22 1 ⁄2 inch pieces for the top and bottom and the 18 3 ⁄4 inch pieces for the sides. Check to make sure that the top and bottom pieces fit between the side pieces. Lastly, check that the outer measurements are 24 by 18 3 ⁄4 inches, then – being careful to keep the box square – glue and nail each corner together.

STEP 3

The next step is to attach the divider and shelf. Find the center of the box – 12 inches across the top and bottom – and insert the board measuring 17 ¼ inches. Glue it and nail it in place. Now, do the same with the 10 7 ⁄8 inch board, positioning it horizontally at the 9 3 ⁄8 inch mark. Again, secure it with wood glue and nails.

STEP 4

ATTACH THE TABLE TOP

Now it’s time to attach the folding top. Stand the box upright, and butt the table top up against the bottom. From there, pull it back about an eighth of an inch, leaving just enough of a gap to then attach the two three-inch utility hinges.

STEP 5

ATTACH THE CHAIN AND HOOK & EYE

Next up is the drawbridge-style chain; this is the part that supports the table once it’s mounted. With the box and table top still resting on the workbench, cut the chain in half. From the outer corners of the table top, measure back two inches and in one inch.

Then use two of the 5 ⁄8 inch screws to attach the chain. Stretch one side of the chain upward. Make sure it’s nice and taught before attaching it to the inside of the box with another 5 ⁄8˝ screw. You may need to cut off some of the excess chain with your pliers. Repeat the process on the other side.

When the chain is securely fastened, it’s time to attach the hook & eye. Close the table top against the box, then screw the eye into the side of the table top, and screw the hook into the outside of the box. Measure carefully; you’ll want to make sure the hook and eye are close enough to latch.

STEP 6

ATTACH MOUNTING PLATES AND HANG

Now, attach the two three-inch corner braces to the inside of the top two corners of the box, and use the deck screws to mount it to the wall. Of course, a full bar can be pretty heavy, so be sure to find a stud or hang it on another strong structure.

STEP 7

STOCK, SERVE, AND ENJOY

That’s it. You’re ready to stock your serving station and raise a glass to a job well done.

0

TAGGED: DIY, home decor, home depot 2 Comments

What our Backyard Looks Like After Cutting Down 36 Trees!

June 4, 2015~ Etc.

This post is sponsored by Pier 1 Imports. I am so excited to show you the before and after of our backyard and how I decorated with new furniture! When we moved into our house a few years ago, we had a National forest in our backyard with 36 trees! So let’s take a look at the before…

BEFORE

 Then we cut down all 36 trees and 36 trees later…

AFTER

While the National forest had its charms, it didn’t allow the kids to really run around and play in our backyard. There was no way we could have put in a swingasan and a trampoline like we have now. And with the help of Pier 1 Imports, we added some outdoor furniture to give it a more finished touch.

Isn’t it such a huge difference? Even our dog Achilles loves it too!

Do you know what I dream about? I dream about the day when all my kids are old enough to go to school all day. The first day of when that day comes, I imagine myself sending them off to school with a homemade lunch and a kiss, then closing the door and just letting the quietness settle in. Then I’m going to grab a book and a cup of tea and sit on my swingasan on the porch and read a book without getting disturbed or being asked to do something every 45 seconds! Doesn’t that just sound heavenly? I mean I can definitely wait until that day comes and I don’t want it to come any faster, but imagining that scenario makes me calm and happy. Is that bad? Haha. I’ve always dreamed of owning a home with a swingasan where I could sit and relax.  So Jay and I’ve been looking into buying a swingasan and when I was shopping online at Pier 1 Imports, I knew immediately what I wanted to get. Every time we go to stores and they have a swingasan on display, my kids hop on it every time and never want to stop swinging, so I knew it was something our whole family would enjoy.


I wanted a Coastal theme because of the clean, classy look and I’ve always been drawn to blues for home decor because blue is a color of relaxation and calmness. I got every item pictured at Pier 1 imports, which made it very convenient to shop and save some time. I chose a white swingasan and a matching white table, a light blue cushion, blue/white striped pillows and green seahorse print pillow, and green/blue lights around the top of the swingasan. The swingasan is really comfortable, guys. Without the cushion the edge on the front of the swingasan hit the insides of my knee, which kept putting pressure on it but with the cushion? I could nap on this thing! My 3 kids and I can all fit in it, it’s pretty wide. I will be chilling in my backyard a lot more from now on, you know where to find me! 😉

Find what speaks to you. See our Outdoor Living collection in stores or at pier1.com/outdoorliving

0

TAGGED: home decor, Home reno 3 Comments

  • 1
  • 2
  • Next Page »
cutmypic
Hello! My name is Sarah and I am so happy to have you here! Here you'll find DIY sewing, DIY home building & decor, honest and vulnerable posts of motherhood and snippets of my family. We are building our dream house and will update you regularly on our whole process from start to finish and I am also starting a mother-daughter sewing series. So I hope you stay awhile!

BLOG ARCHIVES

SEARCH

JOIN THE LIST

- THEME BY ECLAIR DESIGNS - Web Hosting By RFE Hosting -