• ABOUT
  • COLLABORATE
  • CONTACT

Life is Beautiful

Motherhood, Sewing, Family

  • SEW
  • HOME
  • PARTY
  • TRAVEL
  • SHARING MY HEART
  • SHOP

DIY: Make Your Own Pumpkin Stand

August 31, 2015~ DIY DREAM HOUSE


This post is sponsored by The Home Depot.

I am so excited to share a tutorial on how to make your own pumpkin stand. After every project I complete for The Home Depot DIH Workshop, I get such a feeling of accomplishment and pride! I hope you get inspired to attend the DIH Workshop to make your own or even make one at home! This one was the easiest project out of all the projects I made, you can check out my other projects here.
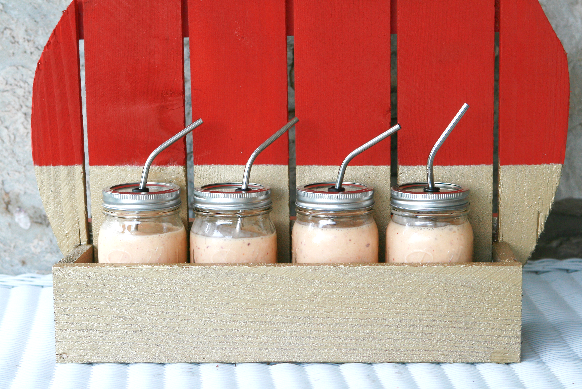
AFTER:

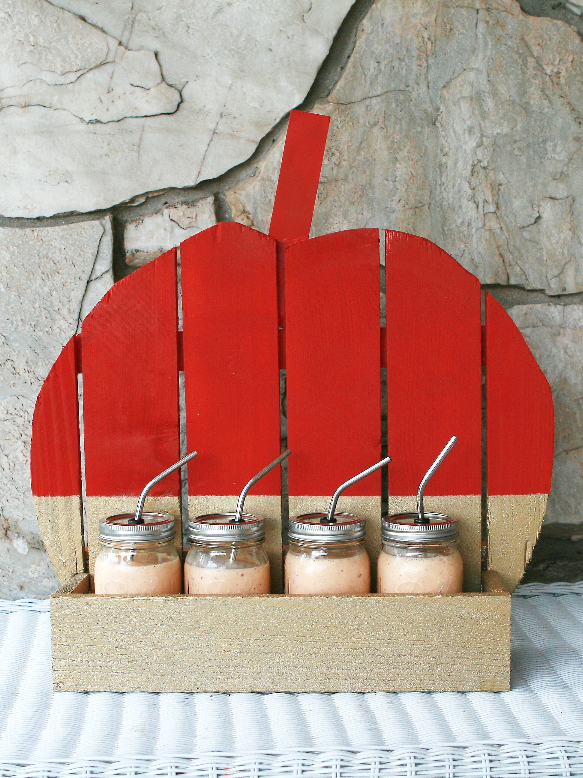
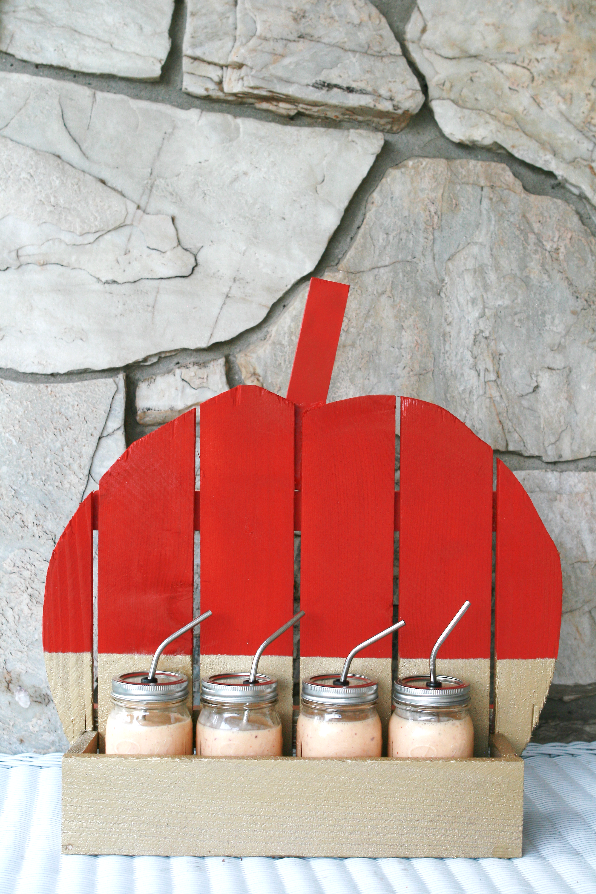
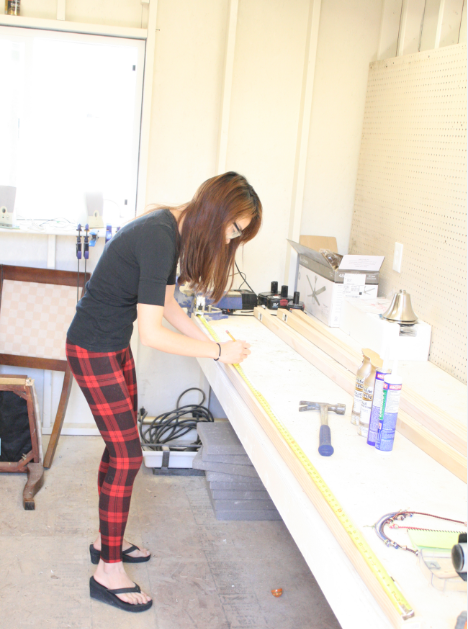
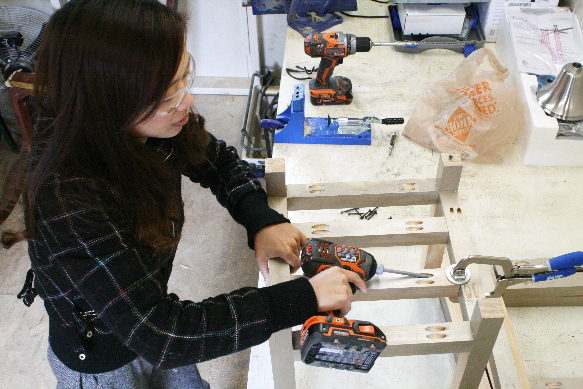
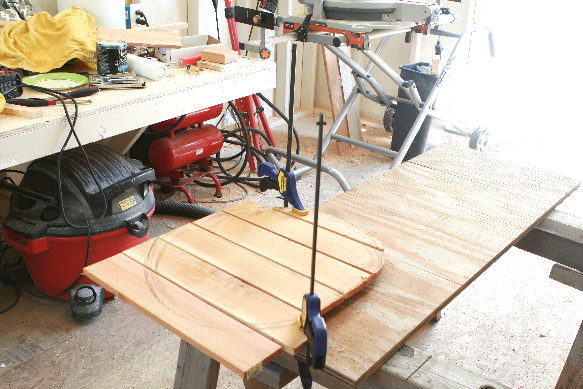
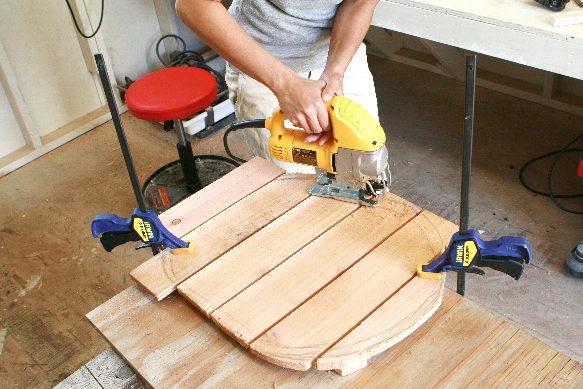
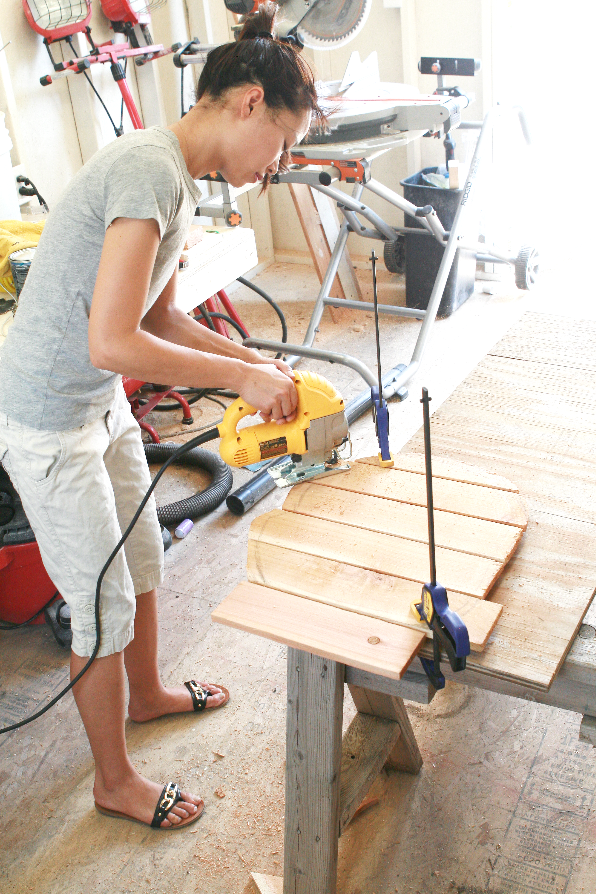
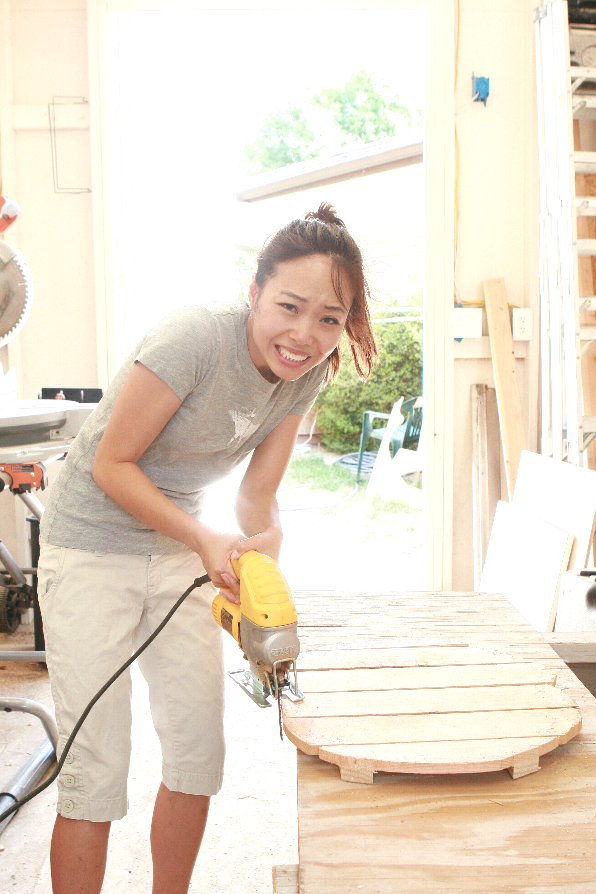
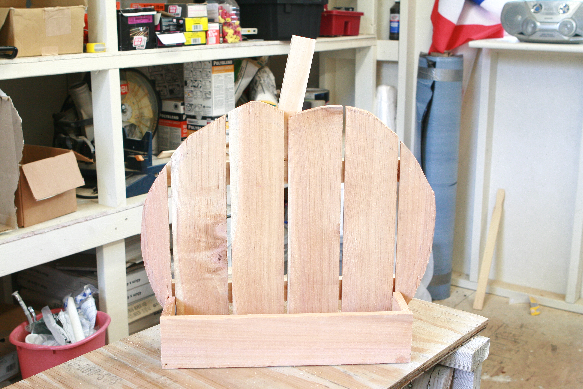
This project was so easy and fun to make! I was really scared to use the jigsaw for the first time but I got the hang of it and it was actually fun cutting out the curve of the pumpkin. I usually know instantly what designs I want my end result to look like, whether it is with sewing or with DIY projects like this one, and I knew I wanted to paint the pumpkin a darker orange and dip part of the pumpkin in gold on the bottom, and I got so excited thinking about it! And it turned out just the way I had imagined so I am so happy with it. It’s also gotten me excited for fall, sweaters, boots, hot chocolate and two of my favorite Holidays — Halloween and Thanksgiving!
I served my peach ice-cream shake on the pumpkin stand when I had my parents over for dinner and they didn’t believe me when I told them I made the stand! Haha, they thought Jay made it. I’ve come a long way with making projects myself, and just like sewing, you get better the more you do it!
You can make the pumpkin stand using the instructions below or make it a girls night and take your girlfriends to a free workshop at your nearby Home Depot. The Home Depot’s DIH Workshop is held every third Thursday of each month and in September, they’ll be making this pumpkin stand. They’ll have supplies and tools all ready for you and you’ll get to take home the finished product! While the workshop is free to attend, you do need to purchase the materials. To check out the schedule and sign up, click here.
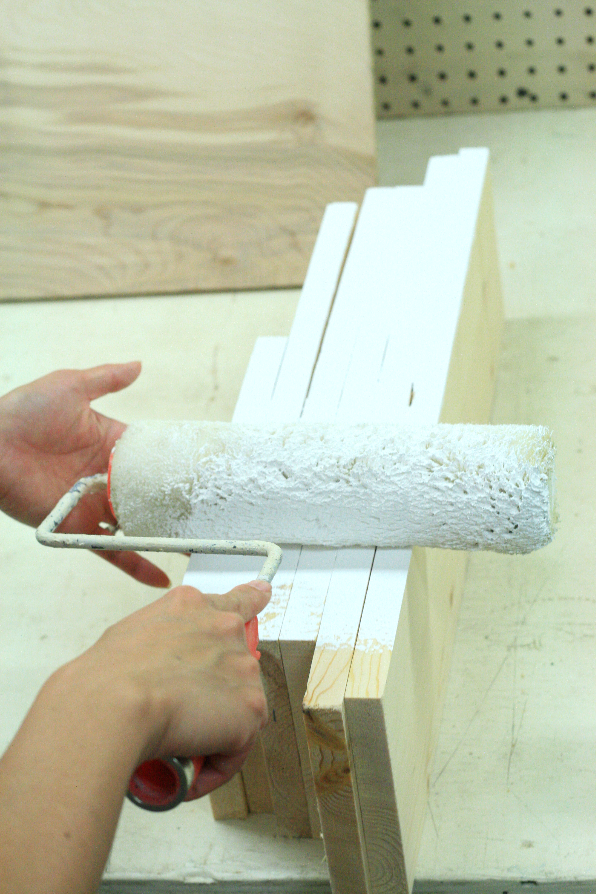
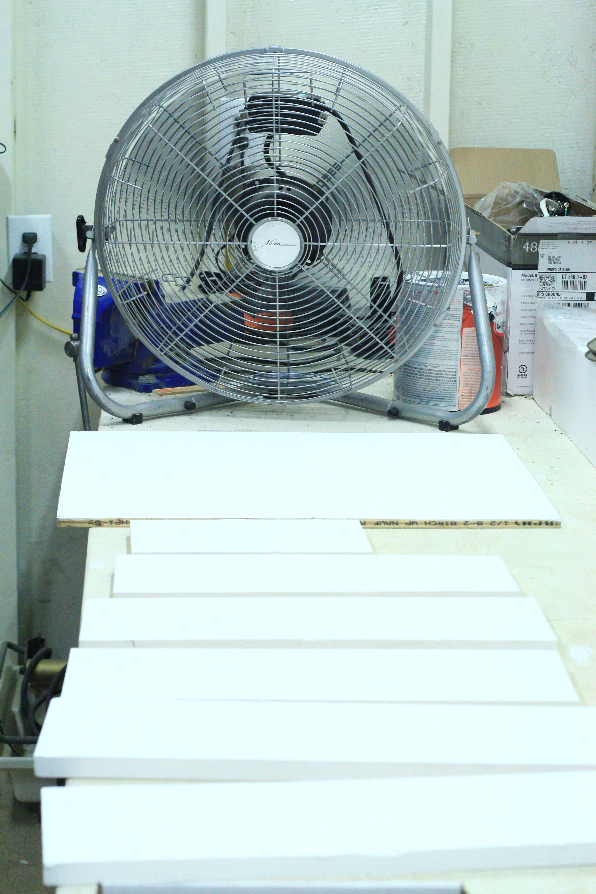
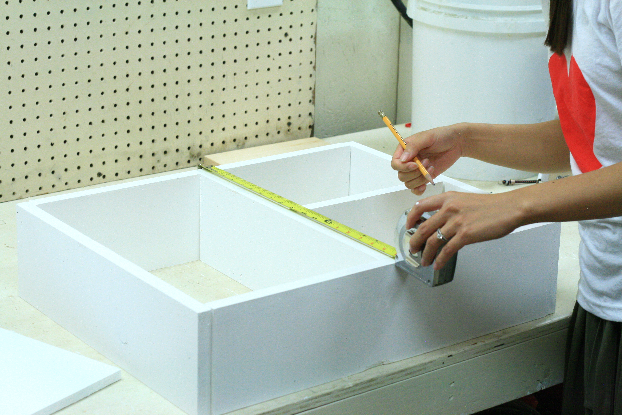
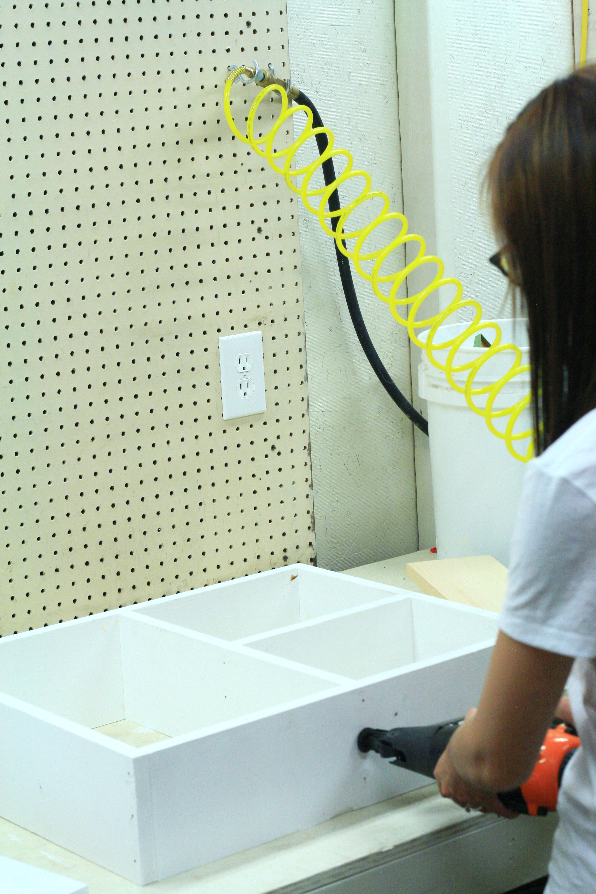
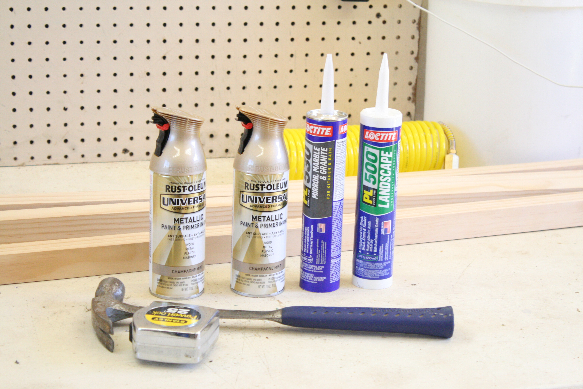
Instructions
(click on the image to view full size)

Estimated time: 2 hrs.
Budget: $20
Skill level: A beginner DIY’er
2

TAGGED: DIY, home depot 11 Comments

DIY: Outdoor Serving Station

June 17, 2015~ DIY DREAM HOUSE

This post is sponsored by The Home Depot. As a second DIY project(the first being the paver planters), this project was faster and not as complicated. I am in love with white and gold so I painted the wood white and used gold chains and I am so proud of myself! #DIHWorkshop
Just like how I feel a sense of accomplishment when I finish a sewing project, I get quite proud of myself after finishing these DIY projects! It doesn’t mean I enjoy every single step of it however; there were some tools that I was scared to use such as the nail gun(that thing is so loud and powerful!), and this time there were bugs flying around the shed constantly, but it’s much like sewing where I mess up and I have to start over or I get frustrated and just want to be done.  But when I’m all done and I look back at what I had just made, the sense of accomplishment and the confidence I feel makes it all worth it! I do have to give a shout out to my husband who guided me every step of the way, thank you Jay!
And guess what? You can go to Home Depot’s DIH workshop and learn to make an outdoor serving station too! Every third Thursday of the month the Home Depot offers workshops for women where they’ll have all the supplies ready for you and you can start making your own DIY project to take home. There is a class this Thursday, June 18th at a local Home Depot near you so grab your girlfriends and make it a girls night out! You can register for the class here. You can also ask for tips and advice from the pros for all of your home improvement projects. I did take my girlfriends to Home Depot in April to make the paver planters but my local Home Depot didn’t have the workshop, so I would call your Home Depot store before the workshop to make sure the class will be held. I don’t want you to sign up for it because you heard it from me and show up and be disappointed! 😉

To cut down on time, I used a fan to make the paint dry faster.

And the result:

HOW TO MAKE A SERVING STATION

TOOLS

• Circular saw

• Level

• Drill with driving bits

• Safety goggles

MATERIALS

• A two-foot by two-foot, three-quarter-inch

 project panel

• A ten-foot long one-by-six pine board

• A nailer and one-and-a-quarter inch nails

• Wood glue

• Paint or stain

• Four 5⁄8 inch screws

• Tape measure

• Pencil

• Paint brush

• Gloves

NOTE: If using these projects outdoors where contact with water could occur,

use either pressure treated, cedar, or redwood boards depending on availability.

• A two-inch hook & eye kit

• A five-foot jack chain and pliers

• And a two-pack of three-inch utility hinges

• Four three-inch deck screws

• And two three-inch corner braces 2 ́x 4 ́ x 1⁄2 ̋

STEP 1

CUT THE BOARD AND PROJECT PANELS

Using a circular saw, cut the one-by-six into two 18 3 ⁄4 inch pieces, two 22 1 ⁄2 inch pieces, one 17 1⁄4 inch piece, and one 10 7 ⁄8 inch piece. Then cut the project panel into a 2-foot by 18-inch rectangle. This is also the optimal time to paint or stain the wood.

STEP 2

BUILD THE BOX

Next, create a box using the 22 1 ⁄2 inch pieces for the top and bottom and the 18 3 ⁄4 inch pieces for the sides. Check to make sure that the top and bottom pieces fit between the side pieces. Lastly, check that the outer measurements are 24 by 18 3 ⁄4 inches, then – being careful to keep the box square – glue and nail each corner together.

STEP 3

The next step is to attach the divider and shelf. Find the center of the box – 12 inches across the top and bottom – and insert the board measuring 17 ¼ inches. Glue it and nail it in place. Now, do the same with the 10 7 ⁄8 inch board, positioning it horizontally at the 9 3 ⁄8 inch mark. Again, secure it with wood glue and nails.

STEP 4

ATTACH THE TABLE TOP

Now it’s time to attach the folding top. Stand the box upright, and butt the table top up against the bottom. From there, pull it back about an eighth of an inch, leaving just enough of a gap to then attach the two three-inch utility hinges.

STEP 5

ATTACH THE CHAIN AND HOOK & EYE

Next up is the drawbridge-style chain; this is the part that supports the table once it’s mounted. With the box and table top still resting on the workbench, cut the chain in half. From the outer corners of the table top, measure back two inches and in one inch.

Then use two of the 5 ⁄8 inch screws to attach the chain. Stretch one side of the chain upward. Make sure it’s nice and taught before attaching it to the inside of the box with another 5 ⁄8˝ screw. You may need to cut off some of the excess chain with your pliers. Repeat the process on the other side.

When the chain is securely fastened, it’s time to attach the hook & eye. Close the table top against the box, then screw the eye into the side of the table top, and screw the hook into the outside of the box. Measure carefully; you’ll want to make sure the hook and eye are close enough to latch.

STEP 6

ATTACH MOUNTING PLATES AND HANG

Now, attach the two three-inch corner braces to the inside of the top two corners of the box, and use the deck screws to mount it to the wall. Of course, a full bar can be pretty heavy, so be sure to find a stud or hang it on another strong structure.

STEP 7

STOCK, SERVE, AND ENJOY

That’s it. You’re ready to stock your serving station and raise a glass to a job well done.

0

TAGGED: DIY, home decor, home depot 2 Comments

DIY: Paver Planters

April 10, 2015~ DIY DREAM HOUSE

This post is sponsored by The Home Depot.  Since my husband is the DIY king and can fix or build anything, I’ve always wanted to learn his ways and am so excited to get this opportunity to make fun projects for my home! #DIHWorkshop 
My husband’s favorite store is Home Depot.  He knows the employees there by name and so do they,  need I say more?  I am not a home DIY person, but more of a sewing DIY person, so the only times I’ve been to Home Depot is to follow my husband along when he needs to buy something, and to take the kids to the Kid Workshops.  My kids love going to the Kid Workshops in their little orange aprons and building something to take home and also receiving a pin upon completion to add to their aprons.  It’s an awesome program they have for kids where they provide all the supplies and it’s free!  Well, guess what?  Did you know that they offer DIH-Do It Herself workshops as well?  I had no idea and was so happy to find out that they did!  It’s held every third Thursday evening so on April 16th, they will teach you how to build a paver planter. This interactive, hands-on workshop is a great opportunity to fine tune your DIY skills and pick up tips and advice from the pros for all of your home improvement projects.  And just like the Kid Workshops, they provide all the supplies and tools and it’s free!  You’ll go home with a paver planter you made and will be so proud like I was when I made them last weekend so you’ll get to see what paver planters are in case you didn’t know…like me who had to Google to see what the heck paver planters were.  So embarrassing.

I am so proud of my first project, guys!  I painted mine champagne gold and am happy how they turned out.  I would have chosen a darker, red mahogany wood to give it a contrast between the tiles and the wood, but my two girls really wanted it to be gold so I went with the gold and I think it turned out really nice.  What color would you have done?
And you bet you’ll find me at Home Depot on April 16th for the class!  Register for the DIH Workshop here before the class gets full!  I am going to invite a few of my girlfriends and make it a GNO!  The Home Depot wants everyone to have the skills and confidence to be a first class do-it-yourselfer which is why they offer in-store workshops where you’ll get step-by-step instructions and hands on experience learning to do simple décor and easy home improvements.  To make two paver planters, it cost me $107(I had all the tools already) which includes the plants also, so I think Home Depot is so generous to offer these classes for free.  Even though I already know how to make them, I will go to refine my skills and let’s be honest, to come home with a free paver planter.  So I hope you’ll take advantage of this offer as well!

DIY: Paver Planters

DIFFICULTY: Beginner
DURATION: 2 Hours (includes drying time)

TOOLS

• A circular saw
• A power drill and bits
• A caulking gun
• Utility knife
• Sand paper block
• A paintbrush

MATERIALS

• Four 12×12 pavers, any color
• Two 8 foot 2x2s
• A bag of moisture control soil
• A small roll of landscape fabric
• 2 Bungee Cords
• Tape measure
• Pencil
• Gloves
• Safety goggles
• A box of 3 ̋ exterior deck screws
• Stain and polyurethane
• A newspaper
• Construction Adhesive

NOTE: If using these projects outdoors where contact with water could occur, use either pressure treated, cedar, or redwood boards depending on availability.

HOW TO MAKE PAVER PLANTER

PROJECT GUIDE

STEP 1: CUT

Start by cutting the 2x2s into four pieces of 16 ̋ and eight pieces of 12 ̋.

STEP 2: SAND AND STAIN

Grab a sheet of sandpaper and begin sanding the entire frame. Apply your stain and polyurethane finish to the wood and let it dry.

STEP 3; FRAME ASSEMBLY

Pre-drill and countersink the 2×2 pieces together, with the 16 ̋ pieces forming the legs, and the 12 ̋ pieces forming the support between the legs. Apply some wood glue, and then screw in the 12 ̋ support pieces in 12 ̋ down the legs, allowing for the pavers to be flush around the entire top. Next, grab your remaining four 12 inch 2x2s, pre-drill, apply some wood glue, and space them evenly across the bottom and screw them into the frame.

STEP 4: GLUING IN PAVERS

Place a thick bead of adhesive along the inside edges of the frame. Gently place each paver into place and avoid getting the adhesive on the front of the pavers or on the outer wood frame. Finally, take your bungee cords and wrap them around the planter while the adhesive is drying. Let the adhesive set overnight to get a strong bond.

STEP 5: PLANTING

Remove the bungees and now you’re ready for some planting! First, line the planter with landscape fabric and then add the planting soil. Arrange the plants or flowers however you desire.

p.s. I was in the knowledge that the supplies provided by the workshop was free but while the class is free to come learn and watch, if you want to make one to take home, you’ll need to pay. sorry for the confusion! I sure was when I went to the DIH workshop. 
0

TAGGED: DIY, home depot 2 Comments

cutmypic
Hello! My name is Sarah and I am so happy to have you here! Here you'll find DIY sewing, DIY home building & decor, honest and vulnerable posts of motherhood and snippets of my family. We are building our dream house and will update you regularly on our whole process from start to finish and I am also starting a mother-daughter sewing series. So I hope you stay awhile!

BLOG ARCHIVES

SEARCH

JOIN THE LIST

- THEME BY ECLAIR DESIGNS - Web Hosting By RFE Hosting -