• ABOUT
  • COLLABORATE
  • CONTACT

Life is Beautiful

Motherhood, Sewing, Family

  • SEW
  • HOME
  • PARTY
  • TRAVEL
  • SHARING MY HEART
  • SHOP

Dream Home Come True Ep. #2: Breaking Ground/Laundry Room

December 21, 2018~ Dream Home Come True, HOME, HOME BUILDING, Jay's DIY

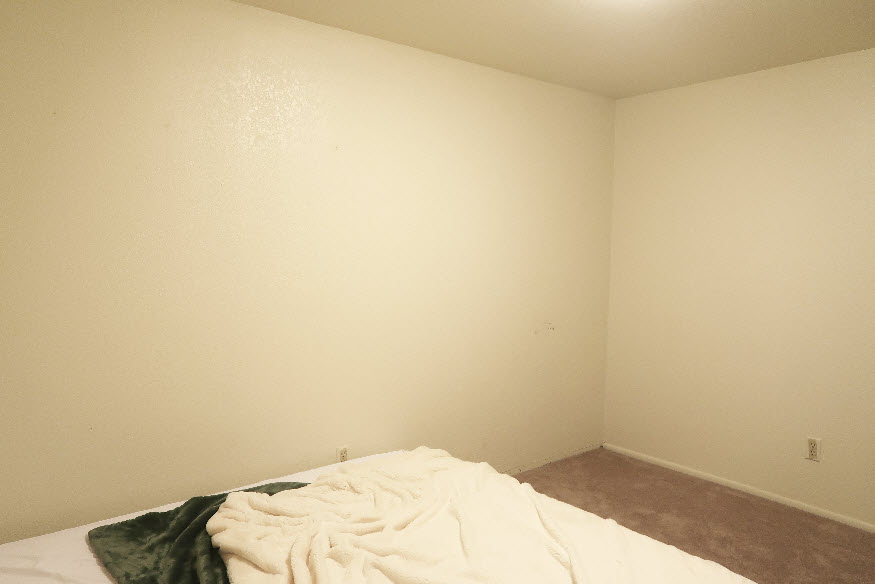
This post is in partnership with Elkay. I’m so excited to show you what our laundry room will look like!


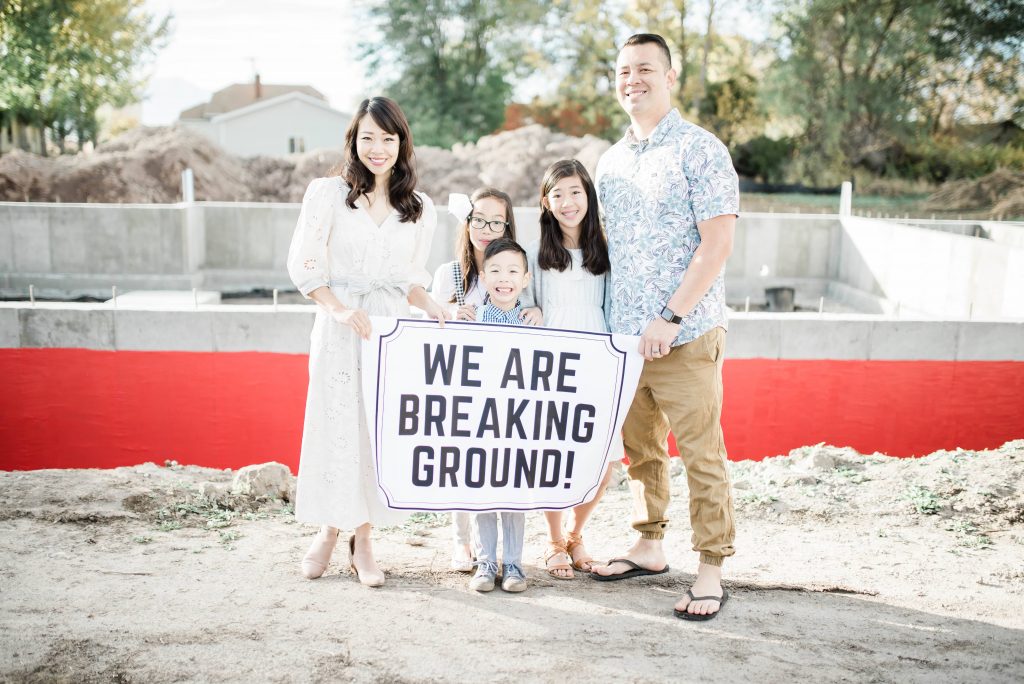
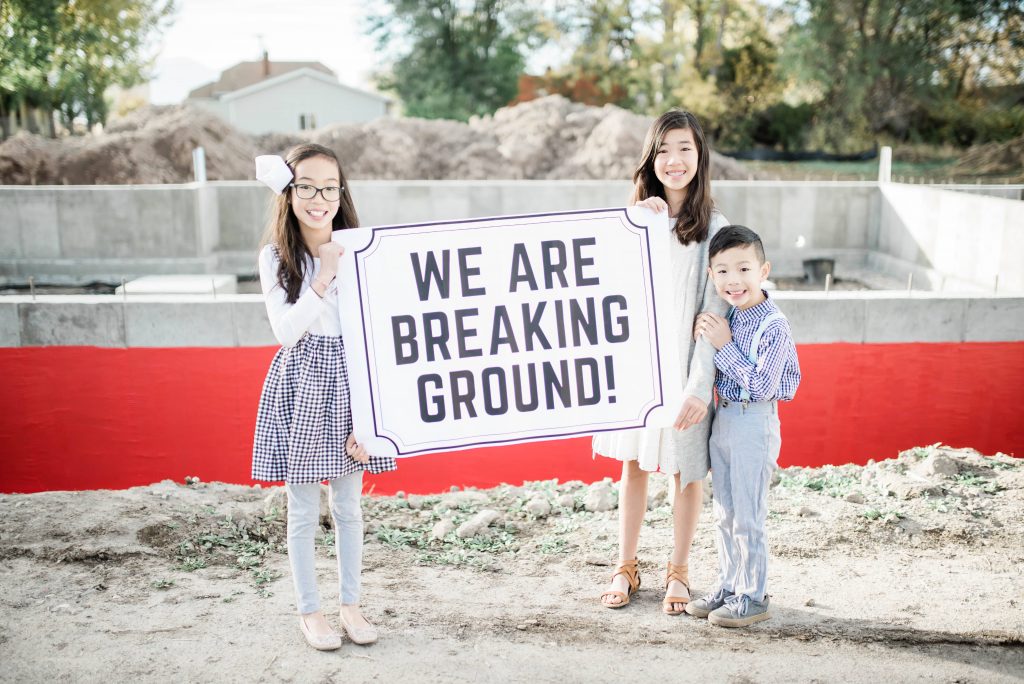
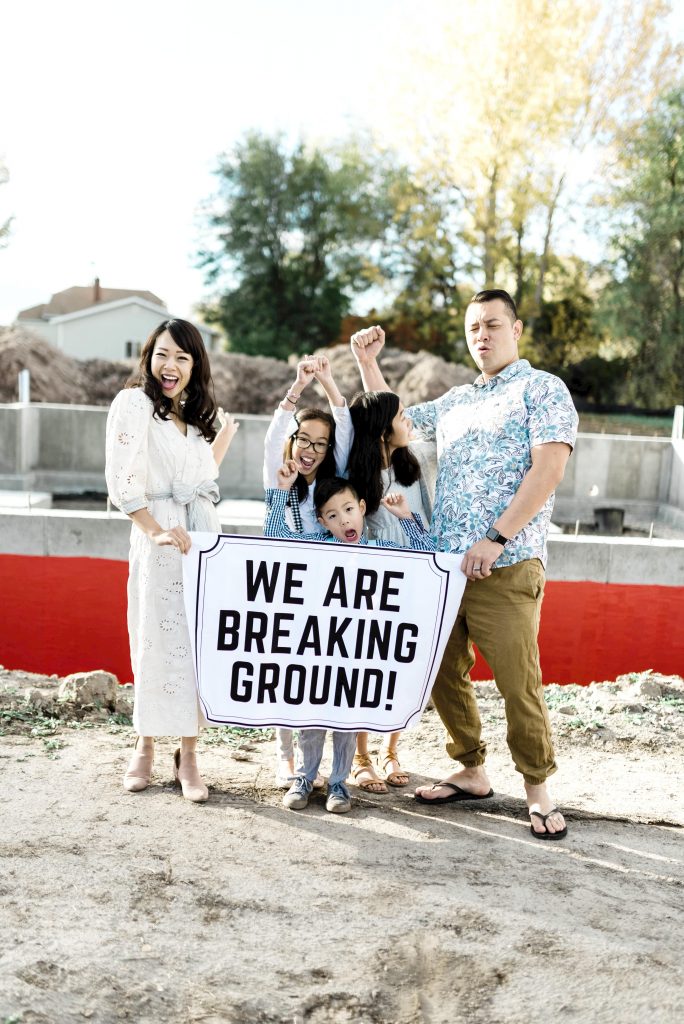
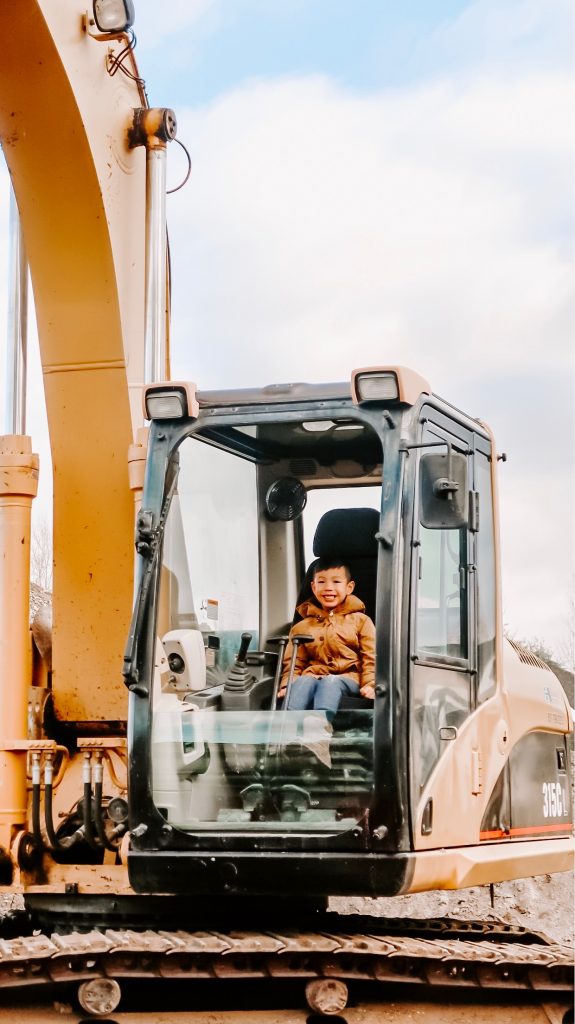
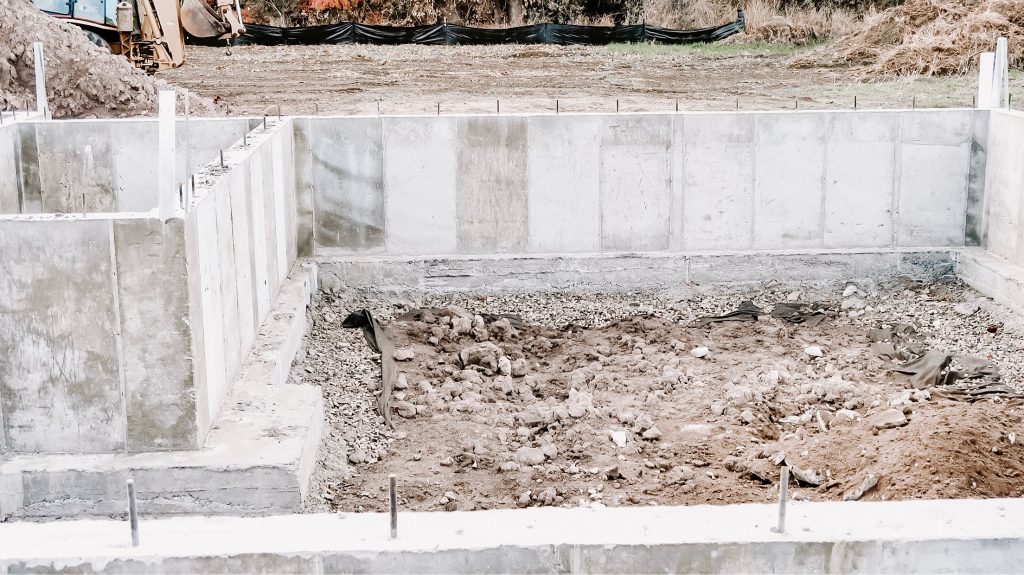
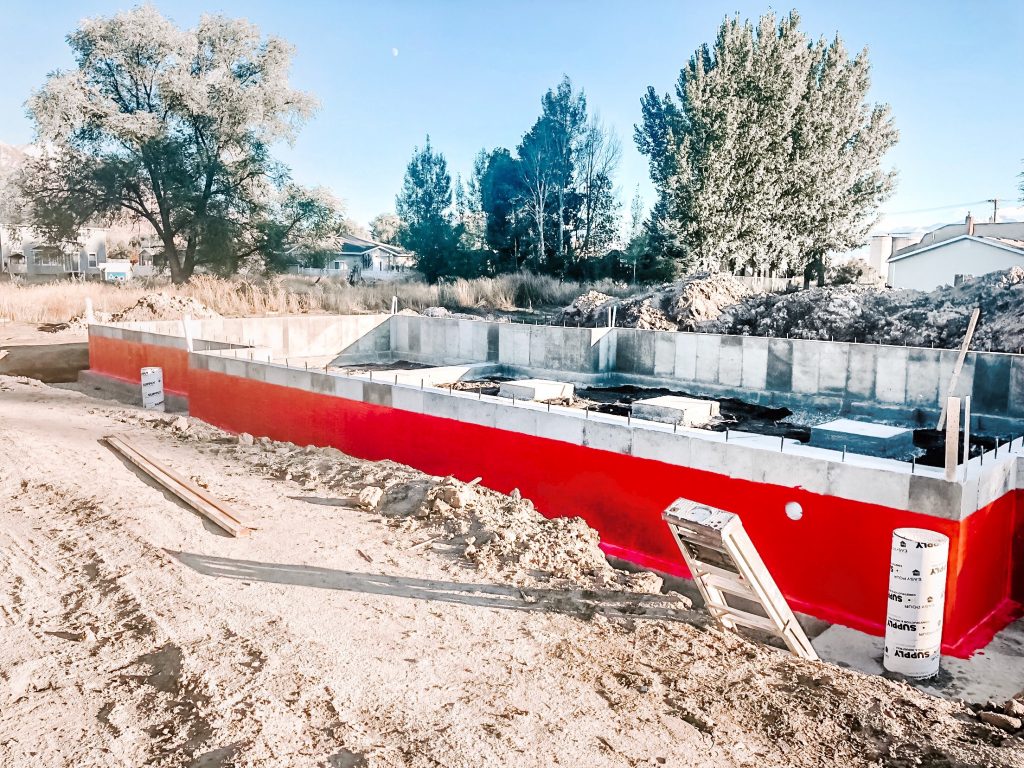
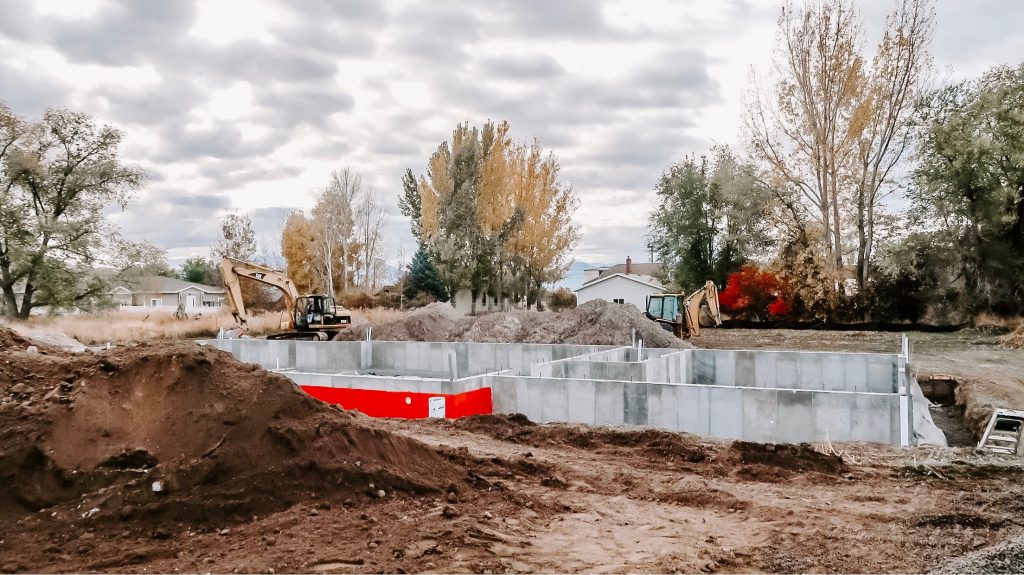
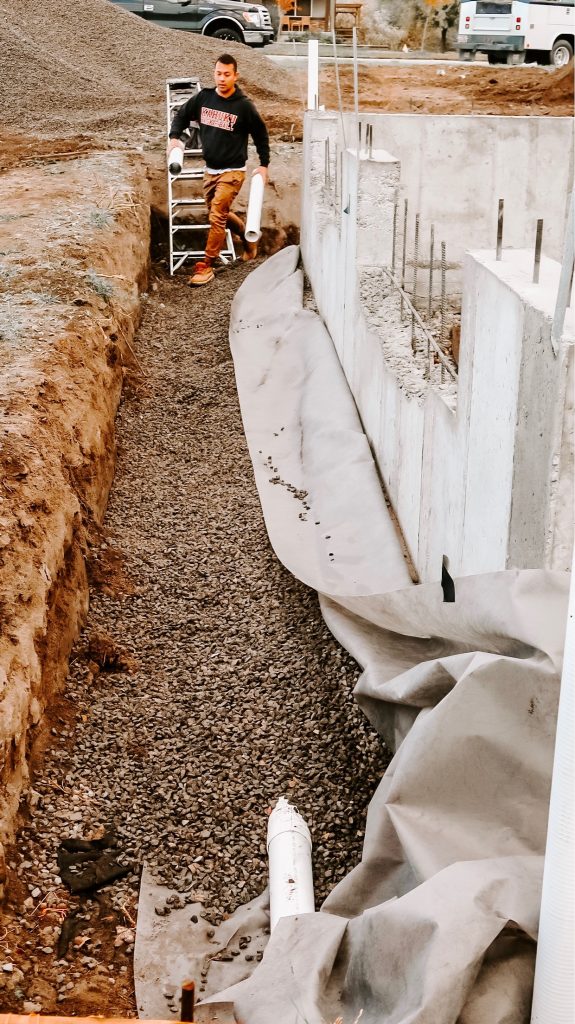
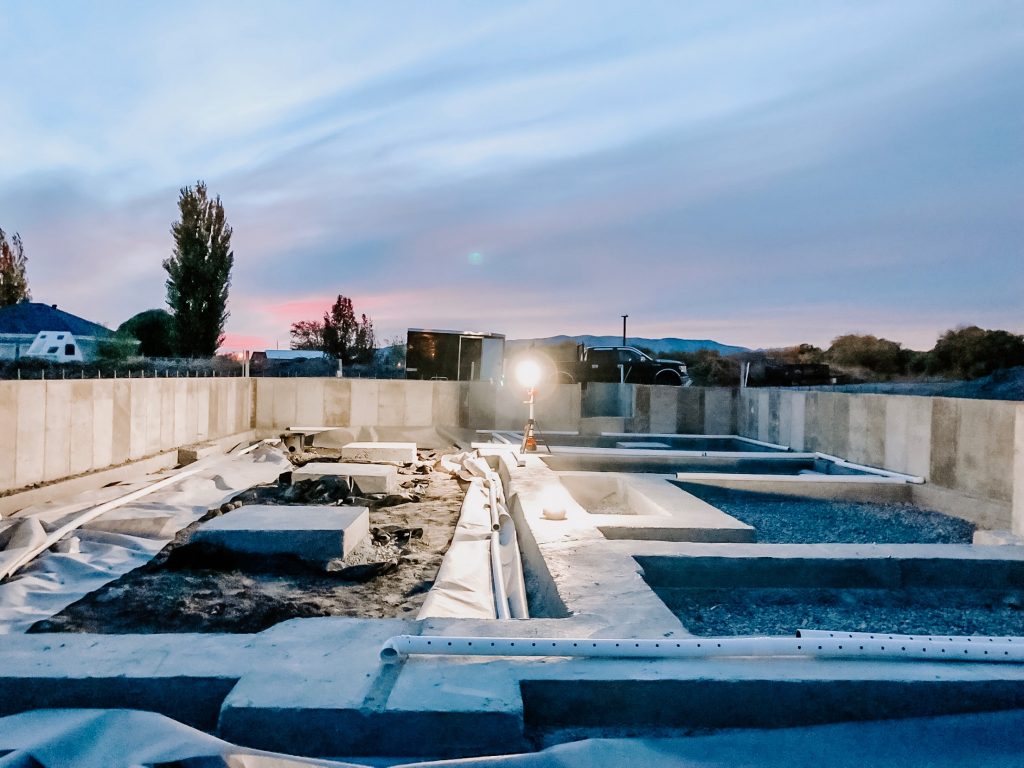
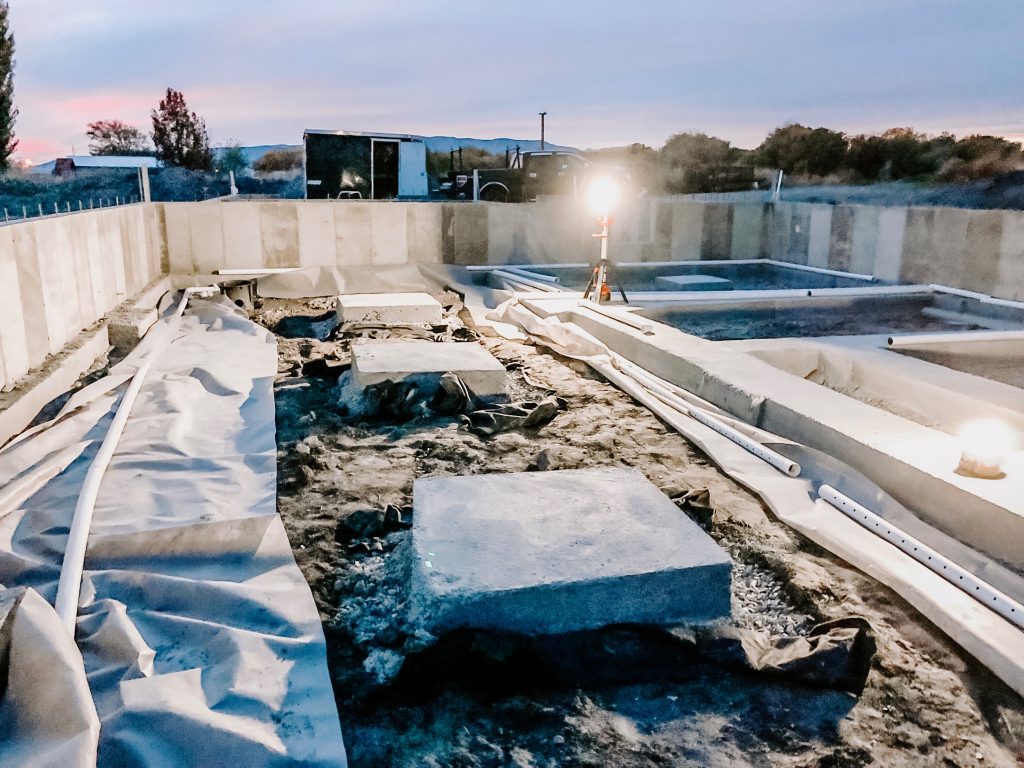
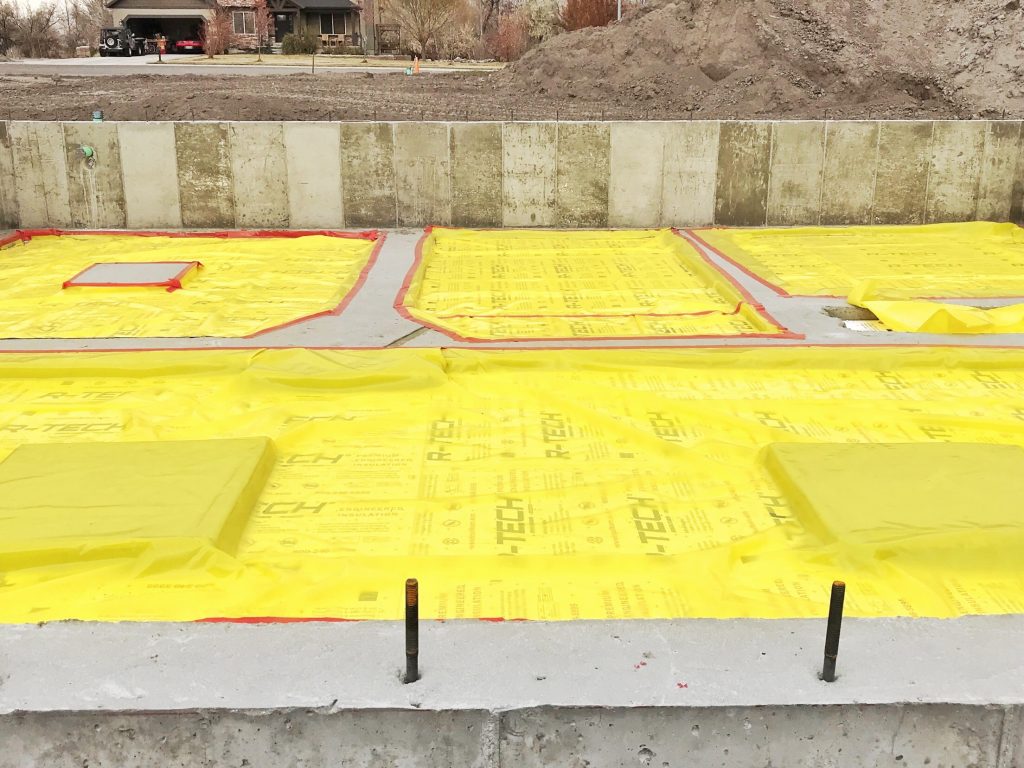
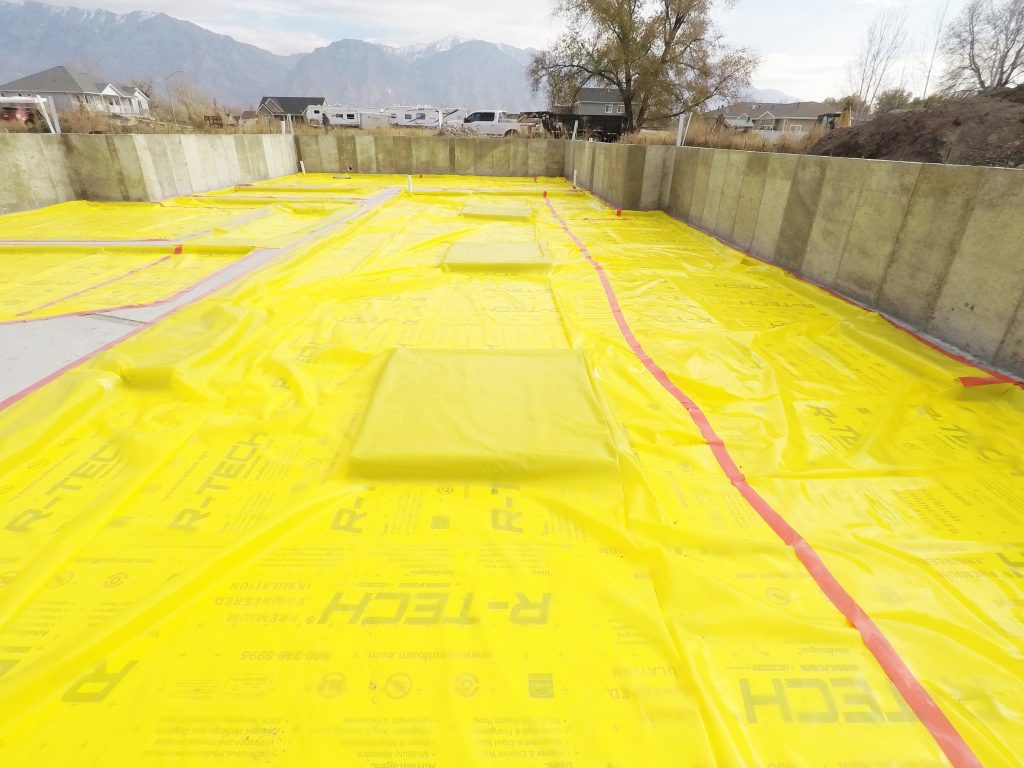
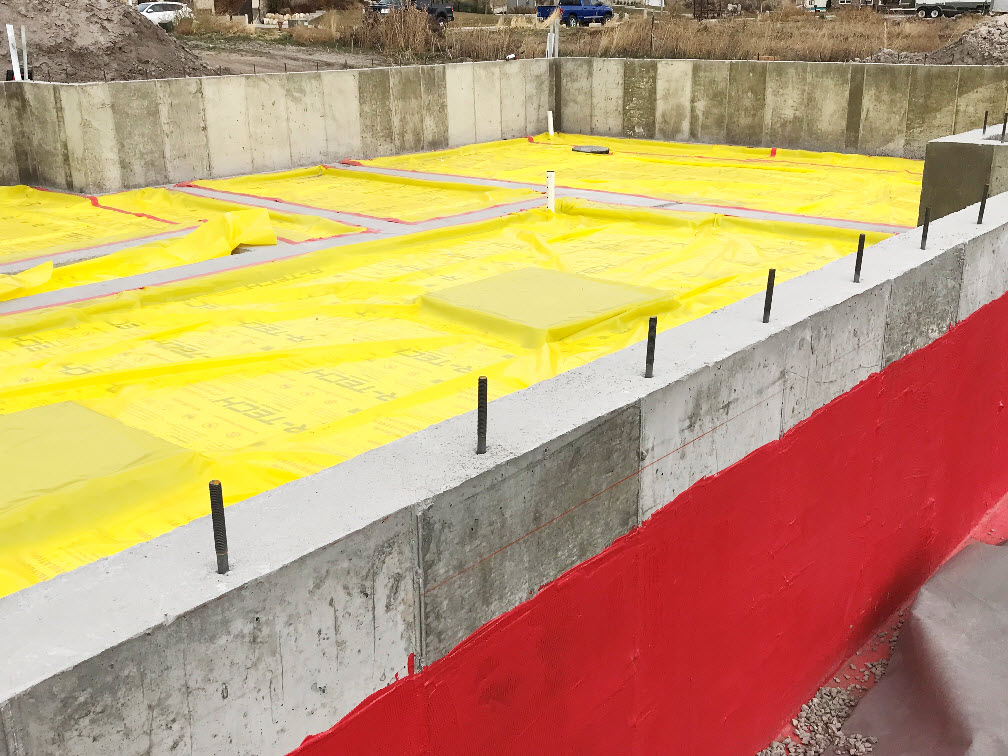
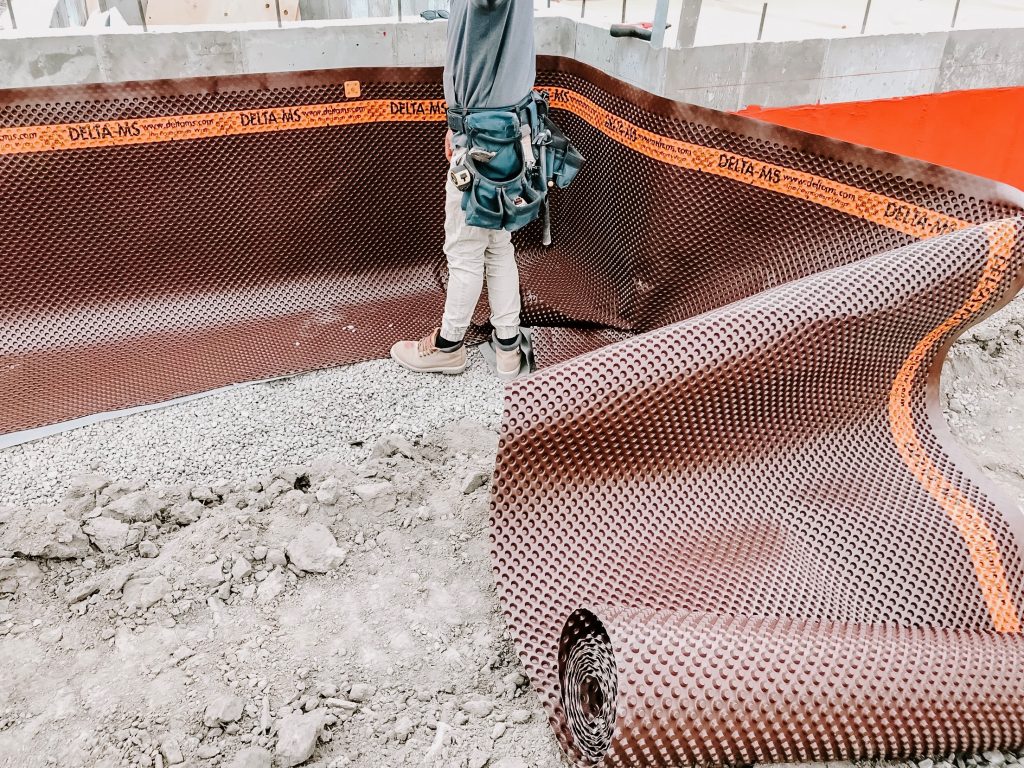
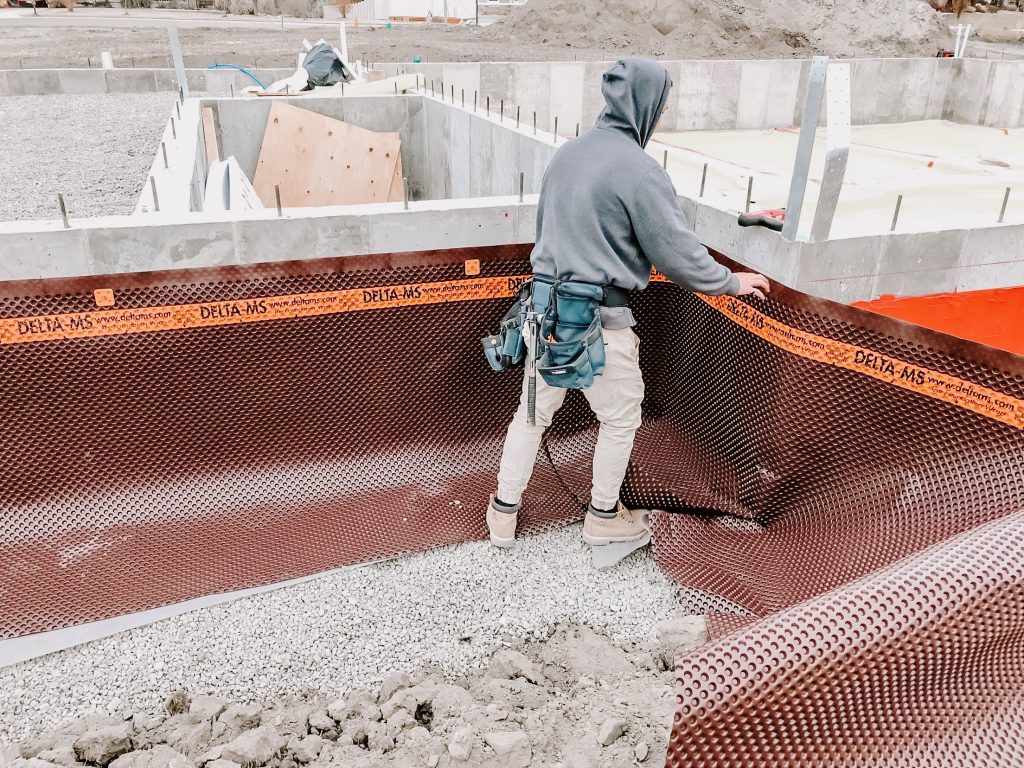
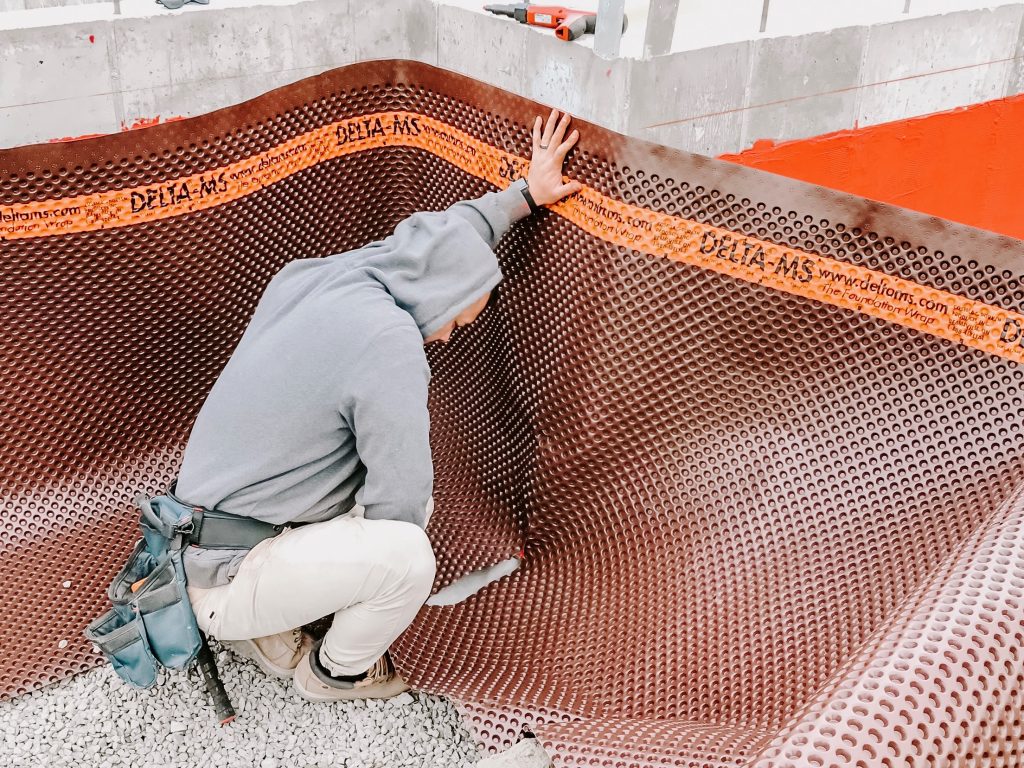
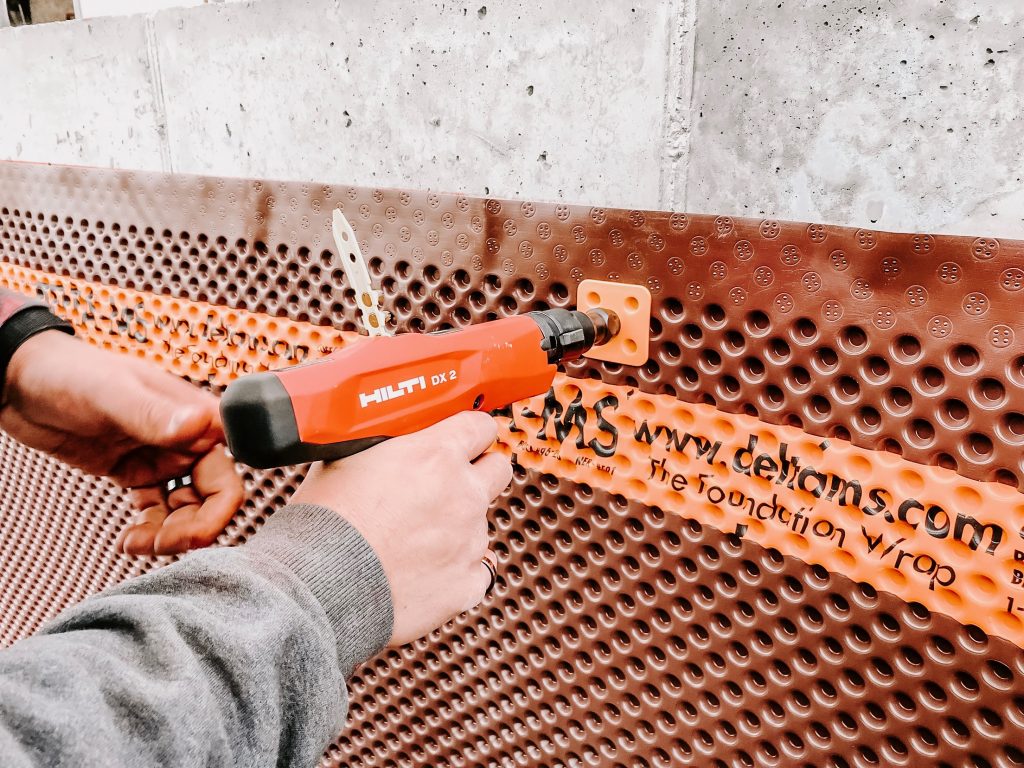
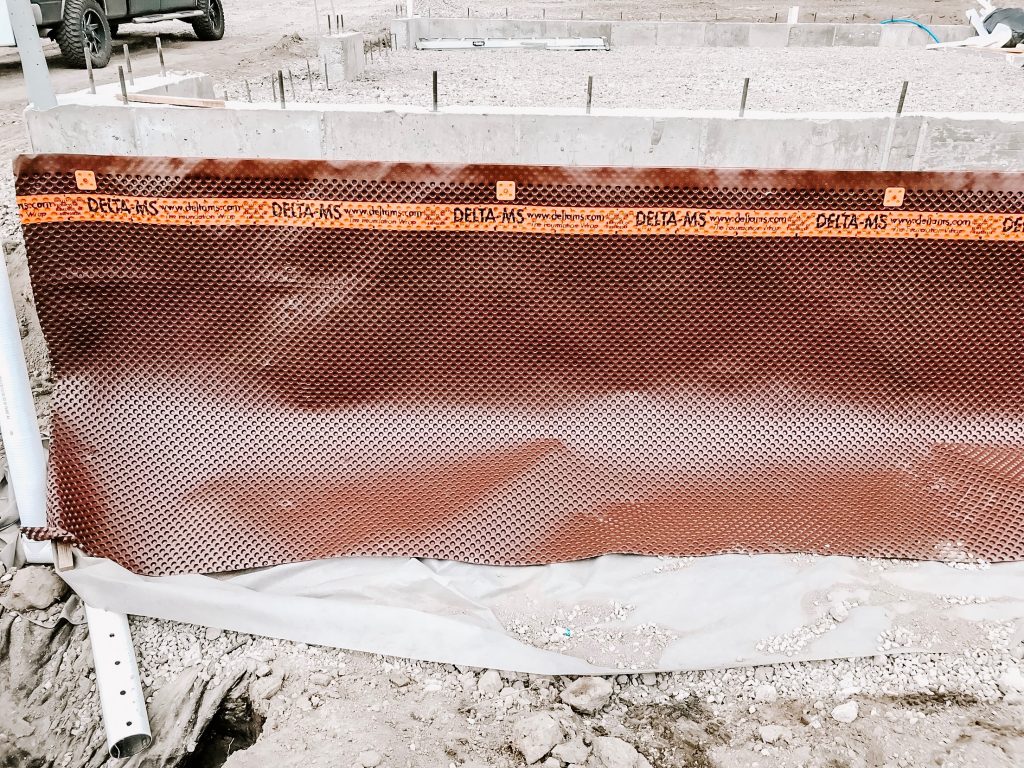
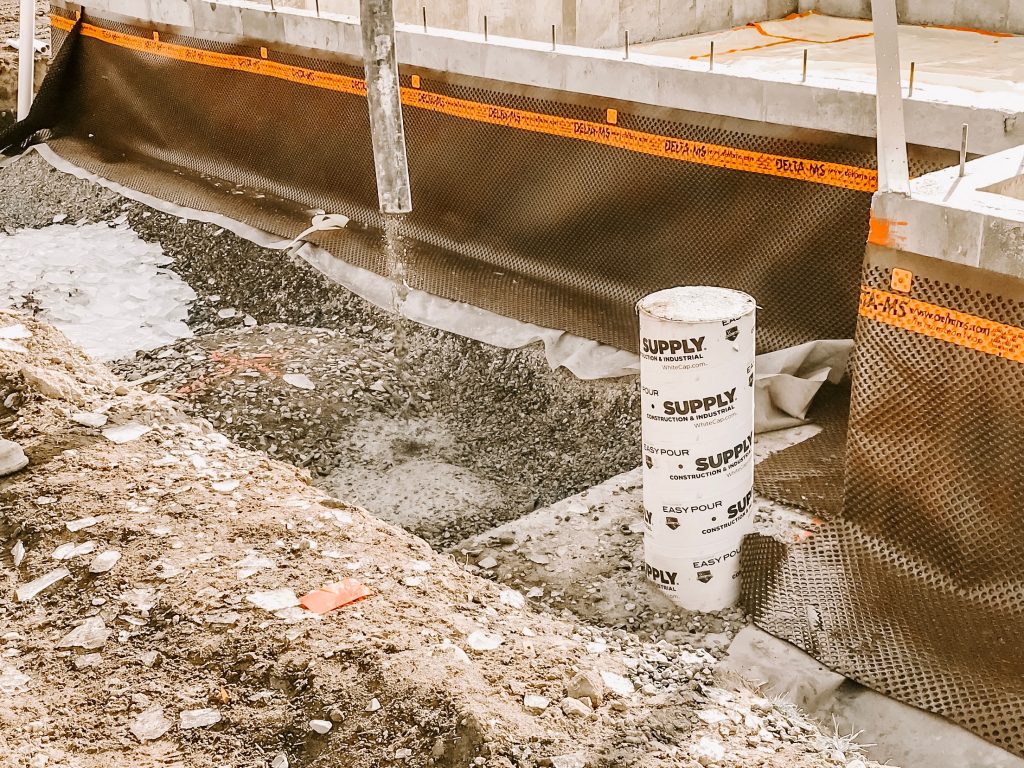
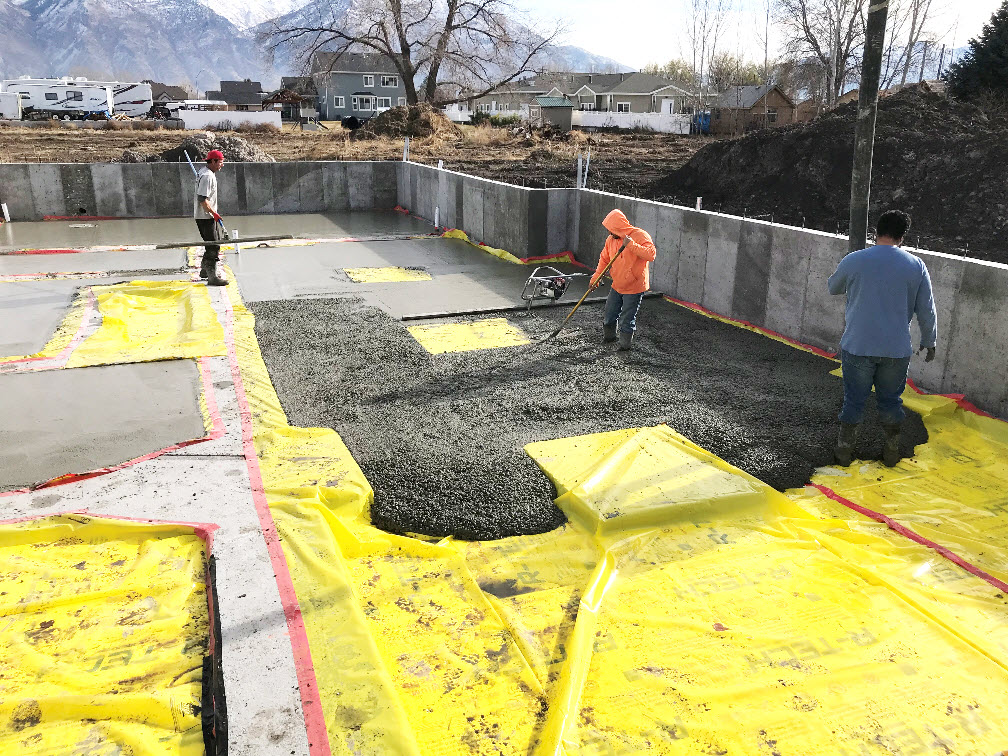
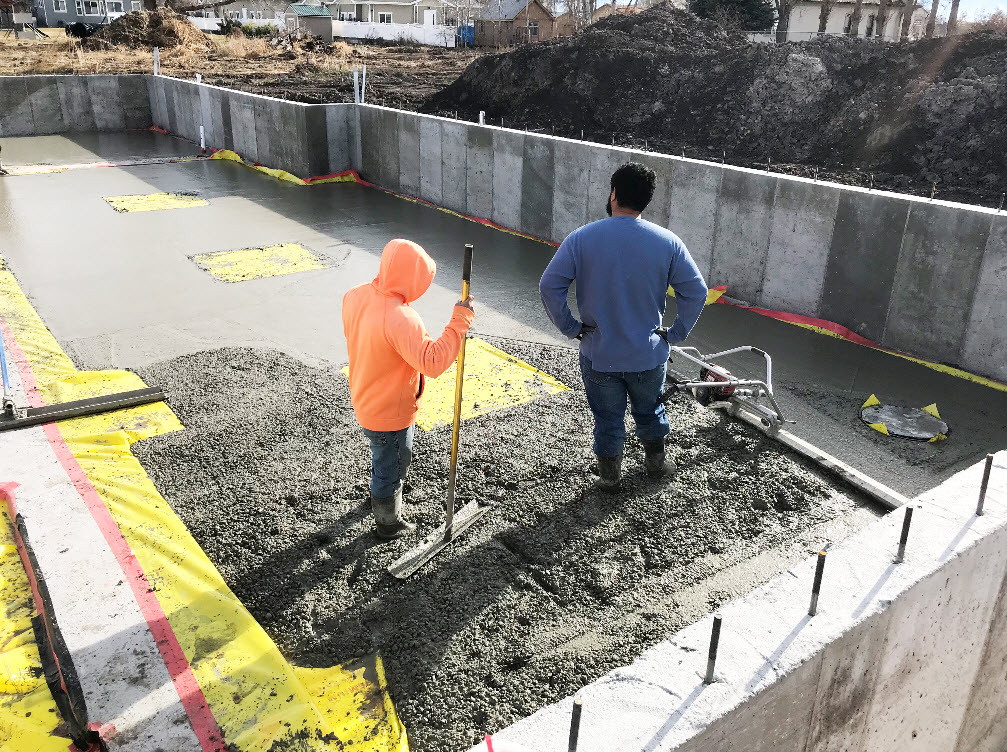
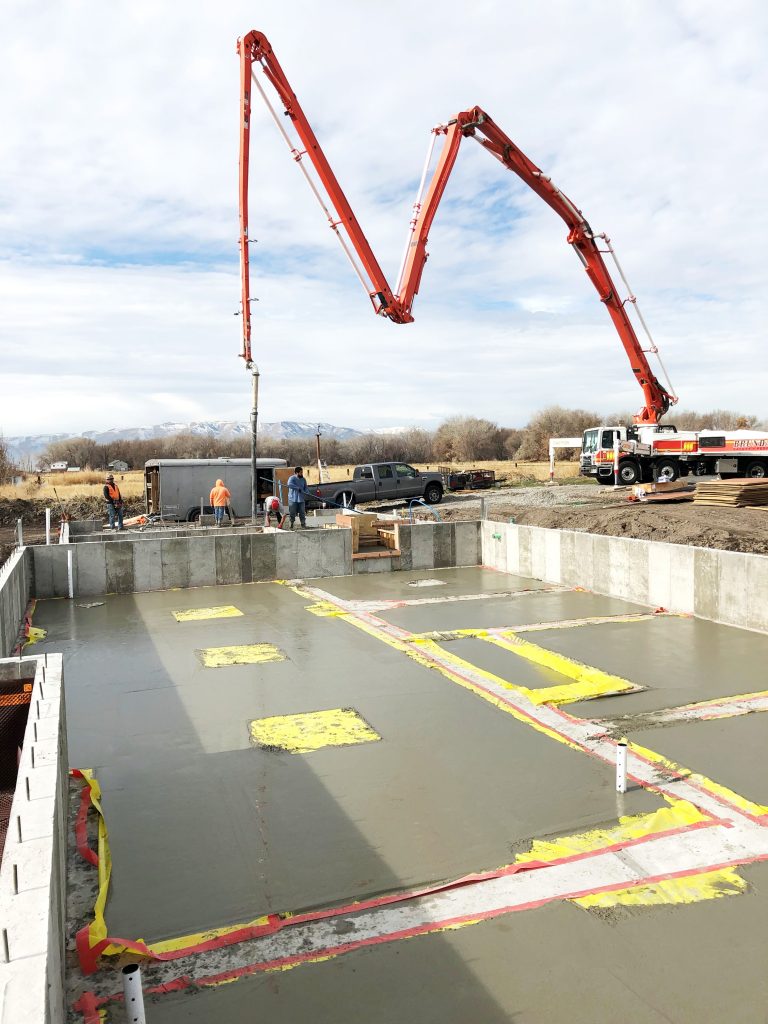
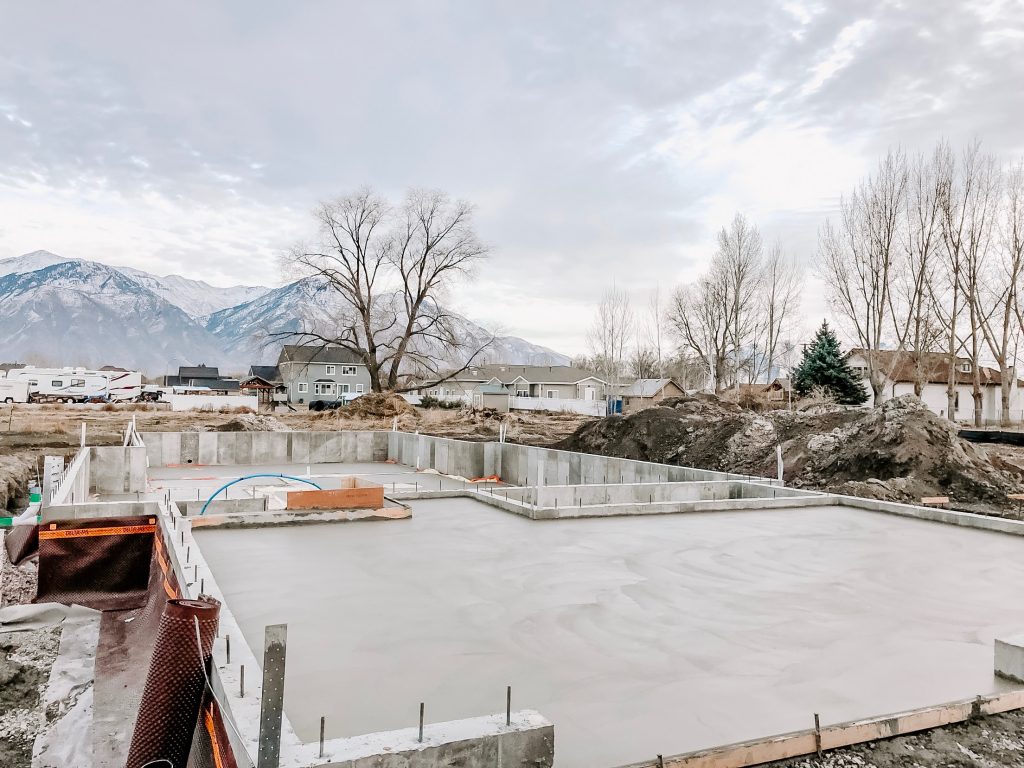
We finally broke ground!!! After waiting 4 months for the City to approve of our plans, I cannot tell you enough how excited and grateful I am that this day is finally here!!!

In this episode, I’ll take you with me to the day of our ground breaking and the actual first digging of the dirt, and then a reveal of what our laundry room will look like! Watch it below!


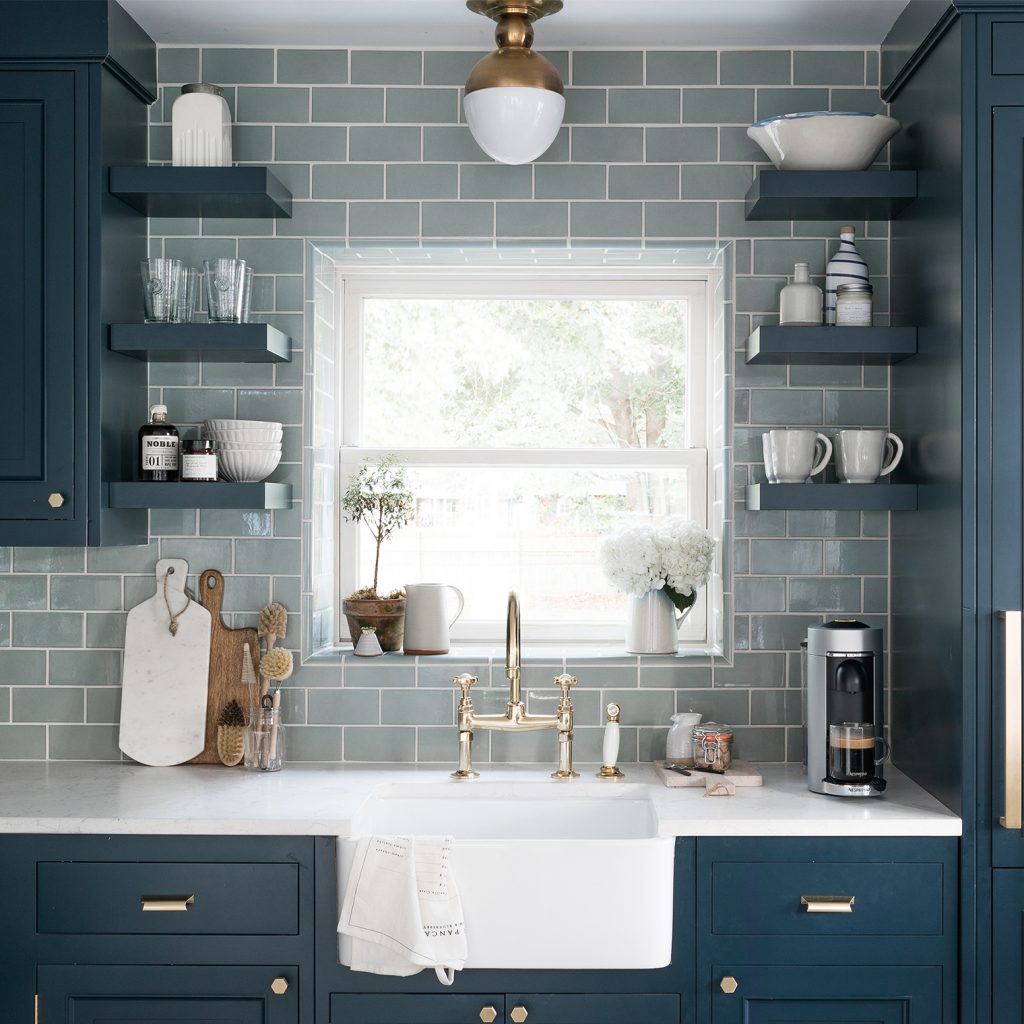
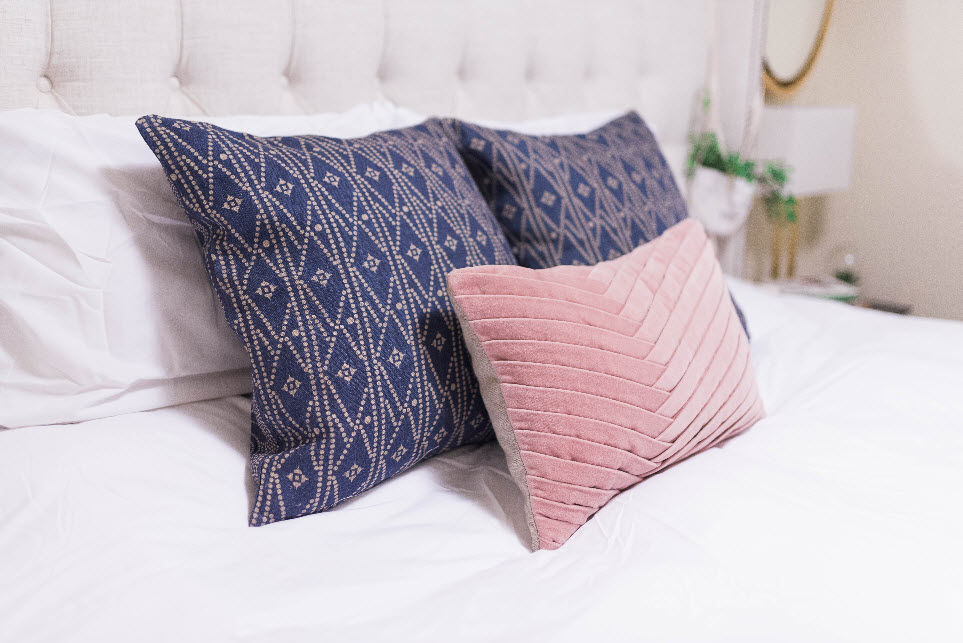
Let me know if the inspiration photo for our laundry room spoke to you as much as it did to me, because I love it. So much. This is actually a kitchen renovation for a beach house by a talented designer named Will Taylor, you can read his kitchen renovation post here.


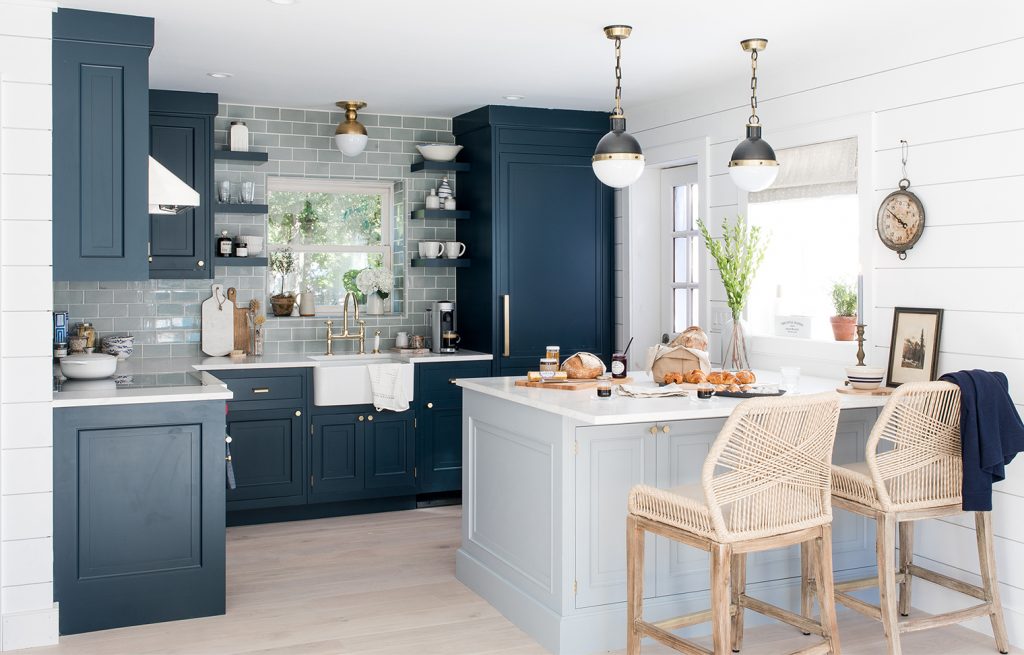
I knew I wanted my kitchen cabinets to be a light color but I loved this design so much, I had to think of a place to incorporate it into, and thought the laundry room would be a perfect place for it, mainly because of that beautiful white farmhouse sink, I love the idea of having a big farmhouse style sink in the laundry room for putting all the dirty clothes in there to wash, or to dye my clothes for my refashion revisions, or to bathe my grand-babies in like 20 years! I just like to plan ahead, guys, is that so wrong?


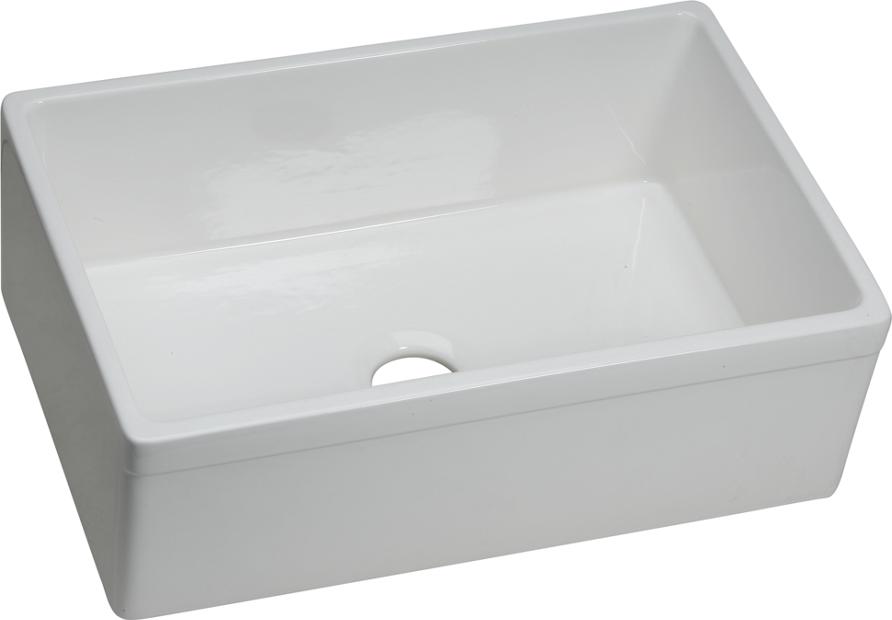
I found a beautiful farmhouse sink from Elkay that will go perfectly for it, and it arrived right on time as I was making this video so make sure to watch the video for the unboxing and see just how big and spacious the sink is! It is a fireclay single bowl that is 29-7/8″ wide which is so roomy, I fit two of my kids in the sink at the same time. I always wished I had a beautiful farmhouse sink to bathe my kids in when they were little but since it’s so big, I can bathe them in it now, even my 11 year old! Haha, I am totally joking but I just might try to bathe my 5 year old in it, don’t judge me.


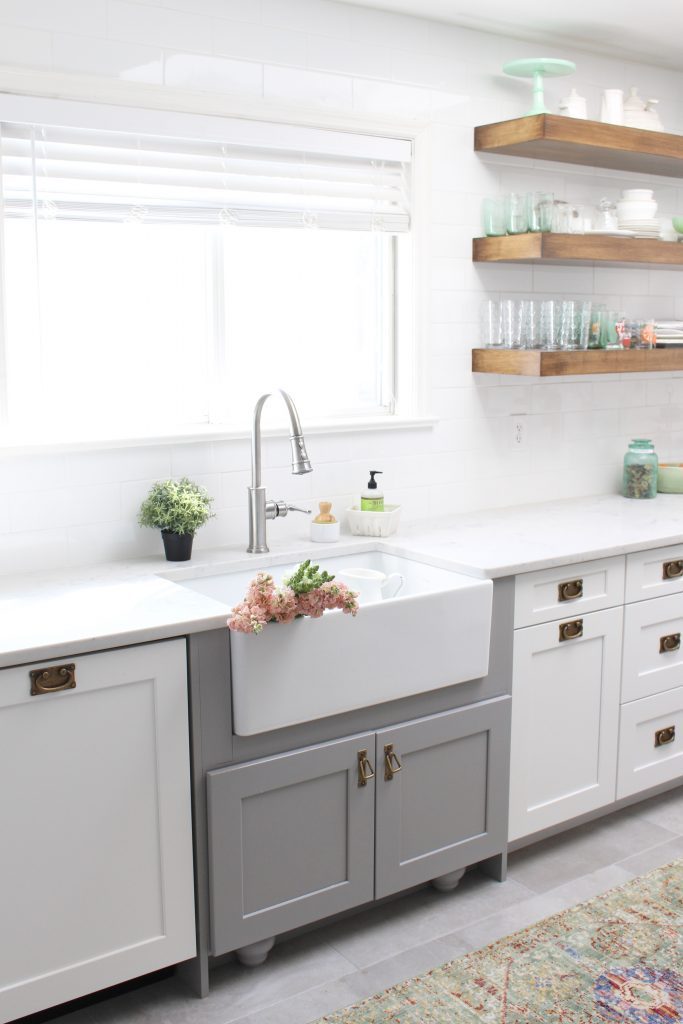
Photo by lifefromhome.com
 
The sink is super heavy and sturdy and very high quality, I didn’t realize just how heavy-duty it was until I tried to move it and couldn’t so Jay had to help me. He doesn’t like many things but he really likes the size of the sink and was impressed by the quality! Also because it’s made of fireclay, it’s super durable, easy to clean and it’s s scratch and stain-resistant.
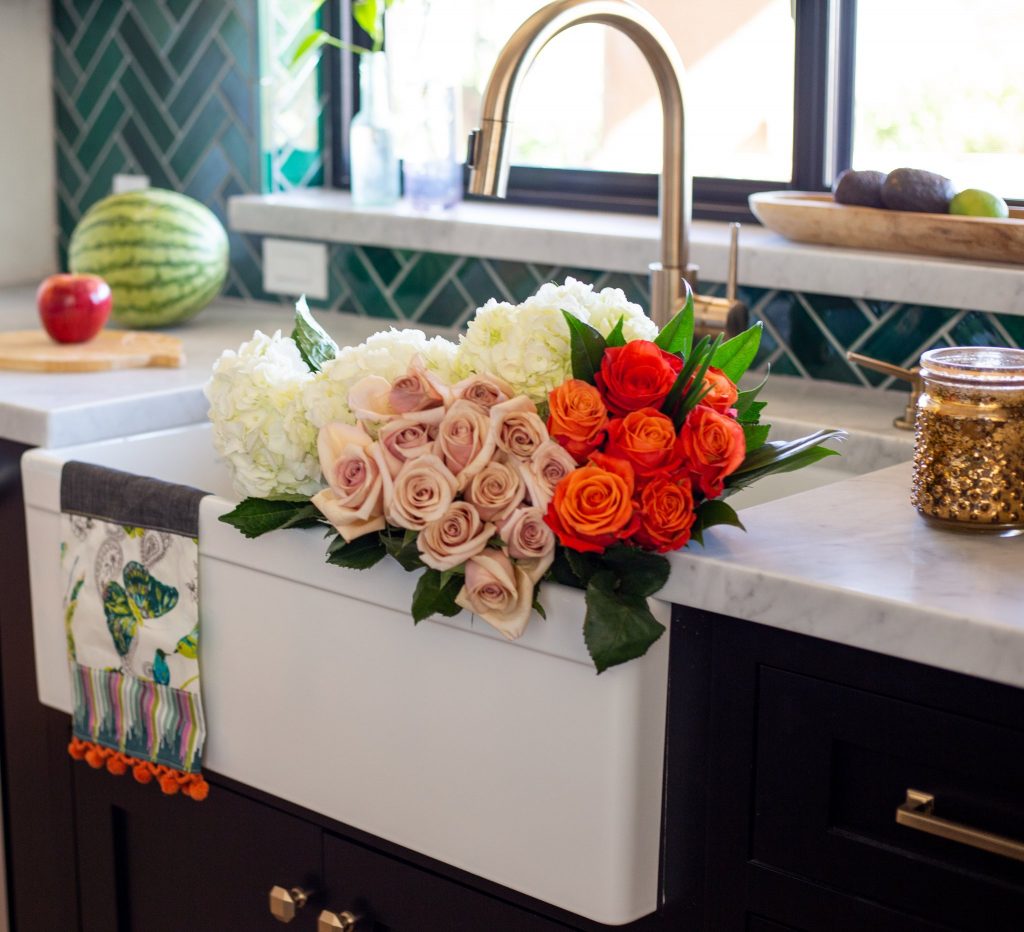
Photo by @barij


The best part about this sink is that it can be installed in two ways: as a flat front or with the decorative band at the top as the two photos above show. Which one should I do for my laundry room?


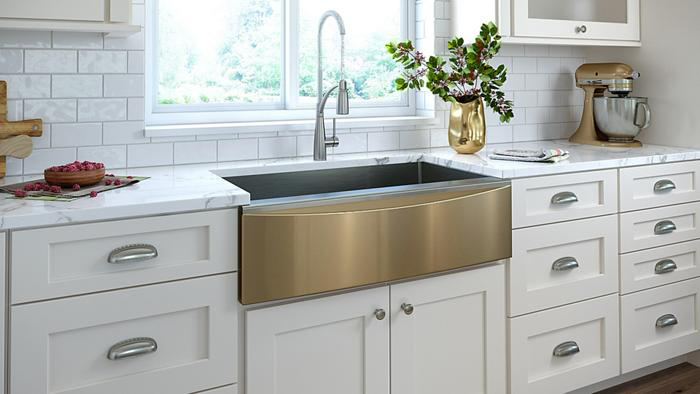
I love that Elkay offers versatile styles for one product, such as the interchangeable apron, where you can switch out the front part of the sink to many various colors such as platinum, sapphire, champagne, scarlet and many other colors, to change according to season, holiday or mood!


Elkay offers a variety of beautiful faucets, drinking fountains, cabinets and more, checkout www.Elkay.com/ for a list of full products.

And let me know in the comments what you think of our future laundry room and which sink style you think fits in my laundry room. Things are rolling along quickly now that we broke ground, so make sure to subscribe to watch more of our Dream Home Come True series!


2

TAGGED: dream home come true 2 Comments

DIY: How to Waterproof your Home

December 5, 2018~ Dream Home Come True, HOME


This DIY on how to waterproof your home is in partnership with The Home Depot. And for the first time in 10+ years, Jay is the one that wrote this blog post! So give him a lot of love and maybe he’ll post more. Just maybe. I’ll let him take it from here!


While we absolutely love the location of our land and consider it to be a great location, the proximity to Utah Lake brings about some unique challenges to what is a houses biggest enemy…water.  The average elevation in feet of the lake coupled with the flood line over the past 10 years is about 4487 ft while our footings and foundation that hold our home up are at an elevation of 4490 ft.  Therefore you can can see that my precautions in building a tight moisture barrier to protect our home are all thoroughly calculated.  We already had brought in a lot of gravel and laid 24″ of 3/4″ gravel down underneath the foundation and brought in an additional 12″ of gravel to lay on top.


We took every step to ensure that we would be able to divert water away from our home.  All of the products except for two specialty items were purchased at Home Depot.  All of these techniques are preventative measures to re-divert water away from your home.


Materials you need:

*quantity varies with every house


4″ pipe for exterior french drain


3″ pipe for exterior french drain  


hilit dx2 gun


hilit dx2 gun powder 


geotextile fabric


redgard(we used 28 gallons)


sika self leveling sealent


R-tech insulation


dorken DELTA


stego wrap


Instructions on Waterproofing your Home


1. I grabbed a box of Sika Polyurethane Concrete Sealant to add some additional protection to the seam between the footings and the foundation as this is more susceptible to failure due to water pooling up on the seam. No waterproofing is needed around the garage since it’ll be at the top of the foundation elevation.

2. I applied a product called ReGard which basically hardens as a rubber. I used a 3/8″ trowel to apply two coats of ReGard to the exterior walls.  I also troweled the ReGard in a vertical striping to add additional direction for water drainage. It is a elastomeric waterproofing membrane suited for interior and exterior substrates.  ReGard creates a continuous waterproof membrane barrier.  The thing that I love while using this product is that it applies pink and dries red.

To reemphasize, no waterproofing is needed around the garage since it’ll be at the top of the foundation elevation.

3. I used 4″ x 10′ triplewall solid pipe on the exterior and 3″ x 10′ triplewall solid pipe on the interior of the house footprint.  After a lot of research I knew that I did not want to use the black prefabricated drain pipe that seems to get crushed under the weight of the ground when it is back filled.  I was then dead set on purchasing 4″ schedule 35 or 40 drain pipe for its rigidity but after further due diligence I found out that some of these pipes, despite their rigidity did not have enough flex in them and started to crack when the ground settled.  Therefore I went with the 4″ and 3″ triplewall solid pipe for its reinforced structure yet flexibility and give.


4. I also created clean-out access around the home so that if the triplewall solid french drain pipe ever gets plugged, I will have access to clean them out with a snake.

5. I purchased 6′ x 100′ geotextile fabric. I laid the geotextile fabric down and put about 3″ – 7″ of 3/4″ gravel on top of it, thereafter I laid the french drain pipe down at a 2 percent slope that drain into two exterior sump pump stations and 2 interior sump pump stations respectively.  I then put another 3″-7″ of gravel on top of the french drain pipe and wrapped the extra geotexitle fabric over the gravel to create a burrito of rock and french drain pipe so that no sediment would clog up our drains.


6. We then used R-tech 2″ rigid Foam Insulation as this not only creates an additional moisture barrier between the gravel and the interior concrete slab.  This also adds a small thermal break between the ground and the slab as it has a R-value of 7.7 which helps the coldness from the ground not travel up and into the home.   I cut all these to fit perfectly between the interior footings.

7. After the R-tech 2″ rigid foam insulation was installed, I used the first specialty item, Stego Class A 10 mil Poly vapor wrap.  This is a multi-layer plastic that stops radon, methane, and water.  All edges and seams were taped with StegoMastic tape to create a continues vapor barrier.

8. I chalked a straight line 10″ down from the top of foundation to get my revel and lined up the top of the DELTA membrane here.

9. On top of the ReGard on the exterior walls, a DELTA dimple membrane made by Dorken was applied to further direct water away from the house and direct any water that settled in the ground straight to the french drain system.  This dimple board has dimples all throughout that create voids for the water to drop straight down to the french drain system.  The reason that I used DELTA is because it has a reputation for being the best vapor and moisture sub-grade system on the market.

10. I used the Hilti DX2 which is a semi-automatic powder actuated concrete nailer to secure the DELTA membrane to the concrete.  I made sure to secure the membrane 1-inch above the top of the RedGard as to not compromise RedGard when the DELTA membrane was secured to the foundation walls.

11. Lastly, we then poured concrete over the interior slab which contained 30″ of 3/4″ gravel, 2″ rigid R-tech insulation, 10 Mil Stego wrap, and then 4″ of concrete.  After the framing is done for the crawl space I will also impregnate the concrete with a waterproof sealer and put a skim coat of epoxy over the whole interior slab.

All waterproofed and ready to start framing!


All of this may sound like an overkill, but I am using proven advanced building science and techniques to build a tight vapor, moisture, and thermal envelope for our home.  You also only have one chance right now to do all of this and while there is additional cost as all of the techniques used were not required and go way above and beyond code, it gives me the peace of mind that in the years to come our home will not be affected by an increased water elevations. Furthermore if there was a problem down the road with water damage then it would cost at least 10 times more to fix than any of the preventative steps we are taking currently and that alone is the reason that we have gone to extreme measures to safeguard our home from a home’s #1 enemy…water.


All-in-one Instructions on Waterproofing Your Home


Materials you need:

*quantity varies with every house

4″ pipe for exterior french drain


3″ pipe for exterior french drain  


hilit dx2 gun


hilit dx2 gun powder 


geotextile fabric


redgard(we used 28 gallons)


sika self leveling sealent


R-tech insulation


dorken DELTA


stego wrap


1. I grabbed a box of Sika Polyurethane Concrete Sealant to add some additional protection to the seam between the footings and the foundation as this is more susceptible to failure due to water pooling up on the seam. No waterproofing is needed around the garage since it’ll be at the top of the foundation elevation.

2. I applied a product called ReGard which basically hardens as a rubber. It is a elastomeric waterproofing membrane suited for interior and exterior substrates. ReGard creates a continuous waterproof membrane barrier. The thing that I love while using this product is that it applies pink and dries red. I used a 3/8″ trowel to apply two coats of ReGard to the exterior walls.  I also troweled the ReGard in a vertical striping to add additional direction for water drainage.

3. I used 4″ x 10′ triplewall solid pipe on the exterior and 3″ x 10′ triplewall solid pipe on the interior of the house footprint.  After a lot of research I knew that I did not want to use the black prefabricated drain pipe that seems to get crushed under the weight of the ground when it is back filled.  I was then dead set on purchasing 4″ schedule 35 or 40 drain pipe for its rigidity but after further due diligence I found out that some of these pipes, despite their rigidity did not have enough flex in them and started to crack when the ground settled. Therefore I went with the 4″ and 3″ triplewall solid pipe for its reinforced structure yet flexibility and give.

4. I also created clean-out access around the home so that if the triplewall solid french drain pipe ever gets plugged, I will have access to clean them out with a snake.

5. I purchased 6′ x 100′ geotextile fabric. I laid the geotextile fabric down and put about 3″ – 7″ of 3/4″ gravel on top of it, thereafter I laid the french drain pipe down at a 2 percent slope that drain into two exterior sump pump stations and 2 interior sump pump stations respectively.  I then put another 3″-7″ of gravel on top of the french drain pipe and wrapped the extra geotexitle fabric over the gravel to create a burrito of rock and french drain pipe so that no sediment would clog up our drains.


6. We then used R-tech 2″ rigid Foam Insulation as this not only creates an additional moisture barrier between the gravel and the interior concrete slab.  This also adds a small thermal break between the ground and the slab as it has a R-value of 7.7 which helps the coldness from the ground not travel up and into the home.   I cut all these to fit perfectly between the interior footings.


7. After the R-tech 2″ rigid foam insulation was installed, I used the first specialty item, Stego Class A 10 mil Poly vapor wrap.  This is a multi-layer plastic that stops radon, methane, and water.  All edges and seams were taped with StegoMastic tape to create a continues vapor barrier.


8. I chalked a straight line 10″ down from the top of foundation to get my revel and lined up the top of the DELTA membrane here.


9. On top of the ReGard on the exterior walls, a DELTA dimple membrane made by Dorken was applied to further direct water away from the house and direct any water that settled in the ground straight to the french drain system.  This dimple board has dimples all throughout that create voids for the water to drop straight down to the french drain system.  The reason that I used DELTA is because it has a reputation for being the best vapor and moisture sub-grade system on the market.


10. I used the Hilti DX2 which is a semi-automatic powder actuated concrete nailer to secure the DELTA membrane to the concrete.  I made sure to secure the membrane 1-inch above the top of the RedGard as to not compromise RedGard when the DELTA membrane was secured to the foundation walls.

11. Lastly, we then poured concrete over the interior slab which contained 30″ of 3/4″ gravel, 2″ rigid R-tech insulation, 10 Mil Stego wrap, and then 4″ of concrete.  After the framing is done for the crawl space I will also impregnate the concrete with a waterproof sealer and put a skim coat of epoxy over the whole interior slab.


Estimated time: 3 weeks

Projected cost: $8000 without labor, $14,000 with labor

Skill level: Intermediate


I hope you enjoyed this knowledgeable information by Jay! I have no idea what he’s talking about in any of the above instructions but that is exactly why he’s the one building our house, not me! Aren’t you so glad? Me too.

Jay has studied in-depth and researched widely and thoroughly in order to make sure he builds our home in the best method, using the highest quality materials so it can be one of the strongest and well-built houses ever built!

Every time someone from the City comes to check off things, they’re so impressed with the way Jay’s building and told him they’ve never, ever seen a house being built this well and thoroughly, ever in the state of Utah or in their entire career. This makes me so proud of him and it makes me in awe at how hard he’s working to build me the house of my dreams.

Don’t you think he should be building other people’s homes? And what do you think of this waterproofing tutorial? Would you want this done in your house?


I acknowledge that The Home Depot is partnering with me to participate in the promotional program described above (the “Program”). As a part of the Program, I am receiving compensation in the form of products and services, for the purpose of promoting The Home Depot. All expressed opinions and experiences are my own words. My post complies with the Word Of Mouth Marketing Association (WOMMA) Ethics Code and applicable Federal Trade Commission guidelines.
0

TAGGED: DIY building, dream home come true 5 Comments

Guest Bedroom Makeover Reveal

October 18, 2018~ HOME, Home Decor


Today is the day of the reveal for the guestroom makeover! I talk about my design process on this post if you want to read about the whole process. I worked with Modsy to design our room and on that post I shared the initial design Modsy designed for me but many of the items were out of my budget so we worked together to find more budget-friendly options while keeping the design style as similar as possible. Then they made another 3-D rendering with all the budget-friendly items we picked out so I knew exactly what my room would look like. Pretty cool, right?

I am trying to be cool by playing it cool and keeping it collective, but forget it, it’s way more than just cool, it’s flippin’ awesome, amazing, a modern day sorcery, if you ask me! I know you have to pay several hundred dollars just to get a 3-D rendering of a room so getting this as part of a package deal of them designing for you, with links to shop the exact items, and being able to revise as many as you want for only $59 is mind boggling to me! It’s worth at least x10 times than this, but make sure to use code: OURLIFE20 for 20% off any design package!


3-D rendering of the guestroom


So let’s not waste anymore time and let’s check out the before/after of our guestroom!


What do you think of the makeover? Isn’t it so much more inviting than it used to be? Now, this is a room I can happily take my guests down to! I still do like the original design Modsy designed for me better(that you can see here), but this was much more budget-friendly and I am very happy with how it turned out. My favorite piece that you see in the room has to be the tufted bed with brass detail, it is high quality and so beautiful, even more beautiful in real life!

My favorite thing that you don’t really see is the Purple mattress. So comfortable! See what my husband and my mom who has never liked a mattress in her 70+ years in her life has to say on this post right here.

I looked everywhere for a comforter without the square stitches but couldn’t find one, is there such a thing? I wanted just a plain, smooth comforter and with no luck, I got the comforter cover which gave me the exact look I wanted. The comforter I got has very high reviews and I was not disappointed either. And very affordable!

I did purchase the same Blue linen pillows and the Pink velvet pillow as the original design because I love it so much. The blue pillows already come with the pillow inside of it but I did have to buy a pillow insert for the pink velvet pillow.

I couldn’t believe how cheap these blue/white rugs were and was more surprised by the quality when it arrived. I love the design so much and would have paid a lot more for them.

The gold oval mirrors I already had, and to save money I used them for this room. I still need to purchase similar mirrors for my other room now but I promised my husband I won’t be buying anymore home decor or furniture until we are closer to finishing our new house. I want to save up money and purchase these Gold oval mirror from the original design.

I am very happy with the black nightstands, gold marble lamps, copper alarm clock and the faux succulent plant that I got, which saved a lot of money compared to the original design. I just need to figure out how to hang the plant hanger from the ceiling!

The art above the bed: ONE | TWO | THREE are in 16×16 size and the art on each side of the room: ONE | TWO are 18×24.


Remember to use code: OURLIFE20 for 20% off any design package if you decide to use Modsy for the design of your home!


If this was the guest bedroom of wherever you were staying at, would you be happy with this room? Leave your answer in the comments below! The comments finally work now, yay! No one was able to leave comments for most of this year, oops! But it’s fixed now!


Links to all of the items in the makeover: 

Tufted Bed -comes in every bed size

Mattress

Comforter insert

Comforter cover

Blue linen pillows

Pink velvet pillow 

Pillow insert for pink velvet pillow

Blue/white rug

Gold oval mirrors(out of stock)

Black nightstands

Gold/marble lamps

Copper alarm clock

Faux succulent plant

Plant hanger

Art above the bed: ONE | TWO | THREE(16×16 size)

Art on the sides of the room: ONE | TWO (both are 18×24)

seat cushion

Purple pillow

Mattress protector

Purple sheets


0

TAGGED: room decor, room makeover 1 Comment

Sneak Peek of the Guest Bedroom

October 17, 2018~ HOME, Home Decor


link to this bed here


Here is a little sneak peek of the guestroom makeover before the full reveal! When I wanted to give our basement guestroom a makeover, I immediately knew I wanted a Purple mattress. Not just because they have that awesome video that went viral on Facebook and my kids wanted Purple just from watching Mallory from Studio C(which they’re avid fans of) in that commercial, even though that was my first impression of Purple and a good one at that, I have a few friends who have Purple mattresses and they love it.

Then my friend Janet who reviews mattresses on her site and has reviewed plethora of mattresses, told me her favorite mattress out of all the ones she’s tried is the Purple. I read somewhere that you need to hear or see the product 6 times before making the purchase and that sounds about right! Because that sealed the deal for me. So I am so excited to share my experience with the Purple mattress and so thankful they agreed to send me one to review!


One big worry I had though even before I even received the mattress was, “Would my mom like it?” You see, this makeover is solely inspired by my mom. After selling her house earlier this year, she stayed with us for several months and I felt bad our guestroom was so sad, with just a single mattress on the floor and nothing else in the room. So I wanted this room to look beautiful and inviting for my mom, not sad and cold like it was.

But the thing is, she hates mattresses. In her 70+ years in her life, she has never met a single mattress she likes. She’s tried numerous ones but she hates it and says it hurts her back. So every single night of her life so far, she’s slept on the hard floor! She did have this Korean stone bed once that had a thick layer of stone that heats up and is suppose to be good for your blood circulation, that she’d lay a thin blanket on top and sleep on. So I take that back, every single night of her life so far, she has never slept a night on a mattress.

But then I thought, oh, we will just move it to our bedroom if she doesn’t end up liking it.

So we visited their warehouse and tried every single Purple bed ourselves, before making the purchase. We tried their Original Purple, Purple 2, Purple, 3 and Purple 4. Here are the Instastories I took during our visit that explains more the differences, Ruthie was the absolute sweetest and such a huge help. I am a very visual person and like to see it visually instead of reading about it so I think you’ll find it helpful.


You might wonder what the difference is between the original Purple vs. Purple 2 when they are both 2 inches of the purple polymer. The biggest difference is, see how there is that nude color edge of foam around the new Purple? That makes it so that you can sit on the edge of the bed. Without it, like in the original Purple, if you try to sit on the edge of the bed to put socks on or to hang out, you will slowly slide down towards the floor.


So which one did we decide to get? We got the Purple 4. I thought it would be best for Jay to have less pressure on his joints and I loved how I felt so light and as if I was floating! So what do I think of the Purple? I LOVE it. But I am very easy to please, I can sleep anywhere(except a hard floor) and I would sleep all through the night and my back would be completely fine the next morning. So I wasn’t worried about me but Jay, being a super skeptic about everything and a person that’s very hard to please, I was curious to see what he’d think.

I heard from some people that you might need a few days to a couple of weeks before your body gets used to it but from night one, it got Jay’s approval! This is huge, guys! He never “approves” anything. I honestly thought his body would need some time to adjust to but from night one, he slept really well. And in his own words, “Yeah, I like it.”, is a HUGE compliment!


What did my mom think of it though? I expected her to just sleep on the floor, next to the mattress on the first night. But the next morning when I went to her room to ask her how the mattress was, she surprised me, no, I mean shocked me and told me as she rolled her shoulders back and felt her back, how she slept on the mattress all night and slept the whole night through and how her back doesn’t hurt one bit and is completely fine! What??? This is insane! She was just as shocked as I was! We literally starred at each other with our mouths gaping open the whole time we had this conversation. A part of me was a little bummed because I expected her not to like it and we were going to move it to our bedroom to use for ourselves, but mostly I was so happy and glad!

She’s slept on her Purple mattress every night since then and she loves it. She still can’t believe it and still keeps saying how could this be? It really is mind boggling to me, for her to find a mattress that doesn’t hurt her back, after 70+ years. Crazy!!! I guess that’s how awesome the Purple mattresses are!

Purple has a new bed for pets now and I want one for my dog, Achilles! We also got the Mattress protector that is waterproof and very sturdy material, Purple sheets that are very stretchy to match the stretchiness of the purple polymer, Purple pillow that is very, very heavy but Jay loves it, he does put another pillow under it though to level his big, broad shoulders(he’s a side sleeper), and the seat cushions.

Jay has the seat cushion in his office and I am sitting on it right now as I write this. The first time I used the seat cushion, my butt was a little sore! I guess my butt was getting used to it? But after the soreness went away, it is so nice and comfortable. I can sit in front of my computer for hours and not feel any discomfort.

So Purple gets my approval, Jay’s approval and my mom’s approval! I would recommend this to my sister and my best friends, which is why I recommend it to you, just like all the other products I feature on this blog and on my other channels. In order to share a product with you, I have to love it enough to recommend it to my own sister and my best friends. That’s how I judge which brands or products I decide to work with.

I will also be giving away two Purple pillows + other products on my Instagram on Oct. 18th, so make sure you go and enter!

Let me know if you have any questions about Purple or if you have one or tried it, let me know what you think! They also have specials going on quiet frequently so watch out for those, like right now they’re offering a FREE SHEET SET WITH ANY MATTRESS PURCHASE (UP TO $129 VALUE!)


Links to the products I’ve mentioned:

Tufted wingback bed

Check out the new Purple here

Original Purple mattress

Buy the new Purple here.

seat cushion

Purple pillow

Mattress protector

Purple sheets


CLICK HERE to go see the full guest room makeover reveal! 


*While I received no compensation, I received Purple products in exchange for this blog post.


0

TAGGED: bedroom makeover, home decor, purple Leave a Comment

Designing our Basement Guestroom

October 4, 2018~ HOME, Home Decor


This post is in partnership with Modsy, an awesome interior-design service I know you’ll love because I’m obsessed with it! Keep reading for a 20% discount code!


This is our guestroom right now. Sad, isn’t it? I have been somewhat embarrassed of sending people downstairs to this dark room in the basement whenever we had people staying at our house. It wasn’t inviting one bit so I’ve been wanting to give our guestroom a makeover that it desperately needed so I am so excited to share with you our 3-D rendering of our basement guestroom and our process of giving our guestroom a makeover!

While I am good at sewing and have a good eye for style and fashion, when it comes to interior design? It is one of my weaknesses. I have no vision for interior design, whatsoever! I don’t have the talent and the eye to mix and match a variety of furniture and decor to make it look all cohesive and tied-in together, it would be a disaster if I tried. So when I met the lovely people behind Modsy at Haven Conference this past Summer, I was very intrigued.

You take a style quiz, take measurements and photos of your room, then one of the many interior designers at Modsy will cater to your style and give you two room design ideas, complete with a 3-D rendering and with the exact products you can shop right from their site. Sounds super cool right? So I was willing to try it to see if it was as good as the website seemed to promise.

Modsy complimented me with a Modsy Premium to try it for myself and I’ll take you along my journey of my design process with them.


First, I took the style quiz. It’s very quick, you pick which 3 rooms you like the best, then mark which items you do like and don’t like and then they tell you what style you are. My style was an Elegant Connoisseur and it was spot on, I was pretty shocked to be honest with you! I’ve never even heard of that term for a design style before but that photo you see above of the living room? I literally gasped because it was perfect. It is so me. I want my living room to look exactly like that!

How did they know so well from such a simple quiz? Was my exact thought. Check out the other beautiful rooms fit for an elegant connoisseur.


I love every one of them. It is so my style; simple, elegant, feminine, with a touch of artsy, unique items that stand out. Click here to take your own style quiz to see which style you are! Then leave a comment letting me know, I’d love to know which style you are.


The current state of our guestroom

I then measured my room from floor to ceiling, side to side, in different areas of the room to get the exact measurements and also took various photos of the room. This is so that they can get an exact rendering of my room for the 3D rendering. Then that’s it!

Once they approve your photos, they’ll send you the two design ideas and the 3D rendering of your room within 14-21 days. They can design around a furniture(s) you already own, want to buy, and the best part is, you can revise it and ask for changes as many times as you want, without an added cost. They’ll send you a 3D rendering with each changes every time so you know exactly what your room will look like beforehand.

So would you like to see the two designs they sent me? Here is design #1 and design #2.


Design 1


Design #2

Which one do you like better? I decided to go with design #2. I gasped(again) when I saw it because I love it so much! Don’t you love it or what? I did want to see it with a different choice of decorative pillows, with a different color scheme so I asked them to switch out the pillows and choose something else and they did, as shown below.

I love the blue and the pink combo so much! I like it with these pillows better, how about you? Just like how they switched out the pillows, they can switch out any of the products and revise as much as you need to get the exact design you want, no matter which design package you choose. Some of the items they chose for this room are out of my budget so they also helped me to find ones that were more in budget.

I think the 360 view is so cool, I wish you could see it too.


I have been nothing but very impressed and happy with Modsy and they have offered a discount for you! Use code: OURLIFE20 for 20% off any design package. With the code, you can get a Modsy interior designer to design two different options for you with unlimited revisions for only $47! SO worth it and such an amazing price. I definitely plan on using Modsy when we design our new house.


Here are the links to the items to purchase:

Tufted tall bed(shown in bronze nailheads in color twill cream)
King size mattress
Comforter 
Duvet cover
Art above the bed
Rug(in color cream)
Chandelier(in antique brass)
Lamps(in brass/ivory)
Side wall art #1(size 18×24)
Side wall art #2(size 18×24)
Peony wall art
Gold oval mirror
Nightstands
Faux cowhide rug
Blue linen pillows
Blush pillow
14×22 pillow insert(for blush pillow)
alarm clock
plant holder 
plant
basket


Click here to see the final reveal of the guest room makeover! 


0

TAGGED: home decor, modsy Leave a Comment

  • 1
  • 2
  • 3
  • Next Page »
cutmypic
Hello! My name is Sarah and I am so happy to have you here! Here you'll find DIY sewing, DIY home building & decor, honest and vulnerable posts of motherhood and snippets of my family. We are building our dream house and will update you regularly on our whole process from start to finish and I am also starting a mother-daughter sewing series. So I hope you stay awhile!

BLOG ARCHIVES

SEARCH

JOIN THE LIST

- THEME BY ECLAIR DESIGNS - Web Hosting By RFE Hosting -