• ABOUT
  • COLLABORATE
  • CONTACT

Life is Beautiful

Motherhood, Sewing, Family

  • SEW
  • HOME
  • PARTY
  • TRAVEL
  • SHARING MY HEART
  • SHOP

magazine publication/modestify your summer dress 2

May 18, 2011~ SEWING

Last year i was invited to be a part of a brand new magazine called the A La Mode Magzine for a tutorial for the Anthropologie vintage lace chemise, and it’s now published, check it out!  I’m on page 22-23.  Thank you Madelyn for the opportunity to be published in such an awesome, useful magazine, I’m so honored!

to purchase a copy, go here.
ο»Ώ
now onto my DIY project
remember how i modestified summer dresses here?
those two dresses were XL’s so there were a lot of fabric to work with,
but these two dresses i modestified were mediums so i didn’t have much fabric.
so this is a way to add the sleeves when you don’t have much fabric left over.
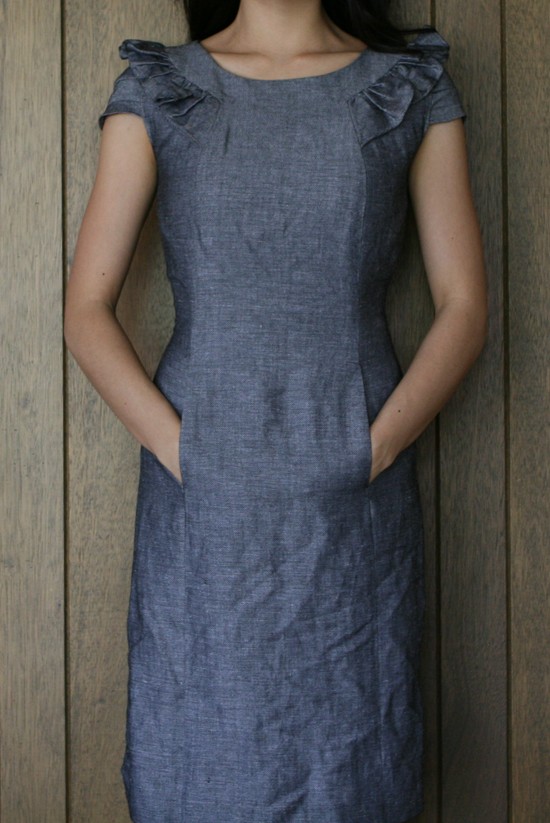
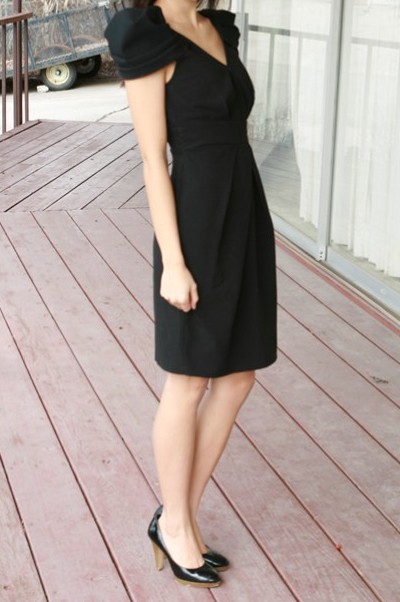
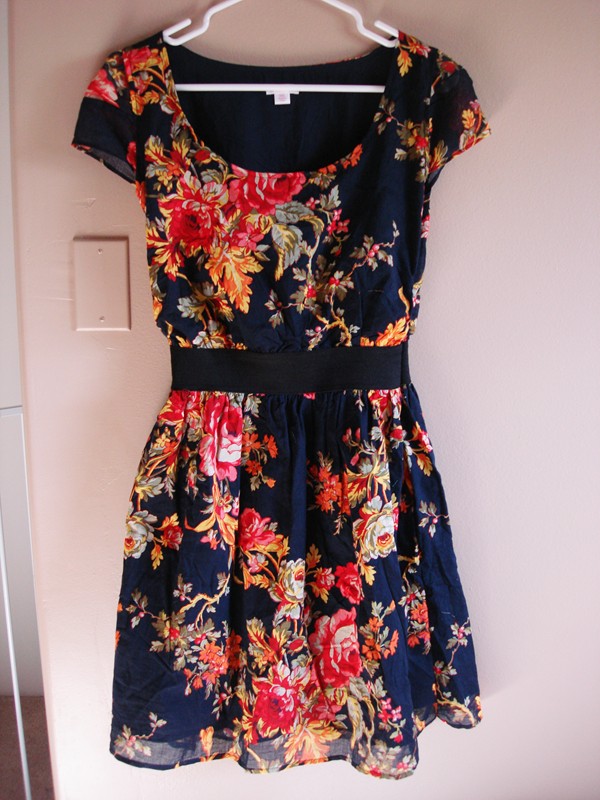
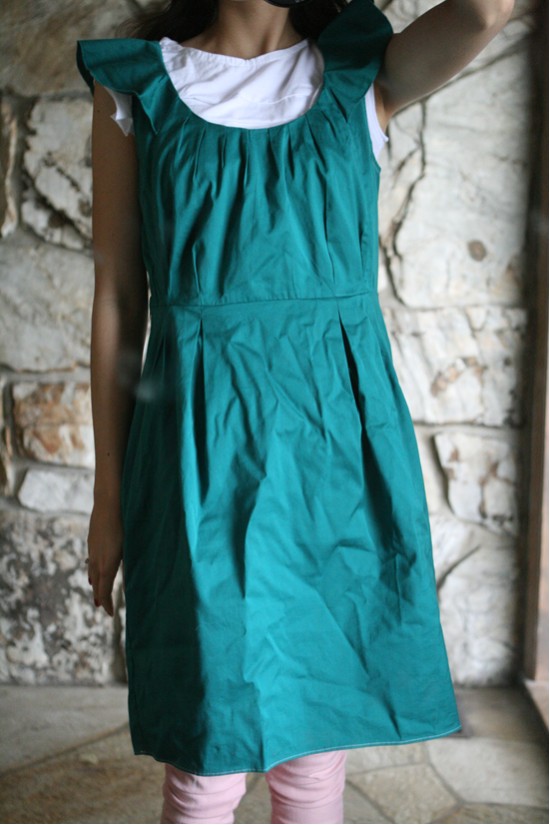
before: a dress from banana republic in size 6.
(original price was like $120 but i got it for $20!)
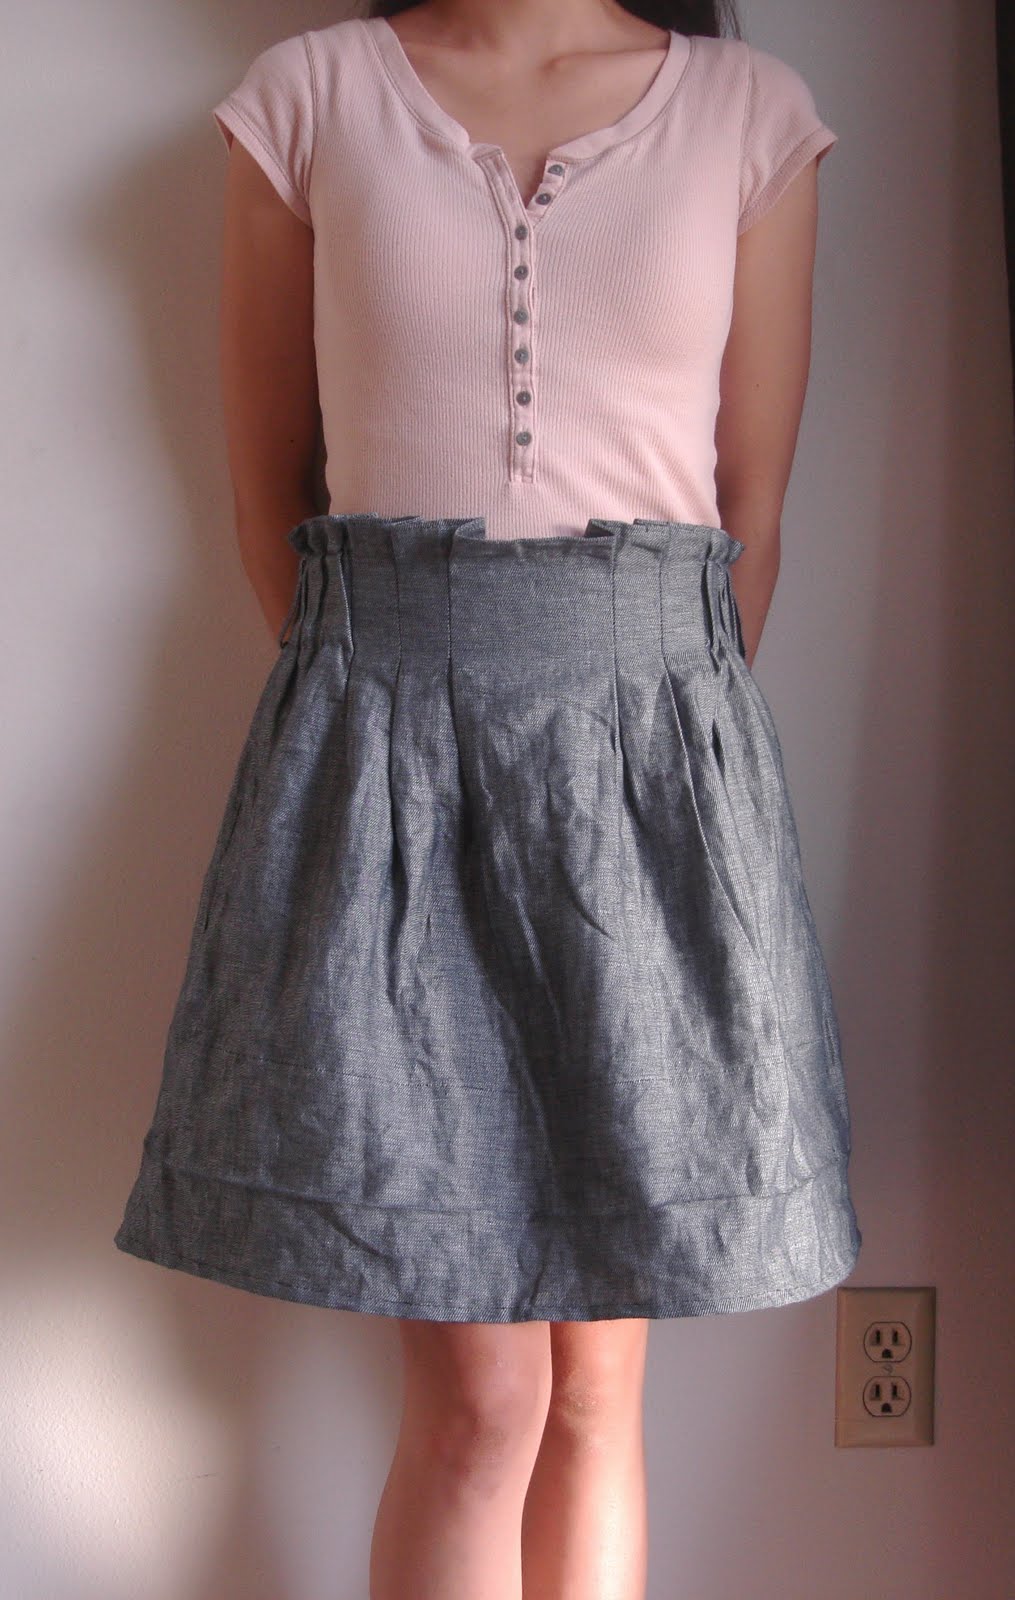
after:

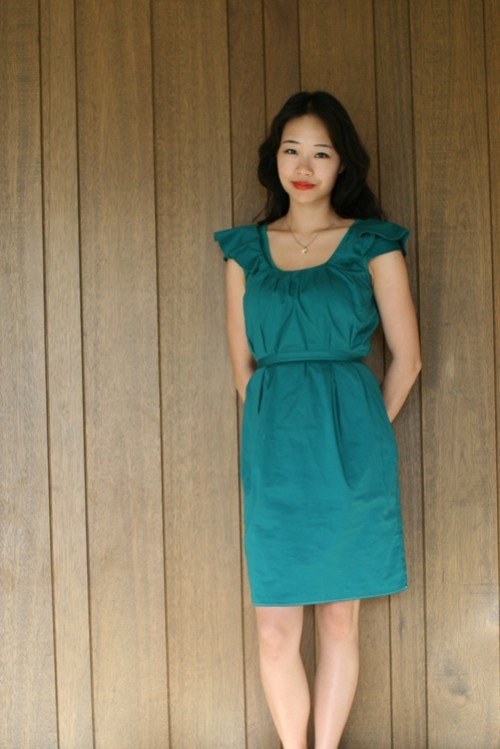
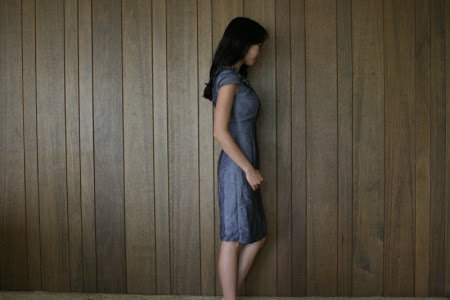
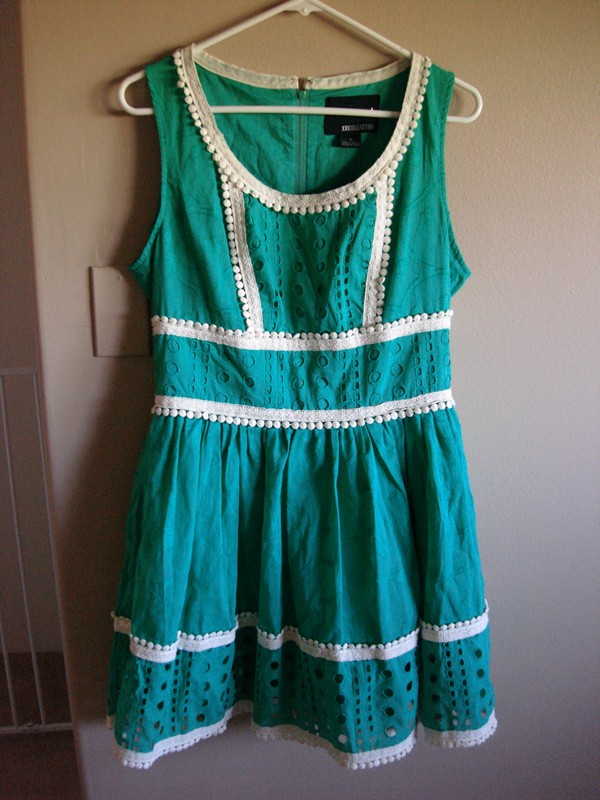
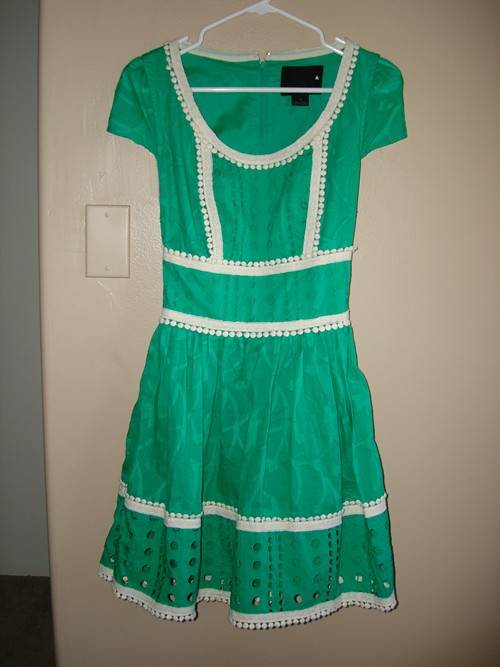
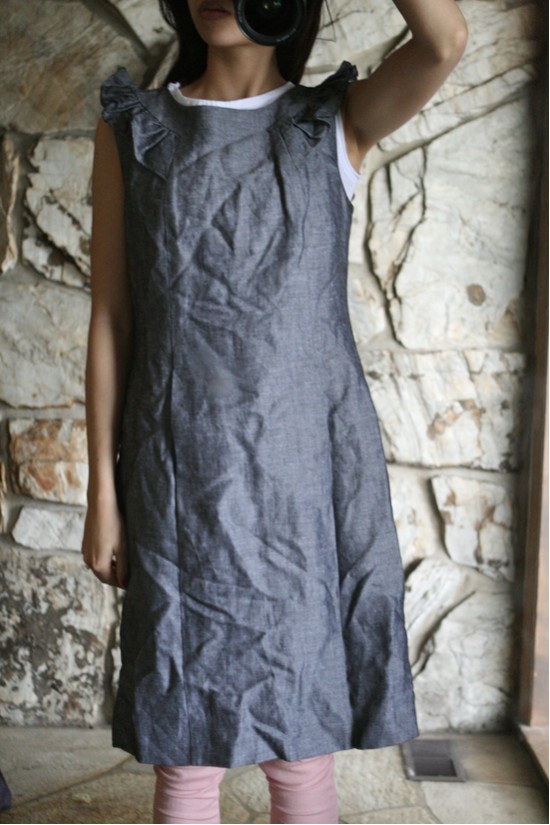
before: a calvin klein dress from nordstrom’s in size 8
(original price was $180 but i got it for $30!)

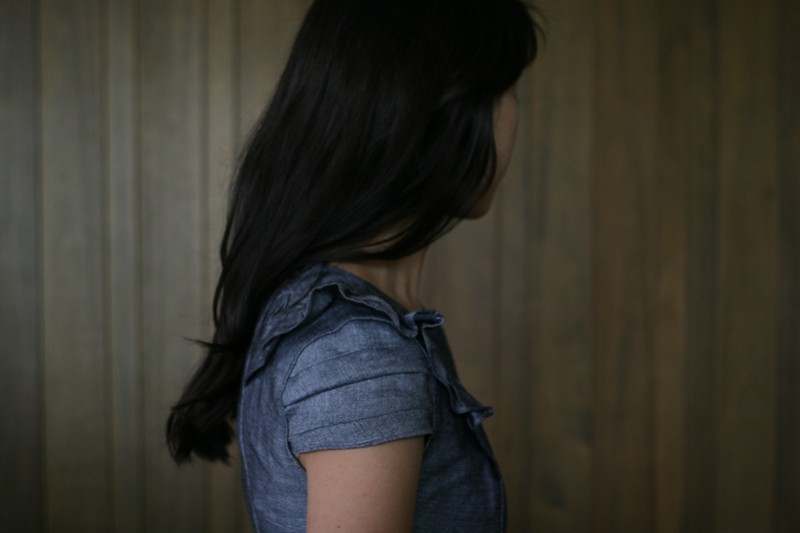
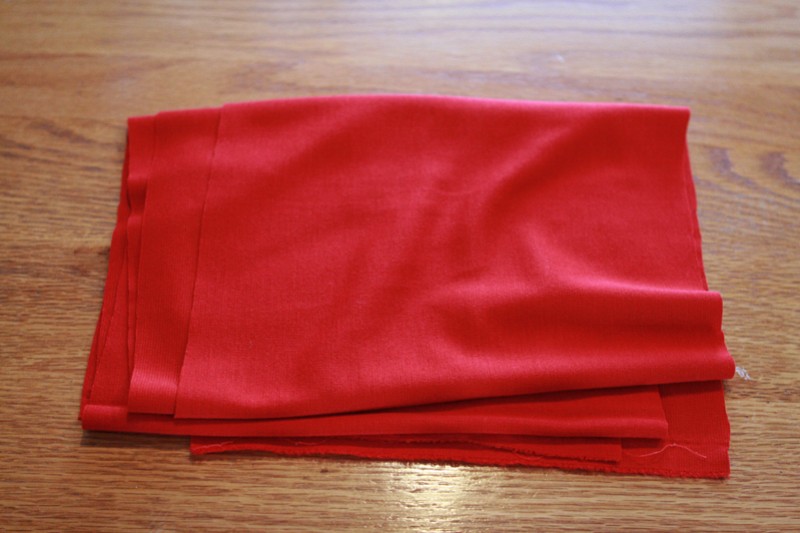
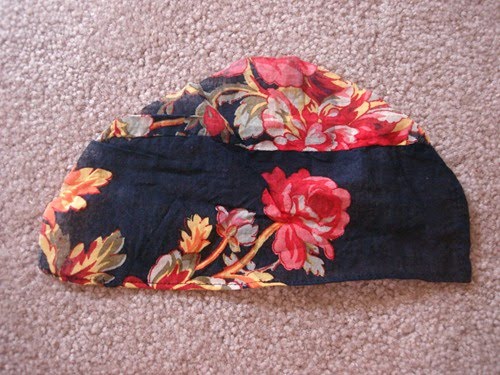
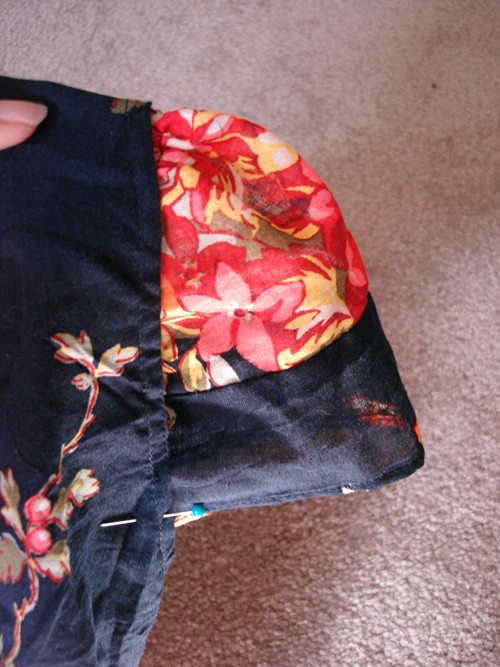
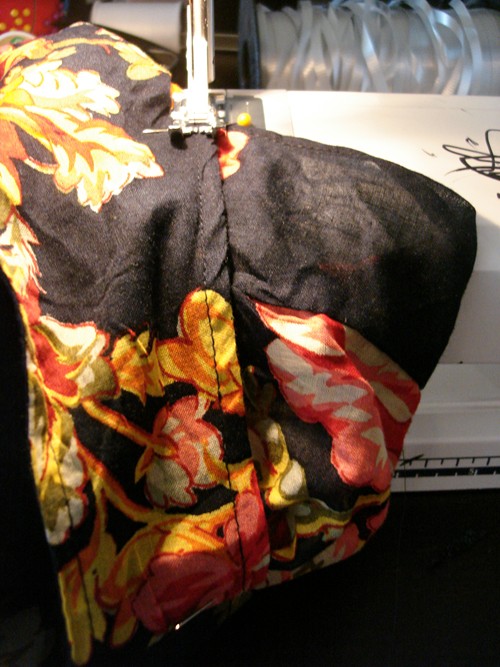
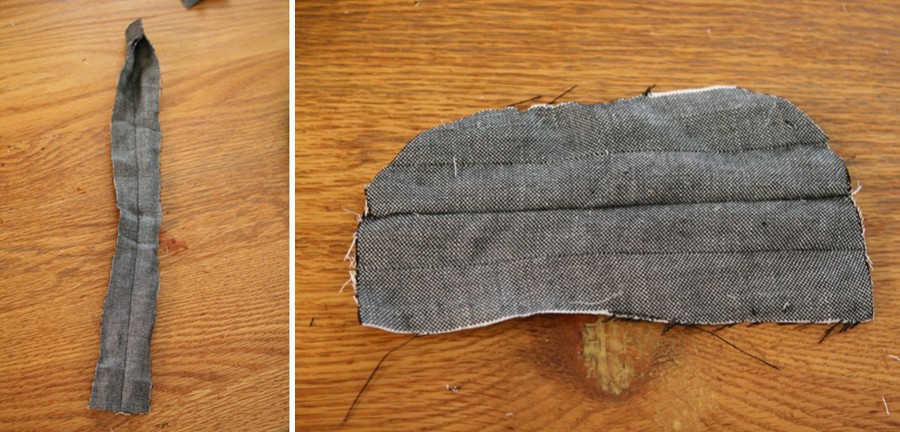
1. take the strip you cut off after altering the sides.
2. cut it in half, then sew the two strips together to make it wider.
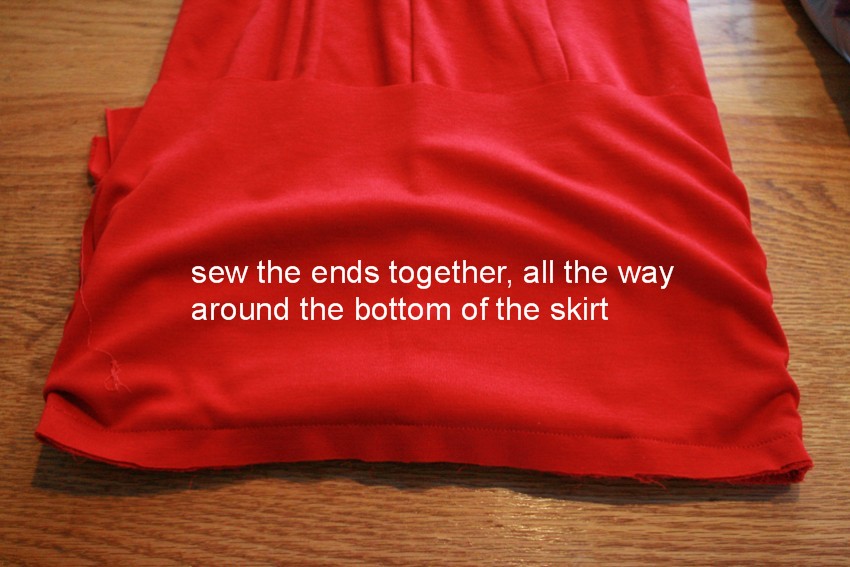
3. then follow the steps shown here.
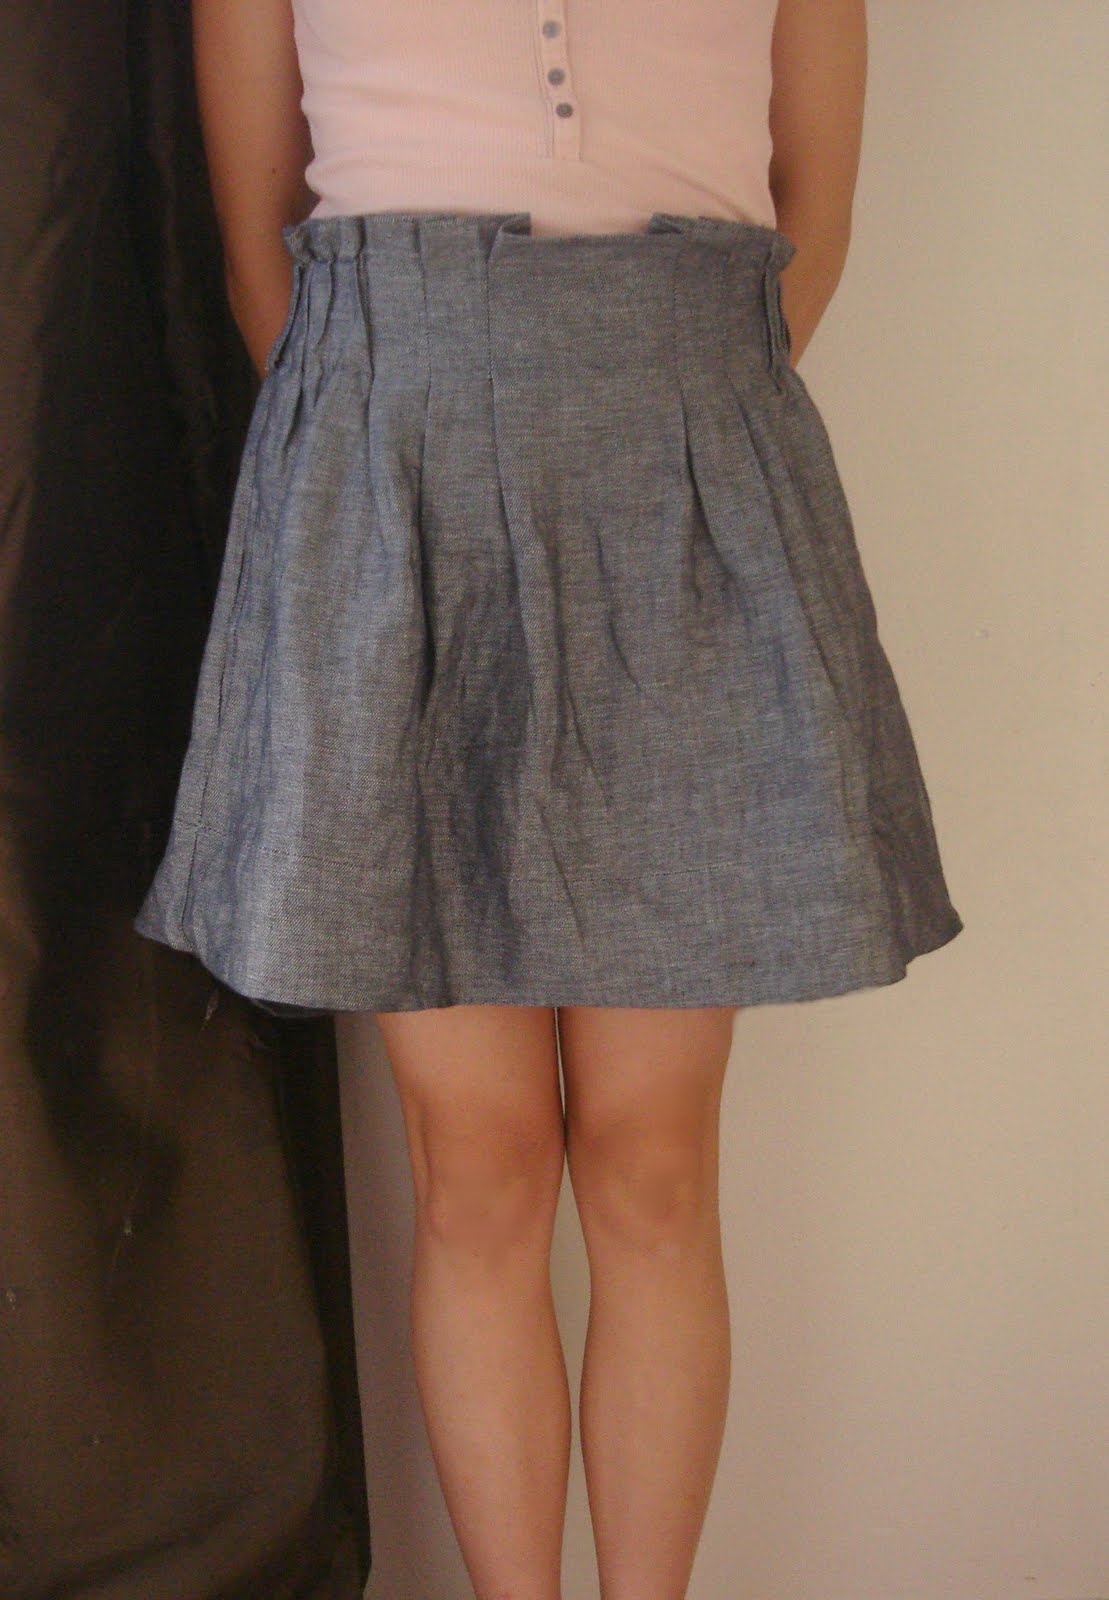
after:
2

TAGGED: DIY, modestify 13 Comments

pleated puffy shoulder dress DIY

March 7, 2011~ DIY DREAM HOUSE

*first of all, i want to thank you for your advice/encouraging words on my last post.  it honestly makes me feel safe to know that there are so many wise mothers out there who understand what i’m going through and i feel like ya’ll got my back in this motherhood thing!  and to update, i took one of the advice i got and put it to use tonight and it worked!  i walked around the block while holding ana and lied down with her on our bed (jay put a twin mattress in her bedroom since i’ve been sleeping with her lately) and she fell asleep within 2 mins.!  it might be that she didn’t nap today and she’s really tired and walking might not work with her tomorrow but i’m taking one day at a time and am so happy! i literally did a happy dance when i sneaked out of her room and closed the door.  she has been waking up every 2 hrs. or so but i go lie down with her and wait for her to fall asleep.  as i was just lying down with her and watching her sleep, i realized that i always say how i would do anything for her and so what if i have to lie down with her for 2 hrs. every night? if i say i’d do anything for her, what’s lying next to her for 2 hrs. and starring at her beautiful face? i’m foremost a mother and that is my top priority so not having my alone time, or eating, or blogging, or catching up on my tivo’ed shows can wait.  being there for her is far more important than all that.  so it’s a sacrifice i will gladly make.  i used to think(even yesterday as i was lying down next to her) how i was wasting my time and thinking of all the things i needed to do or wanted to do but i’m going to have a new mind set that i’m not wasting my time, i’m doing the most important job i have which is being a mother.  i’m being there for her, letting her feel loved and secure, and that sure isn’t time being wasted.  so thank you once again for your advice, i will be trying out every one of them to see which one works for my baby.
my inspiration: this picture from my friend/talented photographer’s blog post.  i was looking at her blog on my phone back in november when i came across this picture.  first glance and the picture being so small on my phone, i thought the fingers on the girl’s arm was a sleeve.  i thought, “ooh i love that shirt!” but upon looking further, i realized it wasn’t her sleeve, it was the fingers. haha
and i mixed it up with this puffy shoulder from anne hathaway’s dress. i love this dress!
in my closet: a black sleeveless deep v-neck dress
after:
i highered the neckline also.
i would wear this dress with a black cap sleeve under it
so it wouldn’t show my g’s. πŸ˜‰
I didn’t do a whole tutorial, i started to but then got too into it that i forgot to do the rest.
but here’s a video of how i made my pleated fabric for the sleeves.
18

TAGGED: DIY, modestify 16 Comments

girls’ tulle skirt and modestifying a short dress

February 14, 2011~ SEWING

i have two happy news.  i was featured in a great craft blog called u-create and i made it to the top 10 knock-off contest.  to be honest when i looked at the other top 9, my exact thoughts were, “oh crap! the other ones are so good and mine sucks!” i felt a little embarrassed i’m not gonna lie! haha, don’t worry i’m not sad by any means, i was just in awe at how amazing the other 9 were and how much time they’d spent on their projects while mine took like an hr.  i kept thinking what other project i could’ve submitted instead but what’s done is done and i’m honored to be in the top 10.  and the winner gets chosen by votes but i’m not asking you to vote for me, i know i won’t make it, i just want you to check out the other 9, you will be blown away! i think my favorites are the wedding dress and the BCBG dress.

for this week’s DIY, i made two things.
 i made a tulle ruffle skirt for my girl and modestified a short dress.
she’s been wearing these necklaces everyday.
i wish i could say the same about the skirt but she doesn’t like it actually
because she says, “it doesn’t spin around like a princess.”  πŸ™

on to my 2nd project

before the dress was modestified and before the mirror was cleaned. πŸ˜‰

 bought fabric from joann’s
(i didn’t have the dress with me (which i don’t recommend) so i just bought it hoping it was the same color and i was lucky enough to have it be the same exact fabric and color!)

1. unpick the seams on the bottom of the skirt.  
2. lay the fabric on top of the dress so the ends meet.  
the right side of the dress and the right side of the fabric are together.
3. sew the ends together all the way around the bottom of the skirt. 

4. pull the sewed fabric down and hem the bottom of the newly-length dress.

after:

i recommend ironing it too which i didn’t do(i hate ironing!).
it would flatten the hem and make it less noticeable i think.

and i paired it with red lips, leopard heels and a bracelet and
wore this to a valentine’s dance this past saturday.

happy valentine’s day everyone!
β™₯β™₯β™₯
project budget: very low priced
estimated time: 15 mins.
level: beginner
0

TAGGED: DIY, modestify 27 Comments

how to modestify a short skirt

July 13, 2010~ Etc.

It seems like many skirts selling at the stores these days are mid-thigh length or shorter. Which is a bummer since I’ll see a cute skirt at the store and gasp with excitement only to find in disappointment that it’s too short. So this is one of two ways I modestify my skirts.

before.
check the hem on the bottom of the dress. is there extra fabric to play with? this one luckily did. see how the hem stitching of the dress is about 3″ above the bottom of the skirt?

unpick the bottom of the dress all the way around.

unfold the extra fabric down.
fold it twice, then hem the bottom of the skirt.
this is what the finished product will look like.
viola! it’s 3″ inches longer now!

FYI: this will not work on all skirts, you’ll have to flip the skirt over and check the hem to see if there’s any extra fabric to lengthen.

0

TAGGED: DIY, modestify 8 Comments

How to modestify your summer dress

June 7, 2010~ SEWING

We’ve all done it before. You know…. wearing a short sleeve shirt under our sleeveless tops/summer dresses. Yes, I’m talking to you LDS women out there. And yes, some of us still do it(me guilty!), it’s such a UT/mormon thing but it’s not like we think it’s cuter that way, we just want to dress modestly and we have no choice when we want to show off our cute top/dresses! But I do gotta admit, it looks the CUTEST just the way it is, without anything underneath. A cardigan is okay, but a white shirt under it? Let’s just say we probably won’t win a “best dressed” award with that outfit. So with Summer here and too hot for a cardigan, what do you do? Well, we can “modestify” our sleevess tops/dresses!

I bought this dress for $9 as an XXL. (*big money saving tip: XL, XXL’s are more likely to be on sale! so buy it and alter it!) So I sewed the sides smaller. (this picture is after the alteration.) Using the extra fabric I had from cutting up the sides, I cut 2 rectangles.

Then cut the top part into a half-round shape.

Using a stitch length 5, sew the top part(curved part) of the fabric.

The sewing machine will automatically bunch it up but make sure it’s even and flatten/bunch it as needed. To flatten it more, simply grab the bunched part and pull it outwards. To bunch it up more, simply grab one string from one side and pull on it while pulling the fabric closer together.

Pin it onto the sleeveless part. Make sure the middle of the sleeves matches up with the middle of the sleeveless seam.

sew it (stitch length 2.5) right along the seams.

That’s it! So simple!

no need to wear a shirt underneath, hooray! πŸ˜‰

This is another dress I did. There was only one left and I fell in love the moment I saw it! Isn’t it so Anthro? It’s a very good material and the fabric has leaf engravened designs all over it. I did the same thing as the dress shown above but using the fabric from the pockets it had. This dress was a size 6 so I altered the sides smaller but it wasn’t enough fabric for the sleeves. I didn’t even know this dress had pockets but good thing it did because I wouldn’t have been able to add on the sleeves.

And viola! No need for a white shirt underneath! And another tip for modestifying your dresses: Buy a dress a few sizes bigger since it offers a longer length and then alter it to fit you.  Use the extra fabric to make the sleeves!
2

TAGGED: DIY, modestify 92 Comments

  • « Previous Page
  • 1
  • 2
cutmypic
Hello! My name is Sarah and I am so happy to have you here! Here you'll find DIY sewing, DIY home building & decor, honest and vulnerable posts of motherhood and snippets of my family. We are building our dream house and will update you regularly on our whole process from start to finish and I am also starting a mother-daughter sewing series. So I hope you stay awhile!

BLOG ARCHIVES

SEARCH

JOIN THE LIST

- THEME BY ECLAIR DESIGNS - Web Hosting By RFE Hosting -