• ABOUT
  • COLLABORATE
  • CONTACT

Life is Beautiful

Motherhood, Sewing, Family

  • SEW
  • HOME
  • PARTY
  • TRAVEL
  • SHARING MY HEART
  • SHOP

DIY: A dress that’s too short & a dress that shrunk

August 27, 2012~ DIY DREAM HOUSE

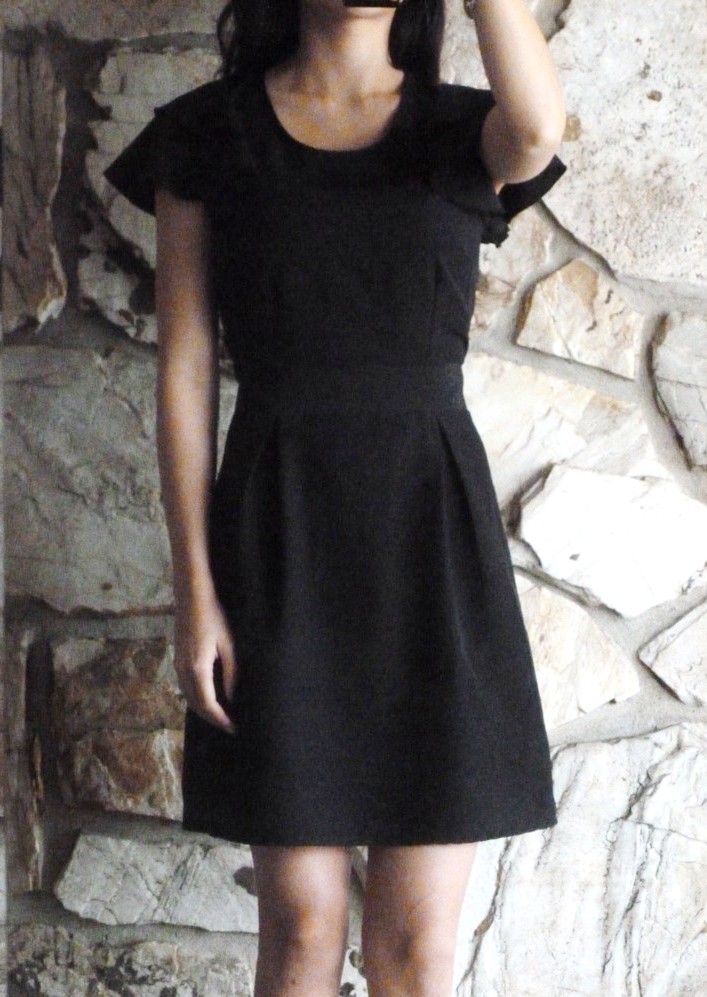
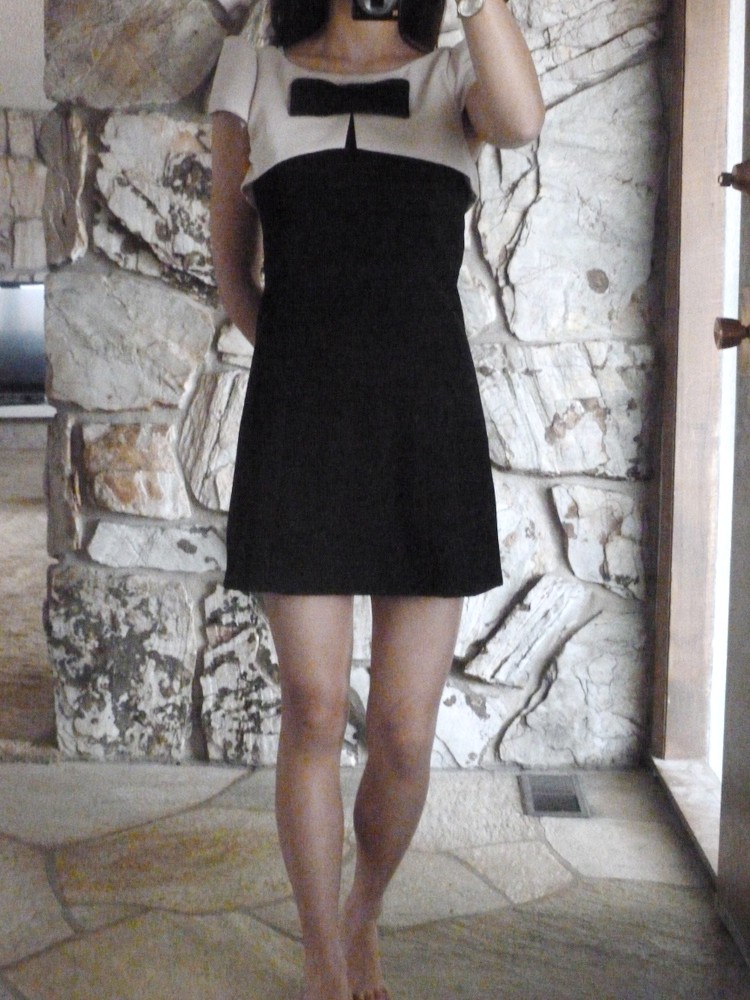
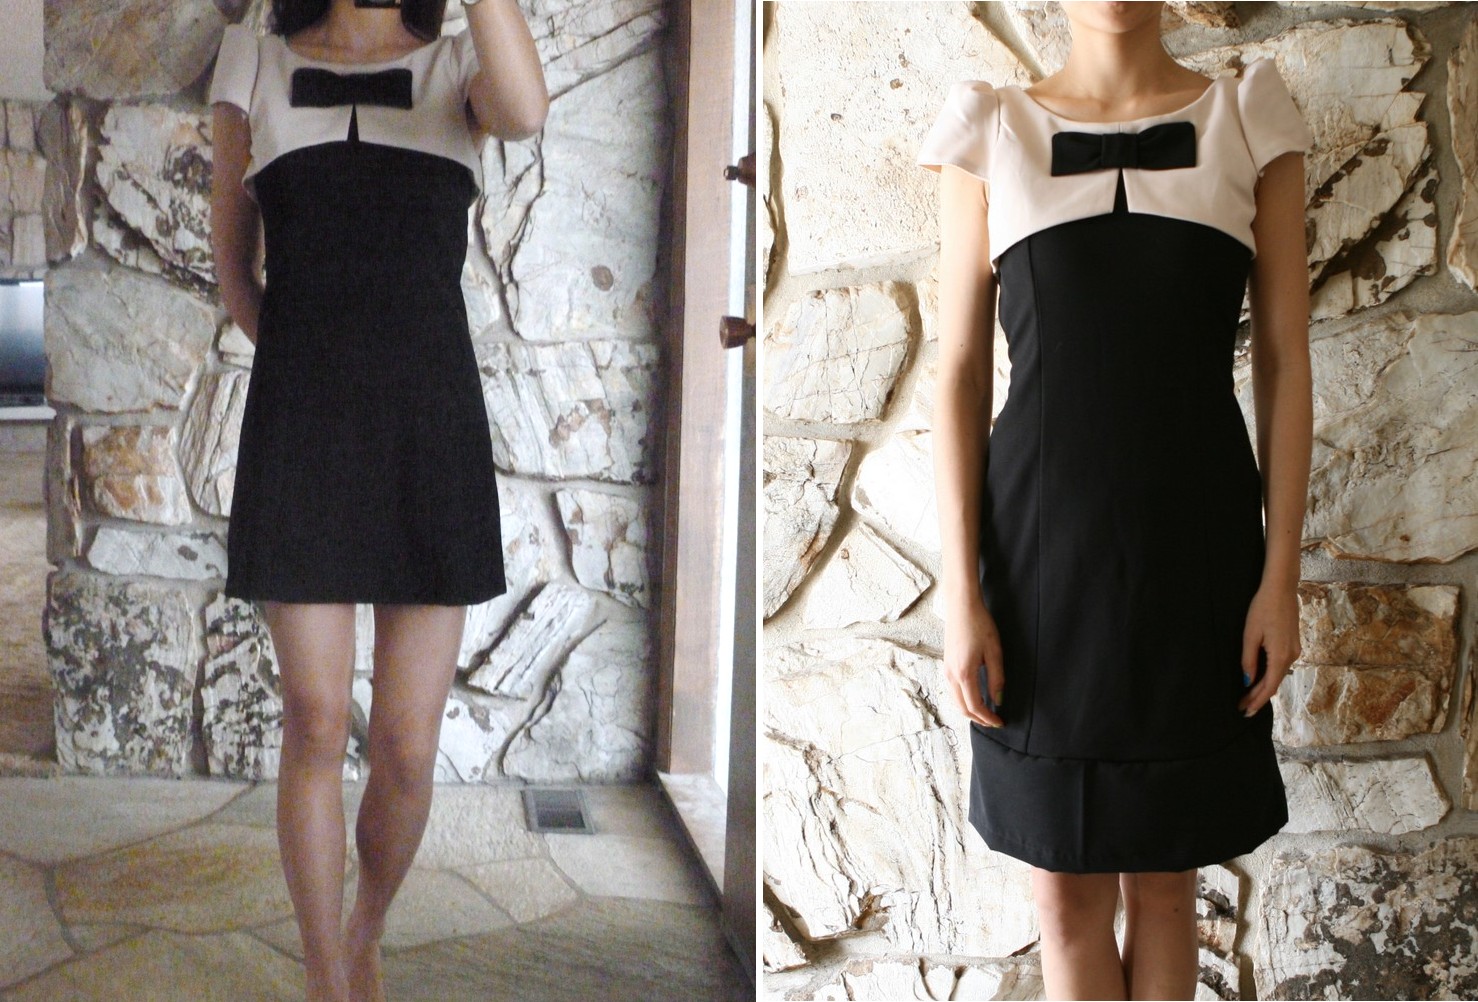
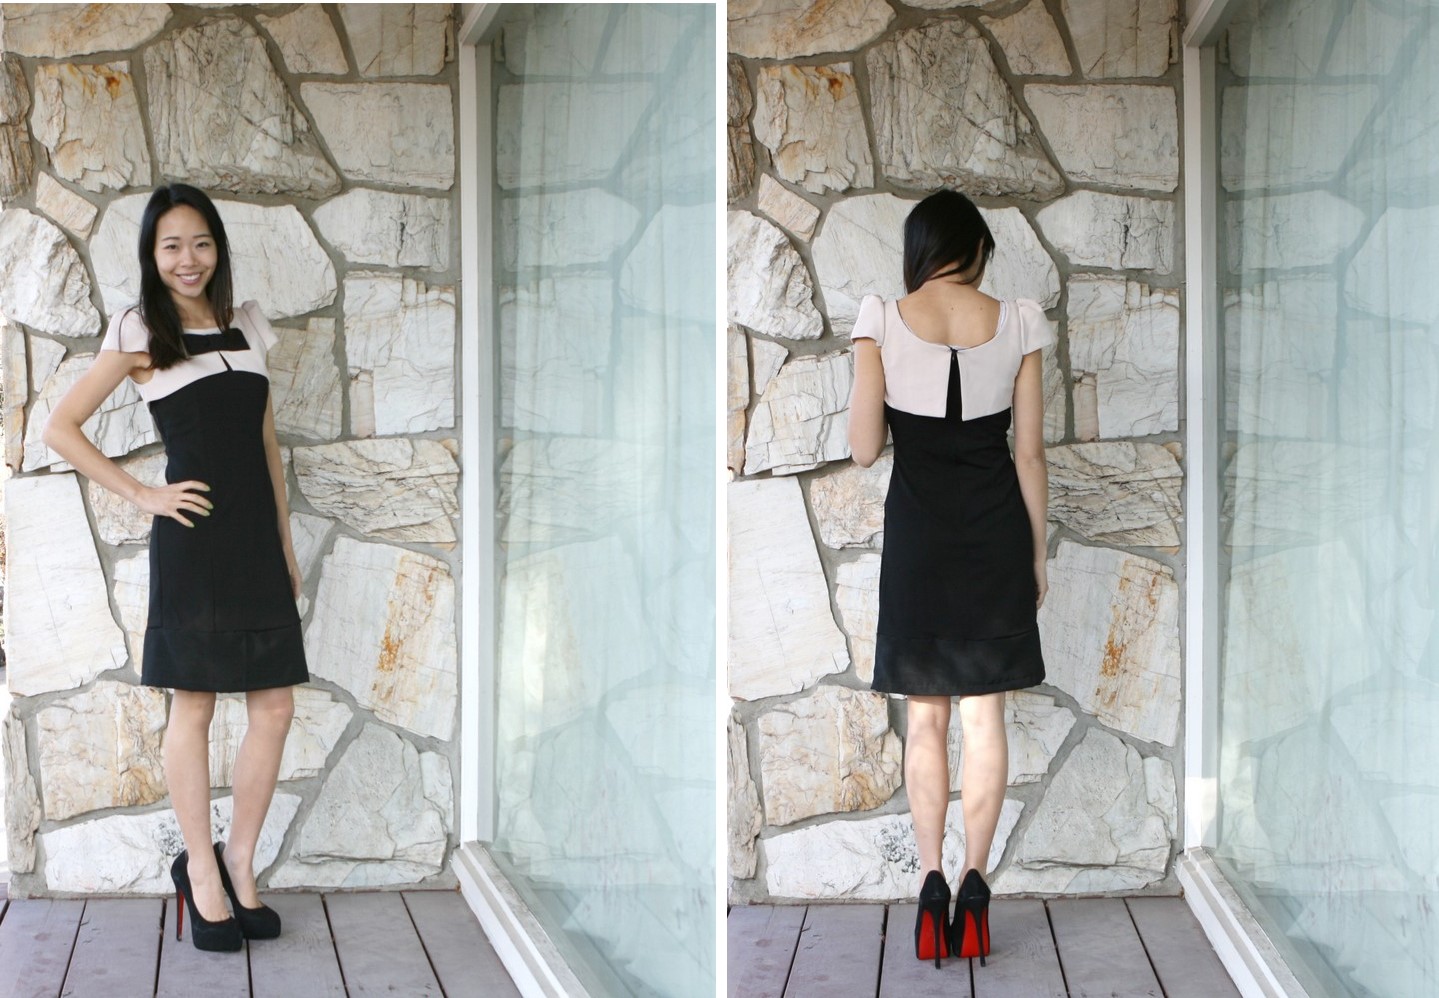
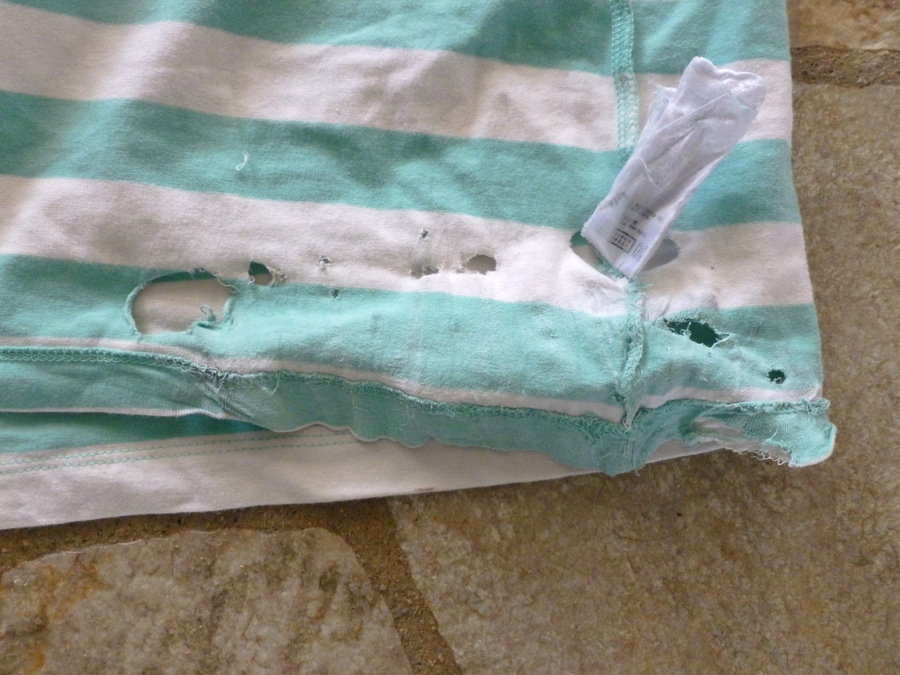
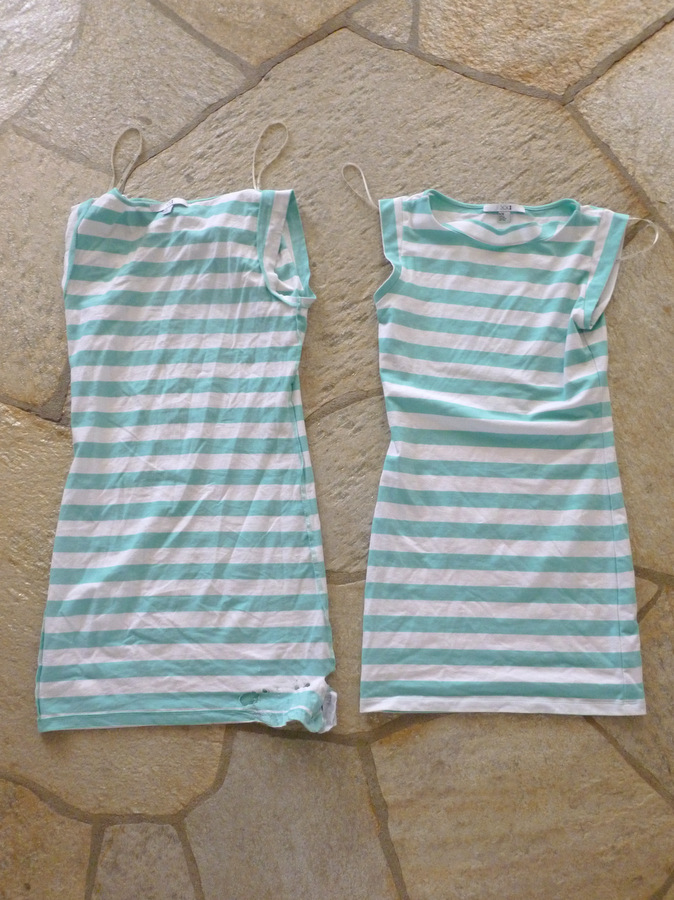
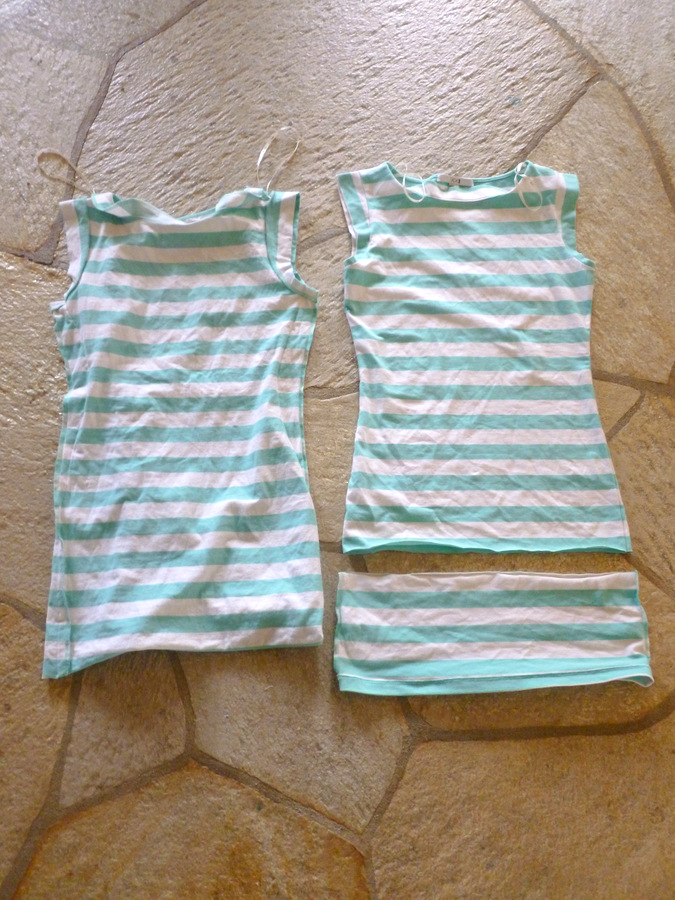
I had two dresses that were too short for me.  One(left) I got knowing it was too short, but I got it anyway with the plans of lengthening it later, and the other one(right) was a good length until I washed it and it shrunk a ton!  Don’t you hate it when that happens?!!

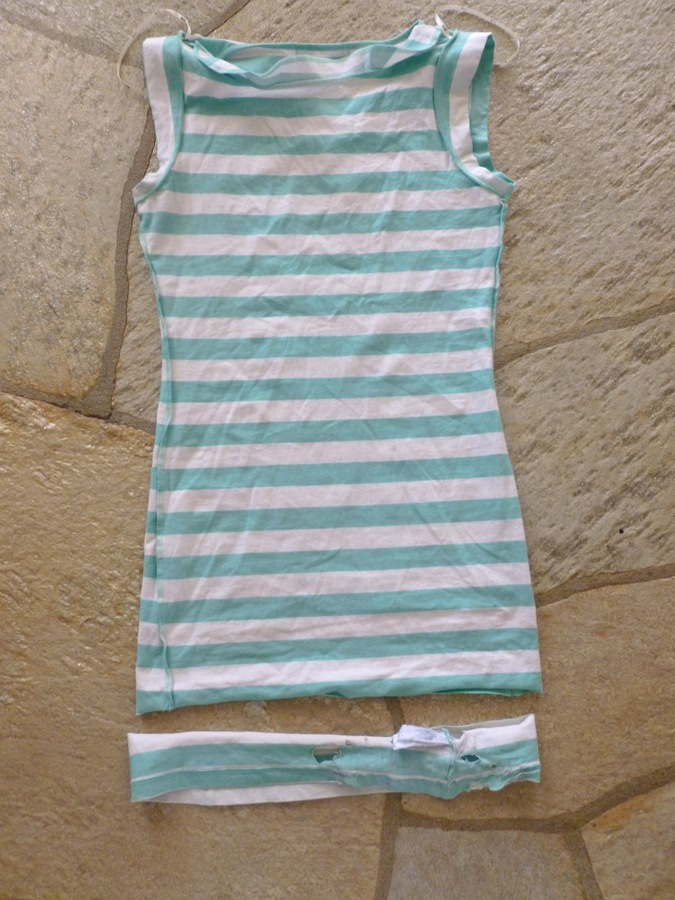
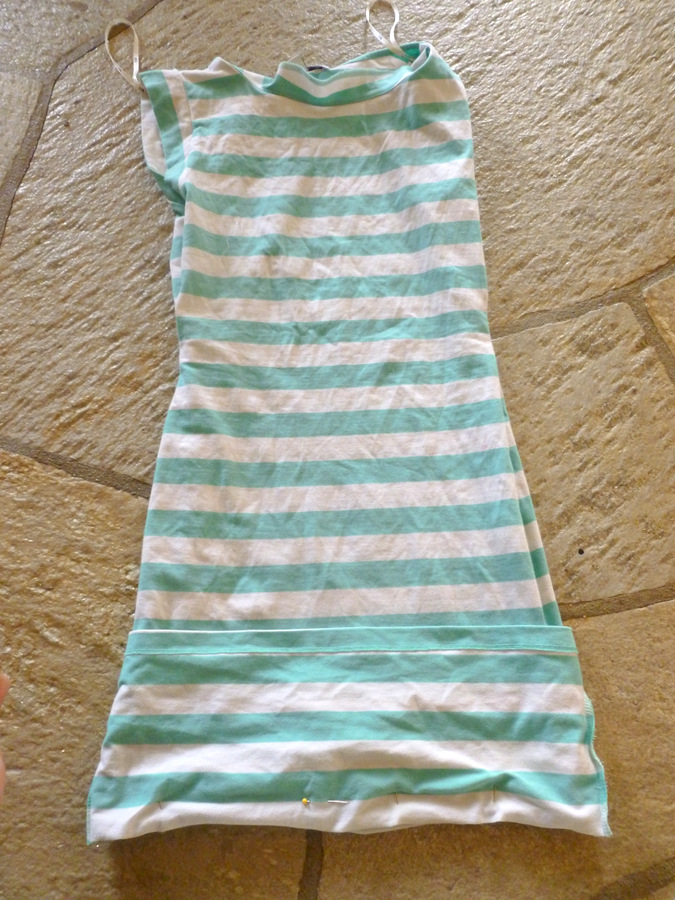
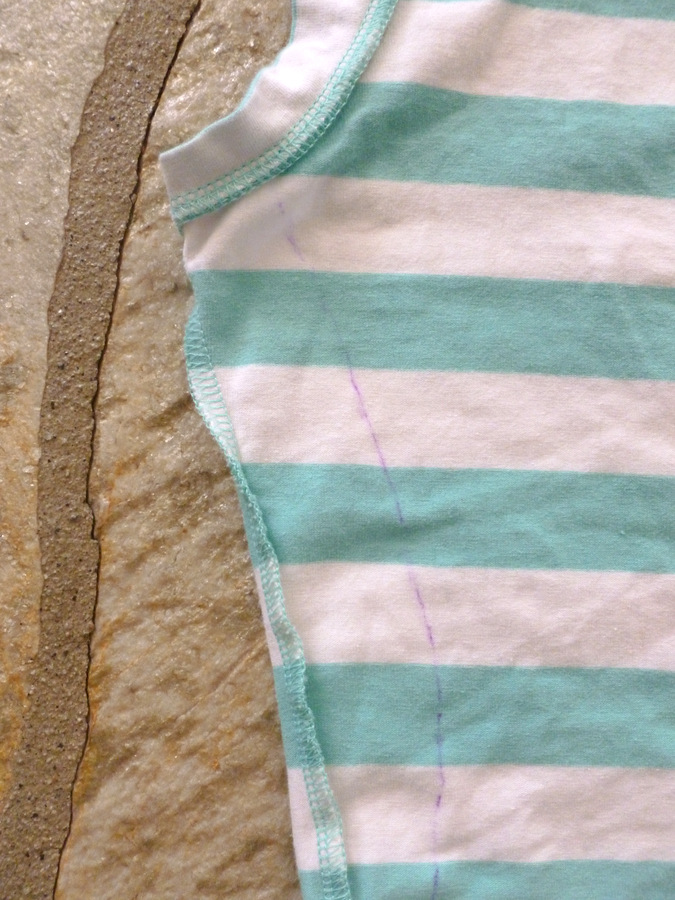
So I cut off one dress and used that extra fabric to lengthen the other dress.  With the dress I cut off, I made it into a top, which turned out to be a very cute peplum top.  The two fabrics are a little different from each other, but I didn’t want to go through the hassle of trying to find the perfect match to lengthen the dress.  It’s noticeable but I don’t think it looks too bad.

I used liquid stitch on the bottom hem of the top(to save the length because if I would’ve hemmed the bottom, it would’ve been too short), and with the extra fabric I cut off, I used it to lengthen the other dress.
The before/after:
Striped dress & Blue sandals : c/o Oasap | Bracelets: H&M, J.Crew
Striped top: H&M(altered) | Royal blue jeans: c/o Romwe | Red flats: Target
0

TAGGED: DIY, modestify 22 Comments

DIY: lengthen a short dress part two.

June 25, 2012~ SEWING

This week I’ll show you how to lengthen a short dress in a different way.
I bought this dress from F21(stripes and mint? how can I say no?) and put it through the wash cycle.  When it came out, this is how it looked.
I went back to the store to see if they would exchange it, but they pointed out that on the tag it said, “hand wash only”.  Shucks, my bad!  So I bought another same exact dress and took it home with me(the dress was only $10 each).
I cut the torn part off.
Then cut the bottom length of the other dress to attach it.
And sewed the bottom part onto the original dress.
Then I got a fitting dress and traced it with a disappearing ink pen.
And sewed along the traced line.  And you’re done!
The after:

What you’ll need:
– two of the same dress/fabric
-matching thread
-sewing machine/(or)needle
-disappearing ink pen
-scissors
-a dress you like the fit of.
Estimated time: 30 mins.
Project cost: moderate(mine was a little over $10)
Skill level: a confident beginner
the after photos by Jessica Peterson.
last week’s giveaway winner announced here.
0

TAGGED: DIY, DIY tailoring, modestify 23 Comments

modestify a LBD.

April 2, 2012~ SEWING

 dress c/o oasap, shoes c/o sheinside.
i’m so excited to let you know that from now on, i’ll be collaborating with Jessica Peterson, an amazing photographer, and also one of my dearest friends, with my DIY projects!  she is beautiful inside and out and has a gift to recognize and capture beauty through photographs.  her photographs are classy, sophisticated, clean, beautiful, and i don’t know how else to word it, but it looks very upscale and expensive.  haha, does that make sense?  just look at these photos, they’re one of my favorites.  so no more me-taking-the-picture-through-the-mirror photos, hooray! 
i modestified the dress by adding black fabric on the bottom of the skirt.  instead of picking out the seams of the bottom of the skirt, i added the extra fabric to the bottom of the skirt and sewed it along the already-there seams of the skirt.  i didn’t sew the bottom of the added-fabric since the fabric cut nice and clean without any fraying.  
project budget: very low(mine was $1-2 per dress)
estimated time: 10 mins.
level: beginner
romwe giveaway winner announced here.

1

TAGGED: DIY, Jessica Peterson Photography, modestify 24 Comments

modestify-lengthen short dresses DIY

March 20, 2012~ SEWING

when i’m shopping, i see many dresses that are really cute and think, “if only it was a little longer, i’d totally buy this dress!”  especially since short dresses are in style these days.  so what i do is buy them anyway and modestify-lengthen the dresses longer.  
before pictures of the 3 dresses i modestified.
black/cream bow-tie dress c/o Sheinside
before/after:
you can buy the cream/black bow-tie dress here, and the black pumps here.  
use code: Sarah20 for 20% off!  valid until april 30th. 
for the two black dresses i used this tutorial, and with the beige dress, instead of picking the seams of the bottom of the skirt, i just added the contrast fabric on the bottom and sewed it along the already-there seams of the skirt, then double folded the bottom part of the contrast fabric.  i also tailored the waist so it was more fitted and made the long sleeves into short sleeves. 
for me the black dresses are the easiest to lengthen out since finding a similar fabric to the dress is not that difficult since matching black to a black isn’t that hard, but with dresses like the beige dress above, it’s more difficult to find a matching fabric so unless you find a fabric of the same color, it might look tacky.  you don’t want the extra fabric to be noticeable if it doesn’t match, so the best option is to add a contrast color that compliments the color of the dress and add it on, making it look like it was originally made that way.
project budget: very low(mine was $1-2 per dress)
estimated time: 20 mins.
level: beginner

1

TAGGED: DIY, modestify 31 Comments

modestify a one shoulder dress DIY

June 16, 2011~ SEWING

okay, i really need to stop with this whole ruffle madness.  as you probably know, i love ruffles, and i just counted how many ruffled clothes i have and guess the number—-52!!! i even have 5 ruffled swimsuits! this is getting ridiculous so i vow to not buy or make anymore ruffles! that’s it! we’re done! 
well, after this DIY project that is. he.he.he.  but hey this is my 52nd and my last! (i vow to try my hardest but no guarantees :p) i loved this dress when i saw it but they only had bigger sizes in stock, not to mention it’s a one shoulder strap dress.  so i bought it anyway and altered/modestified it.
before:
after:
i only had to cut off and sew one side of the dress since it’s a tube top and i also cut off the bottom length. (if you notice the before picture it’s a slanted assymetrical length but now it’s symmetrical) and with the extra fabric i cut off, i added the sleeves on both sides.  it’s basically a long rectangle and you bunch up one side in the front of the dress and bunch up the other side in the back and sew.  i did the same for the ruffled shoulder, just a smaller rectangle and i sewed the sleeves under the strap.
then we went to our friends wedding.
dejavu anyone?
such a cute, happy couple! and the bride looked beautiful.
adi: “mom, when am i going to get married?”
me: “when you get older and find a boy you love.”
adi: “but i already have my prince!”
me: “uh…who?”
adi: “daddy! so when can i marry him?”
me: “NEVER, you cannot marry him, he’s mine! i’ve already married him, so bad, so sad.”
okay…so i didn’t say the last line but the rest is all true story. 😉
oh and speaking of prince, there’s this king’s daddy-daughter grand ball i’ve been trying to get jay to take adi and ana to.  the prince dresses up in his tux and the princesses in their fancy dresses and eat treats and learn & practice special dances in a castle-like ballroom.  HAHAHAHAHA, am i the only one that finds this hilarious? i mean it’s such a cute idea and my girls would love it but really? what about those poor dads! can you just imagine a bunch of dads in their best suit with their male testosterones flying across the room while they munch on special treats and practice some special dances in a castle of magic and wonder? jay says no way he’s going so i’ve been telling adi to say to daddy, “but this is my dream come true, daddy! it’s all i want for my birthday! are you going to crush a 3 yr. old girl’s dream?” but it’s not working yet.  but oh how i wish jay would take our girls to it so that i can spy on them and take plethora of pictures to blackmail him later. 
0

TAGGED: DIY, modestify 14 Comments

  • 1
  • 2
  • Next Page »
cutmypic
Hello! My name is Sarah and I am so happy to have you here! Here you'll find DIY sewing, DIY home building & decor, honest and vulnerable posts of motherhood and snippets of my family. We are building our dream house and will update you regularly on our whole process from start to finish and I am also starting a mother-daughter sewing series. So I hope you stay awhile!

BLOG ARCHIVES

SEARCH

JOIN THE LIST

- THEME BY ECLAIR DESIGNS - Web Hosting By RFE Hosting -