• ABOUT
  • COLLABORATE
  • CONTACT

Life is Beautiful

Motherhood, Sewing, Family

  • SEW
  • HOME
  • PARTY
  • TRAVEL
  • SHARING MY HEART
  • SHOP

How to modestify your summer dress

June 7, 2010~ SEWING

We’ve all done it before. You know…. wearing a short sleeve shirt under our sleeveless tops/summer dresses. Yes, I’m talking to you LDS women out there. And yes, some of us still do it(me guilty!), it’s such a UT/mormon thing but it’s not like we think it’s cuter that way, we just want to dress modestly and we have no choice when we want to show off our cute top/dresses! But I do gotta admit, it looks the CUTEST just the way it is, without anything underneath. A cardigan is okay, but a white shirt under it? Let’s just say we probably won’t win a “best dressed” award with that outfit. So with Summer here and too hot for a cardigan, what do you do? Well, we can “modestify” our sleevess tops/dresses!

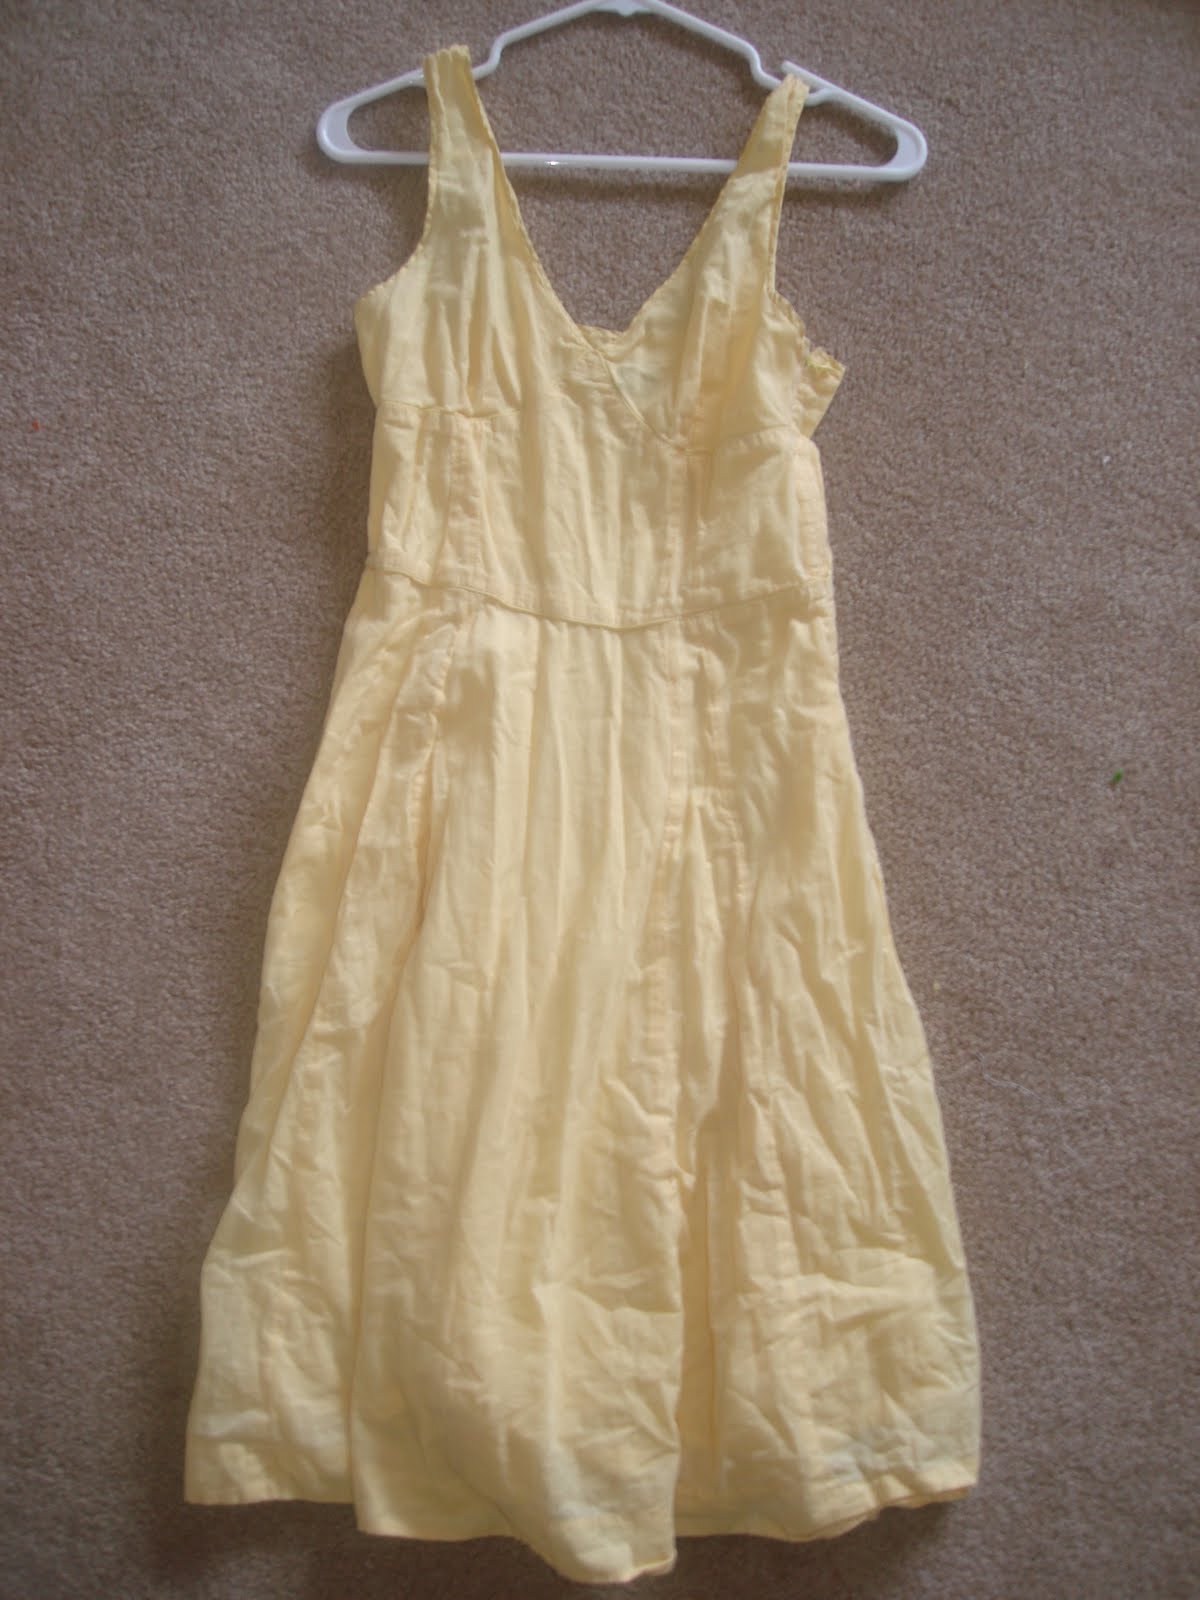
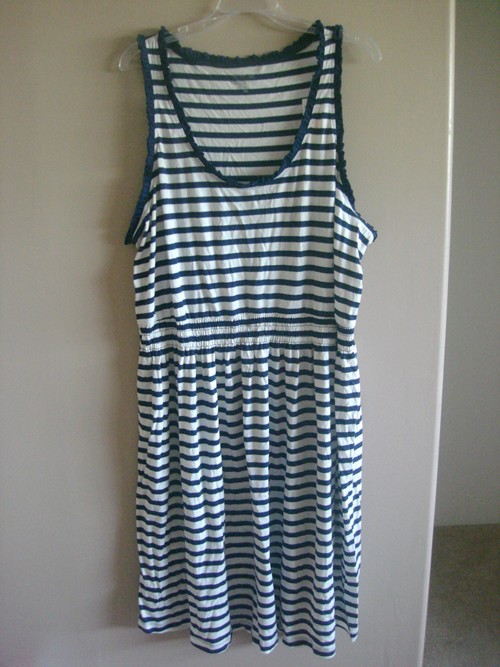
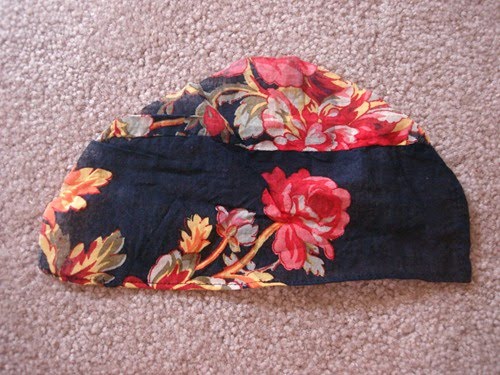
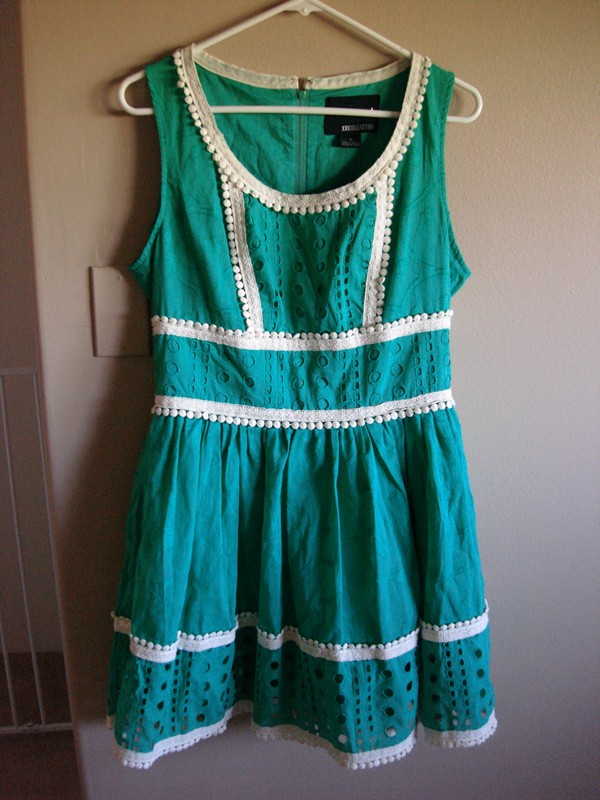
I bought this dress for $9 as an XXL. (*big money saving tip: XL, XXL’s are more likely to be on sale! so buy it and alter it!) So I sewed the sides smaller. (this picture is after the alteration.) Using the extra fabric I had from cutting up the sides, I cut 2 rectangles.

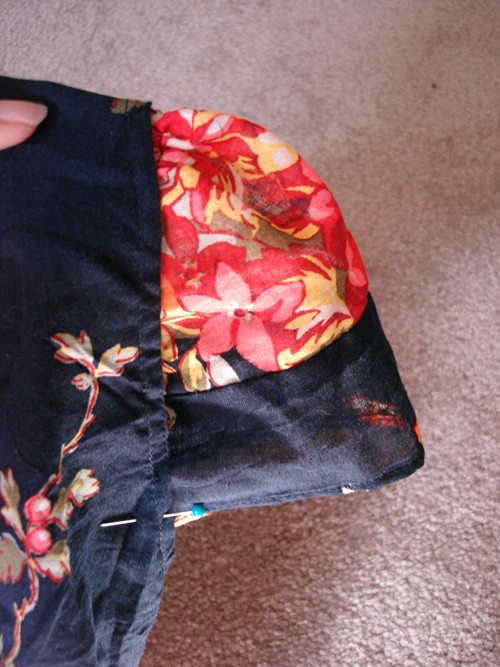
Then cut the top part into a half-round shape.

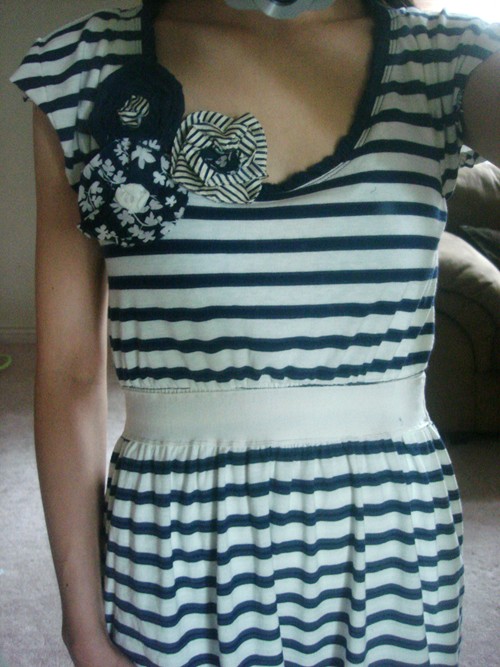
Using a stitch length 5, sew the top part(curved part) of the fabric.

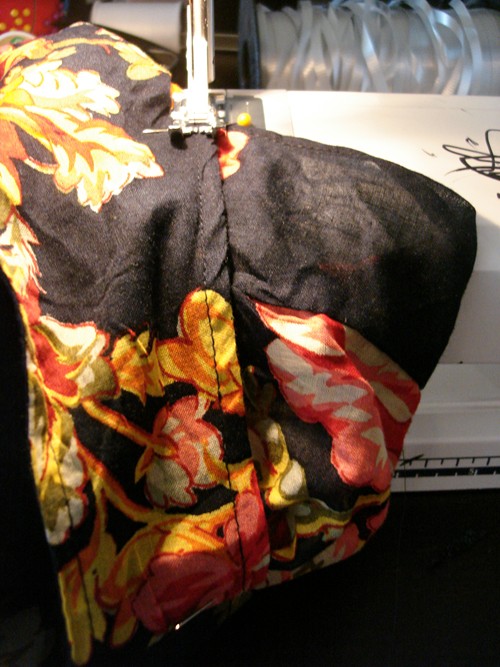
The sewing machine will automatically bunch it up but make sure it’s even and flatten/bunch it as needed. To flatten it more, simply grab the bunched part and pull it outwards. To bunch it up more, simply grab one string from one side and pull on it while pulling the fabric closer together.

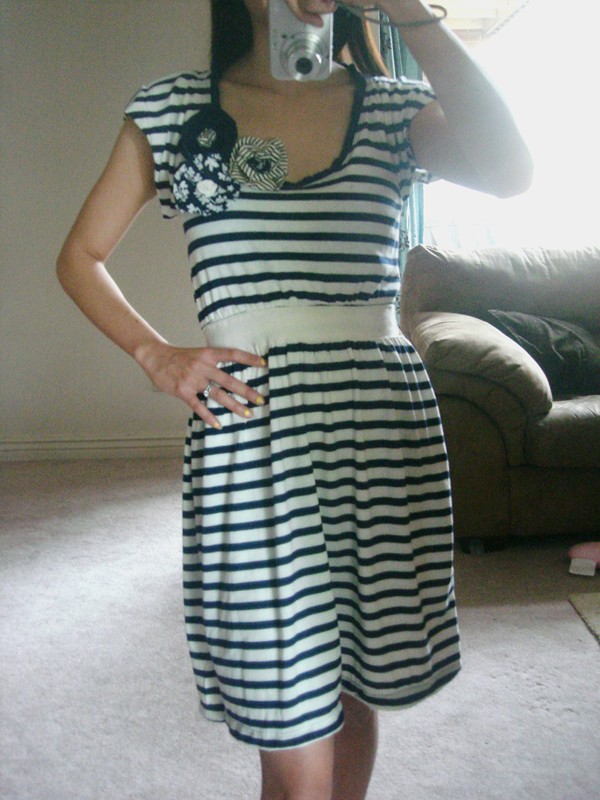
Pin it onto the sleeveless part. Make sure the middle of the sleeves matches up with the middle of the sleeveless seam.

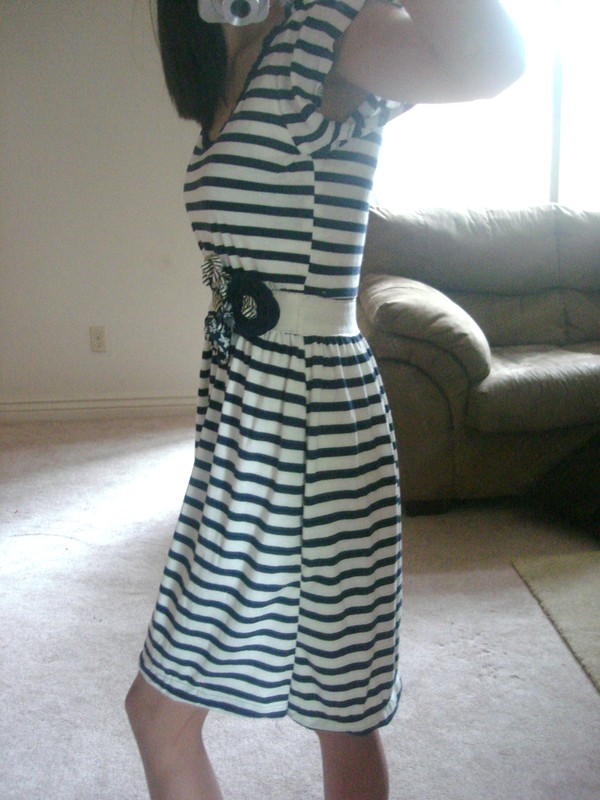
sew it (stitch length 2.5) right along the seams.

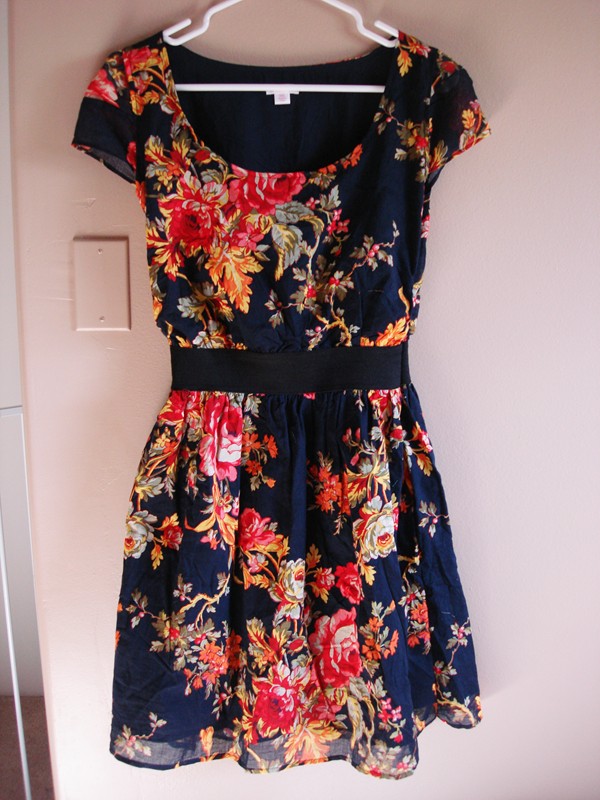
That’s it! So simple!

no need to wear a shirt underneath, hooray! πŸ˜‰

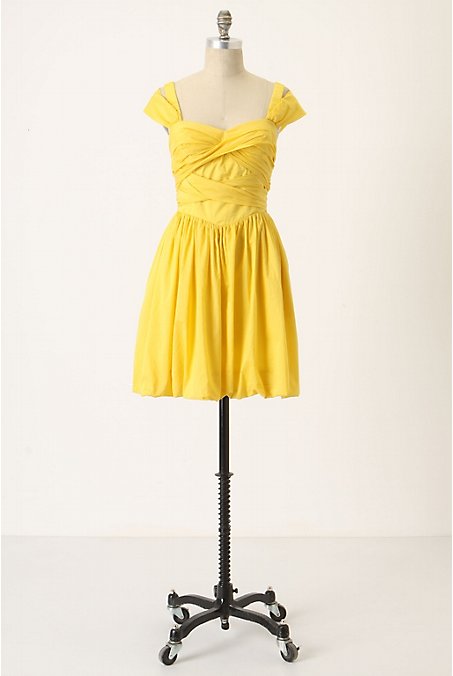
This is another dress I did. There was only one left and I fell in love the moment I saw it! Isn’t it so Anthro? It’s a very good material and the fabric has leaf engravened designs all over it. 
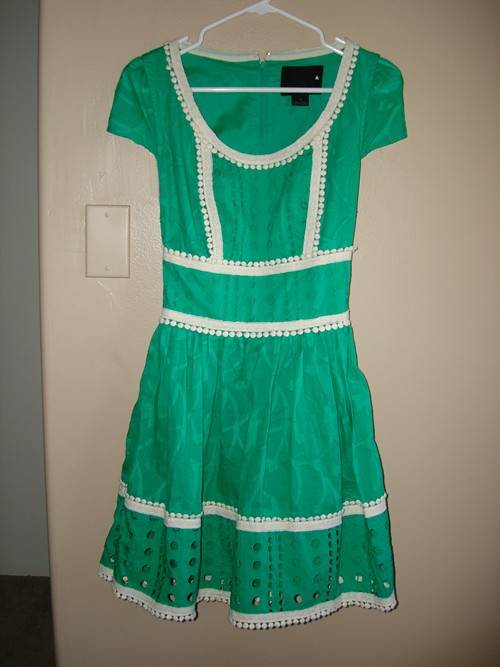
I did the same thing as the dress shown above but using the fabric from the pockets it had. This dress was a size 6 so I altered the sides smaller but it wasn’t enough fabric for the sleeves. I didn’t even know this dress had pockets but good thing it did because I wouldn’t have been able to add on the sleeves.

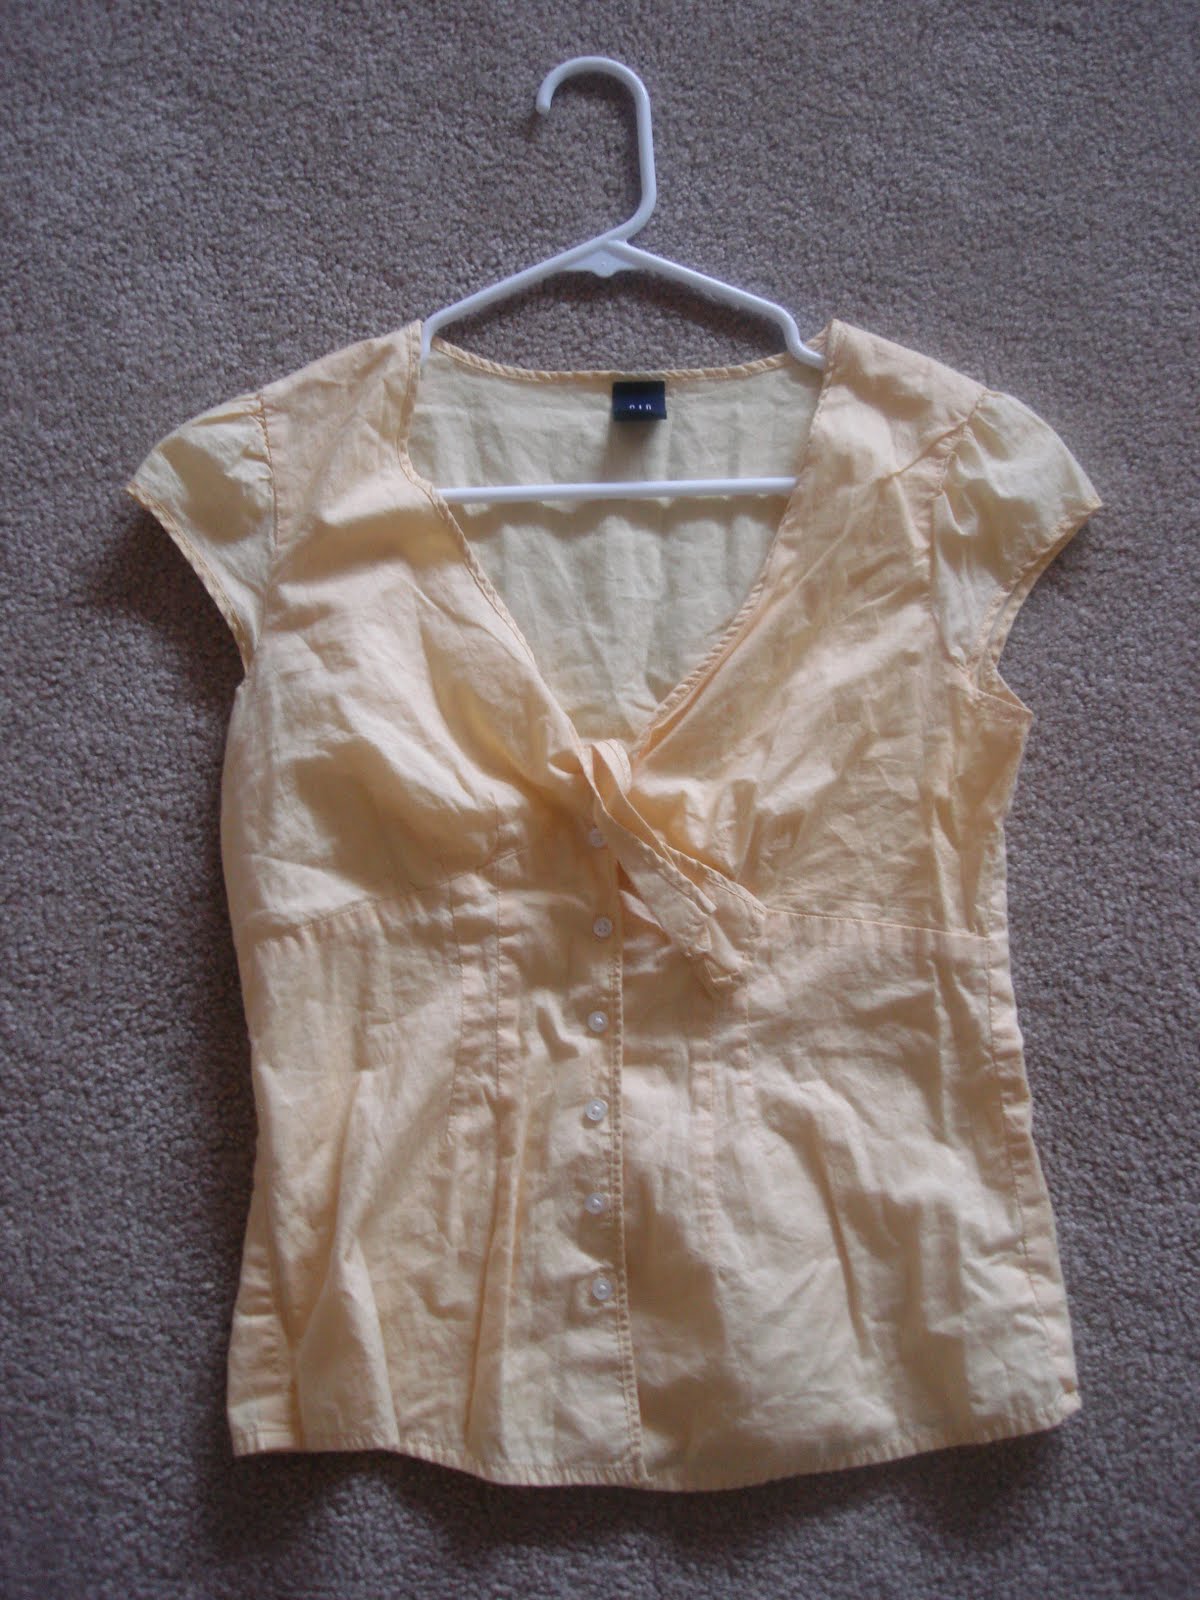
And viola! No need for a white shirt underneath! And another tip for modestifying your dresses: Buy a dress a few sizes bigger since it offers a longer length and then alter it to fit you.  Use the extra fabric to make the sleeves!
2

TAGGED: DIY, modestify 92 Comments

Anthropologie DIY-Bamboo Garden Dress

May 25, 2010~ SEWING

My inspiration this week was a dress from….you guessed it, Anthropologie. Right when I saw this dress online I thought, hmm I have a yellow dress in my closet…

This dress is about 6 yrs. old from GAP. It’s a little big now and I think I’ve worn it once in the past 4 yrs.

This top is also from GAP about 6 yrs. ago. It’s the same color as the dress above so I cut up this shirt to use for the extra fabric.

My after……….

(do you like how my daughter made it in the picture? She’s just sitting on her litttle lawn chair, just chillin’. πŸ™‚

I cut up the shirt into a long strip about 5″ wide and I also cut up the bottom of the dress because it hit me way below the knee which is a fashion no no for us shorties. And I used those extra fabrics for the waist-tie for the dress.

And instead of doing a gather like the one in Anthro, I twisted the fabric instead.

I didn’t take in the sides of the dress since the waist-tie did the work of making it smaller. It was a side-zipper anyhow so it would’ve been too much work to alter the sides.

This dress from Anthro is $218. And since my dress and the top was from my closet- it was free! πŸ™‚ I saved over $220!
And thanks to all those that are voting for me as Oprah’s next T.V Star! Please keep voting for me until July 3rd!
Featured on:
Kojodesigns
Avidaccents
CreativeItch
0

TAGGED: Anthro DIY, DIY 49 Comments

Anthro Inspired DIY-Striped Dress w/ flowers

May 17, 2010~ SEWING

DId you miss me last week? πŸ˜‰ This week I turned a XL tank dress into a XS flutter-cap sleeve dress, inspired by this dress from Anthropologie.


I bought this dress on clearance for &7.99 from Old Navy and I first altered it by shortening the waist area(cutting it and re-sewing the waist), took the sides in about 3 inches from both sides, and used that extra fabric to add the sleeves and the flower.

And the result…

Instead of sewing on the flowers, I made it into flower pins so that I could wear the dress and the flower pins in many different ways.
just plain

flowers on the neckline, or on other shirts.

I used a white waist-tie I had in my closet that once belonged to a cardigan for the waist.

I also used old scraps from old projects I saved up for the flowers.


It is so comfortable, I love it. Not to mention I just saved over $120!
0

TAGGED: Anthro DIY, DIY 37 Comments

Anthropologie DIY- Lace Cardigan

May 3, 2010~ SEWING

My project this week:


I’ve been looking for an oval-shaped stone ring for awhile so when I saw these real Jade stone earrings, I was so excited! I just took out the earring post and bought a faux gold ring and attached to it. I bought a Krazy glue that’s for metal to attach the stone to the ring but is there something better? The stone is quiet heavy so I’m afraid the glue won’t hold it in as good. Maybe a glue gun would work? I would love to get tips from you amazing crafty mothers out there.

Anywho, since it was an earring set, I have one more jade stone ring so if you would like to purchase it, then click here. It’s only $20. And plus, we can be BFF’s and have the same ring! πŸ˜€

Onto my next project:

I was inspired by this cardigan from Anthropologie, priced at $118.

I bought this size XXL cardigan from Old Navy. (That was the only size left) And some lace.
Then I cut up the sides and the sleeves and sewed it back on after cutting the extra fabric.
Then I sewed on the lace about 1/5″ to the hem. I thought lace in the back around the neckline would be cute so I did that but the lace kept cuffing up and folding so I just cut it off. Then I used liquid stitch(my first time using it and it’s awesome!) on the other edge part of the lace so it doesn’t air up when I move.
And my result:

I thought about adding pearl buttons but it would make it look more dressy and it would take attention away from the lace so I decided to leave the original buttons to keep it a more simple/casual style. It’s really light and soft so it can be worn in the summer, especially on cool summer nights. 
2

TAGGED: Anthro DIY, DIY 57 Comments

Molly Hanna DIY

April 26, 2010~ SEWING

I made two necklaces this past weekend. The first one was a bracelet but I thought it would be cute as a necklace.

Before

After

All I did was take the beads out and out a gold chain around it. So easy! I love recycling.

The second one was an inspiration from a designer Molly Hanna. I saw her designs in the J.Crew catalogue and instantly fell in love.

This model is Molly Hanna herself. Isn’t her necklace just beautiful? (It’s not for sale.)


These two necklaces were being sold for $495 and is sold out. So I thought, hey, it doesn’t look that hard… So I wanted to just experiment with it first so I made a “trial” one using jewelry I already had at home.


And the best thing is, it didn’t cost me a penny! I just gathered all the jewelry, beads, hair clips, earrings, flower brooches I had that I don’t wear and just played around and put together what I thought matched well together. Then I just super glued it on a black felt and super glued the black ribbon. No sewing was necessary, yay!

I can’t wait to make another one but this time buying some beads and jewels and I’ll hand sew the beads on a fabric instead. And a photographer Amber Weimer took this picture of me wearing the necklace for one of her projects.

Kinda embarrassed posting this picture haha. But oh what the heck. ^ ^

0

TAGGED: DIY, J.crew DIY, modeling jobs 45 Comments

  • « Previous Page
  • 1
  • …
  • 23
  • 24
  • 25
  • 26
  • 27
  • Next Page »
cutmypic
Hello! My name is Sarah and I am so happy to have you here! Here you'll find DIY sewing, DIY home building & decor, honest and vulnerable posts of motherhood and snippets of my family. We are building our dream house and will update you regularly on our whole process from start to finish and I am also starting a mother-daughter sewing series. So I hope you stay awhile!

BLOG ARCHIVES

SEARCH

JOIN THE LIST

- THEME BY ECLAIR DESIGNS - Web Hosting By RFE Hosting -