• ABOUT
  • COLLABORATE
  • CONTACT

Life is Beautiful

Motherhood, Sewing, Family

  • SEW
  • HOME
  • PARTY
  • TRAVEL
  • SHARING MY HEART
  • SHOP

DIY: Make a Dress a Longer Length

October 5, 2015~ SEWING

Make a dress longer
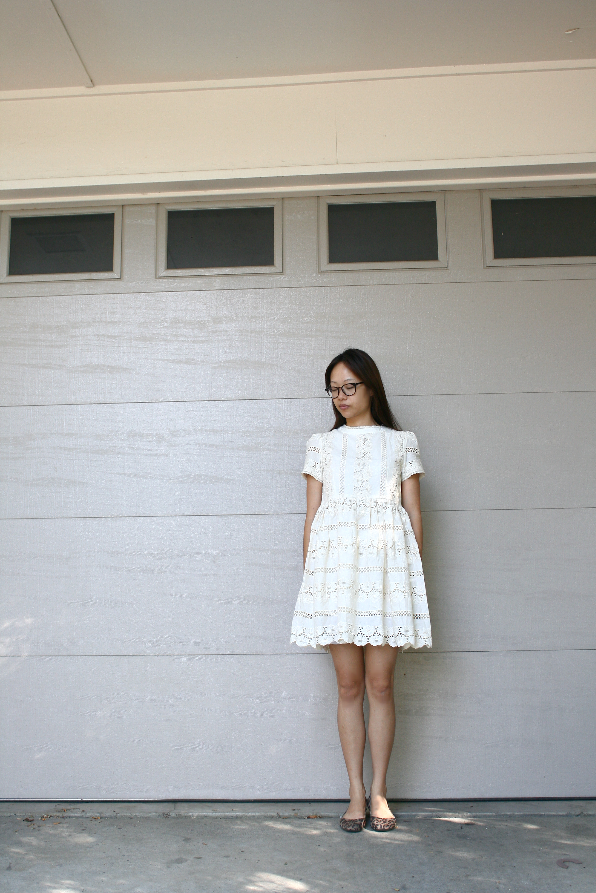
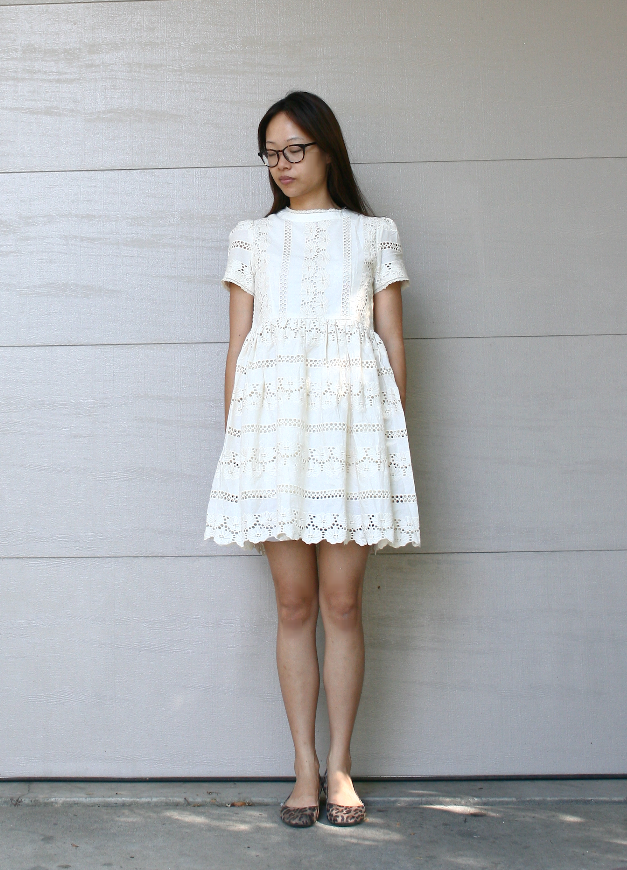
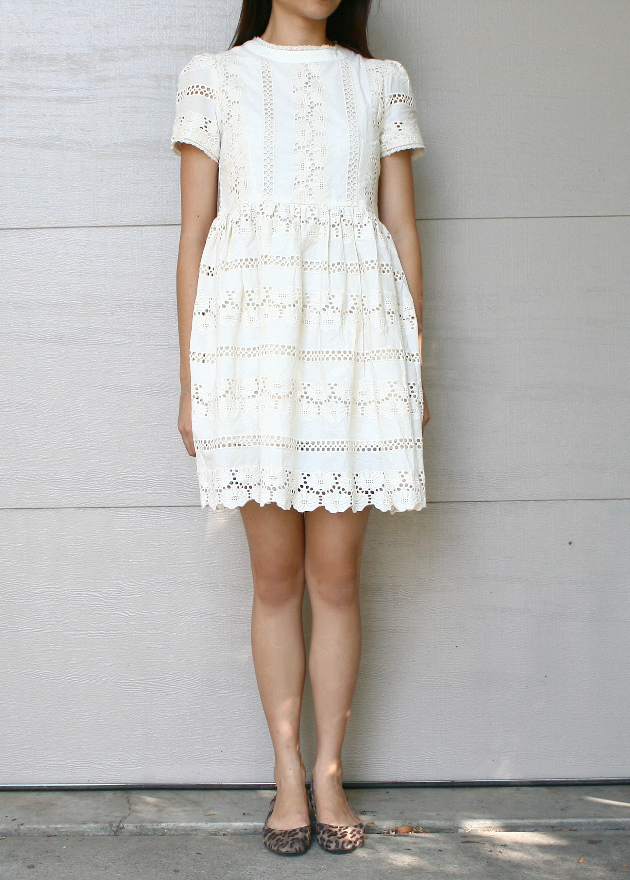
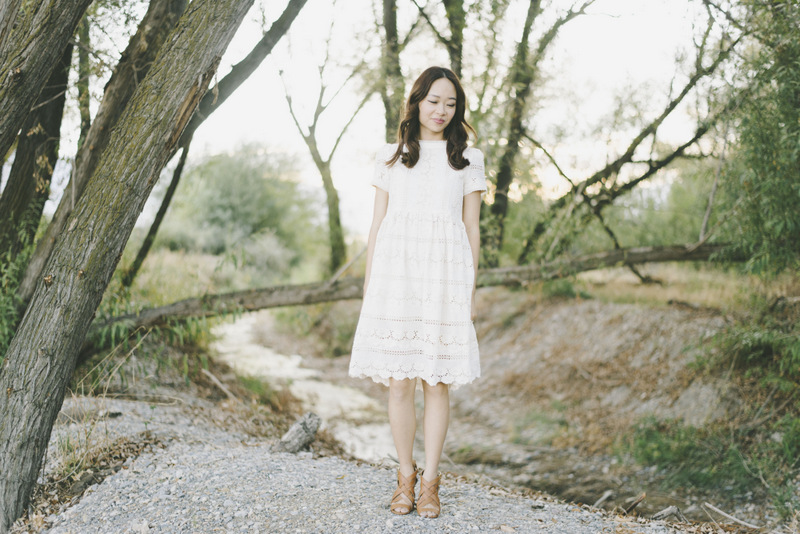
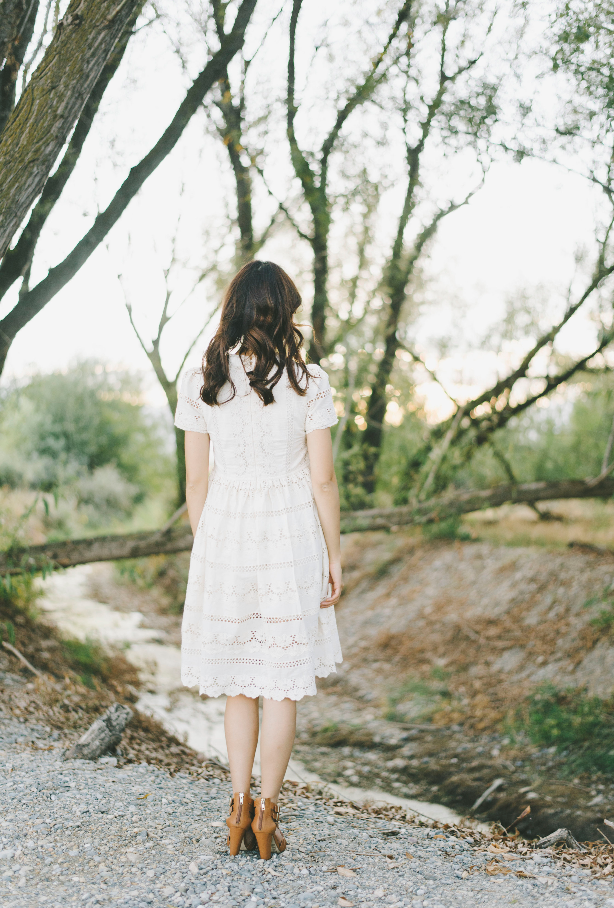
I LOVE this lace dress. I’m sure you’ve noticed by now but I love lace and embroidery, it is so feminine and classy. But when I got it, everything was perfect except it was just a few inches too short to wear with my LDS garments. GAH!!! But I loved it so much so I went to the fabric store to see if there was any lace trim that was very similar in design and color with no luck. So I got another one of the same dress to use it to lengthen. I knew I could use the second dress I’d be cutting to make it into something, so I felt it was justified. But I would never purchase another of the same dress just to cut 3″ of the bottom to lengthen the other dress and throw it away.
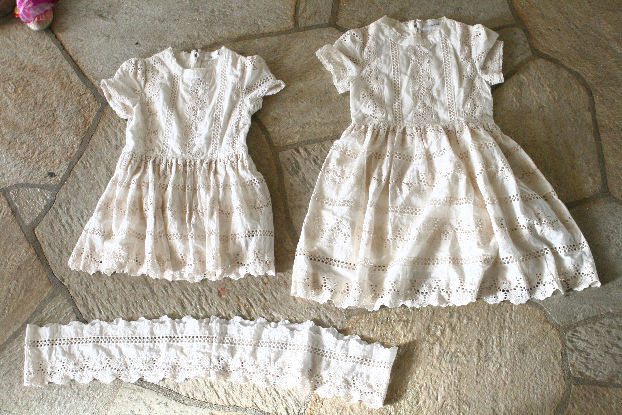
I put on the dress and went in front of the mirror to see how many inches I wanted to lengthen, then cut the bottom of the other dress and sewed it onto the bottom of the original dress. So easy and simple!
After:


How to lengthen a dress


Lengthen a dress longer
How to make a short dress longer
Purchase the lace dress here.
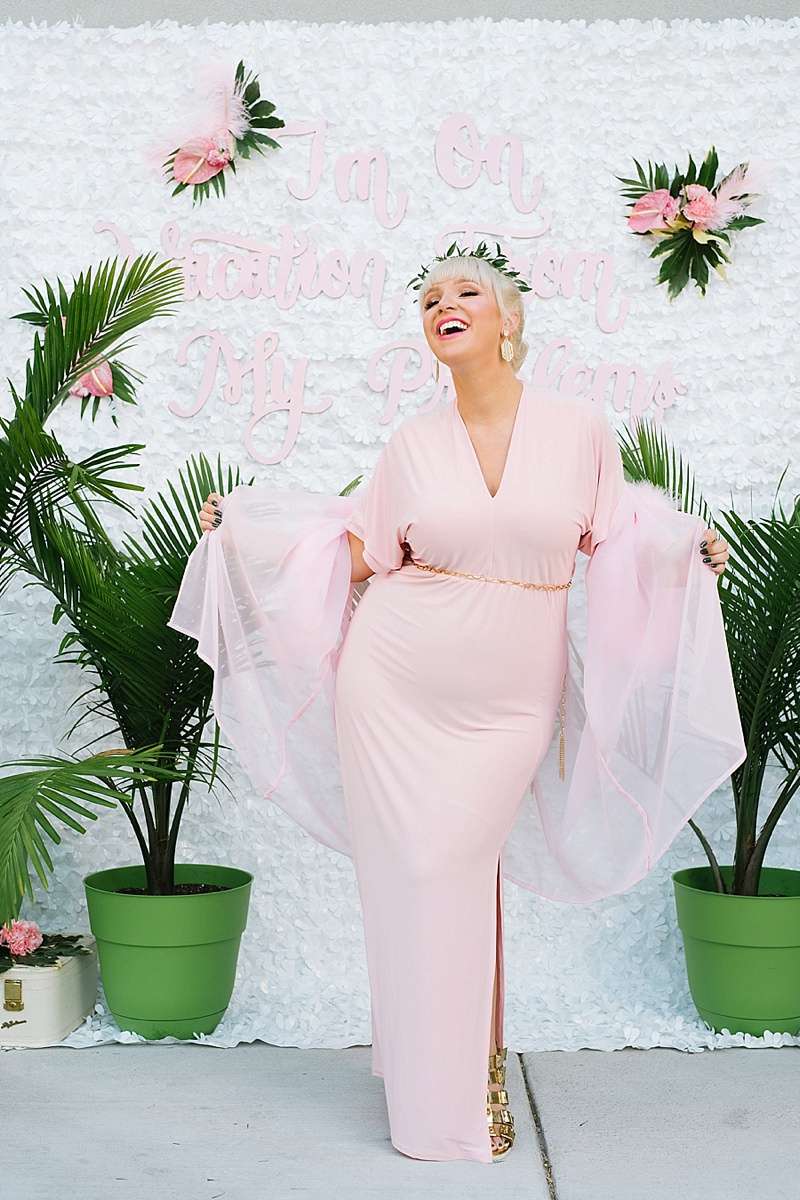
Stay tuned to see what I did with the other dress I cut the bottom of! ;)And don’t you love these after pictures? Thank you to Emily Cooper Photography for the beautiful image, she was amazing! I did 7 outfit pictures with her in one hour and wow, I have so much more respect for fashion bloggers who do outfit photos on a weekly basis like this. I barely grabbed 7 outfits of clothes and when I got in the car, I remembered I need to also think of shoes to match each outfit and jewelry and handbags! You’ll notice in later pictures that I switch between two pairs of shoes and I’m not wearing any handbags and minimal jewelry. 😀

What you’ll need:
-2 of the same dress
-Matching thread
-A needle or a sewing machine
-Scissors
Estimated time: 5-10 mins.
Budget: $100
Skill level: A very basic beginner
<


Pin & Share!


How to make a dress longer


Make a short dress longer
0

TAGGED: 5-min.DIY, DIY 11 Comments

DIY: Making a Terrarium with a 3D Maker

September 28, 2015~ DIY DREAM HOUSE

This project was made in partnership with HP.
I am not tech savvy at all and hate getting used to new technology. Like my iPhone 6? I hate when you have to update it every so often and I delay it as long as possible. The same with Facebook or Instagram, why do they keep changing the layout? So when I received the Dremel 3D printer, it stayed in the box for awhile. 3D printer? It just sounds so futuristic and intense and therefore confusing and intimidating! After holding it off as long as possible, I had to open it so that I could make a project with it. Jay kept telling me he’d help me set it up but he’s been training for a marathon and been falling asleep while putting the kids to sleep almost every night so after waiting for him for 2 days with no luck, I reluctantly opened it by myself, hoping I’d be able to figure this dang thing out. And guess what? It’s a miracle. I set it up all by myself with no trouble! I still can’t believe I did it! I am so proud of myself! Haha, it just means it was super easy and simple to set up and run. I figured out how to download designs and make something too, with no hassle or frustration. I LOVE this 3d printer. I haven’t used any other ones but I am so happy that it’s easy and so simple to use, that even I figured it out with no trouble! And I didn’t really know how a 3D printer worked before and how it makes stuff, but now I know and I am blown away. Technology is so awesome. Especially when it’s so simple and non-intimidating. 

Maybe you all know how a 3D printer works, but it’s string by string, line upon line. That white filament you use on the very left is like the ink. Then it goes through the metal tip that’s like a pen and it shoots out thin strings to build upon line upon line to make the design. 
HP Sprout also came out with their new 3D turntable scanner where you can turn whatever object you put on the turntable come to life. so like a true printer. You place the object on the turntable and it’ll take meticulous measurements and pictures from all angles, you hook it up to the Dremel 3D printer and it’ll make the copy!
Here is a video of my process, so you can see better how it all works!

I’ve also made a toothpaste squeezer, a dinosaur head and a frog for the kids and their friend, and a tablet stand. The filament is about $26 and it lasts a lot longer than I had thought. I’ve made all this with one filament that came with the printer and there’s still quiet a bit left. What would you make with a 3D scanner and a 3D printer?
Find out more about HP here.
See what others have created here.
To find a HP Sprout near you click here. 
1

TAGGED: DIY, HP by Sprout 6 Comments

Custom Kimono for Alison’s Cabana Boogie

September 24, 2015~ Etc.

When Alison’s Cabana Boogie tickets went on sale, I bought one immediately and told all my friends to buy one too, she throws the best dance parties! Then a week before the party, Alison asked me if I could design something for her to wear for her party and I was so flattered! She came over and we talked about the concept and came up with some design ideas. The end result looked fabulous on her and she rocked the party! She entered the party in the throne of awesome as she calls it with 6 men carrying her. How awesome is that? Gotta love Alison!

I made her a custom kimono with faux fur around the collar and the sleeves. I also made her a pink sash with two fur pom poms in the end but she didn’t end up wearing it because it made her look too much of a “sex kitten” she said. I told her she can wear it for her husband later. 😉 
This kimono wasn’t the initial design but we were worried she wouldn’t be able to get down and dance with the original design. She loved it and I am so glad she did!

pictures from my phone & Alison’s
The party was awesome and it was such a good time! The picture below is the original design concept I came up with after Alison told me the theme of the party and the look she was going for. It’s just the rough draft so it would have looked a lot more polished and better looking of course, with more structured shoulders with the leaves and the leaves sewn on, with light green sparkles all over the leaves. I wanted to make her a high collar with the leaves like a queen since I knew her entrance would be the 6 men carrying her in her throne but then it was quickly dismissed since she wouldn’t have been able to dance in it. Which design do you prefer, the original design or the pink faux fur kimono? I was personally rooting for my original design below. 😉

0

TAGGED: DIY 1 Comment

DIY: Adding Sleeves to a Sleeveless Dress

September 21, 2015~ SEWING

I attended Alison’s Cabana Boogie dance party and the theme was tropical and I found this perfect dress for only $20! I paid $6 for expedited shipping which is still such an awesome deal for $26. Since I am LDS and wear the garments, I don’t wear sleeveless clothes(if you ask me, this dress is by no means immodest and I think shoulders are one of the prettiest body parts in a woman! Wearing garments is something I should pray about and gain a personal testimony of, don’t tell anyone I said that, ha!), and oh my goodness, I just realized my hairy arm pits! Oh shoot! hahaha, I did not photoshop that out, but oh well, that’s the real me folks, just accept me for who I am! ;D
+
I planned on taking the sides in and using that extra fabric as cap sleeves but I wans’t able to find the time to do that so literally 20 mins. before I had to leave, I frantically looked in my closet to see if there was a top that was a green color that I could use to add as sleeves and I came across this top! I put it next to the dress and it matched really well, so I knew this top would have to do! The pleats ended up working out really well with the dress since it matches the design of the leaves. 
=

I wasn’t aware the second layer of the ruffle was tucked in! GAH! 
Here’s a better picture. The sleeves in the back look like little wings, don’t you think?

Estimated time: 10 mins.
Budget: $0.00
Skill level: A confident beginner
Pin & Share!

0

TAGGED: 5-min.DIY, DIY 7 Comments

Refashion Runway Winner Announced!

September 9, 2015~ REFASHION RUNWAY, SEWING

I am the winner of The Refashion Runway! Thank you so much for your support, encouragement & votes! Here’s a link to see all my Refashion Runway projects: https://www.ourlifeisbeautiful.com/search/label/Refashion%20Runway

READ MORE

76

TAGGED: DIY, Refashion Runway 7 Comments

  • « Previous Page
  • 1
  • 2
  • 3
  • 4
  • …
  • 27
  • Next Page »
cutmypic
Hello! My name is Sarah and I am so happy to have you here! Here you'll find DIY sewing, DIY home building & decor, honest and vulnerable posts of motherhood and snippets of my family. We are building our dream house and will update you regularly on our whole process from start to finish and I am also starting a mother-daughter sewing series. So I hope you stay awhile!

BLOG ARCHIVES

SEARCH

JOIN THE LIST

- THEME BY ECLAIR DESIGNS - Web Hosting By RFE Hosting -