Learn how to transform a thrifted blouse to a sleeveless, bow-tie blouse in this step by step tutorial
I am so excited to show you my newest Refashion Revision, in partnership with @Dove.
If you follow my stories on Instagram, you saw a sneak peek of this project and how hard it was to get myself to finish it. Since last Summer, I have not completed one real refashion project because it felt so intimidating and like such a daunting task. I procrastinated until I couldn’t any longer and finally finished it and it feels so incredible! It turned out exactly to my imagination which helped me get my mojo back and it feels amazing. I can’t wait for the next project! Thank you for sticking around even when I haven’t sewed in over a year, it means so much to me.
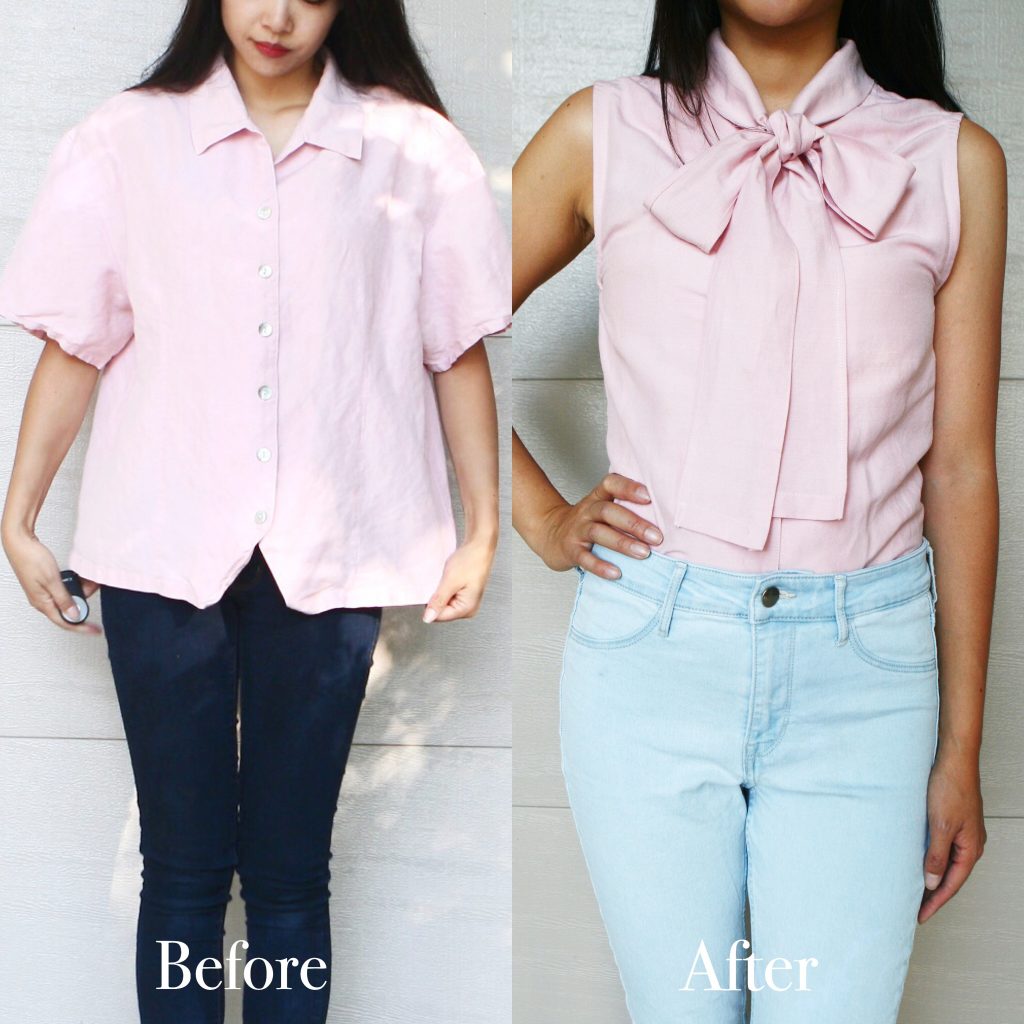
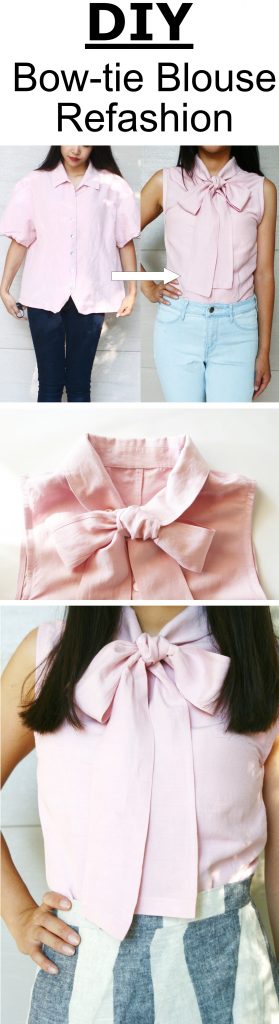
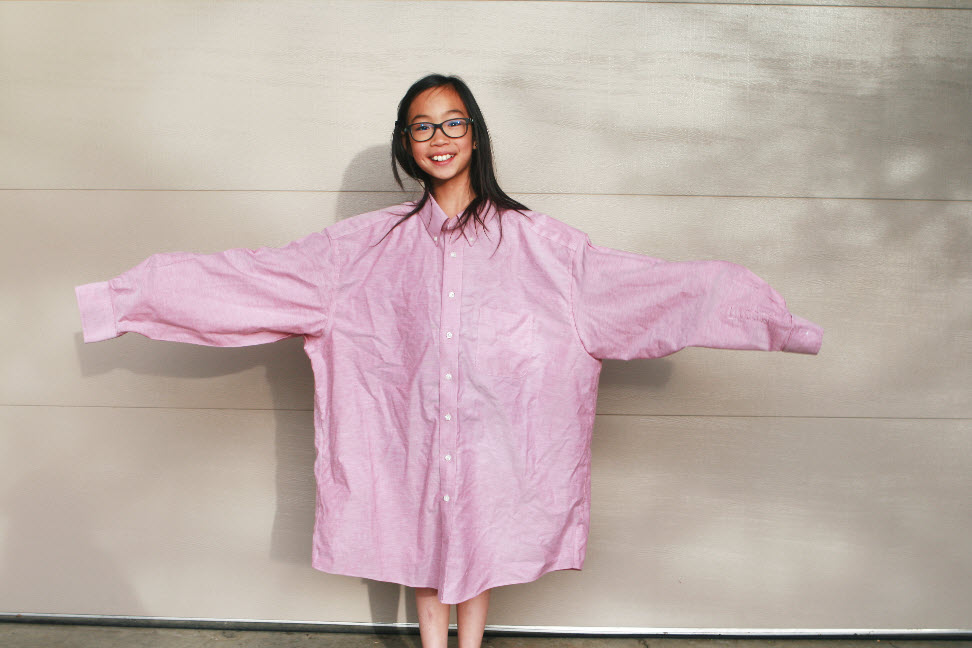
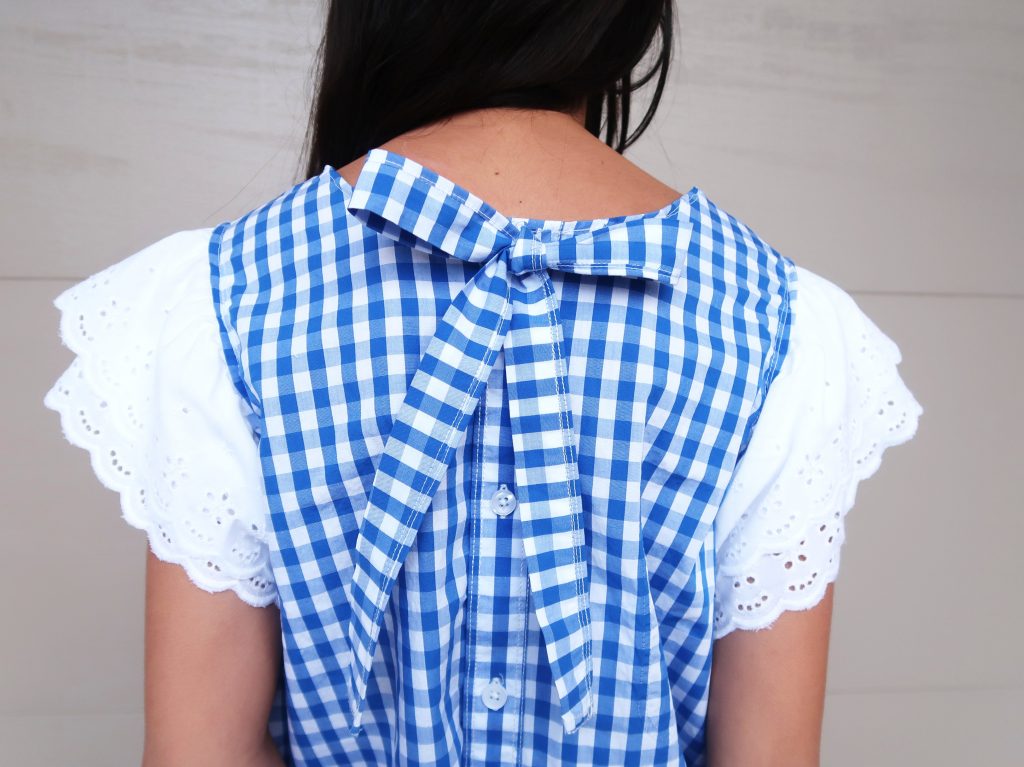
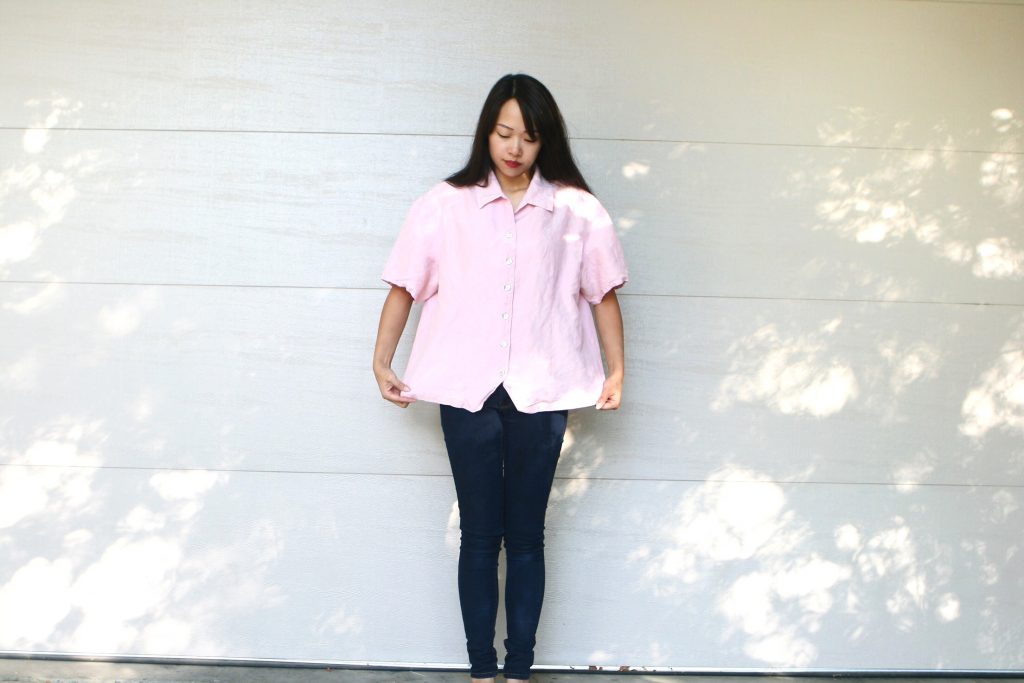
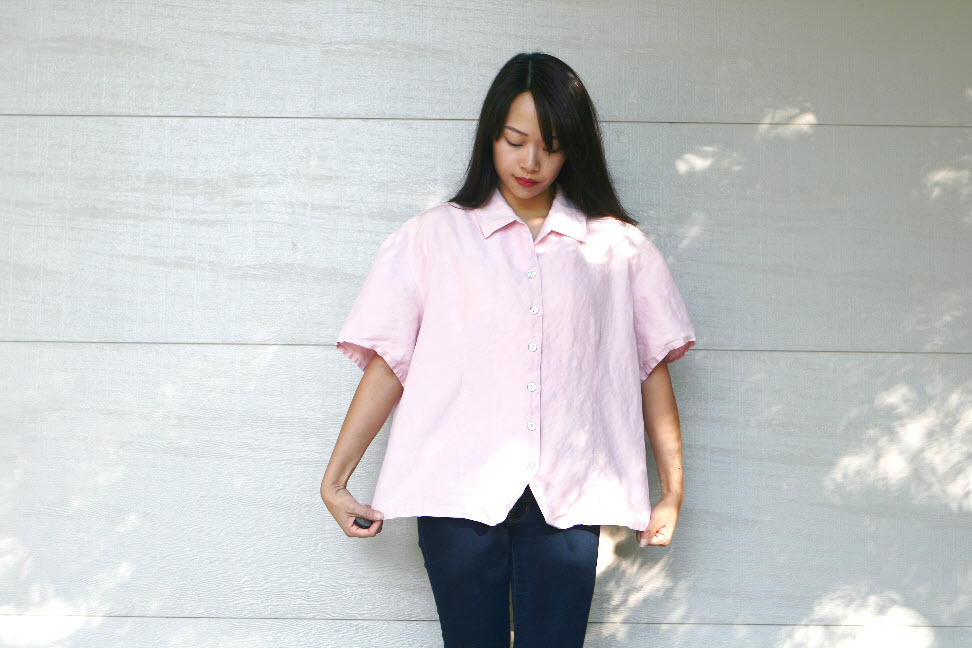
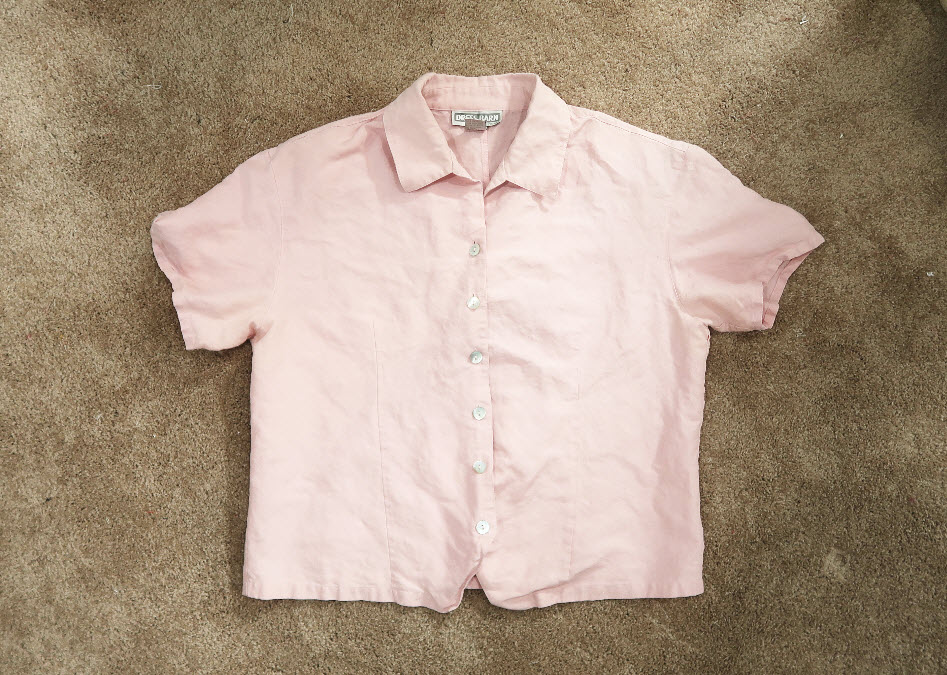
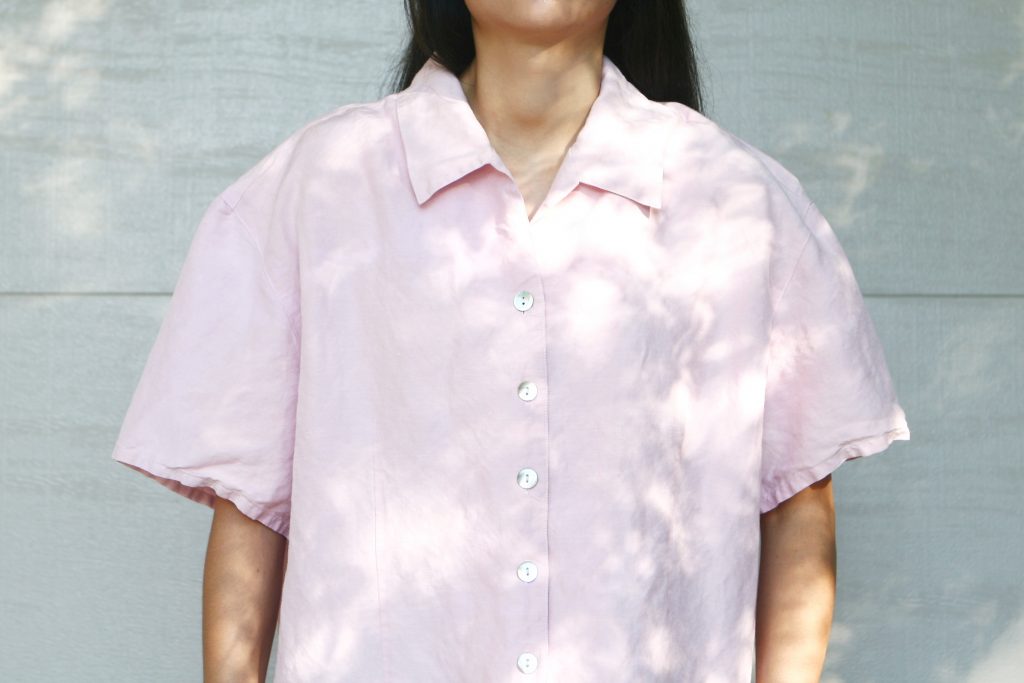
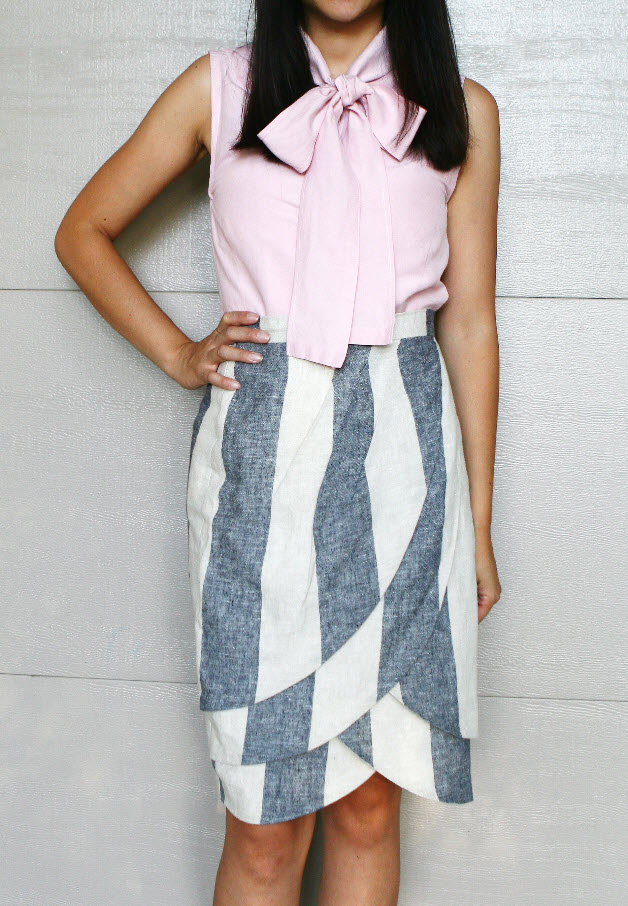
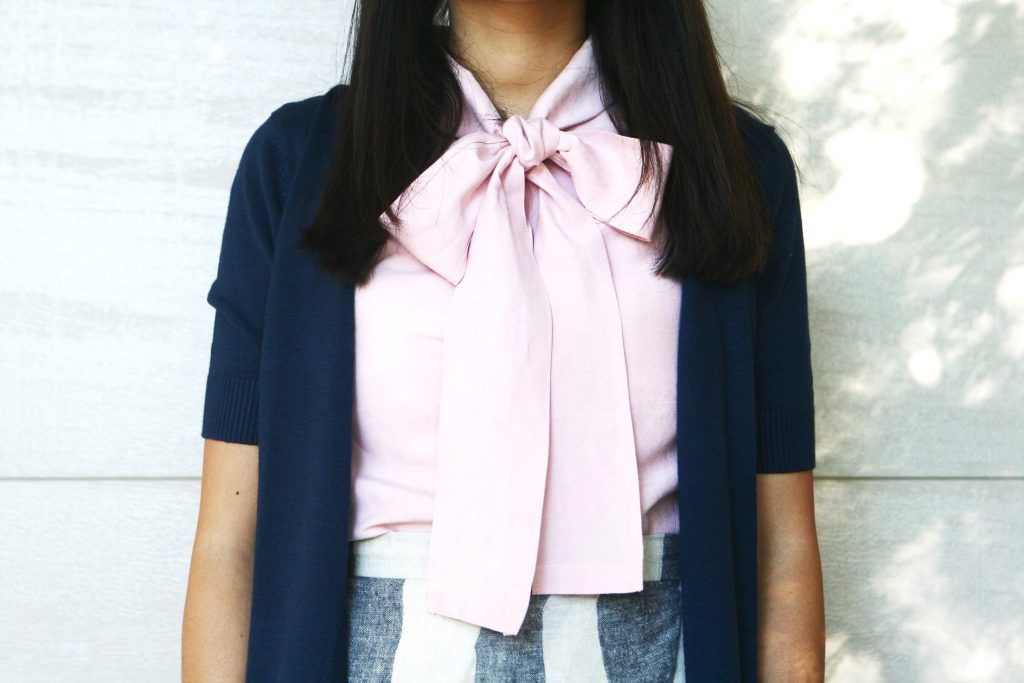
Now, let’s look at the before of the transformation. I got this pink button-up blouse from a thrift store in Pasadena for $4, when visiting my sister in California this Summer. I was drawn to the pretty blush pink color and in under 10 seconds of looking at it, I knew I wanted to turn this into a sleek, sleeveless bow-tie top. Let’s see how it turned out – and how I rock those underarms with confidence.
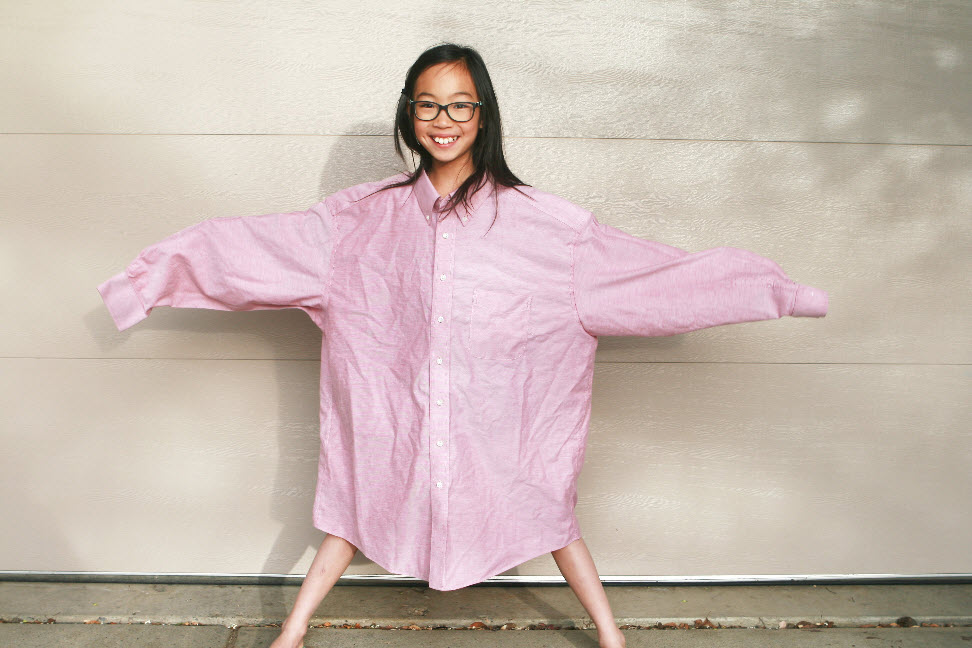
BEFORE
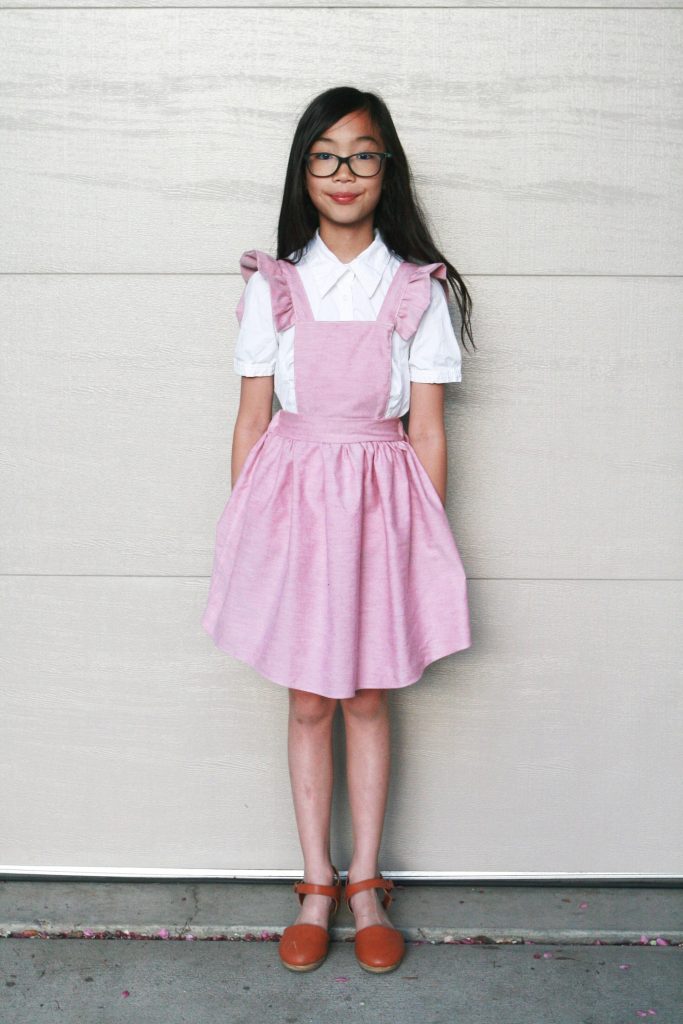
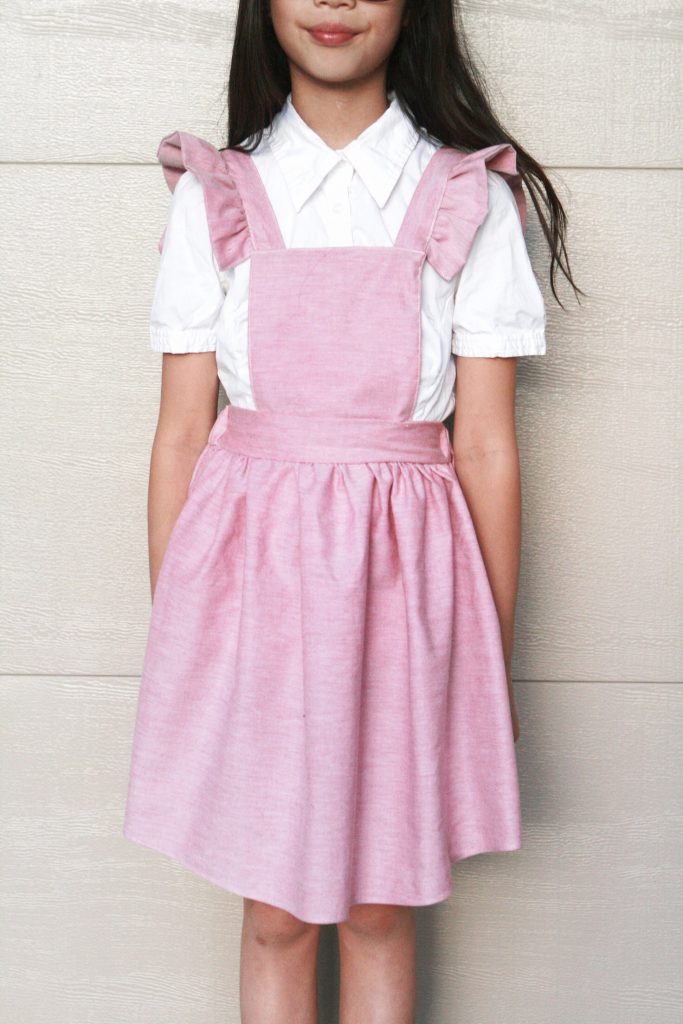
AFTER
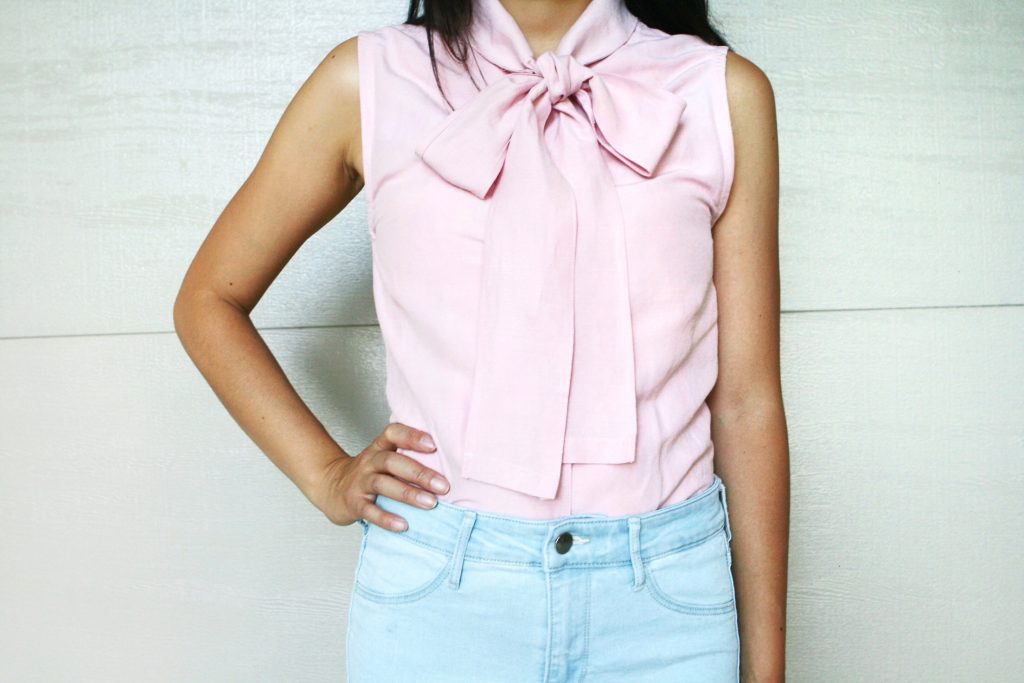
What do you guys think? I wanted a transitional top from Summer to Fall and thought a sleeveless blouse with a bow-tie detail because a sleeveless blouse is perfect under a cardigan or a jacket since there are no bulky, extra material you need to stuff inside your sleeves, and the bow-tie detail adds a pop of personality underneath your cardigan/jacket to make your outfit stand out.
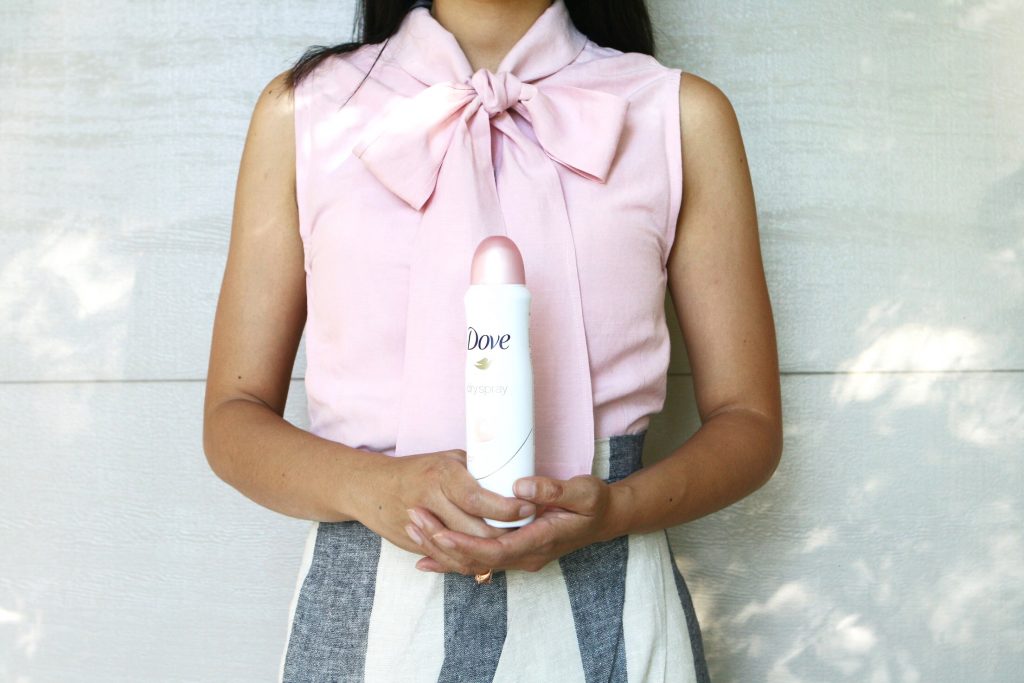
Now, I don’t know about you, but I get paranoid when wearing sleeveless tops! If I want to wear sleeveless, I always have to make sure my underarms are freshly shaved and smelling really nice so I don’t get embarrassed when I have to raise my arms – like waving frantically at a friend I unexpectedly run into across a busy street or in case I have to volunteer as tribute- are the first two things that popped in my head. Once I get dressed, I don’t want to worry about any of that so I can forget about myself and focus on serving others once I am out the door.
I was particularly excited to partner with Dove because I’ve trusted the brand since I was 14 years old with my underarm care (20 years and counting) and while I’m a bit paranoid for sleeveless looks, I can trust I’m in good hands. While I haven’t been one to deviate from my beloved Dove Advanced Care Antiperspirant, I received a sample of Dove Dry Spray Antiperspirant in the beauty finish variant and quickly converted! Dove Dry Spray Antiperspirant has all the care of Dove and goes on instantly dry for a cleaner feel. It provides 48-hour odor and wetness protection with ¼ moisturizers for added skincare benefits, keeping my underarms in great condition to rock all the sleeveless looks I desire (and make).
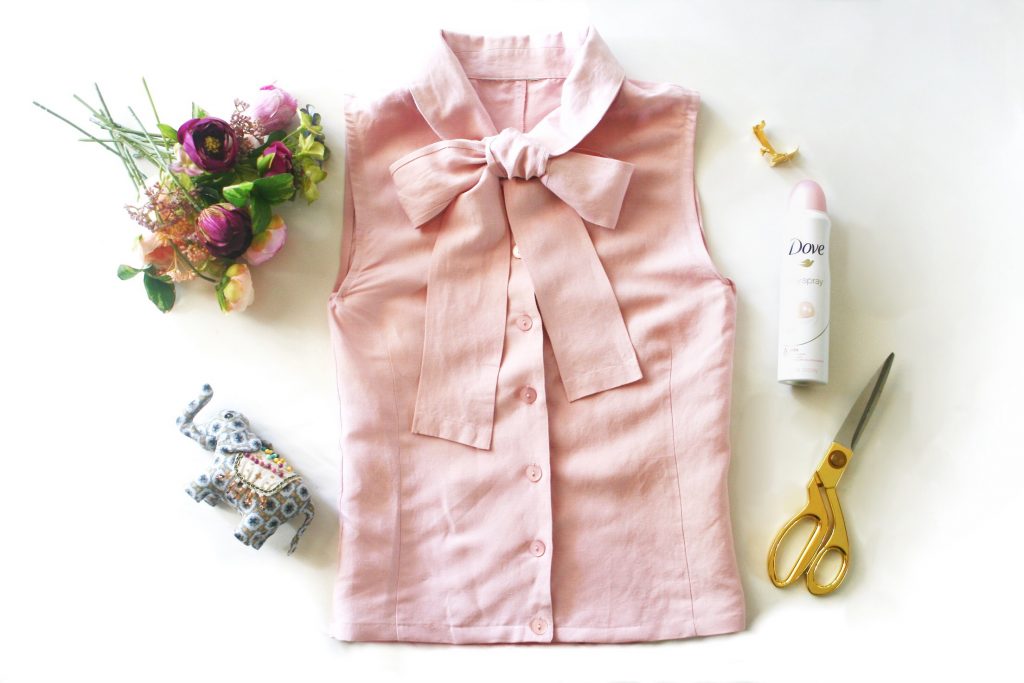
If you’re looking to try out your own sleeveless bow-tie blouse continue reading for the tutorial, and don’t forget the ultimate last step for those sleeveless styles: Dove Dry Spray!
Sleeveless Bow-tie Blouse DIY Tutorial

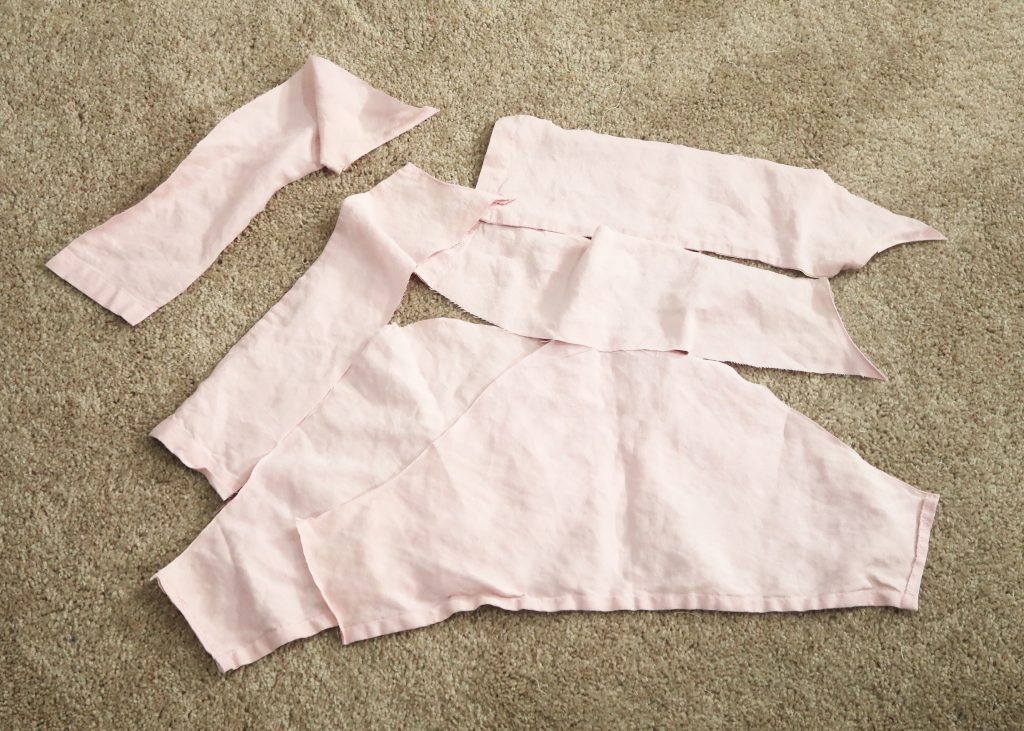
1. Cut the sleeves off.
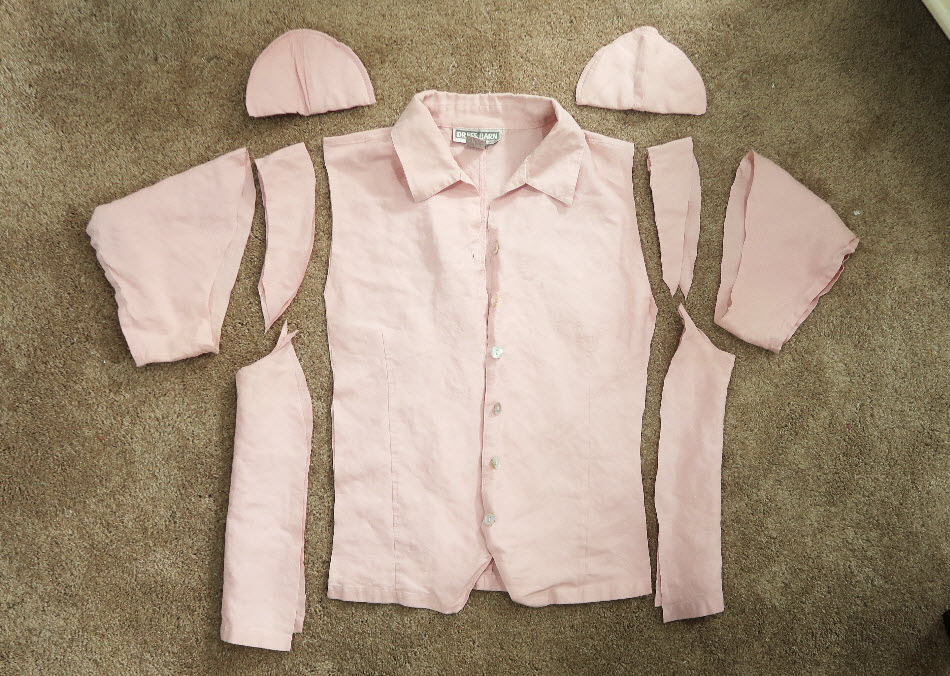
2. Cut out the shoulder pads, extra fabric on the armholes and the sides of the bodice.
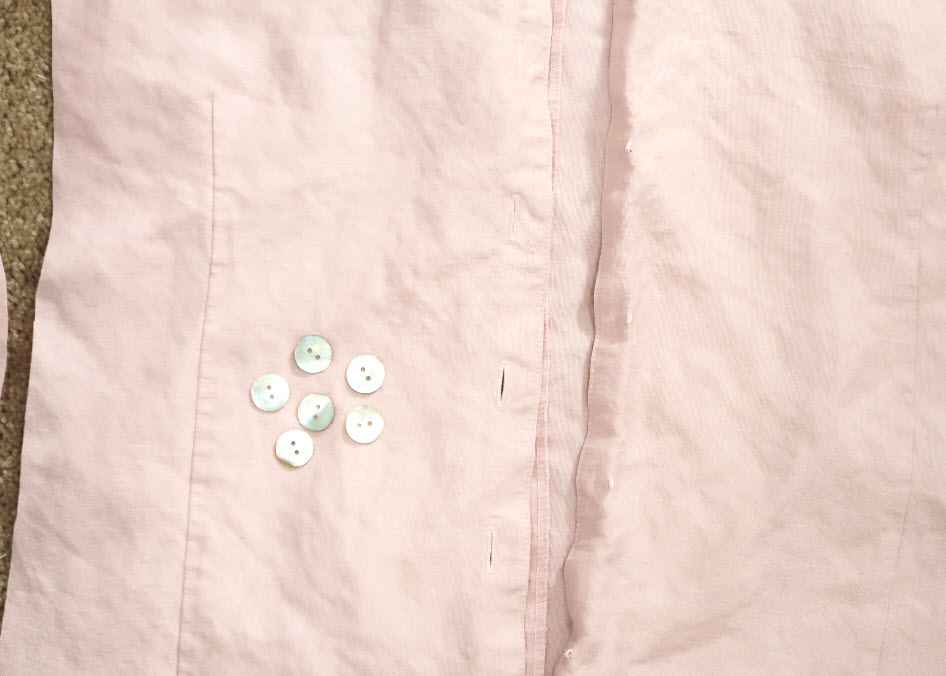
3. Remove the buttons.

4. Hem the armholes and the bottom of the blouse.
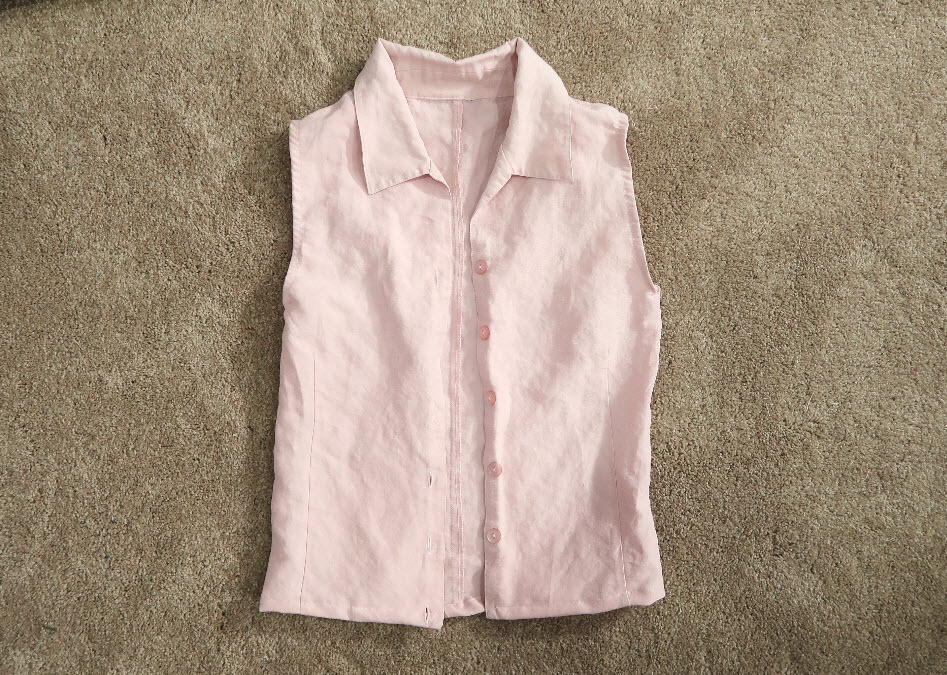
5. Sew on new buttons.

6. Cut off the hem at the end of the collar, so we can attach the tie. Cut off the last 4-5 inches on each side of the collar where it starts to widen. Then hem it closed.
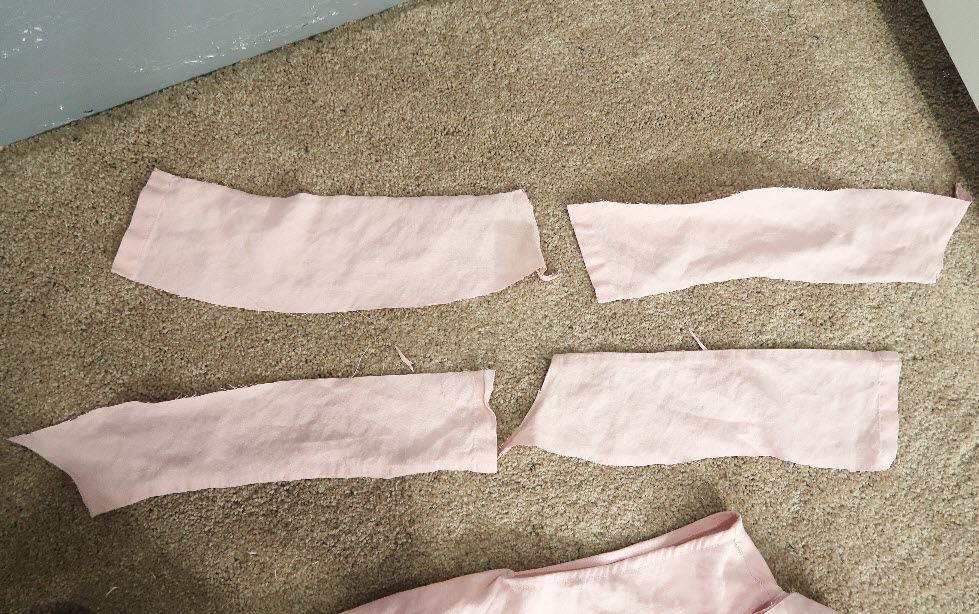
7. With the extra fabric from cutting off the sides of the bodice, make two long strips. So connect two pieces to make one long strip, then hem all the edges except for one edge that will attach to the collar.
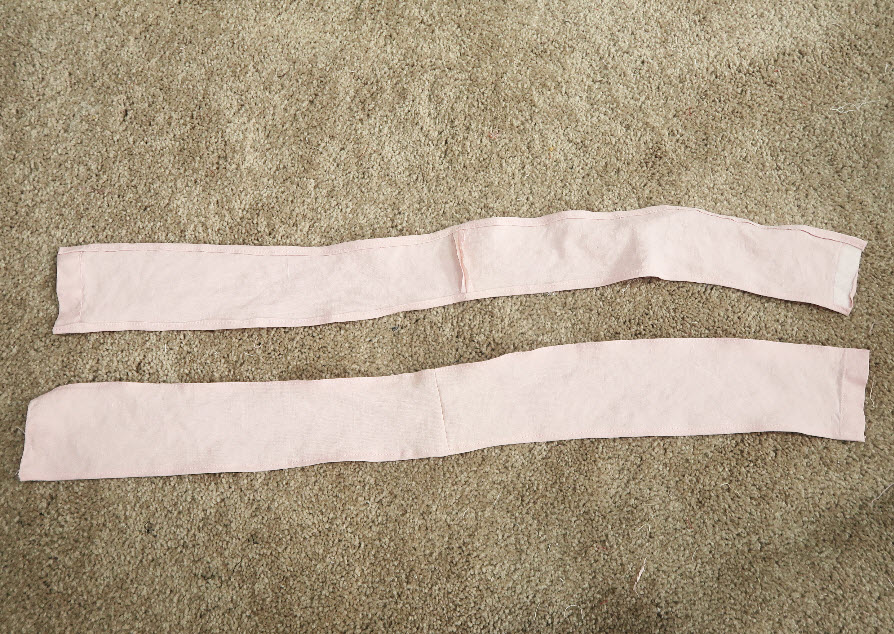
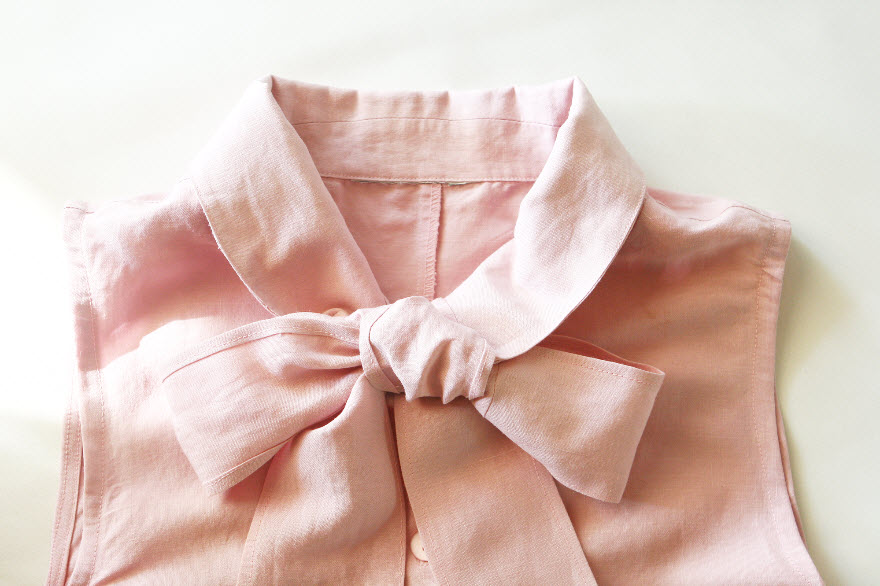
8. Once you have your two strips, attach it to the end of the collar. And you are done!
BEFORE
AFTER


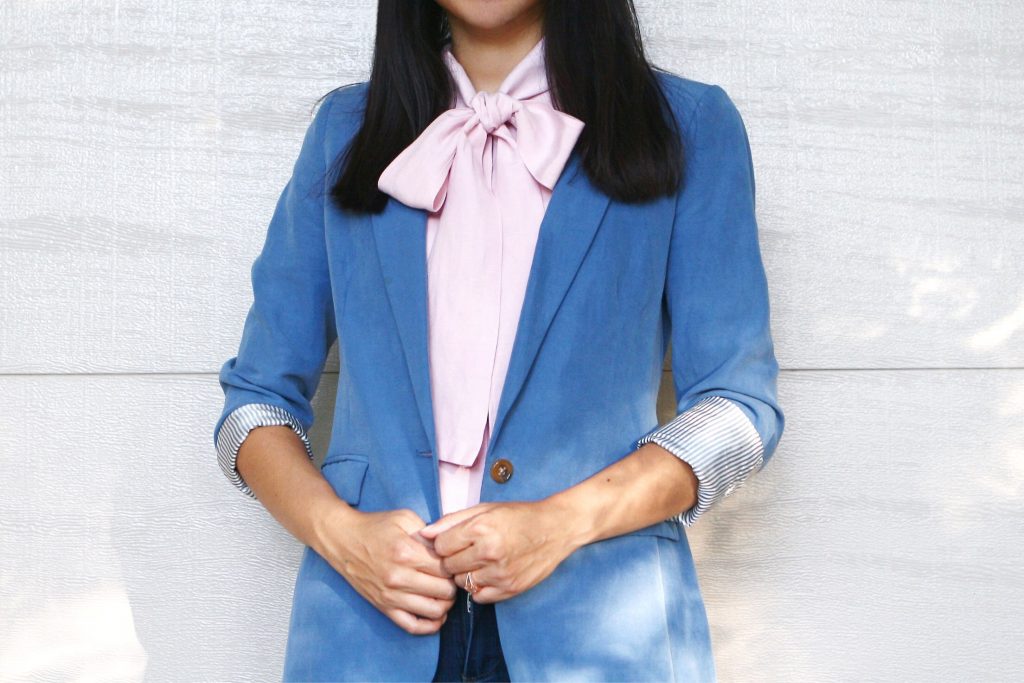
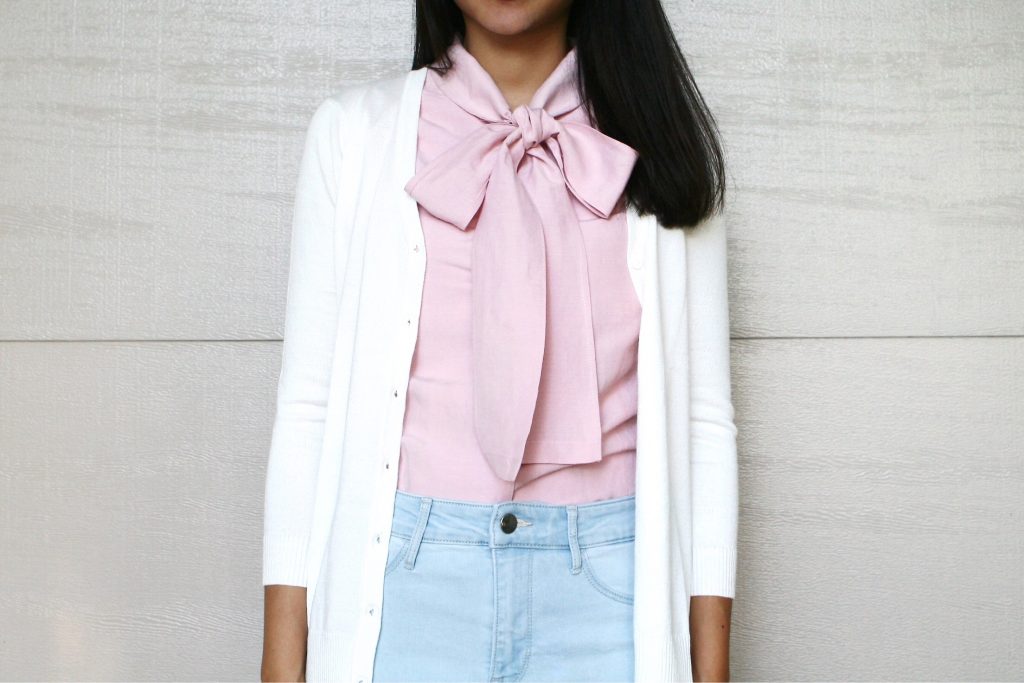
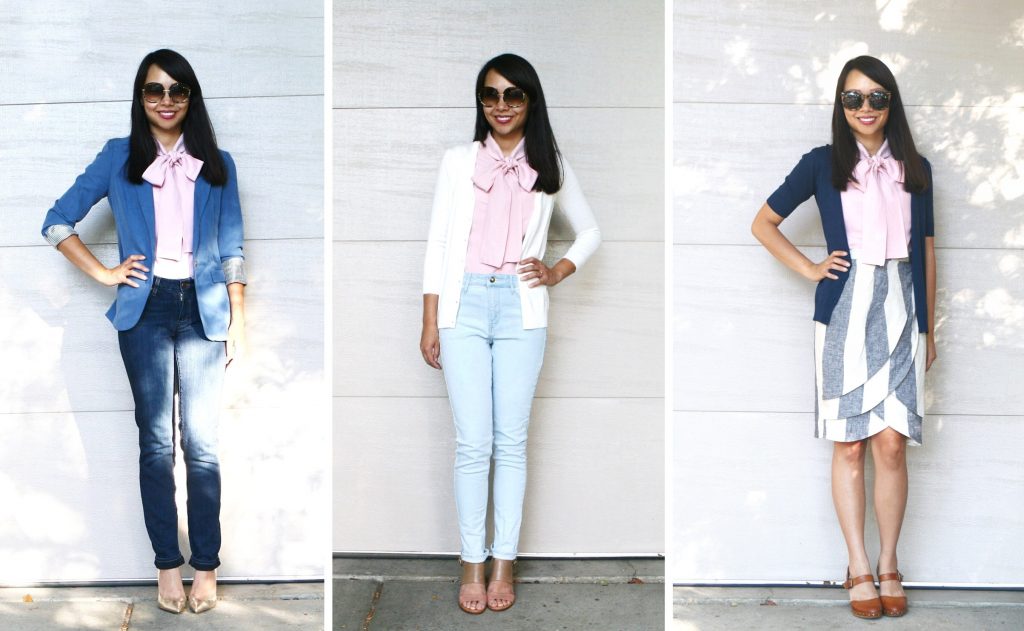
Here are 3 different ways I styled the blouse for Fall, which one is your favorite?
Let me know what you think about my refashion! And now that I got my mojo back, stay tuned for many more Refashion Revisions!
Pin me, share me, I like to get around!