• ABOUT
  • COLLABORATE
  • CONTACT

Life is Beautiful

Motherhood, Sewing, Family

  • SEW
  • HOME
  • PARTY
  • TRAVEL
  • SHARING MY HEART
  • SHOP

WHICH ITEM SHOULD I REFASHION NEXT?

January 28, 2018~ SEWING, YOUTUBE VIDEOS


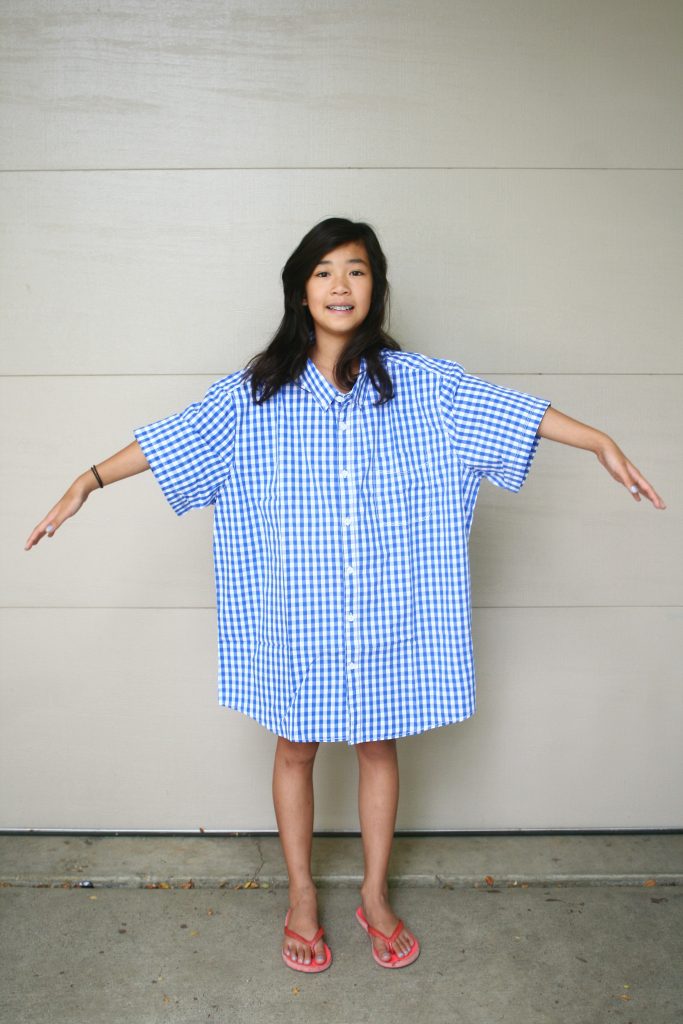
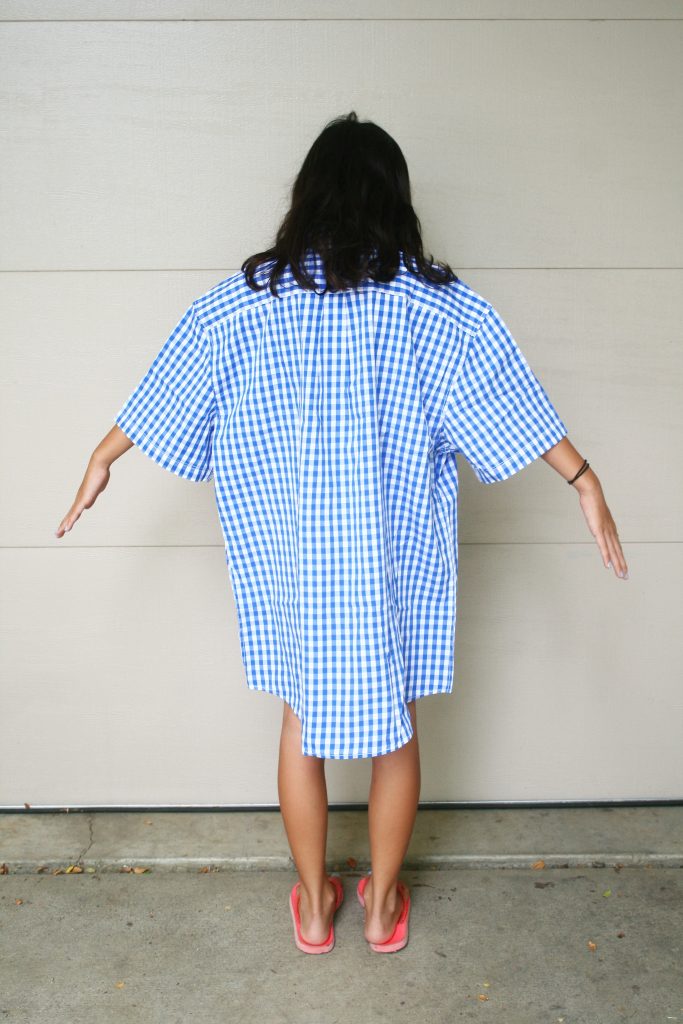
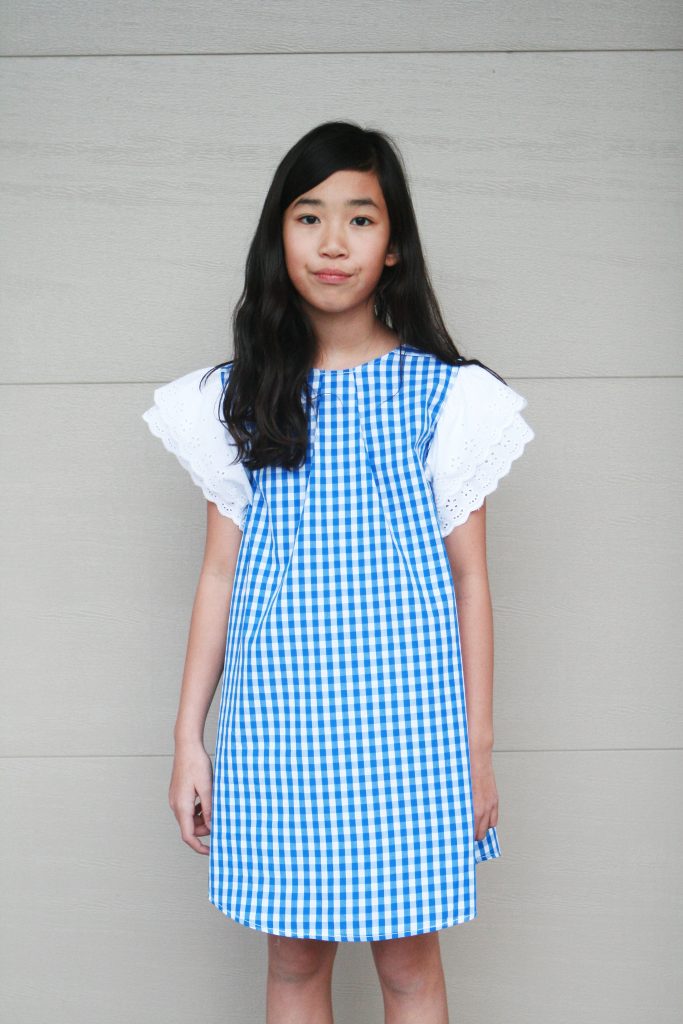
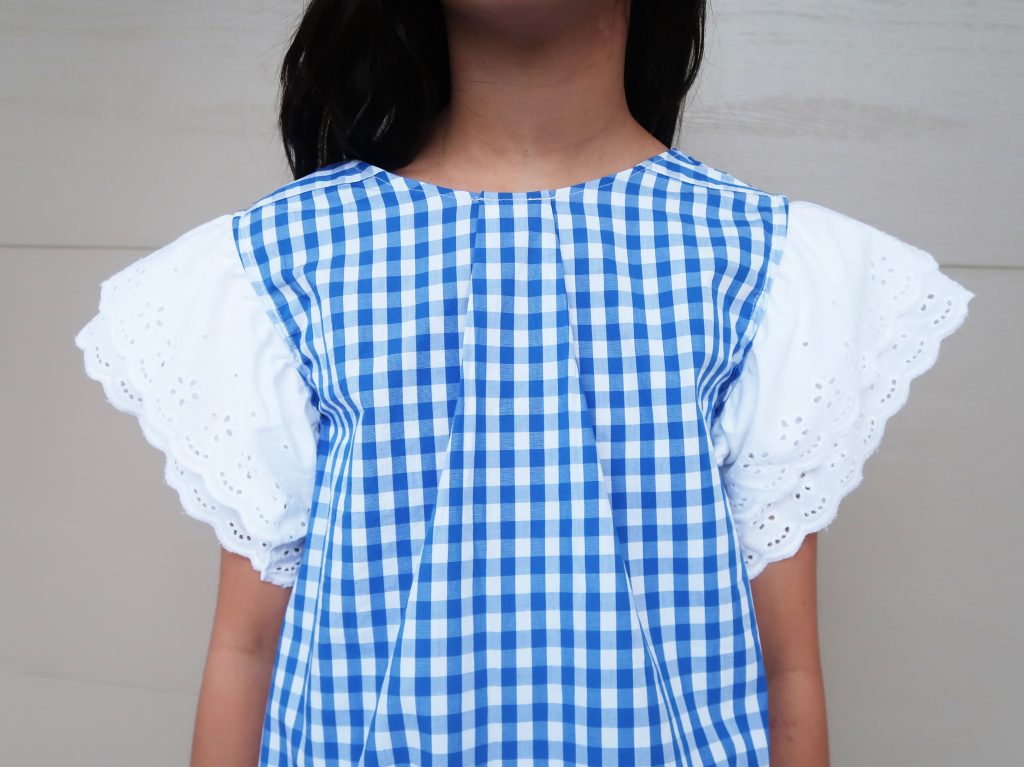
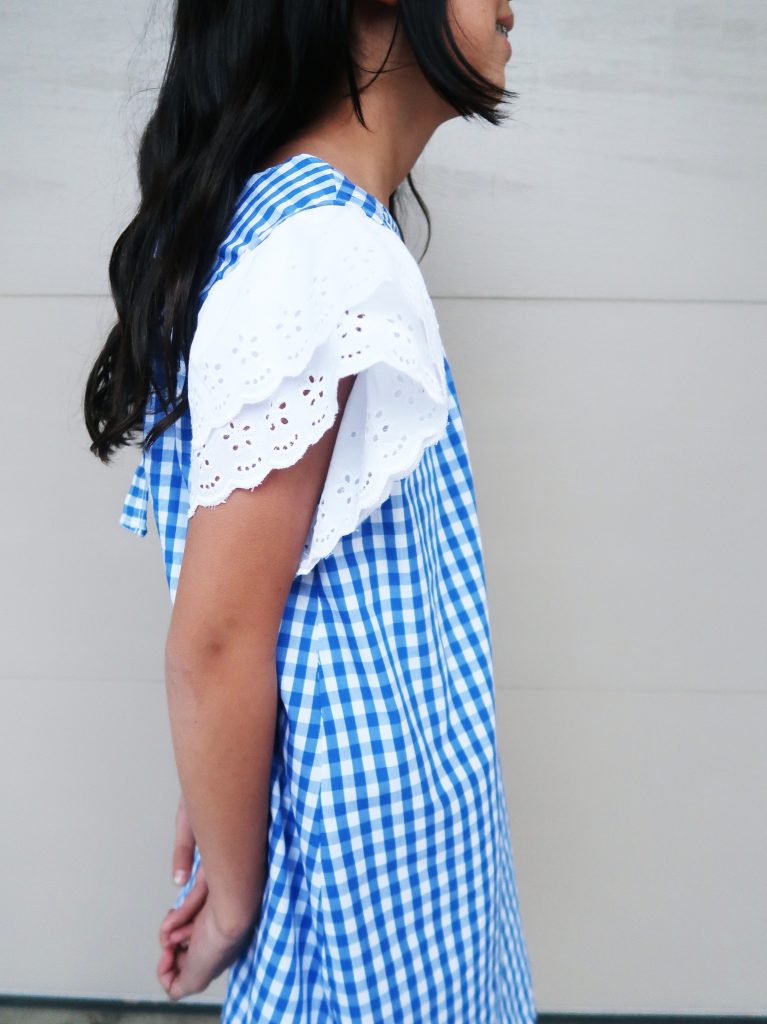
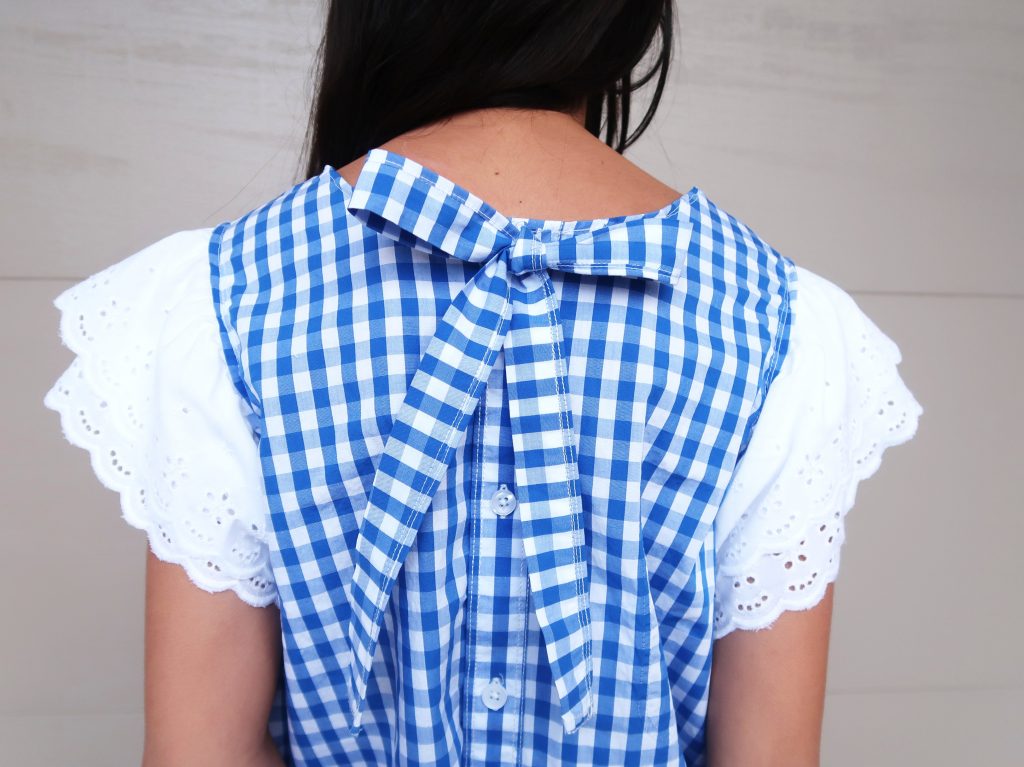
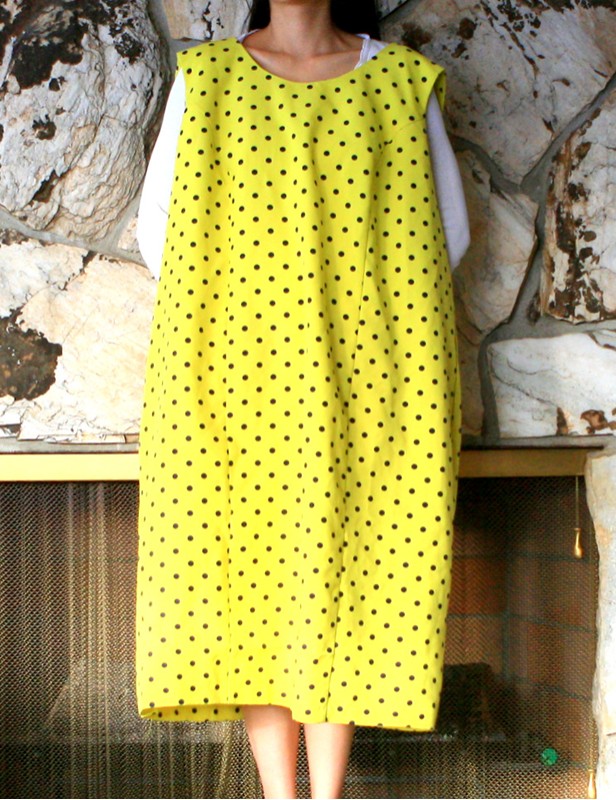
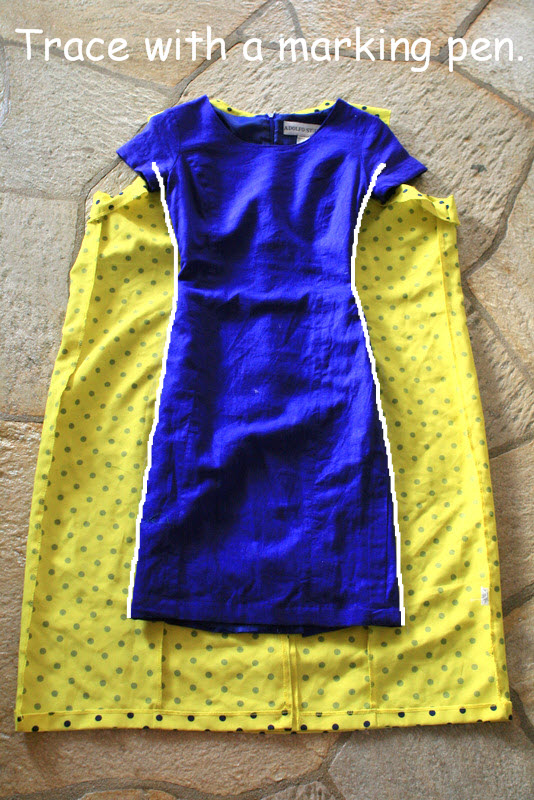
Help me choose which one I should refashion next! This is episode #5 of Refashion Vision, where I take you thrift shopping with me and I brainstorm right then and there how I’d refashion each clothing item.

This one was hard for me guys! It usually takes me 5-15 seconds before images and ideas pop into my mind but maybe because I took a 6 month break, I was rusty! But I was able to come up with cute ideas for all of the options at the end, whew!

Help me choose which item to refashion next by voting in the comments! The # with the most votes will be the one I’ll tackle next!


#UPDATE: #3 won, thank you for voting! To see what I transformed the XL pink men’s shirt into, click here to see it!
1

TAGGED: refashion, sew, thrift shop, vintage 10 Comments

CLOTHING HACK MEN’S SHIRT TO DRESS | REFASHION DIY

January 19, 2018~ SEWING, YOUTUBE VIDEOS


Welcome to Refashion Revision where I take outdated clothes and turn it into new. In this episode, I show how to turn a XL men’s shirt into a girls’ dress with a cute sleeve detail.


BEFORE


AFTER


Do you wish the sleeves were shorter? Comment below!


Follow me on @sarahtyau on Instagram to see behind the scenes and sneak peeks.

Watch my other Refashion Revision episodes

We are starting a mother-daughter sewing series! Watch “6 Reasons Why You Should Learn to Sew”

Come thrift shopping with me and help me choose my next refashion!


0

TAGGED: clothing hack, refashion, sew, sewing, upcycle 2 Comments

DIY: Turn a XL women’s shirt into a girl’s dress

July 23, 2014~ SEWING

Before:
I found this shirt on sale for $10.  I bought one for myself in XS and then saw another one in XL and immediately thought it’d make a cute little dress for my girls!

yeah, no, I did not put away those shoes around her to get better pictures.  You’re talking to a mother of 3 little kids here, psh.  please lower your expectations. 😉
Before/After:
Instructions:
1. Cut off the sleeves of the shirt.
2. Get a little girl’s dress to get the approximate sizing to compare to.

3. Place the sleeve of the girl’s dress on the cut sleeve and roughly trace, matching the width and the length, adding about 1.5 centimeters extra on both sides.  Make sure the folded part is not cut(and keep the buttons on the cuff).

4. Cut the fabric following the trace to make smaller sleeves.
5. Cut the extra fabric off the sides of the body.  You will have to cut the arm-hole smaller too.
6. Sew the smaller sleeves back on. 

7. Using the extra fabric you cut off, cut off an oval shape similar to above.

8. Fold the edges twice and sew all the way around on all sides.
9. Ruffle the shorter curved side and sew it onto the top of the shoulder seam.

10. Using the extra fabric, make a waist-tie to use as a belt for the dress.  For a tutorial, click here.
After:

What you’ll need:
-An oversized shirt
-matching thread
-needle or sewing machine
-scissors
Directions:
1. Cut off the sleeves of the shirt.
2. Get a little girl’s dress to get the approximate sizing to compare to.
3. Place the sleeve of the girl’s dress on the cut sleeve and roughly trace, matching the width and the length, adding about 1.5 centimeters extra on both sides.  Make sure the folded part is not cut(and keep the buttons on the cuff).
4. Cut the fabric following the trace to make smaller sleeves.  
5. Cut the extra fabric off the sides of the body.  You will have to cut the arm-hole smaller too.
6. Sew the smaller sleeves back on. 
7. Using the extra fabric you cut off, cut off an oval shape similar to above.
8. Fold the edges twice and sew all the way around on all sides.
9. Ruffle the shorter curved side and sew it onto the top of the shoulder seam.
10. Using the extra fabric, make a waist-tie to use as a belt for the dress.  For a tutorial, click here.
Estimated time: 45 min.-1 hr.
Budget: just the cost of the dress(mine was $10!)
Skill level: a very confident beginner

4

TAGGED: DIY, refashion 22 Comments

DIY: thrift dress to origami peplum dress

November 19, 2012~ DIY DREAM HOUSE

I was a part of the Refashionista series with I am momma, hear me roar blog(check it out here), and this is the project I submitted.  I went to the thrift store twice and went to a bunch of stores, hoping to find something I can refashion but had no luck!  Discouraged, I went through my “I need to work on this…some day” file, and decided to go along with this dress I picked up this past Spring.  
I purchased this dress at a thrift store for $4.  At first glance I cringed a bit, but saw the potential with the beautiful neon green/yellow color and the polka dot fabric, so I brought it home with a goal to make it not cringe-worthy.


INSTRUCTIONS:
*not pictured, but cut the bottom length of the dress as well and hem the bottom.
and you’re done!
AFTER:
dress: thrift(DIY’ed) | colorblock t-strap heels: oasap 
Estimated time: 2.5 hours
Budget: $4
Skill level: intermediate to advanced

The peplum design was inspired by this skirt. 
I did another thrift dress to a peplum dress here.  
27

TAGGED: DIY, DIY tailoring, refashion 43 Comments

cutmypic
Hello! My name is Sarah and I am so happy to have you here! Here you'll find DIY sewing, DIY home building & decor, honest and vulnerable posts of motherhood and snippets of my family. We are building our dream house and will update you regularly on our whole process from start to finish and I am also starting a mother-daughter sewing series. So I hope you stay awhile!

BLOG ARCHIVES

SEARCH

JOIN THE LIST

- THEME BY ECLAIR DESIGNS - Web Hosting By RFE Hosting -