• ABOUT
  • COLLABORATE
  • CONTACT

Life is Beautiful

Motherhood, Sewing, Family

  • SEW
  • HOME
  • PARTY
  • TRAVEL
  • SHARING MY HEART
  • SHOP

7 Tips to Raising a Non-picky Eater

October 28, 2015~ EAT


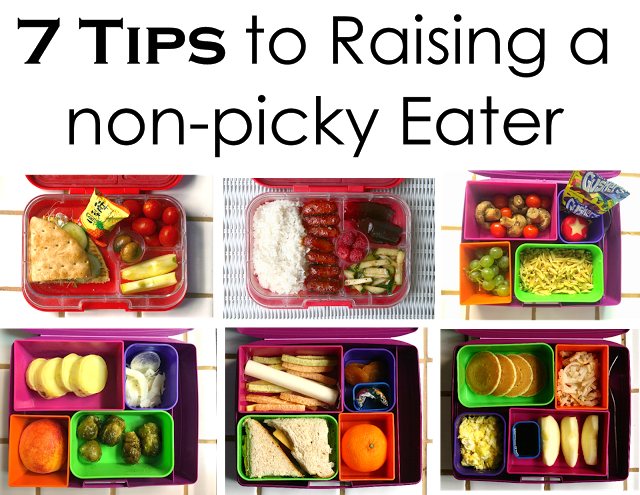
Whenever I post these bento lunches or dinners I cook got my family, I get a lot of comments from people asking, “Your kids really eat this? How did you raise such non-picky eaters?” I didn’t realize they were non-picky eaters until these comments!
 
All of my kids are good eaters who will at least try a bite of something new, and I guess I’ve been taking it for granted?! So I’m sharing with you the rules or things I’ve implemented in my family that might have helped my kids be good eaters.


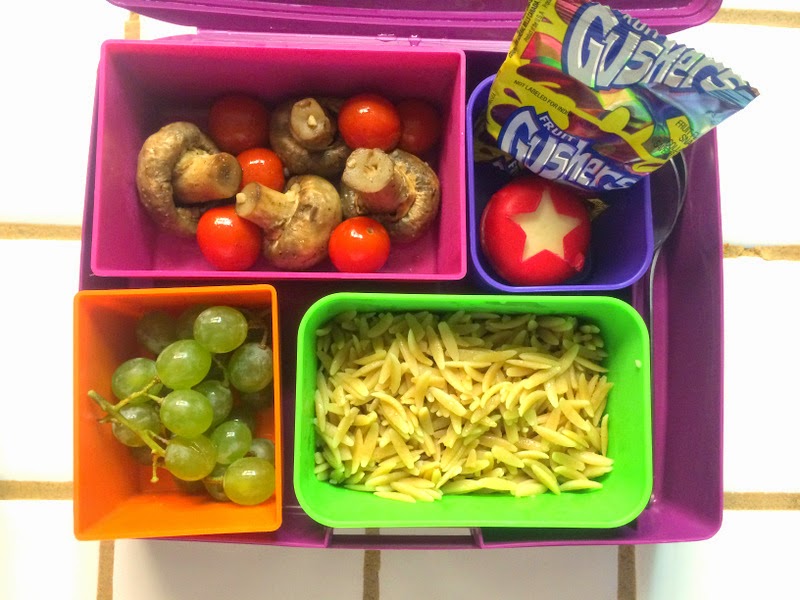
Sautéed mushrooms & cherry tomatoes in olive oil
Sea salt & garlic powder
Grapes picked fresh from our backyard the morning of
Butter, garlic & olive oil orzo pasta
Babybel cheese
Gushers


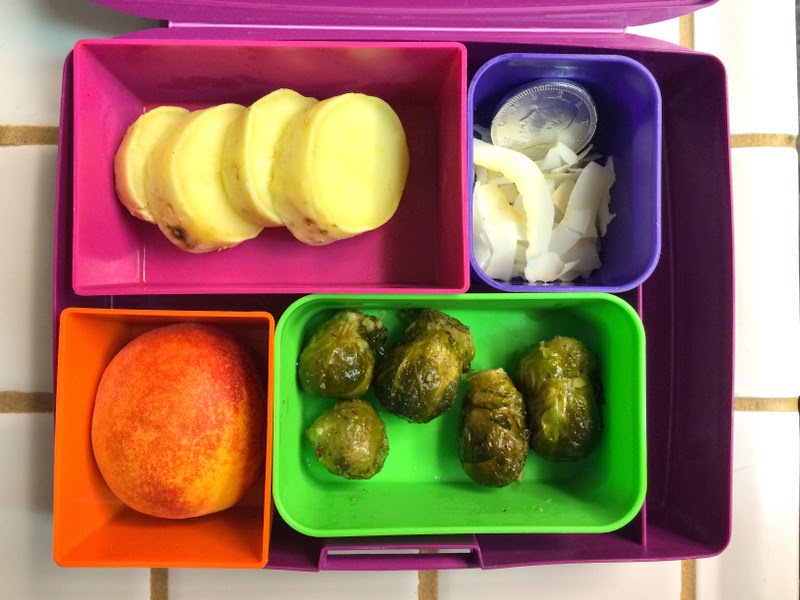
Steamed sweet potatoes
Roasted Brussels sprouts
1/2 a peach
Coconut chips
A chocolate coin


How to Raise a Non-picky Eater

  • We have a “3 thank-you bites” rule. Unless they find it too spicy or were allergic to it or some legit excuse like they just don’t want to eat a live, squirmy octopus, they need to take 3 thank-you bites as an appreciation to the person who cooked it, even if they don’t like it.


  • I am not a fan of kids menus at restaurants. It actually bothers me that they’re almost always the exact same menus such as chicken nuggets, chicken fingers, macaroni & cheese, or pizza! Not to mention they’re about $2-3 cheaper than an adult menu with way less of a portion and not even good food, so I usually have my kids share two adult meals between the 3 of them, or just have each of them order an adult menu and then take the rest home to eat as leftovers. “Why go out to eat if you’re going to get the same foods all the time at every restaurant?”, you can hear me saying once in awhile. That’s not to say they’ve never gotten a macaroni & cheese kids meal, I let them get it once in a blue moon but most of the time I have them order from the adult menu and they want to eat the same foods I am eating anyway!


  • I ate whatever I wanted while pregnant and while I was nursing. Except for monitoring the intake of seafood or a ton of junk food while I was expecting, since some seafood contain high levels of mercury that’s found to be harmful for your baby, and obviously, the less nutritious junk food isn’t good for the baby. I don’t drink alcohol, soda or smoke or eat raw meat, so those weren’t a problem for me to begin with. My personal theory is that when I’m nursing, different foods that I eat produce different tasting milk, thus introducing to the baby different flavors. And my babies weren’t colicky or gave me a reason to seriously worry about what not to eat, so I guess I was lucky.


  • I listened to my instincts when feeding my baby. Instead of reading an article on how you shouldn’t feed egg whites, peanut butter, fish, berries, or wheat and adhering to it without question, I trusted my intuition and if it felt okay, I ate it or fed it to the baby. Keep in mind- I solely breastfed my babies until they were at least 9 months old, some I went as long as 18 months. I didn’t feed my baby popcorn or grapes or things that they can choke easily, but fed them peanut butter, fish, egg whites, berries and wheat after they turned about 1.


  • I introduced them to a lot of variety of foods from different cultures after they initially started with rice cereal and poi(Hawaiian food that my husband said was one of the best things babies can eat), and baby foods of pureed fruits and vegetables. This is when they are curious, excited and the most open-minded about trying different kinds of foods! So take advantage of that trust and open-mindedness to have them try a variety!


  • “You don’t know if you’ll like it until you try it.” is a phrase I said to my kids until they now say it themselves while trying a new vegetable or something that doesn’t look very appealing because that’s of course true, how are you going to know you don’t like it if you haven’t even tried it? Unless it’s something way off your comfort zone like the live octopus I mentioned(Koreans love that stuff!), then you don’t have to try it. 
 
  • If you don’t like dinner, that’s too bad. If you don’t like the food I made for you, then you don’t get another option. If you found it too spicy, or the food is causing discomfort, then I’ll make something else for you, but those are the exceptions. My kids are not allergic to anything that we are aware of, so that’s not an issue for us either. You eat what me and dad eat and make for you, I am not going to make another meal for you because you’d rather eat macaroni & cheese(which I’ve only made for them once in their lifetime, my girls recently told me disapprovingly).


  • I continue to cook many different types of foods from different countries for dinner. My kids love oxtail soup & kimchi from Korea, fish balls & black bean paste from China, tamarind sauce from Thai, duck, raw fish, squid, octopus, oysters, mussels, to name a few. Introducing them to many different types of foods helps them to be open minded and adventurous with their food. 
 
 
I believe having these guidelines and rules have helped my kids to be non-picky eaters and by eating a variety of foods that each offer different nutrients and benefits, they are able to live a healthy life. 

How do you provide a healthy lifestyle for your family?


0

TAGGED: korean recipe, recipes 7 Comments

5 Delicious Make-Ahead Breakfast Ideas

September 16, 2015~ EAT

Do any of you mothers struggle in the morning to getting the kids ready, fed, and out the door on time? I feel we are rushed every morning to get them in the car and I am so tired in the morning. I’ve been wanting to make healthy breakfasts ahead of time and I am sharing with you 5 delicious breakfast recipes that you can make ahead of time so that your mornings won’t be so rushed!
As a part of the National Milk Life Campaign’s Back-to-School program, I had a chance to learn about the benefits of milk that I didn’t know before. I agreed to be a part of this campaign while letting them know that I didn’t believe cow milk is the healthiest milk option for my children and I preferred serving them almond milk or rice milk. I was actually surprised that milk isn’t as bad as I thought it was! I’ll talk bout that after these mouth-watering recipes!
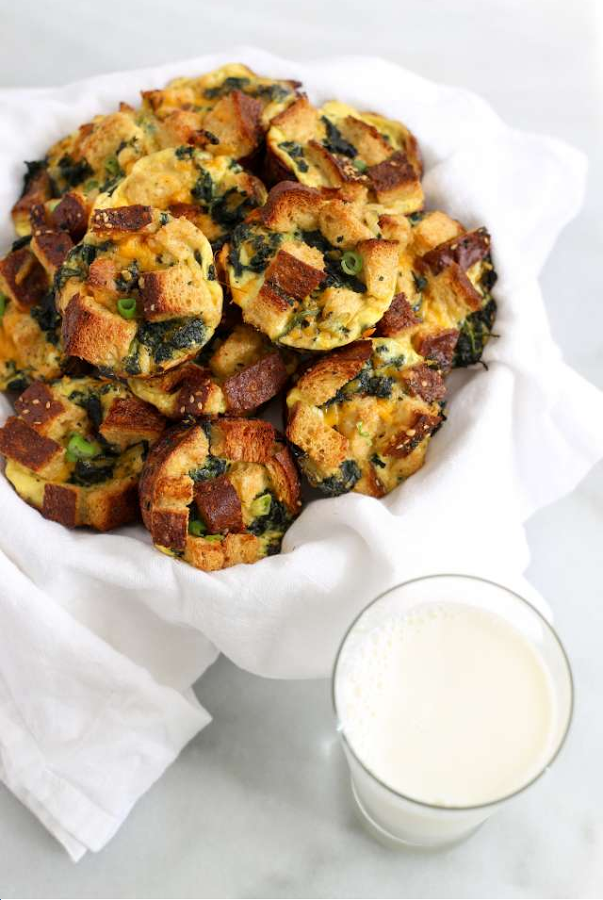
1. Grab-and-Go Mini Breakfast Casseroles Recipe
Grab-and-Go Mini Breakfast Casseroles Recipe
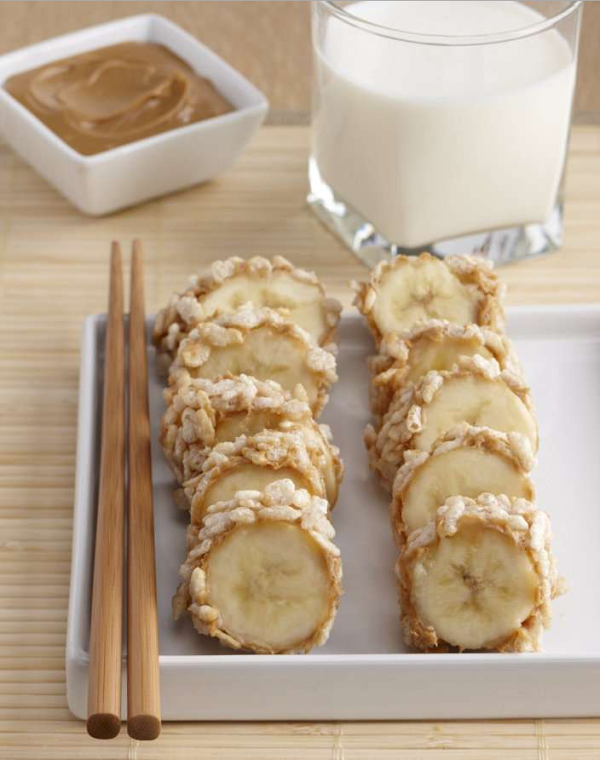
2. Peanut Butter and Banana Breakfast Sushi Recipe
Peanut Butter and Banana Breakfast Sushi Recipe
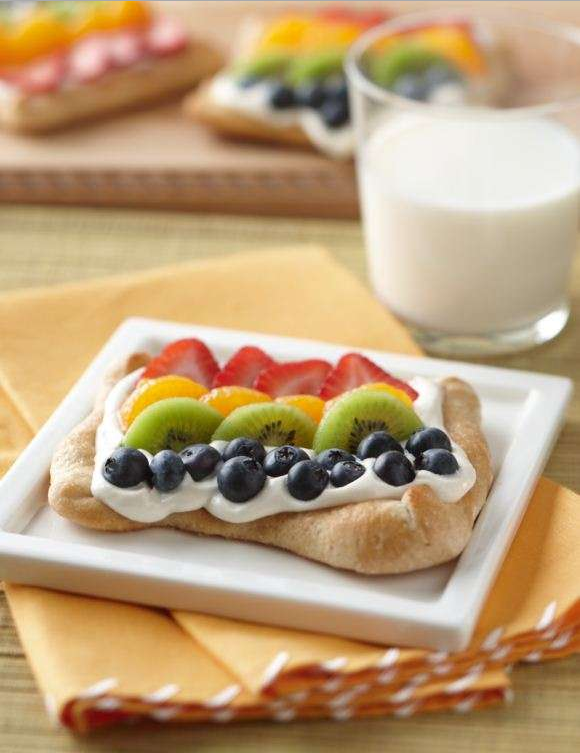
3. Monster Breakfast Pizza

Monster Breakfast Pizza
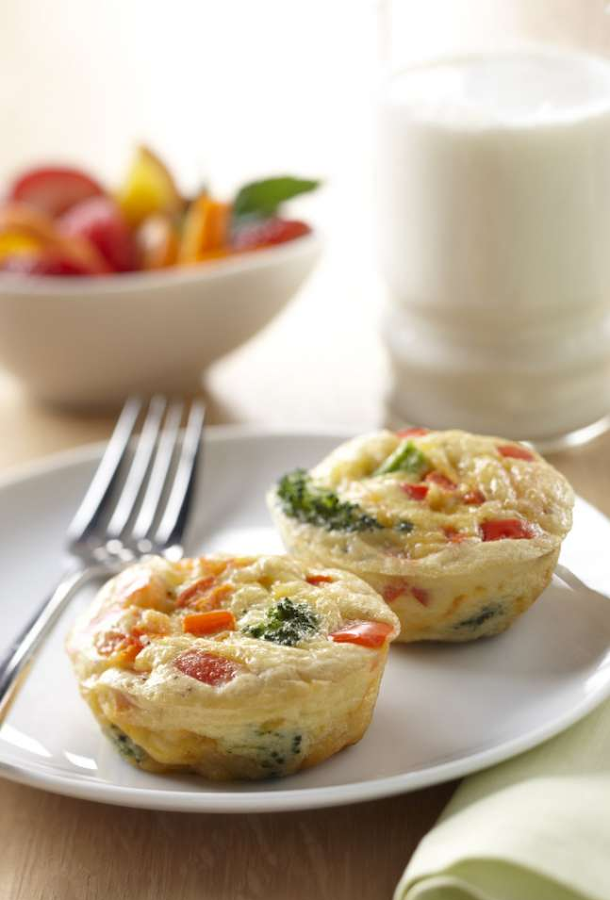
4. Broccoli and Cheese Frittatas

Broccoli and Cheese Frittatas
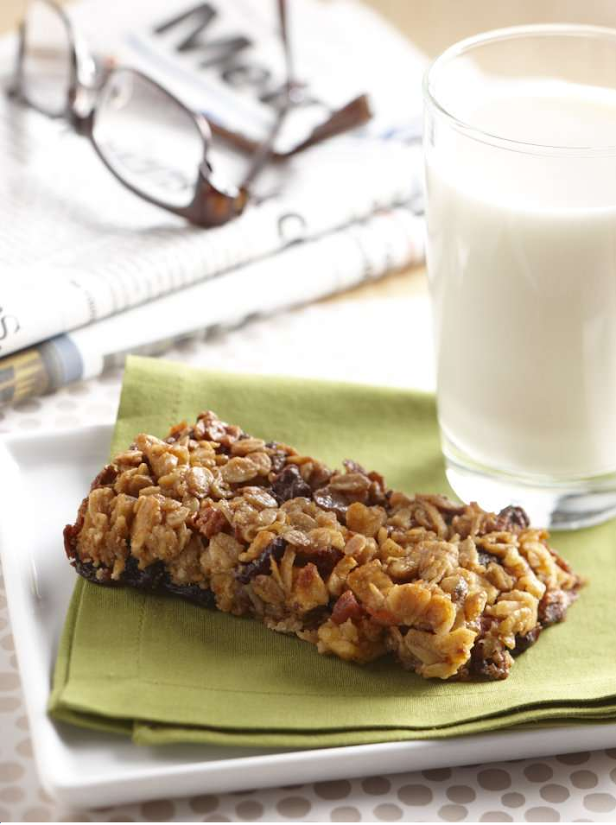
5. Breakfast Bars

Breakfast Bars

I had a chance to listen to a Registered Dietitian, Holley Grainger about the benefits of milk. Here are some facts I’ve learned that I thought was interesting.

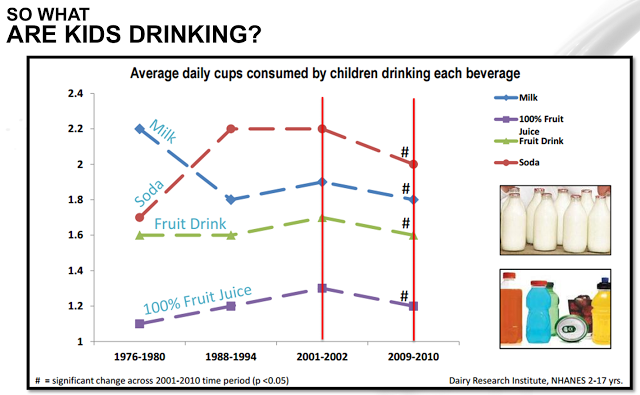
1. Kids are drinking way too much soda.

I knew kids love to drink soda, but look at that huge jump on soda! I found this surprising since I hardly let my kids drink soda and was upset when my two girls were 2 and 3 years old and have never drank a sip of soda in their life, went to a 3 year old’s birthday party where the only drink option they had was Sprite! They even had Sprite ice-cubes they put in the soda and called it “fancy juice” and served it to every guest. I didn’t want to be difficult or cause trouble so I let the girls drink it and they both said, “Ooh, mommy, what is this spicy juice?” Haha. But I was not happy they didn’t even offer another kind of drink, maybe I am not normal? But I wouldn’t serve soda at a 3 year old’s birthday party, am I weird or too over-protective of their health? I wanted to let them live their life as long as possible without ever drinking soda. This graph is interesting since milk is the only drink shown that has been declining.

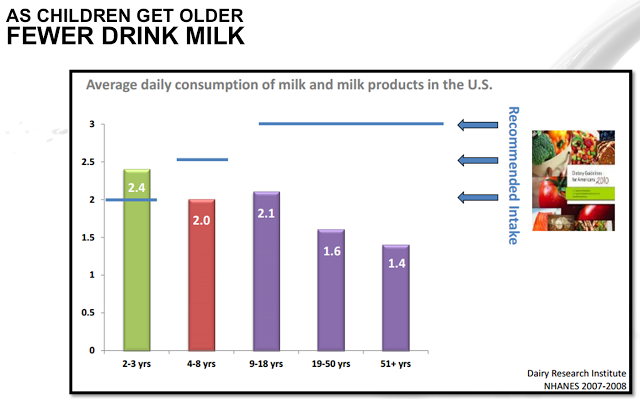
 2. The older we get, the less milk we drink.

This graph is showing us that the recommended intake actually gets higher the older we get but we are consuming less the older we get. Ages 2-3 years is the only age where it’s recommended intake is met.
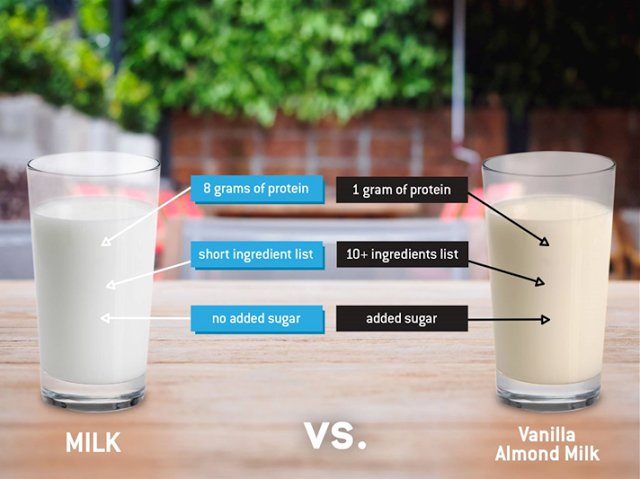
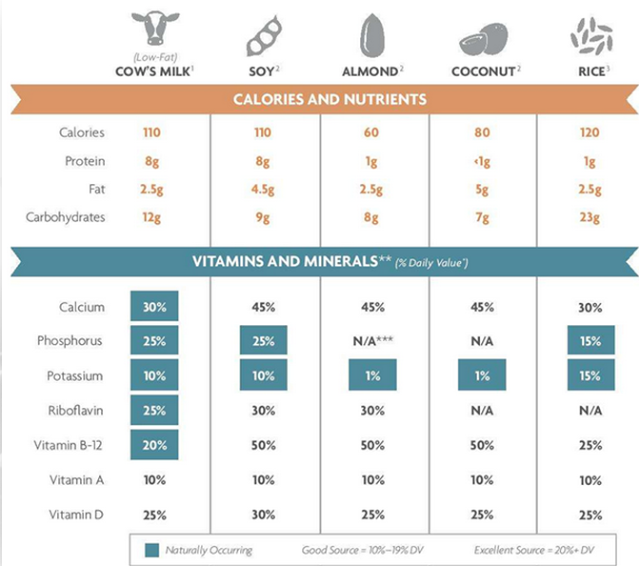
3. Almond milk isn’t as nutritious as I thought it was!

While almond milk is higher in calcium and Vitamin B-12, it has no phosphorus and potassium. I honestly believed almond milk had all the nutrients that a cows milk had plus more. So I found this surprising. We’ve been feeding my son rice milk recently and it’s not as nutritious as I thought it was either.
Another thing I was reminded of is that getting enough calcium from infant to age 20 helps you reach your tallest height potential. I knew milk helps with growth and bone health but reading it from an official source makes me wish I drank milk growing up! I never drank milk, my parents are lactose intolerant and milk was never an item we had in our refrigerator! Ahhh, maybe I could have been taller and actually played basketball in HS when my PE teacher asked me to try out for the basketball team! Haha. But seriously….

We now have a small giveaway exclusively for my readers where a winner will receive two gift cards worth the amount of a two free month’s supply of milk (valued at $36). All you have to do is comment below with an answer to this question by Sept.23rd:

Which tips about milk surprised you the most? 

Good luck!

Go to MilkTruth.com to learn more about milk.
0

TAGGED: recipes 9 Comments

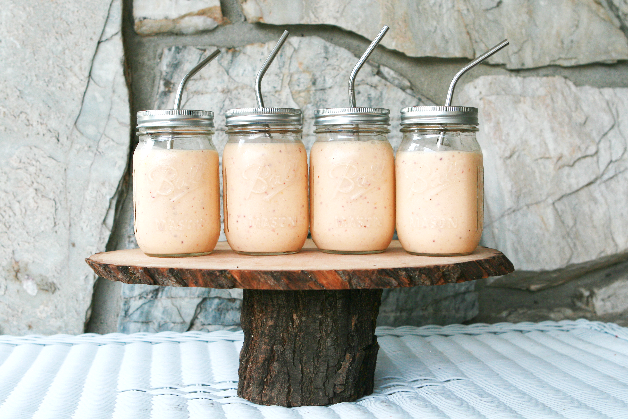
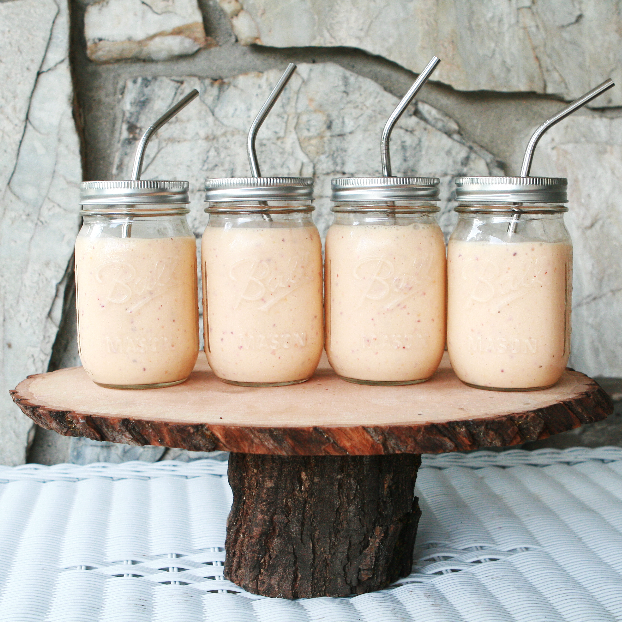
The Best Peach Shake Recipe

September 5, 2015~ EAT


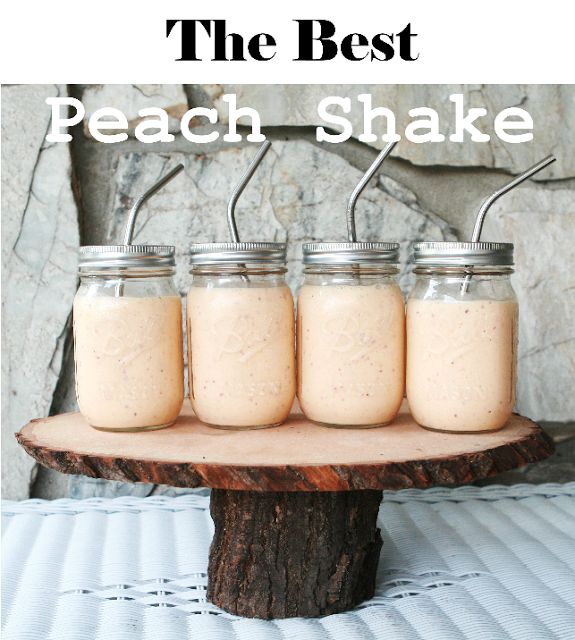
Every year when the peach season comes around, there is one thing we drink a lot at our house; a peace ice-cream shake. It’s so good that it just doesn’t feel right drinking it within my immediate family, so I invite my girlfriends over and we have a peach shake night! We talk about our children, our trials and challenges, and funny moments and the peach shake just makes the moment that much sweeter. Most of the guests always ask for seconds and no matter how many times I’ve had this shake, I never get sick of it!


I have an awesome recipe to share with you today that is the best peach shake you will ever have. It has a touch of tart, sweetness and creaminess that you’re going to love! I got this recipe from Jamie Rasmussen and am so grateful she’s letting me share her recipe with you!


Peach Milkshake recipe
Ingredients
3 peaches, pitted (skinned is optional, I leave mine on)
1/2 cup buttermilk
1/2 tsp almond extract
4 very large scoops of vanilla ice-cream(I use almost half of the half gallon)
*optional: whipped cream

DirectionsPut all the ingredients in the blender and blend. Enjoy the shake!


0

TAGGED: recipes 5 Comments

Homemade Boba Recipe

June 16, 2015~ EAT

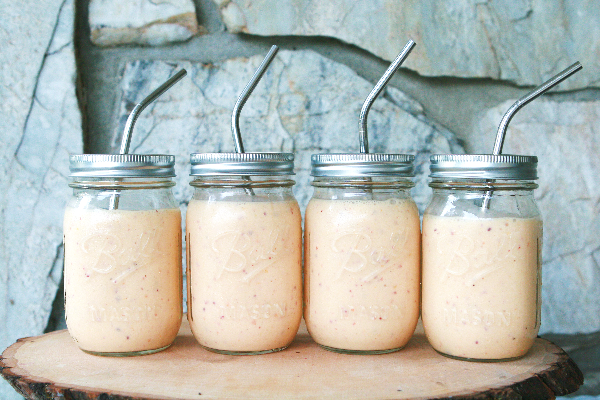
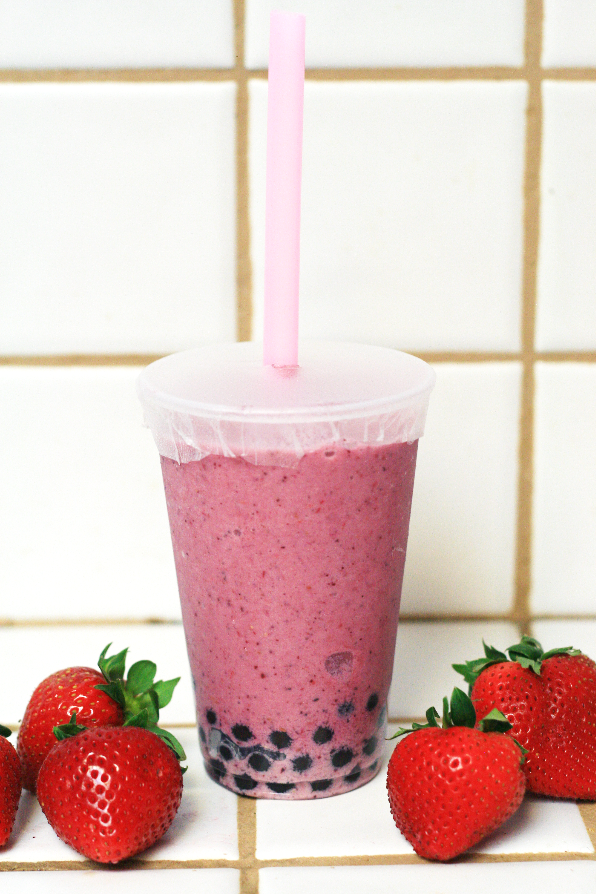
I have some delicious boba drink recipes for you today and am so excited to share it with you! Boba drinks are also known as bubble tea or tapioca drinks, it is originated from Taiwan in the 1980’s. The real original boba drink consists of Taiwanese black tea, small tapioca pearls, condensed milk, and syrup or honey. Many variations have been created since then such as fruit milk teas, which is basically a fruit smoothie but with tapioca balls added in. This is the drink I order when I go to boba shops or such as the one you see in the pictures below, because being LDS, I choose not to drink tea such as black tea or green tea. But I have added in some original boba drinks with tea in it for those of you that want to try it out!


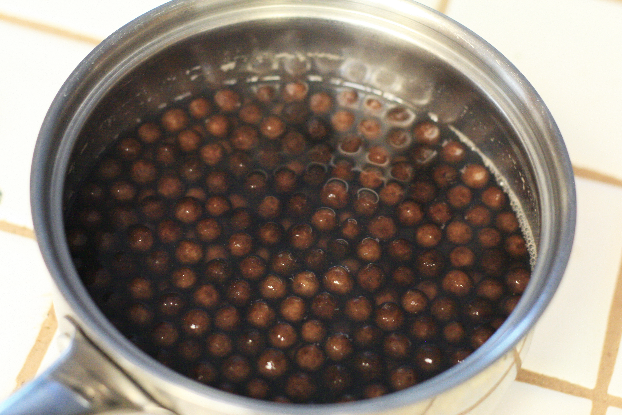
Cook the tapioca balls


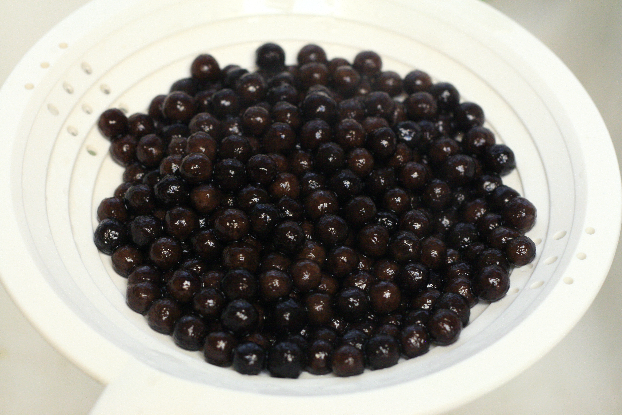
Drain the tapioca balls
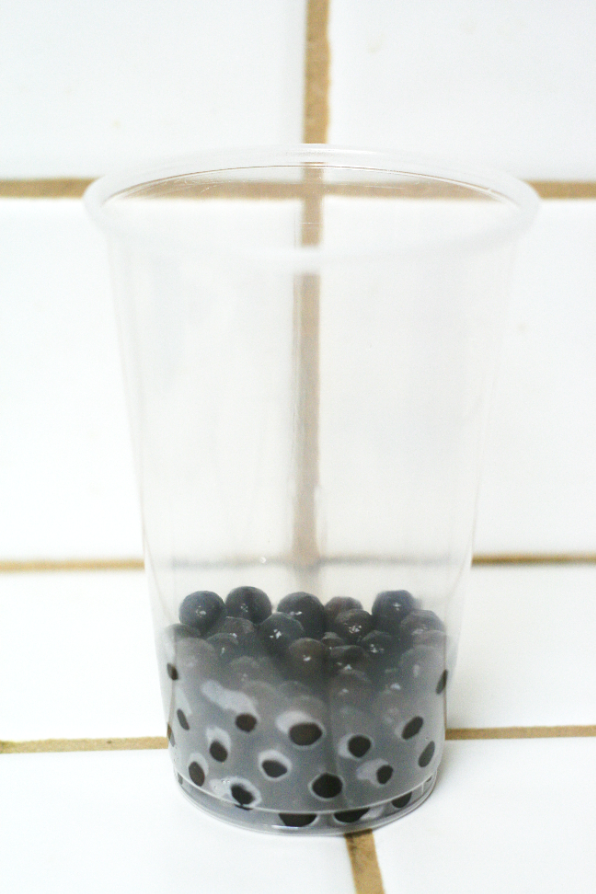
Add to your drink cup
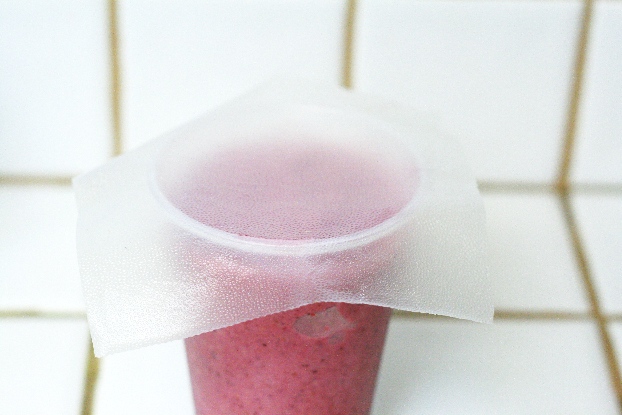
Cut a square size Glad Press’n Seal
Seal it and poke the straw in. Now you have your boba!


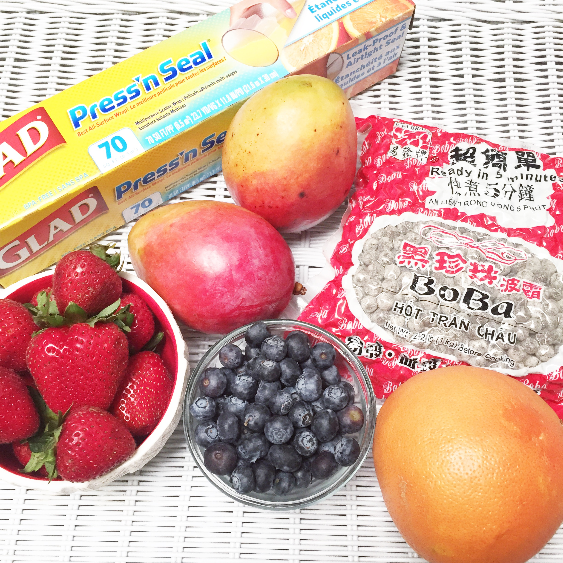
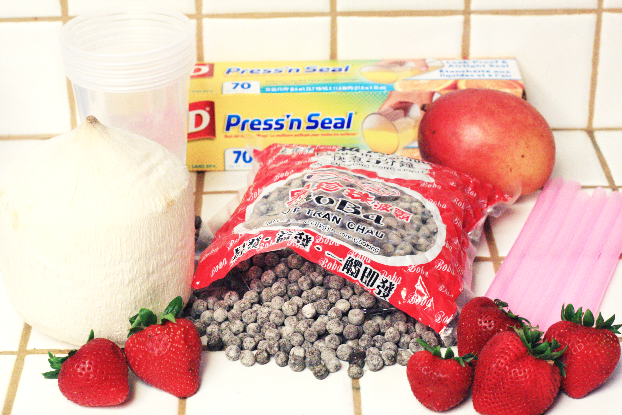
What you’ll need:

  • Glad Press’n Seal
  • Tapioca balls
  • Big straws(to fit the tapioca balls through)
  • Smoothie or milk tea recipe(shared below)
  • (*optional) Bubble tea flavor powder


I got the Glad Press’n Seal from Walmart, the tapioca balls from a local Asian grocery store, I ordered the straws on Amazon. You can purchase the Tapioca pearls, boba straws, and bubble tea flavor powder all on Amazon. There are many different kinds of tapioca balls of colors and sizes, my favorite is lychee jelly! Okay, that’s not considered to be tapioca balls, but it’s an option many boba shops have and I always order it if they have it.
In order to make boba, you need to first know how to cook the tapioca balls:
How To Cook Tapioca Pearls:

Ingredients:

6 to 8 cups water
1 cup tapioca pearls
Preparation:
1. In a large pot (Make sure the pot is big enough so boiling tapioca water will not spill over) over high heat, add water and bring to a boil.
2. Slowly stir in the tapioca pearls so that they do not stick together (after 1 minute, the tapioca pearls should float). Reduce heat to medium and let boil, covered, for approximately 15 minutes; turn the heat off and let the tapioca pearls sit, covered, for an additional 15 minutes. After 15 minutes, remove from heat, rinse the tapioca pearls in cold water, and drain.
NOTE: The cooking time above is a general guideline. If you shorten the cooking time, you will get chewier tapioca balls. Cook longer and you will get less elastic tapioca balls.
Add the cooked tapioca pearl to your favorite Bubble Tea recipe.
 
This recipe below for sugar syrup is totally optional, you can just use sugar or honey or xagave but it tastes better to add the sugar syrup in my opinion than just plain white or brown sugar. But it’ll taste good either way!
How to cook Bubble Tea Sugar Syrup:
Ingredients:
1 cup white sugar
1 cup brown sugar
2 cups water
Approximately 32-35 sixteen ounce servings
Preparation:
  1. Mix sugar and water in a large pot.
  2. Cook at medium to high heat.
  3. Once the mixture boils remove from stove immediately.
  4. Let cool and serve.
    *Refrigerate any excess
Then use any of these recipes below to make your boba! Note that most boba shops don’t use any fresh fruit and just use bubble tea flavor powder, milk and ice but there are some that uses a blend of fresh fruit and bubble tea flavor powder. I prefer fresh fruit added in and sometimes you have to ask them to add it in.


Boba Fruit Drink:

The best tasting fresh fruit drinks include strawberry, watermelon, mango, red bean (adzuki), papaya, and my favorite, honeydew melon.

Ingredients:
1 cup fresh fruit
1/2 cup milk
1 Scoop bubble tea sugar syrup(recipe above)
1 cup ice
2 fl. oz. cup of cooked Bubble Tea Tapioca Pearls

Preparation:

  1. Put all ingredients except bubble tea tapioca pearls into a blender and blend well.
  2. Make sure that the fruits are grinded into the milkshake.
  3. Add bubble tea tapioca pearls to a cup, and pour your drink over.
  4. Put in your big fat bubble tea straw and enjoy.


Bubble Tea Powder Fresh Fruit Drink:

Ingredients:
1 Scoop Bubble Tea Flavor Powder
1 Scoop non-dairy powder creamer
1 Scoop bubble tea sugar syrup(recipe above)
1/2 cup fresh fruit
1/4 cup crushed ice
2 fl. oz. of cooked Bubble Tea Tapioca Pearls

Preparation:

  1. Put bubble tea flavor powder, creamer sugar syrup and fresh fruit into the blender for 20 seconds or until blended well.
  2. Blend the drink less if you like little pieces of fruit.
  3. Add tapioca pearls to a cup, and pour your drink over.
  4. Put in your big fat bubble tea straw and enjoy.


Pearl Milk Tea

This can be made with black, green, oolong, chai, or jasmine. The most popular are black tea and green jasmine tea.

Ingredients:
3/4 cup tea
1 Scoop non-dairy powder creamer
1 Scoop bubble tea sugar syrup(recipe above)
1 cup ice
2 fl. oz. of cooked Bubble Tea Tapioca Pearls

Preparation:

    1. Put hot tea, creamer and bubble tea sugar syrup in shaker and mix well.
    2. Add in ice, cover shaker and shake for a nice froth.
    3. Add tapioca pearls to a cup, and pour your drink over.
    4. Put in your big fat bubble tea straw and enjoy.

*A much easier option is to use our Bubble Tea Milk Tea Powder.


0

TAGGED: recipes 7 Comments

After School Snack Party with Hormel Peperoni

March 25, 2015~ PARTY

My kids love and devour Hormel Pepperonis so I thought why thought throw a party out of it? This party has been compensated by Collective Bias, Inc. and its advertiser. All opinions are mine alone. As always, thank you for supporting this blog! #PepItUp #CollectiveBias
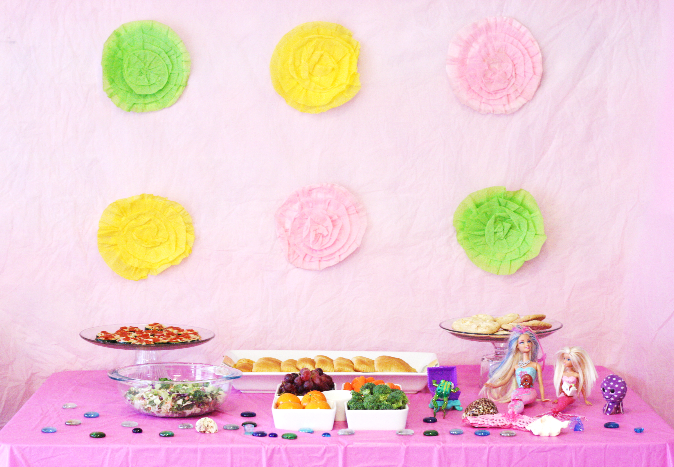
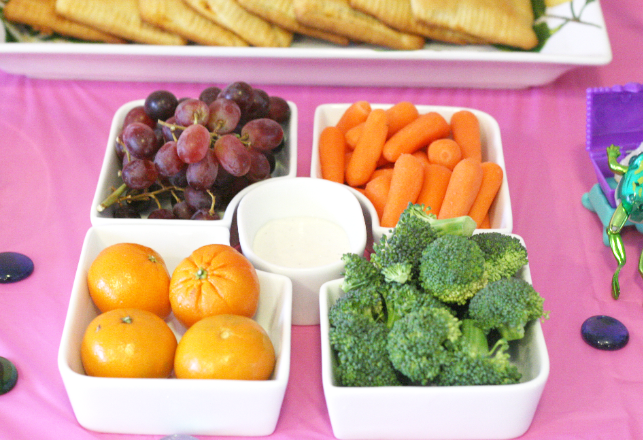
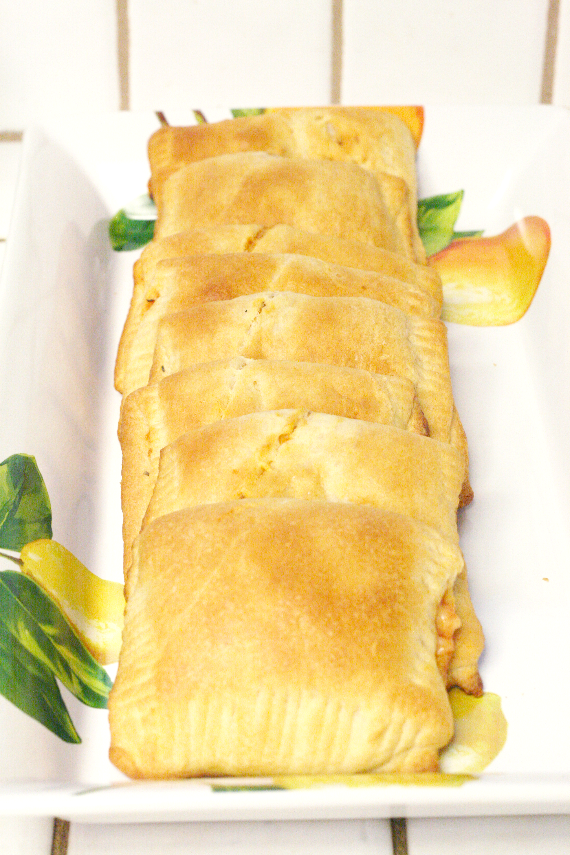
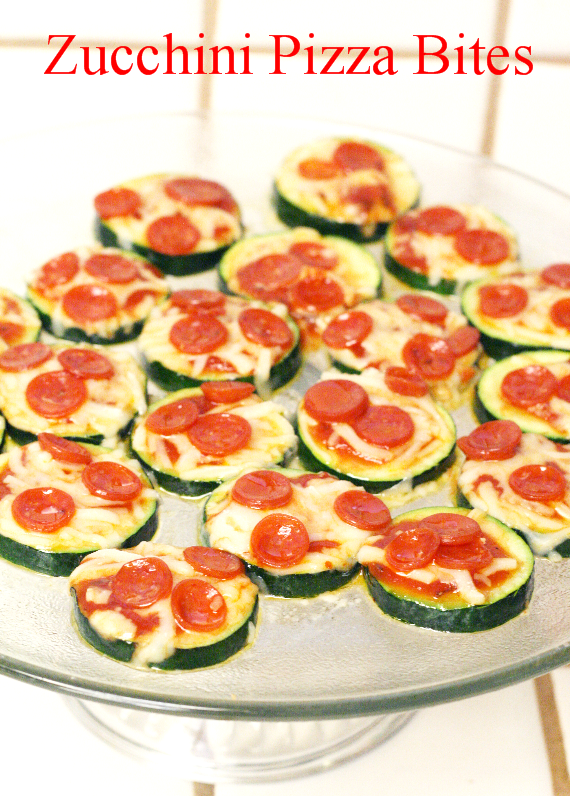
I don’t know about you, but by the time my daughter comes home from school, she is always hungry and asks for a snack.  It’s such a awkward time at 3:30 in the afternoon when you’re just a few hours away from dinner time so you don’t want your child to eat a hefty meal and not be hungry for dinner, but you don’t want to give her something little that won’t satisfy her for a few hours.  So I made a quick and easy pizza pocket and zucchini pizzas and they were so perfect for her and her friends after school!  These two recipes were perfect because not only are they filling but not hefty, but they are super easy and fast and who wants to cook a meal before making the real meal which is dinner?  Not me!  
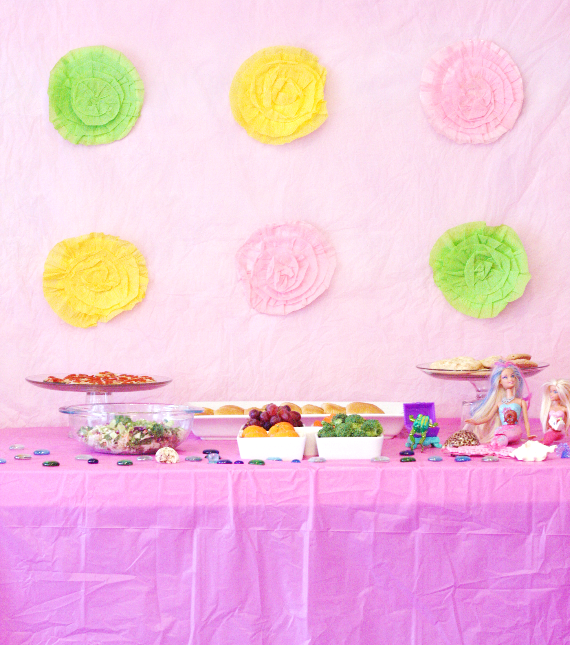
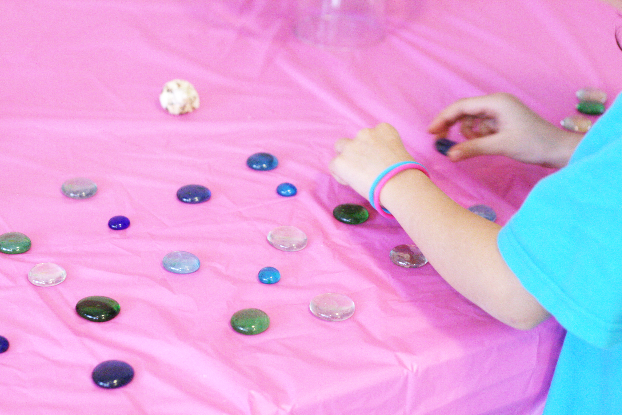
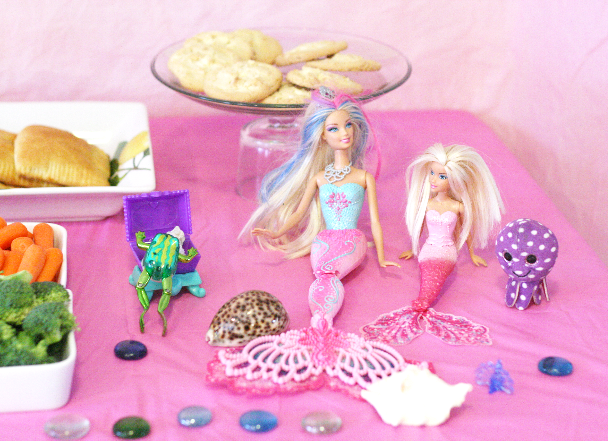
My daughter was so excited to help me decorate for the party and came up with the designs herself! She also decorated the table with sea shells and blue and green rocks, treasure chest and her mermaids to give it a “Under the Sea” feel to the party.  I think she did a wonderful job decorating it, don’t you think?  I made the flowers using the crepe paper on a white paper plate.  I glued the first layer of crepe paper and pressed down to the glue as I ruffled the paper, in a round circle until all the white paper area was filled.
Below are the two recipes, enjoy!
Easy Pizza Pockets 

Ingredients:

1
can (8 oz) crescent dinner rolls

1/4
cup pizza sauce

3/4
cup shredded mozzarella cheese

1/2
cup sliced Hormel mini pepperoni 

1
teaspoon grated Parmesan cheese

Instructions:

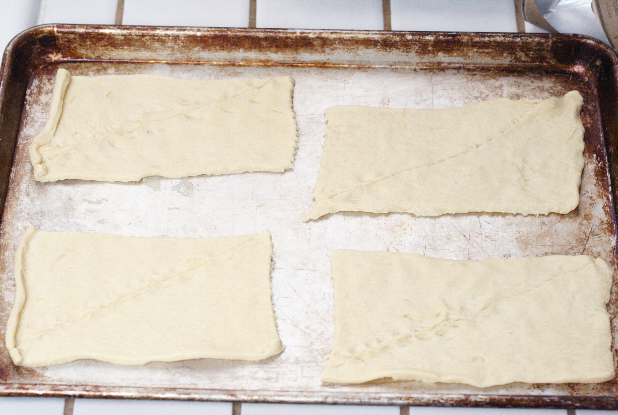
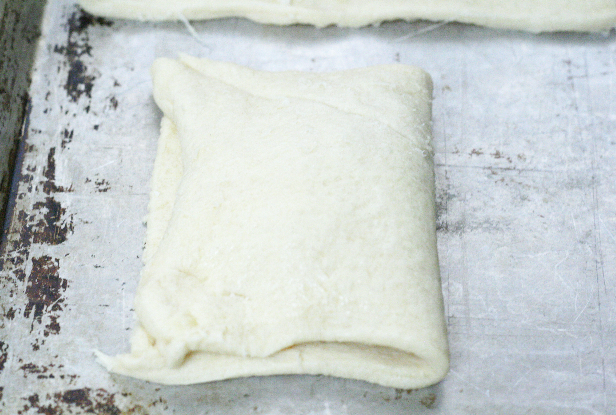
  • 1. Heat oven to 375°F. Unroll dough onto cookie sheet; separate into 4 rectangles (2 triangles each). Press each rectangle to form a 6×4-inch rectangle, firmly pressing perforations to seal.
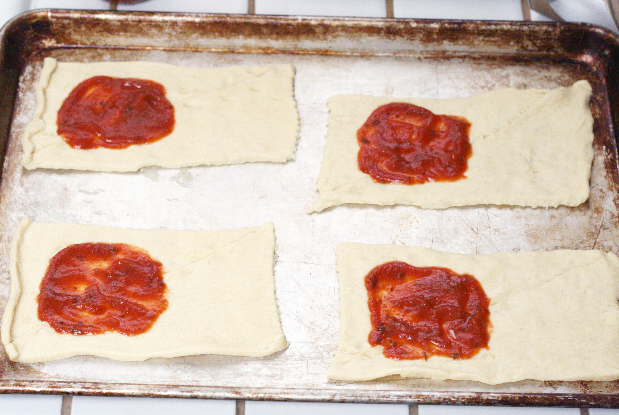
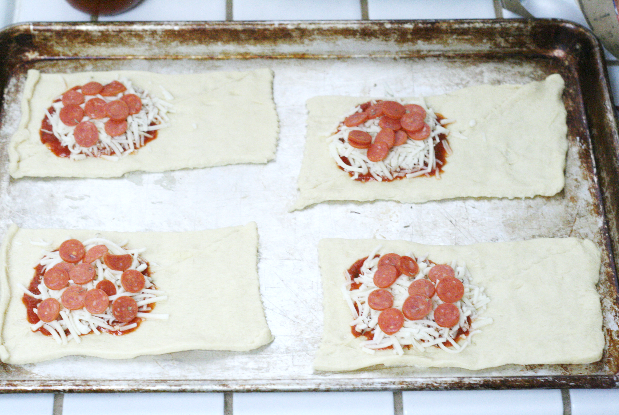
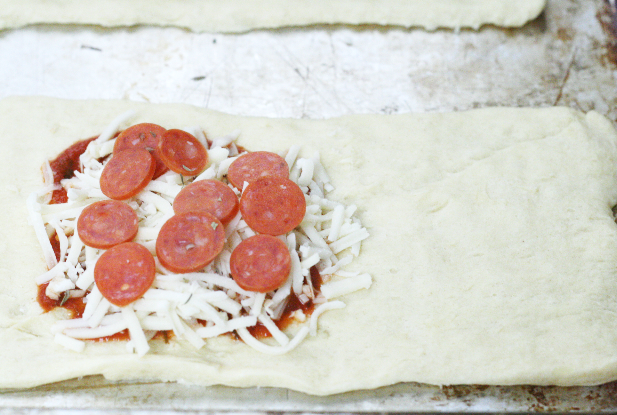
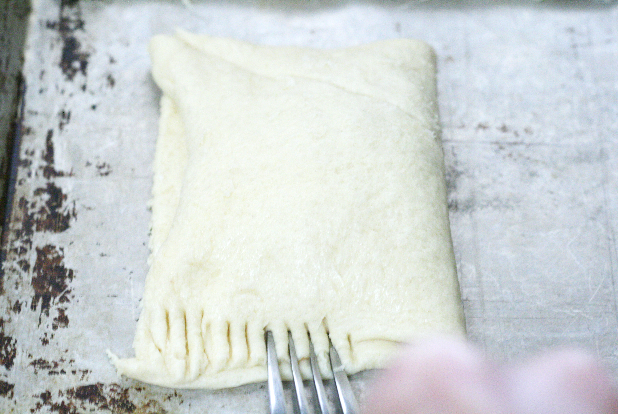
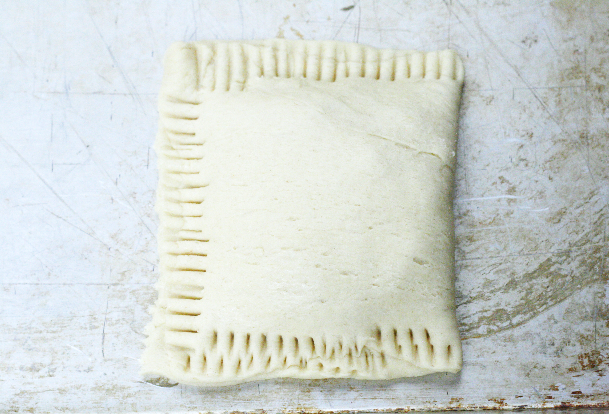
  • 2. Spread 1 tablespoon pizza sauce on half of each rectangle to within 1 inch of edge. Sprinkle each with 3 tablespoons cheese; top with 6 slices pepperoni. Fold dough from the top over filling; firmly press edges with fork to seal. Sprinkle each rectangle with 1/4 teaspoon grated cheese. With fork, prick top of each to allow steam to escape.
  • 3. Bake 13 to 15 minutes or until deep golden brown. Serve warm.


Zucchini Pizza Bites
INGREDIENTS
  • 1 tablespoon olive oil
  • 3 zucchini, cut into 1/4-inch thick rounds
  • Kosher salt and freshy ground black pepper, to taste
  • 1/3 cup marinara sauce
  • 1/2 cup finely grated mozzarella
  • 1/4 cup Hormel pepperoni minis
  • 1 tablespoon Italian seasoning(optional)
INSTRUCTIONS
  • Preheat oven to broil.
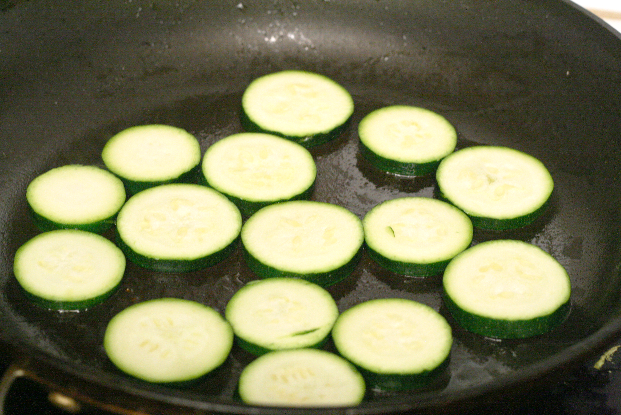
  • Heat olive oil in a large skillet over medium high heat. Working in batches, add zucchini and cook, flipping once, until golden, about 1-2 minutes on each side; season with salt and pepper, to taste.
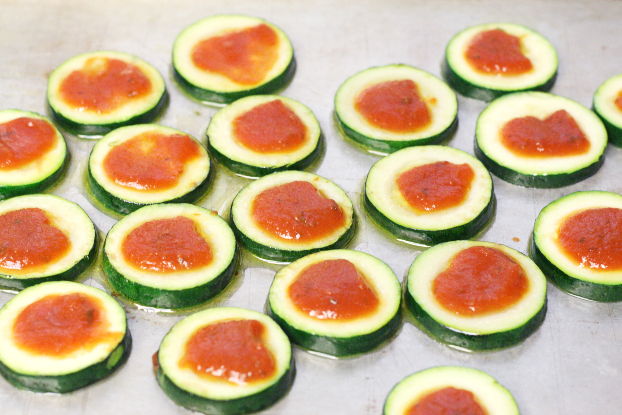
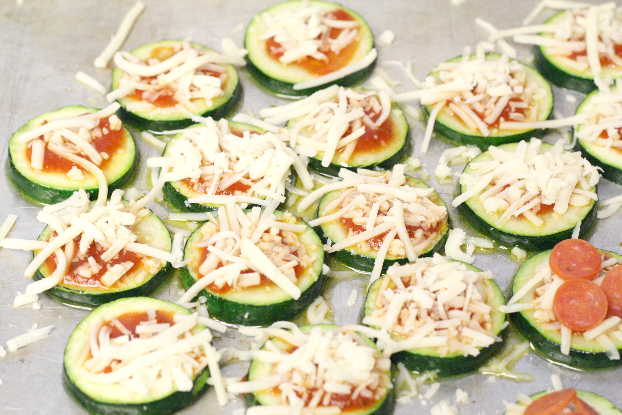
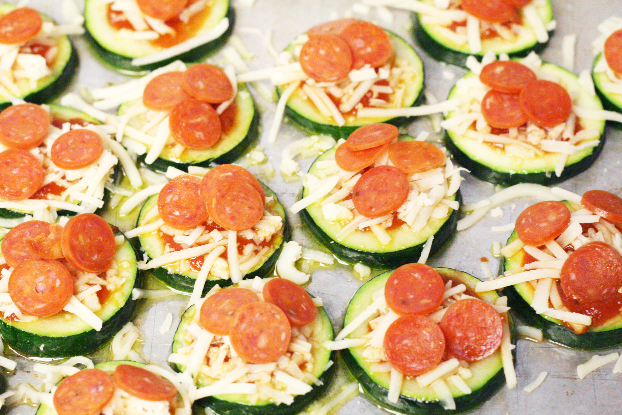
  • Place zucchini rounds onto a large baking sheet. Top each zucchini round with marinara, mozzarella and pepperoni minis.
  • Place into oven and cook until the cheese has melted, about 1-2 minutes.
  • Serve immediately, sprinkled with Italian seasoning, if desired.
Check out other Hormel Peperoni recipes on their Facebook Page.

Do you have a after school go-to snack that you make for your kids?  Please share the recipe with me!
0

TAGGED: recipes 3 Comments

  • 1
  • 2
  • 3
  • …
  • 5
  • Next Page »
cutmypic
Hello! My name is Sarah and I am so happy to have you here! Here you'll find DIY sewing, DIY home building & decor, honest and vulnerable posts of motherhood and snippets of my family. We are building our dream house and will update you regularly on our whole process from start to finish and I am also starting a mother-daughter sewing series. So I hope you stay awhile!

BLOG ARCHIVES

SEARCH

JOIN THE LIST

- THEME BY ECLAIR DESIGNS - Web Hosting By RFE Hosting -