Before:
.JPG)
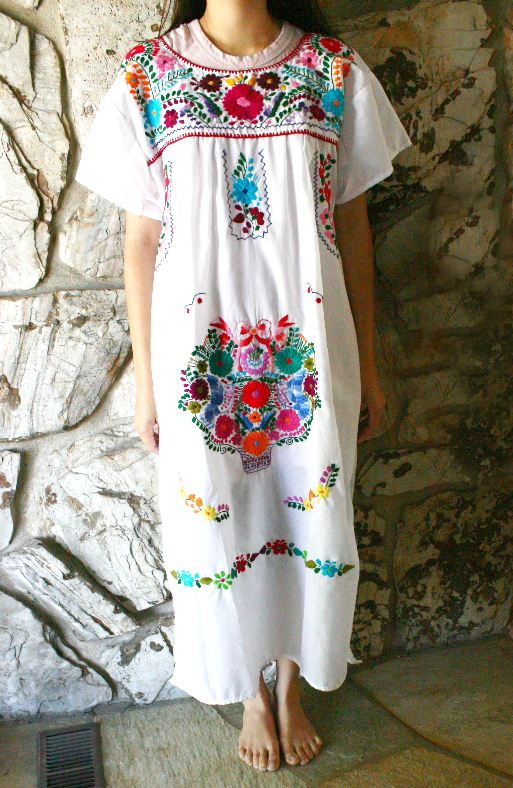
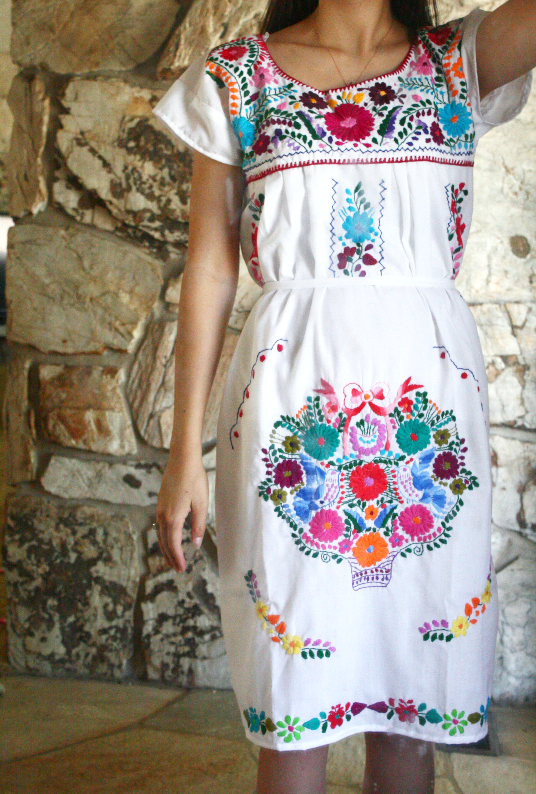
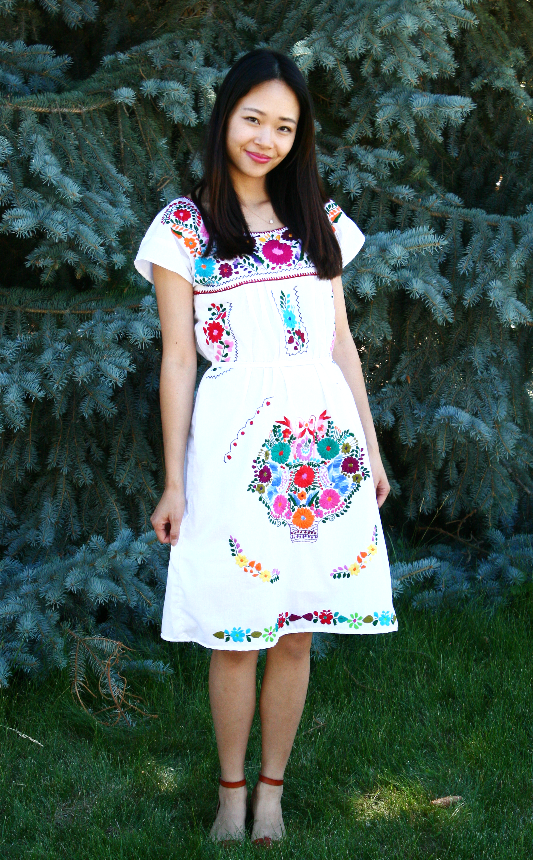
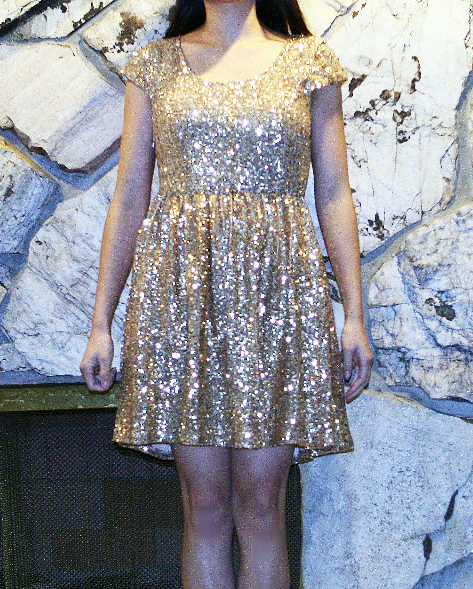
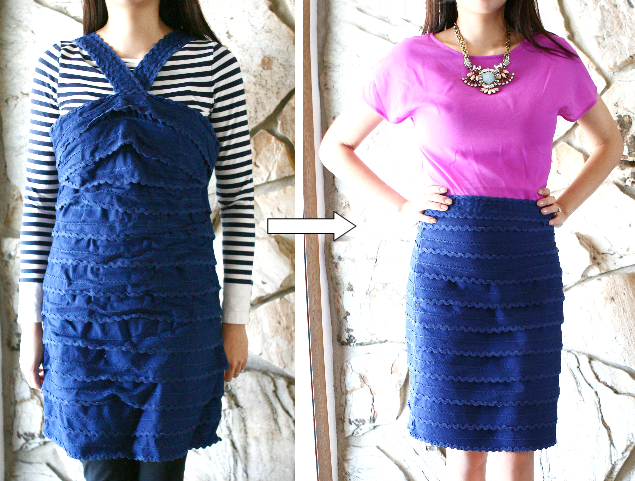
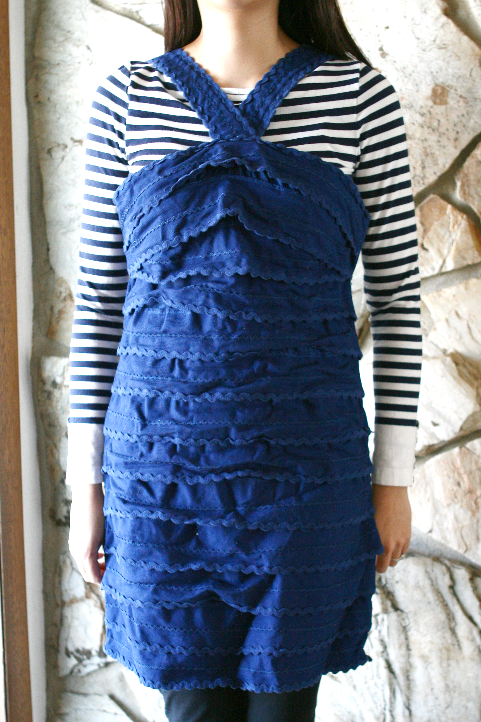
I found this shirt on sale for $10. I bought one for myself in XS and then saw another one in XL and immediately thought it’d make a cute little dress for my girls!
.JPG)
.JPG)
yeah, no, I did not put away those shoes around her to get better pictures. You’re talking to a mother of 3 little kids here, psh. please lower your expectations. 😉
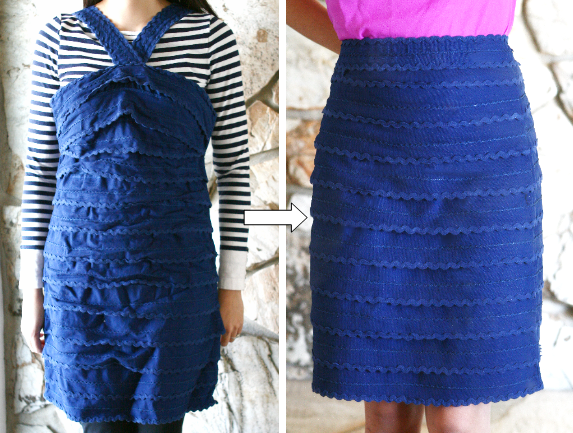
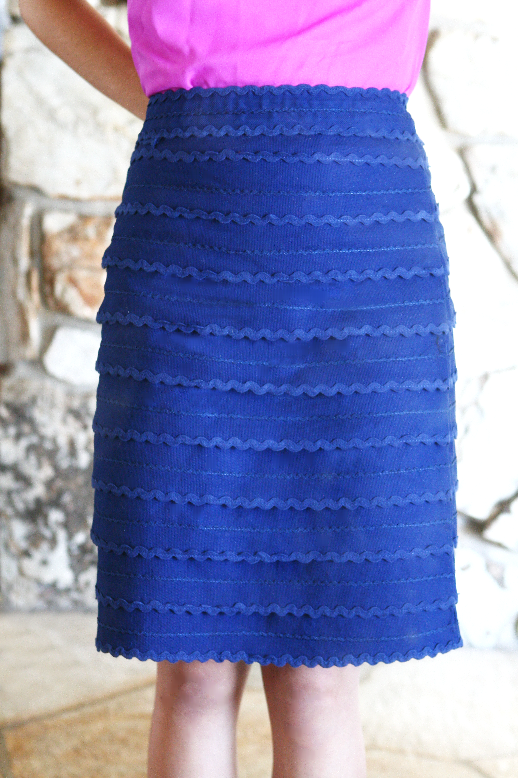
Before/After:
.JPG)
.JPG)
Instructions:
.JPG)
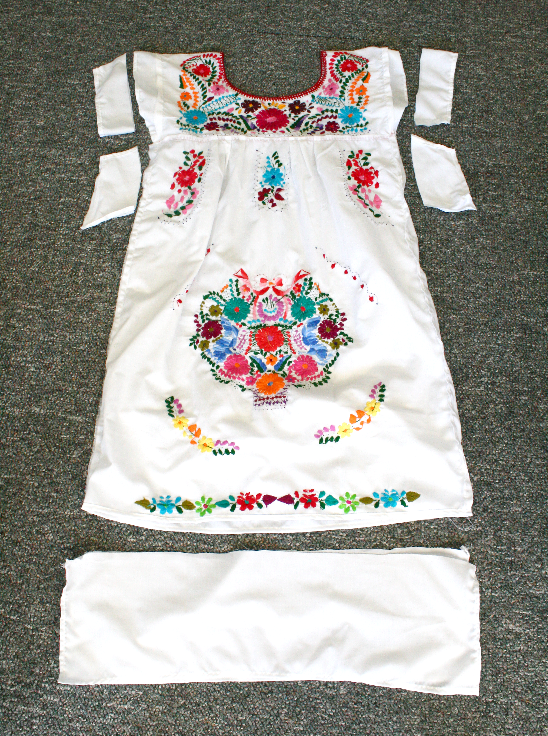
1. Cut off the sleeves of the shirt.
.JPG)
2. Get a little girl’s dress to get the approximate sizing to compare to.
.JPG)
3. Place the sleeve of the girl’s dress on the cut sleeve and roughly trace, matching the width and the length, adding about 1.5 centimeters extra on both sides. Make sure the folded part is not cut(and keep the buttons on the cuff).
.JPG)
4. Cut the fabric following the trace to make smaller sleeves.
.JPG)
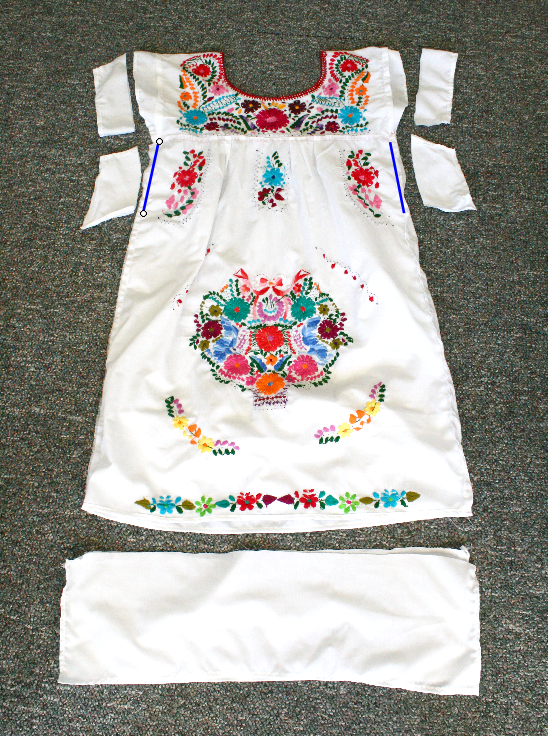
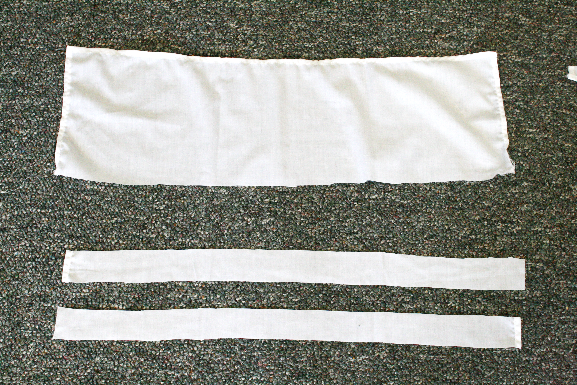
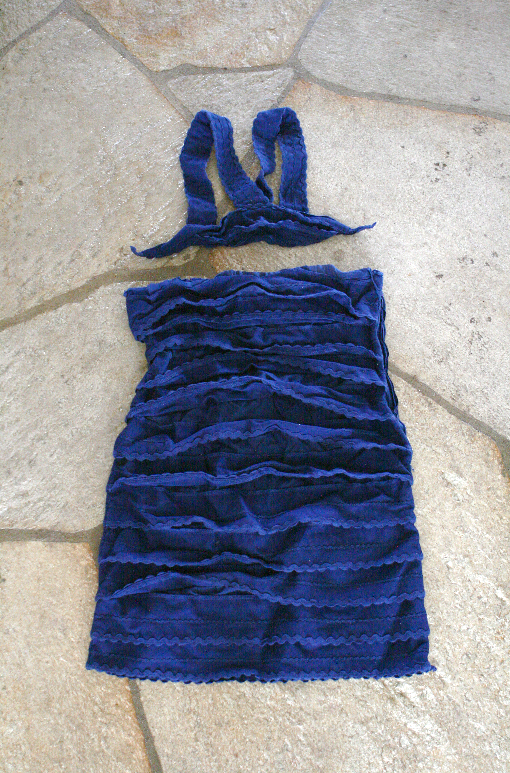
5. Cut the extra fabric off the sides of the body. You will have to cut the arm-hole smaller too.
6. Sew the smaller sleeves back on.
.JPG)
7. Using the extra fabric you cut off, cut off an oval shape similar to above.
.JPG)
8. Fold the edges twice and sew all the way around on all sides.
9. Ruffle the shorter curved side and sew it onto the top of the shoulder seam.
.JPG)
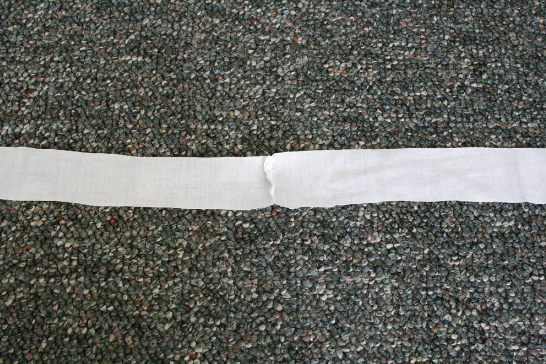
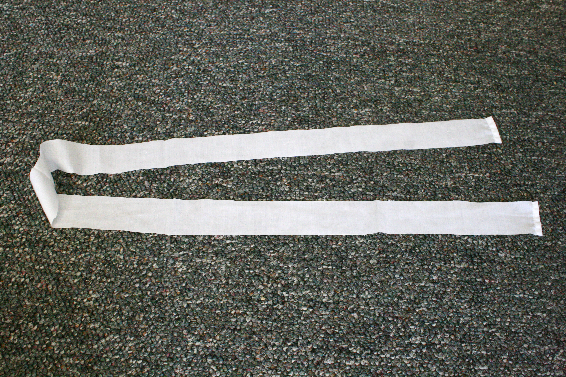
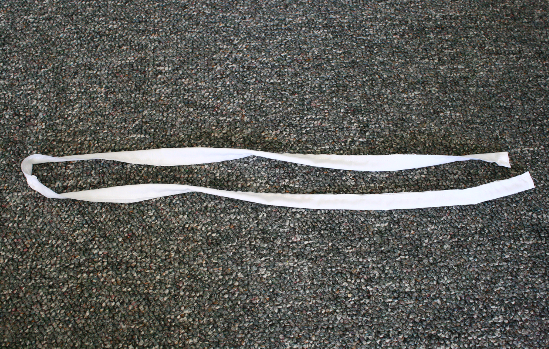
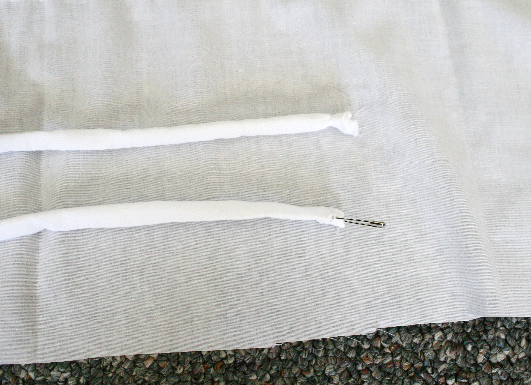
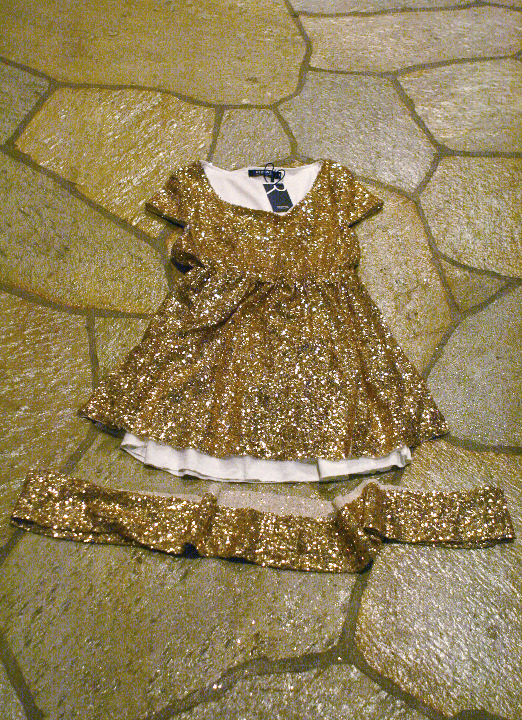
10. Using the extra fabric, make a waist-tie to use as a belt for the dress. For a tutorial, click here.
After:


What you’ll need:
-An oversized shirt
-matching thread
-needle or sewing machine
-scissors
Directions:
1. Cut off the sleeves of the shirt.
2. Get a little girl’s dress to get the approximate sizing to compare to.
3. Place the sleeve of the girl’s dress on the cut sleeve and roughly trace, matching the width and the length, adding about 1.5 centimeters extra on both sides. Make sure the folded part is not cut(and keep the buttons on the cuff).
4. Cut the fabric following the trace to make smaller sleeves.
5. Cut the extra fabric off the sides of the body. You will have to cut the arm-hole smaller too.
6. Sew the smaller sleeves back on.
7. Using the extra fabric you cut off, cut off an oval shape similar to above.
8. Fold the edges twice and sew all the way around on all sides.
9. Ruffle the shorter curved side and sew it onto the top of the shoulder seam.
10. Using the extra fabric, make a waist-tie to use as a belt for the dress. For a tutorial, click here.
Estimated time: 45 min.-1 hr.
Budget: just the cost of the dress(mine was $10!)
Skill level: a very confident beginner