• ABOUT
  • COLLABORATE
  • CONTACT

Life is Beautiful

Motherhood, Sewing, Family

  • SEW
  • HOME
  • PARTY
  • TRAVEL
  • SHARING MY HEART
  • SHOP

sailor inspired dress DIY

June 9, 2011~ SEWING

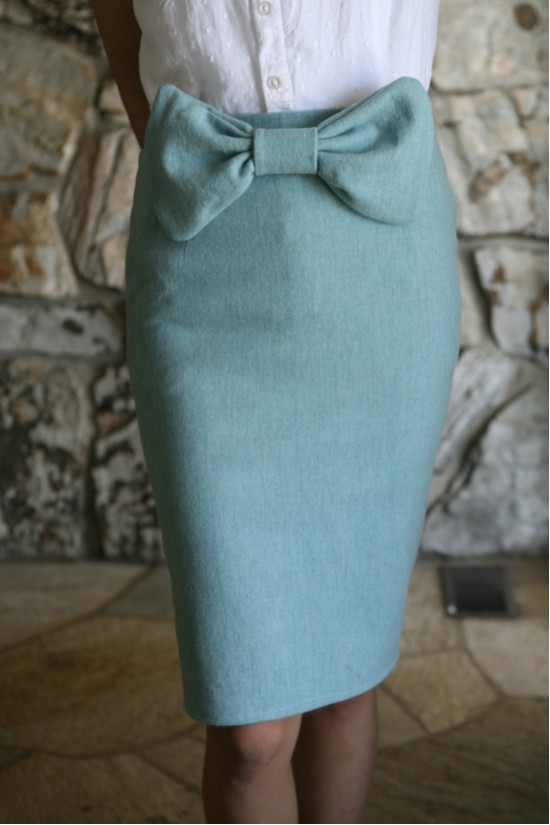
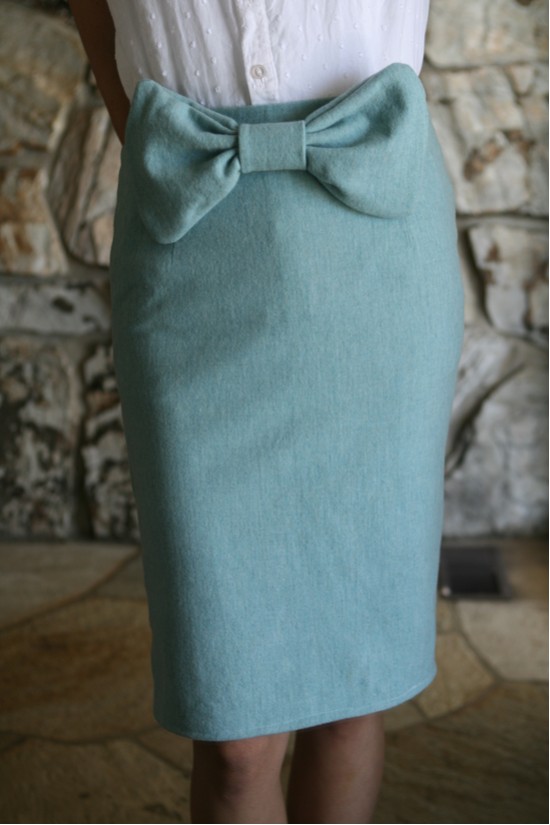
i’ve been wanting and looking for a sailor inspired dress for awhile so when i saw
 this girl turn a thrift dress into this(red dress on the left) i decided to just make one myself. 
so using inspirations from these pictures i collected, i made one.
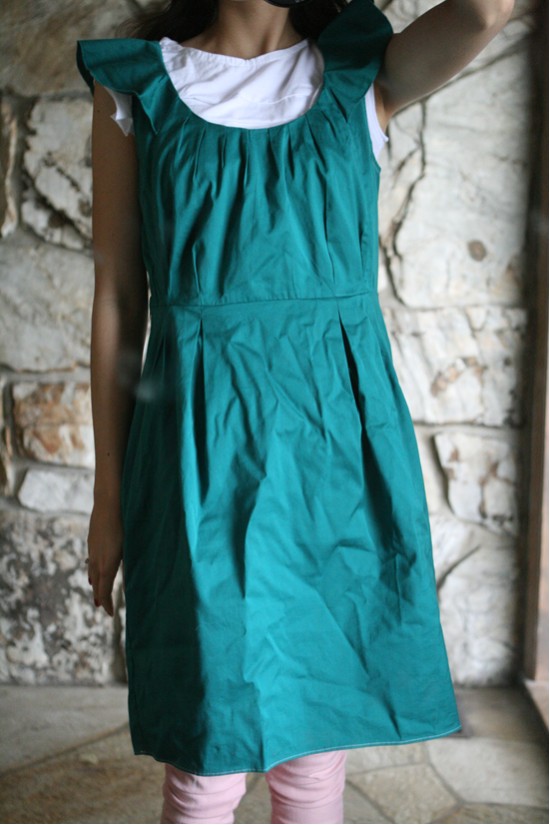
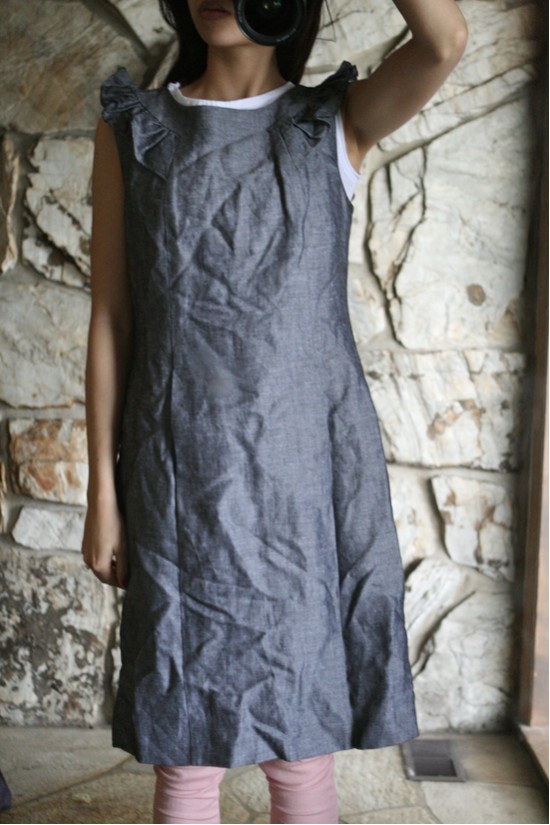
my goodness, i think the last time i made a dress from scratch was my sewing class in jr.high.
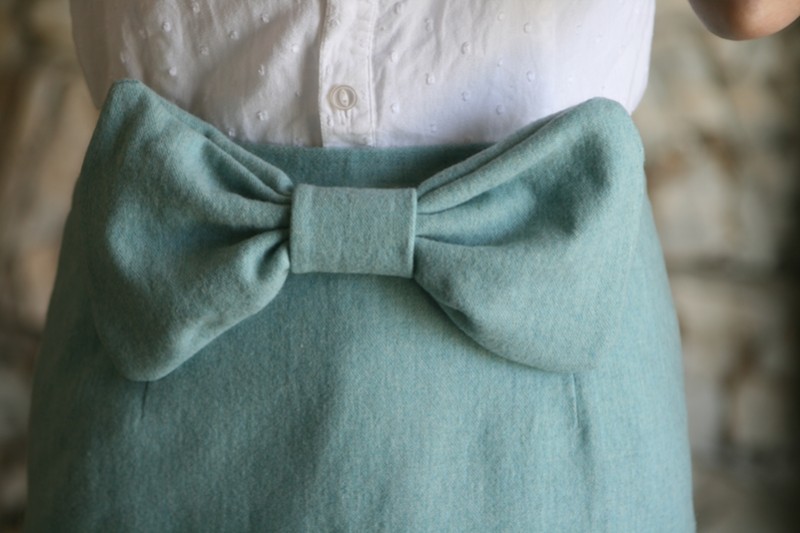
i just made up the pattern for the dress since i couldn’t find a pattern i wanted
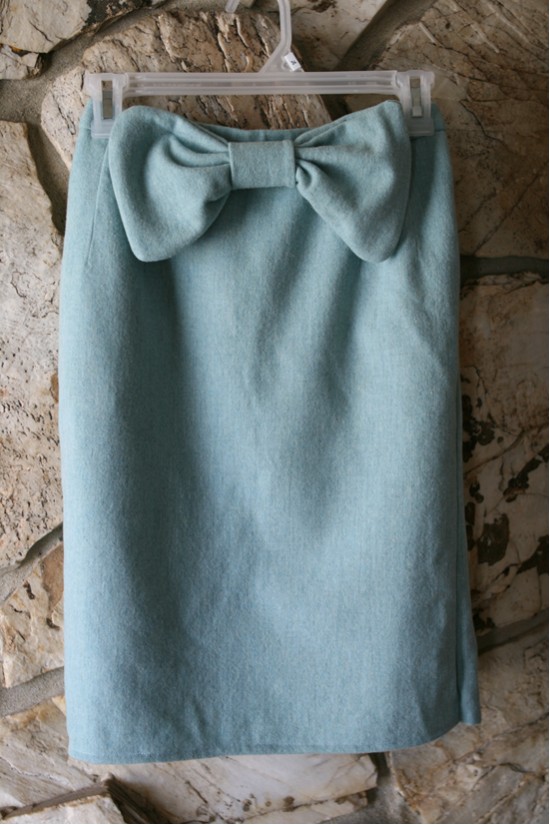
and it was my first time sewing an invisible zipper.  the zipper didn’t work out so smoothly
and that is why there are no pictures of the dress from the back haha.
0

TAGGED: DIY 48 Comments

simple little girl’s dress

June 1, 2011~ Etc.

 i would like to thank everyone who voted for me for top 25 with style,
some voted many times, some everyday and i’m so grateful for each one of you!
i made it to rank 12th and i’m so honored.  i’ll be having a giveaway within a few weeks!
Circle of Moms Favorite

i have this shirred tube top dress that shrunk like crazy.

so i just added gold ribbon as straps and now it’s a perfect maxi dress for my little one.
and adi picked out this fabric awhile ago so that i could make her a dress
and i finally got around to it this past weekend.  i used no pattern and just made it
with the above dress design in my head.
it only took 1 1/4 yards to make 2 dresses.
and guess what? it’s finally sunny and warm here in UT woo hoo!!!
0

TAGGED: DIY 6 Comments

magazine publication/modestify your summer dress 2

May 18, 2011~ SEWING

Last year i was invited to be a part of a brand new magazine called the A La Mode Magzine for a tutorial for the Anthropologie vintage lace chemise, and it’s now published, check it out!  I’m on page 22-23.  Thank you Madelyn for the opportunity to be published in such an awesome, useful magazine, I’m so honored!

to purchase a copy, go here.

now onto my DIY project
remember how i modestified summer dresses here?
those two dresses were XL’s so there were a lot of fabric to work with,
but these two dresses i modestified were mediums so i didn’t have much fabric.
so this is a way to add the sleeves when you don’t have much fabric left over.
before: a dress from banana republic in size 6.
(original price was like $120 but i got it for $20!)
after:

before: a calvin klein dress from nordstrom’s in size 8
(original price was $180 but i got it for $30!)

1. take the strip you cut off after altering the sides.
2. cut it in half, then sew the two strips together to make it wider.
3. then follow the steps shown here.

after:
2

TAGGED: DIY, modestify 13 Comments

banana republic braided top DIY…but fail.

May 12, 2011~ DIY DREAM HOUSE

inspiration: a top from banana republic
(which i started just liking about a year ago.
i always thought it was too old and boring but now i love that store!
either my style’s changed or i’m now old hahaha)
anyway…so this was my inspiration BUT it didn’t end up looking like this.
because? i couldn’t figure out how to do those dang braid things! haha
it looks like just two loop braids but i cannot figure it out!
(unless i make seperate loop for every one of them)
do any of you know how?

so this is my version.  i just stuck with a traditional braid
got a plain light blue shirt
cut 3 strips from the bottom of the shirt since it was extra long

pinned the top and started braiding.  i did it very very loose.

then using liquid stitch(oh how i love thee!), i glued the braids onto the neckline
and there you have it.
(can you tell i despise ironing?)
0

TAGGED: banana republic DIY, DIY 61 Comments

vintage bowtie skirt DIY

May 5, 2011~ SEWING

inspiration: vintage bowtie skirt
at a thrift store i found a long skirt
and turned it into this: the before/after photo:
 i cut the botton of the skirt to the right length and
 altered the hips and the thighs part.
and with the bottom part i cut off, i made the bowtie.
cut 2 layers of fabric into a rectangle
sew around the edges, leaving a 2″ opening
using the 2″ opening, flip it to right side out
fold a small fabric and sew one side closed
flip it right side out and fold it in half and sew it closed.
then flip it right side again
pull the big rectangle 1/2 way through the small rectangle
see the little 2″ opening from the bowtie we haven’t closed?
(right side top)
i used liquid stitch to close the seam
the bowtie looks like this
then with a one-side flat safety pin, i sewed it to the back of the bowtie
then safety pin it to the middle of the skirt and there you have a bowtie skirt!
1

TAGGED: DIY 53 Comments

  • « Previous Page
  • 1
  • …
  • 15
  • 16
  • 17
  • 18
  • 19
  • …
  • 27
  • Next Page »
cutmypic
Hello! My name is Sarah and I am so happy to have you here! Here you'll find DIY sewing, DIY home building & decor, honest and vulnerable posts of motherhood and snippets of my family. We are building our dream house and will update you regularly on our whole process from start to finish and I am also starting a mother-daughter sewing series. So I hope you stay awhile!

BLOG ARCHIVES

SEARCH

JOIN THE LIST

- THEME BY ECLAIR DESIGNS - Web Hosting By RFE Hosting -