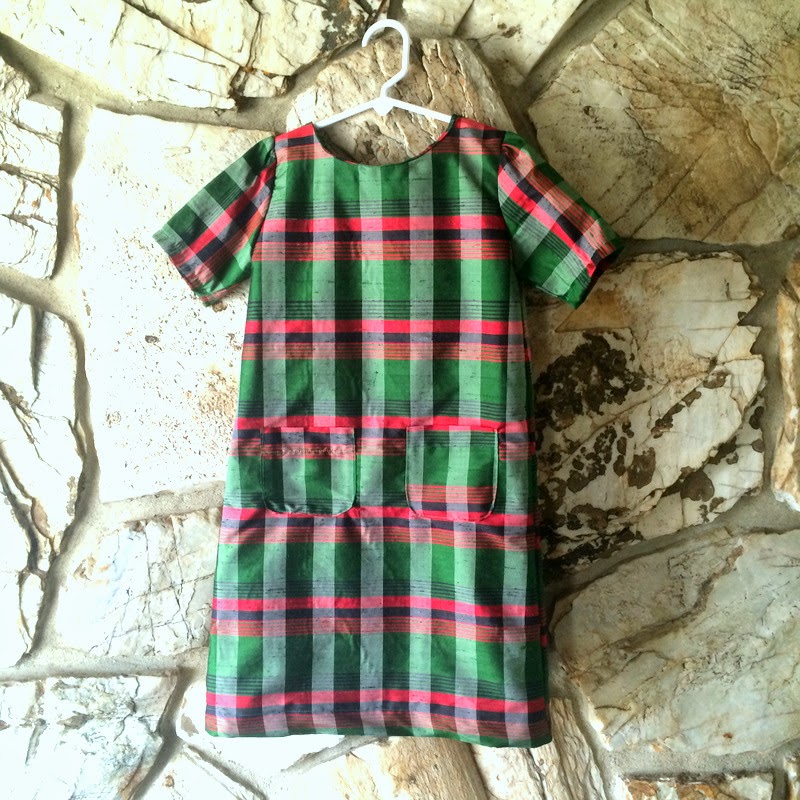
I found this gorgeous wedding dress at a thrift store. Sure, it’s outdated and not within the time of what’s in style right now, but I can see why a certain lovely bride fell in love with this dress and wore it to her wedding! I am sure she looked absolutely stunning in this dress and I felt a little bad(?) as I cut into this dress and made it into something different.
Search Results for: DIY dress
DIY: Outdated, Oversized, Faded Yellow Dress Suit to a Red Peplum Dress
Hello guys! For Refashion Runway challenge 4, we were to make a maxi skirt or a dress.
I got this really outdated, oversized, faded yellow dress suit from a thrift store. I am still in love with peplum design clothes, I think peplums are so flattering on many body types as it accentuates the waist-to hips ratio and by helping to make your waist look slimmer. After debating whether to dye this dress to a mint color or red, I decided to go with red since I’ve always wanted a red peplum dress.
DIY: XXL shirt into a little girls dress
A XXL women’s shirt into a little girls dress w/ tulip pockets
BEFORE:
my son refused to move away so a picture with him it is! I’ve learned to choose my battles and also think to myself, “Will this matter in the end on my deathbed?” That is how I survive motherhood. 🙂
Right when I saw this XXL women’s shirt at a thrift store for $5(it still had the tags on, don’t you love when that happens?), I automatically had an image pop in my head so I started on the project hoping it would execute just the way I imagined.
DIY: Plaid silk dress with pockets for girls
Remember this plaid silk fabric I bought? Right when I saw it I knew it’d make a perfect Christmas dress. I initially wanted to make it for myself, but then decided it would be cuter on a little girl. I envisioned a simple short sleeve tunic dress with front pockets and this is the result:
It has gold lining inside which makes it even more perfect as a Christmas dress, don’t you think? Since it’s such a simple design, I didn’t use a pattern and traced one of the girl’s dresses for the sleeves and the bodice.
What you’ll need(for one dress):
-1 yard of fabric
-1 yard of lining
-matching thread
-needle or sewing machine
-scissors
-buttons
Estimated time: 2 hrs.
Budget: $13
Skill level: A confident beginner or intermediate
DIY: Men’s XL shirt into a little girl’s dress
Hi guys! I have exciting news, I am launching a new sewing YouTube channel!
Subscribe to my YouTube Channel to tune in every Thursdays at 4 p.m. MST for a new sewing video!
For behind the scenes and sneak peeks of my next refashion follow @sarahtyau on Instagram
See all of my DIY: Sewing projects
We are starting a mother-daughter sewing series! Watch “6 Reasons Why You Should Learn to Sew” and subscribe to our channel to learn to sew along with us!
Now on to this DIY:
This is one of 4 DIY sewing projects of making a large shirt into a little girls dress! Check out the other posts, one(this won a Refashion Runway contest!), two, three!
Before
I bought this men’s shirt at Target clearance section for $10 in size XL. I loved the sailor boat pattern and also the fabric, the fabric is a thick, sturdy, high quality fabric which I liked. I’ve had this project in my mind for a few months and wanted to do a turn a XL shirt into a girl’s dress part two(see part one here) so when I saw this shirt I immediately thought of turning it into a girl’s dress.
Instructions:
1. Lay the shirt down on a flat surface.
2. Using a girl’s dress as a reference, cut the sleeves off and the top body piece, and take out the pocket. Cut and discard the extra fabric in between the shoulder area.
3. Sew the sides of the top piece together(shown in pink line). Make sure you turned it inside out first(sorry it’s not pictured).
4. After cutting off the excess fabric on the shoulder area, you should now have a straight across skirt piece. Baste stitch 1/2″ to the edge(shown in pink line) and pulling one side of the string, gather it together. Sew the skirt onto the top piece.
5. Cut the sleeves smaller.
6. Sew along the pink line.
7. Sew the sleeves onto the top piece.
8. *I made a button hole and sewed the button on right below the waistline.
9. Serge the unfinished seams.
After
What you’ll need:
-An oversized shirt(mine from Target)
-matching thread
-needle or sewing machine
-scissors
Directions:
1. Lay the shirt down on a flat surface.
2. Using a girl’s dress as a reference, cut the sleeves off and the top body piece, and take out the pocket. Cut and discard the extra fabric in between the shoulder area.
3. Sew the sides of the top piece together(shown in pink line). Make sure you turned it inside out first.
4. After cutting off the excess fabric on the shoulder area, you should now have a straight across skirt piece. Baste stitch 1/2″ to the edge(shown in pink line) and pulling one side of the string, gather it together. Sew the skirt onto the top piece.
5. Cut the sleeves smaller.
6. Sew along the pink line.
7. Sew the sleeves onto the top piece.
8. *I made a button hole and sewed the button on right below the waistline(when I cut the shirt diagonally along the waistline, I had to cut right over the button & the button hole so I had to make new ones).
Estimated time: 1.5 hours
Budget: cost of the shirt(mine was $10)
Skill level: a very confident beginner to intermediate
and to show you what I have to deal with while trying to take pictures…
My husband does this every time I really don’t want him in the pictures. Sigh. Why can’t he be so eager to be in pictures when I actually want him to be in pictures???
- « Previous Page
- 1
- …
- 3
- 4
- 5
- 6
- 7
- …
- 24
- Next Page »