• ABOUT
  • COLLABORATE
  • CONTACT

Life is Beautiful

Motherhood, Sewing, Family

  • SEW
  • HOME
  • PARTY
  • TRAVEL
  • SHARING MY HEART
  • SHOP

DIY: update/tailor a vintage style dress

June 12, 2012~ SEWING

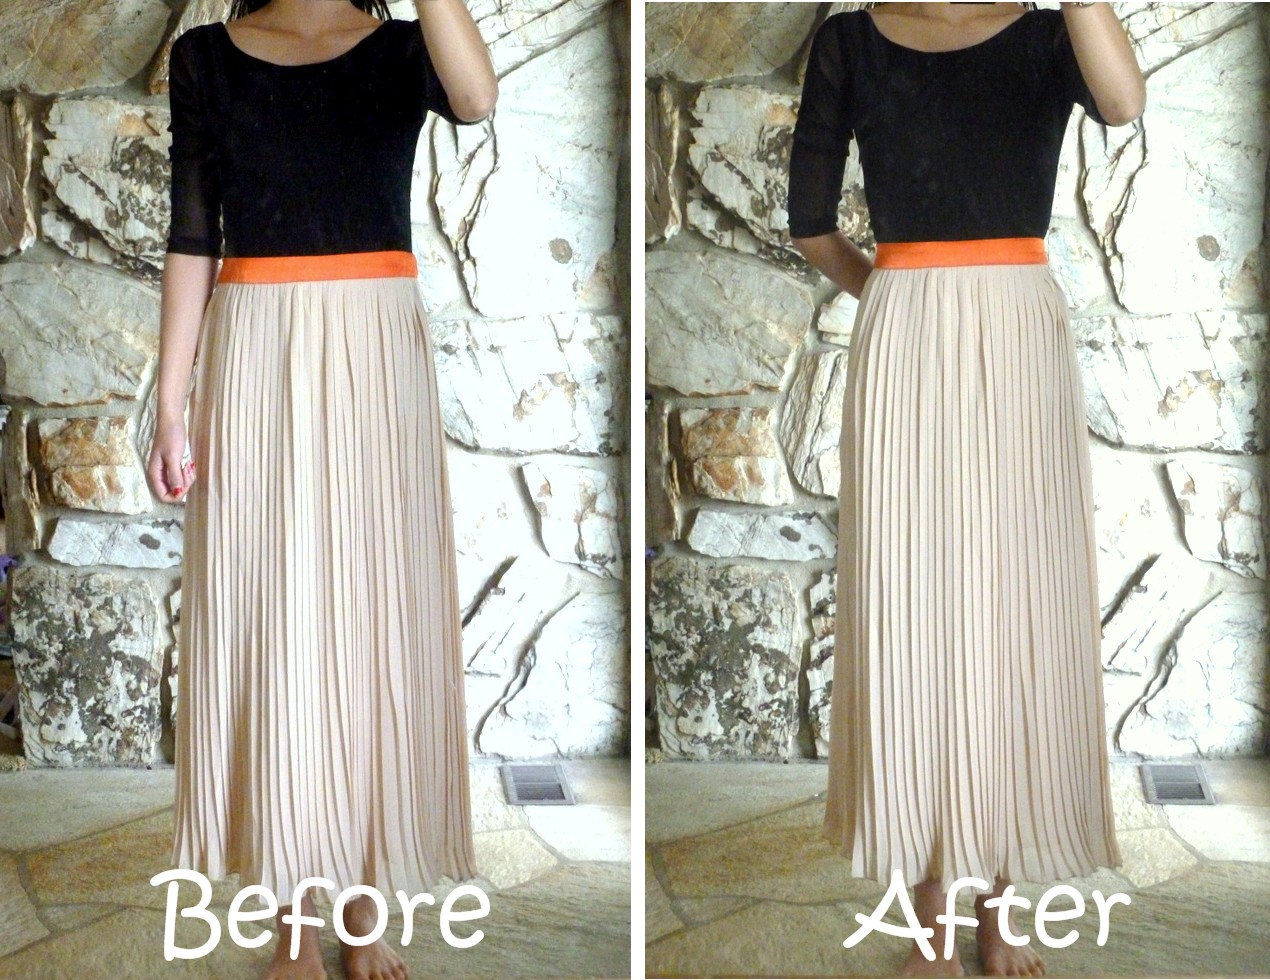
I got this dress but it was a little too big and I didn’t like the sleeves.  
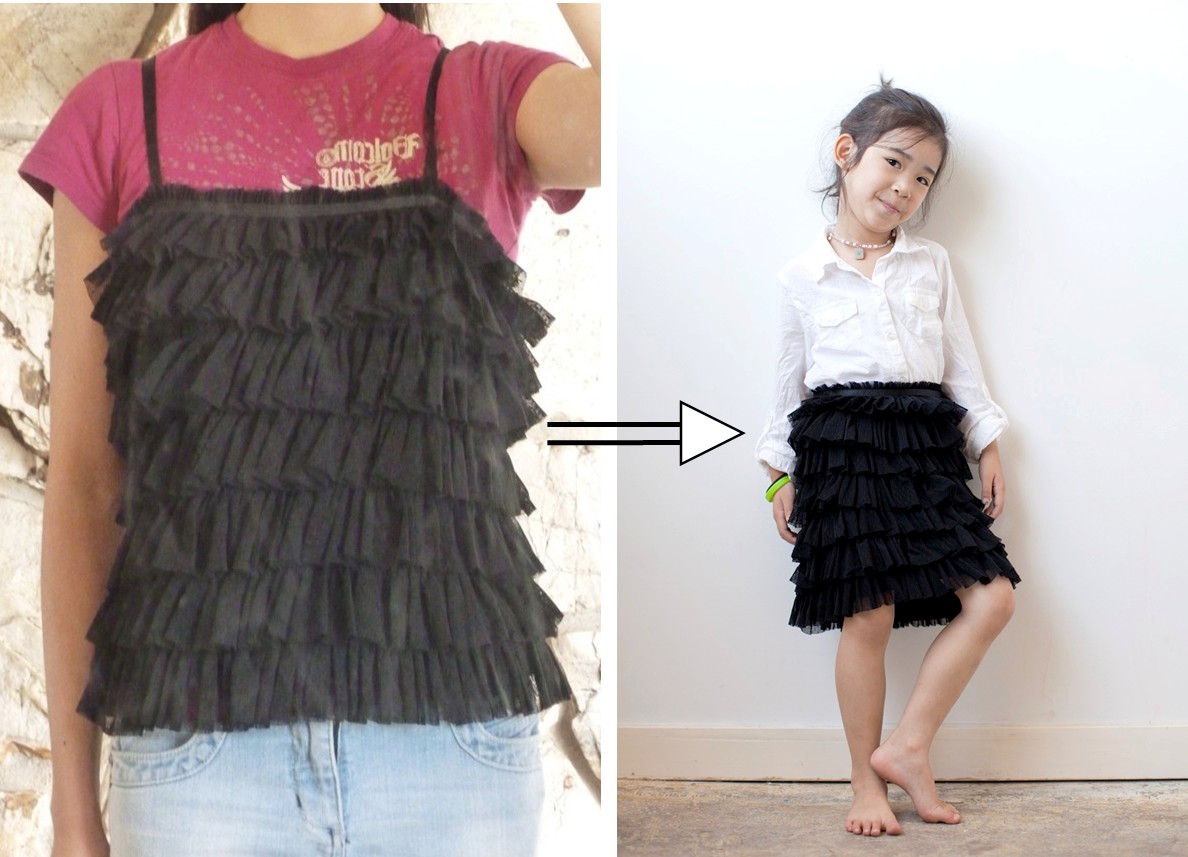
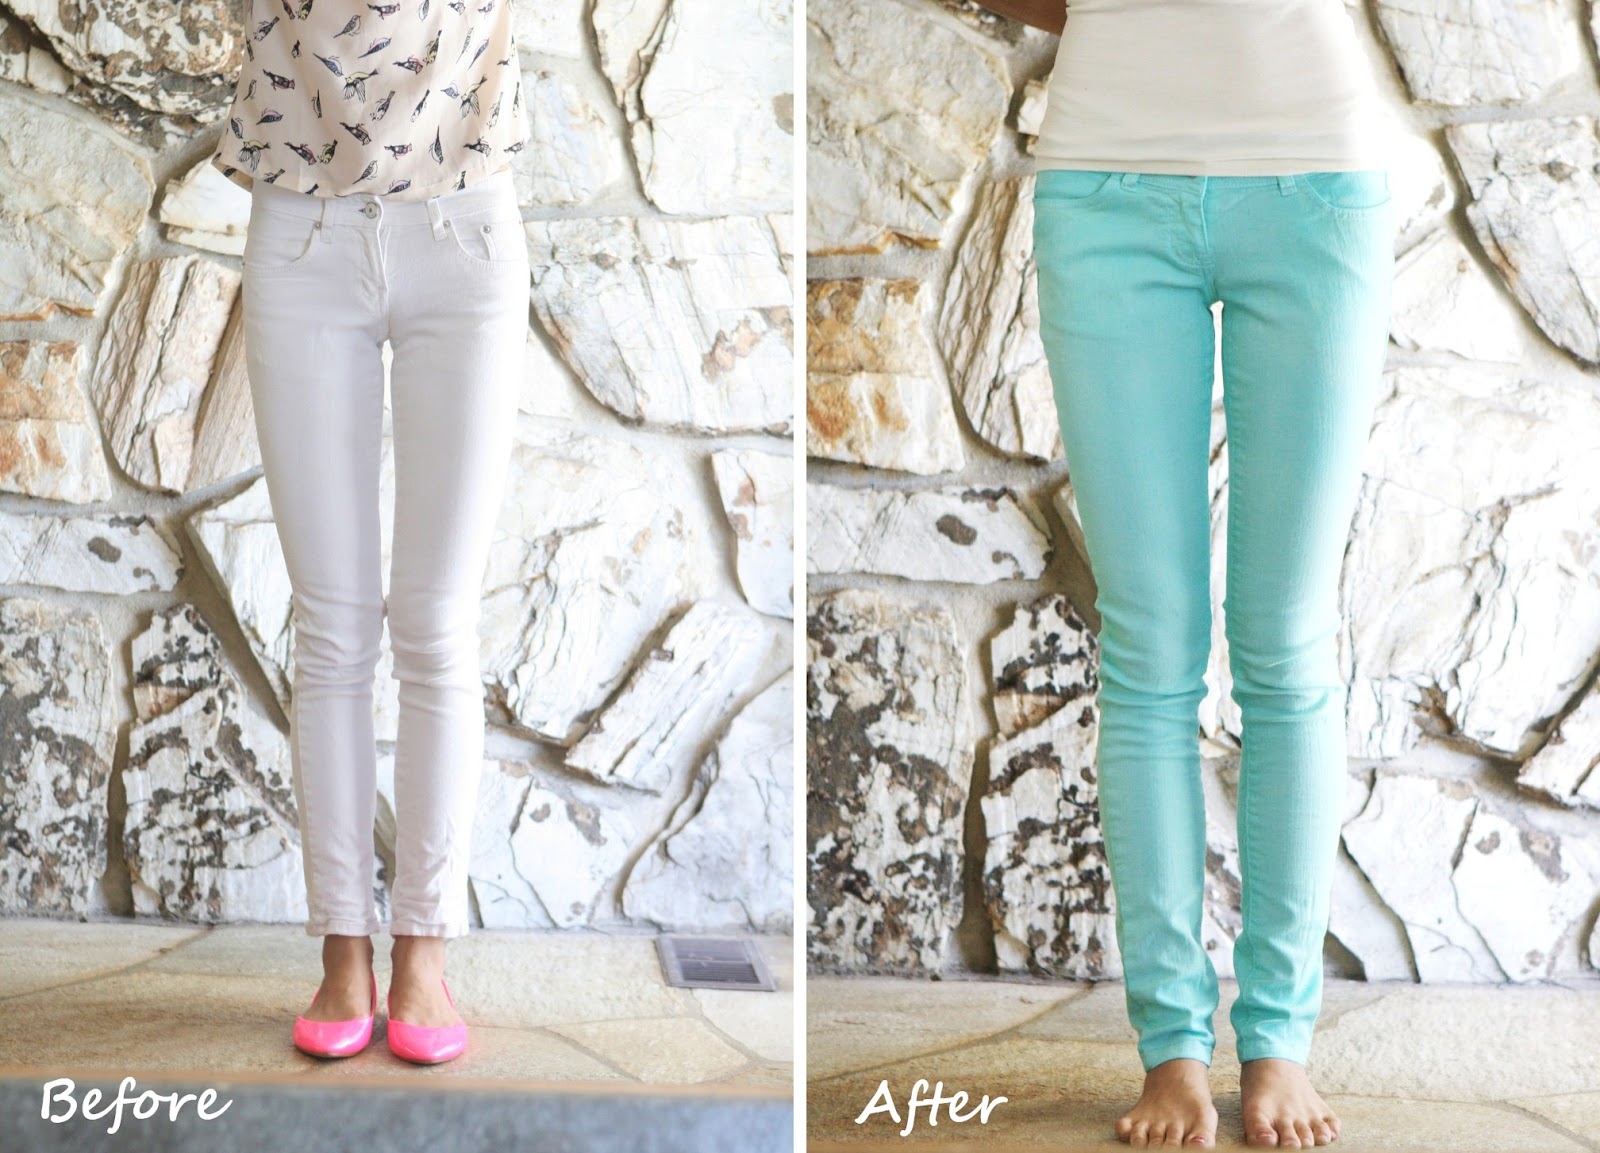
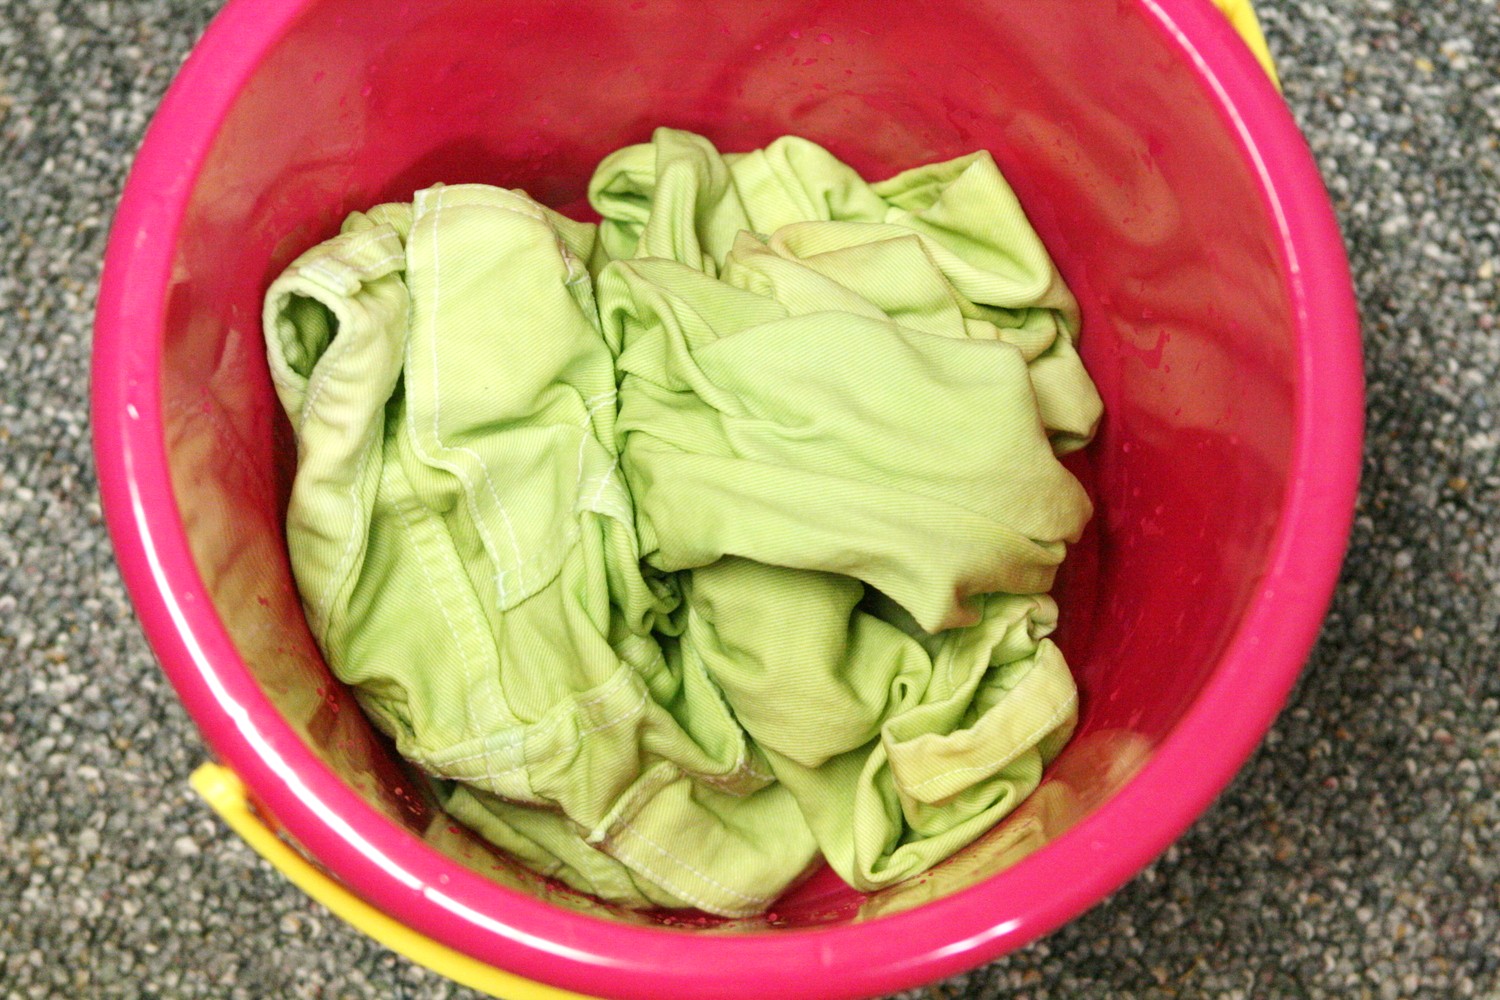
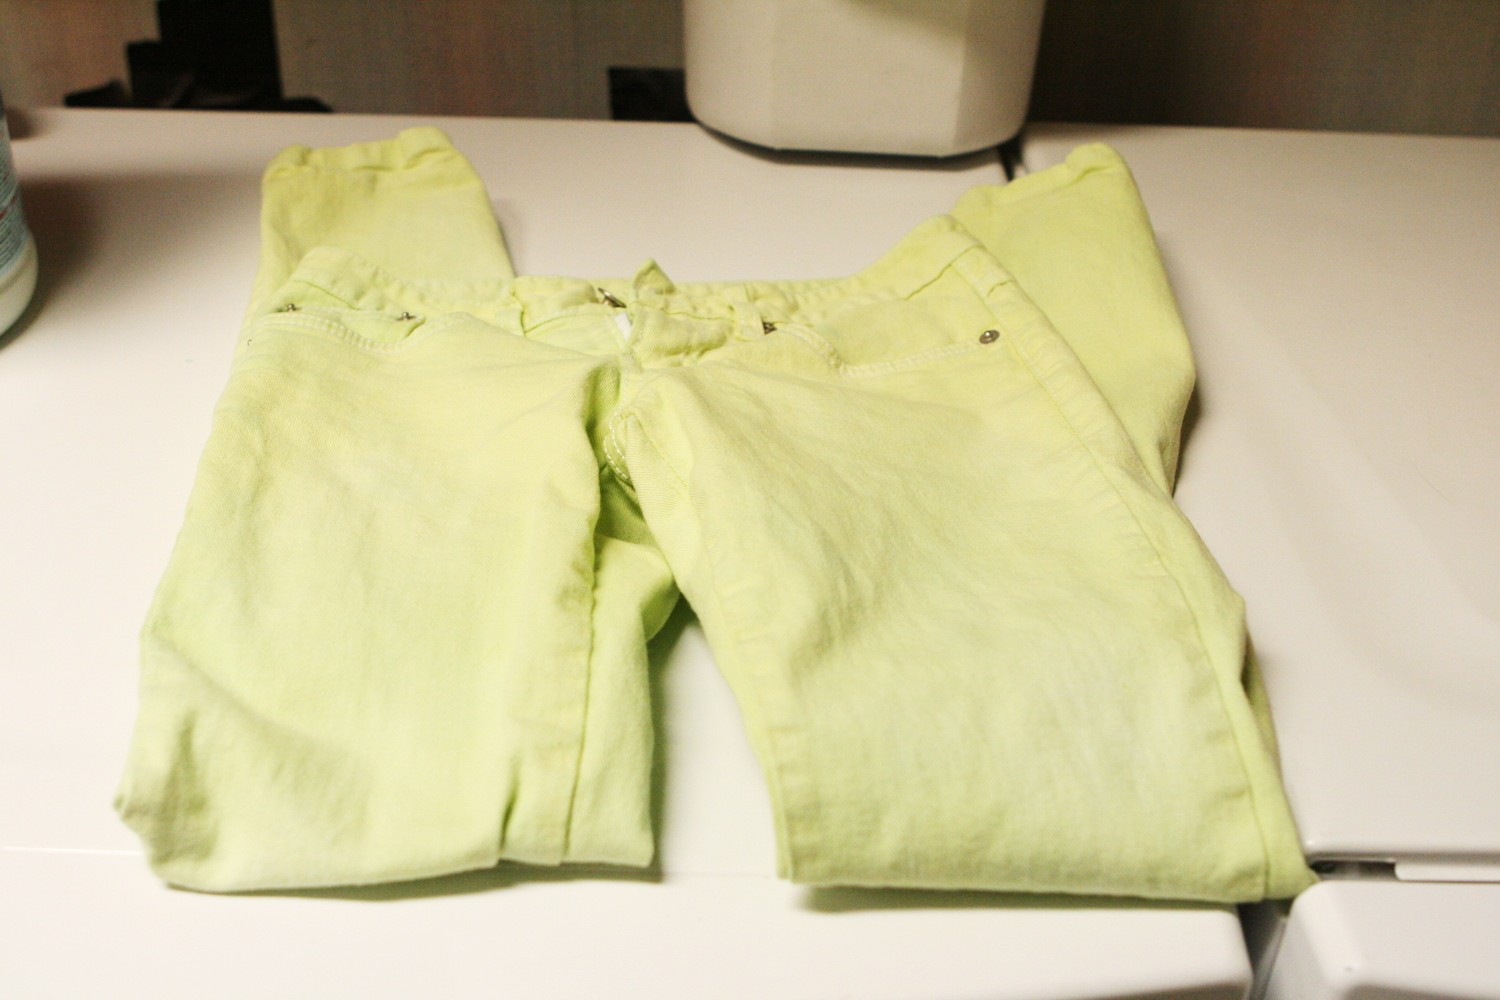
before/after:
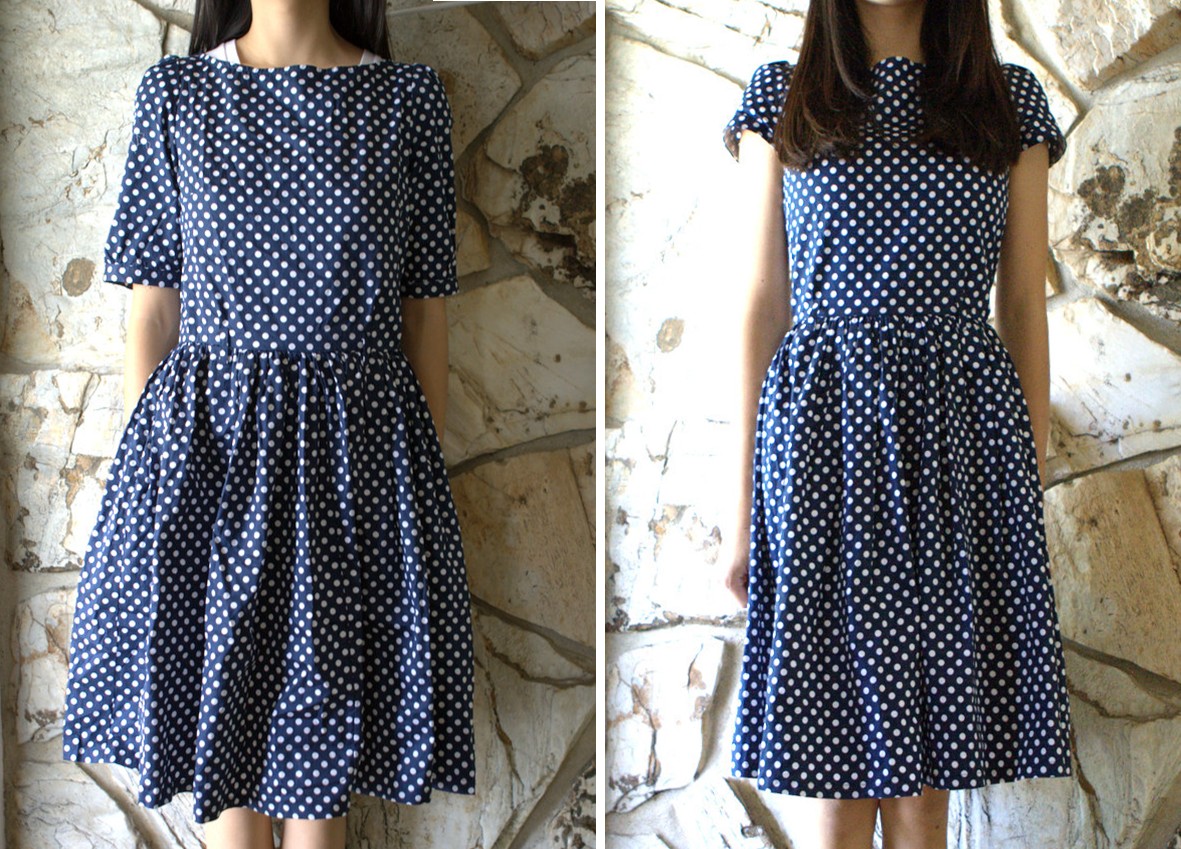
since it had a side zipper, I thought it’d be easier to take in the back instead of the sides.
Picture Instructions:
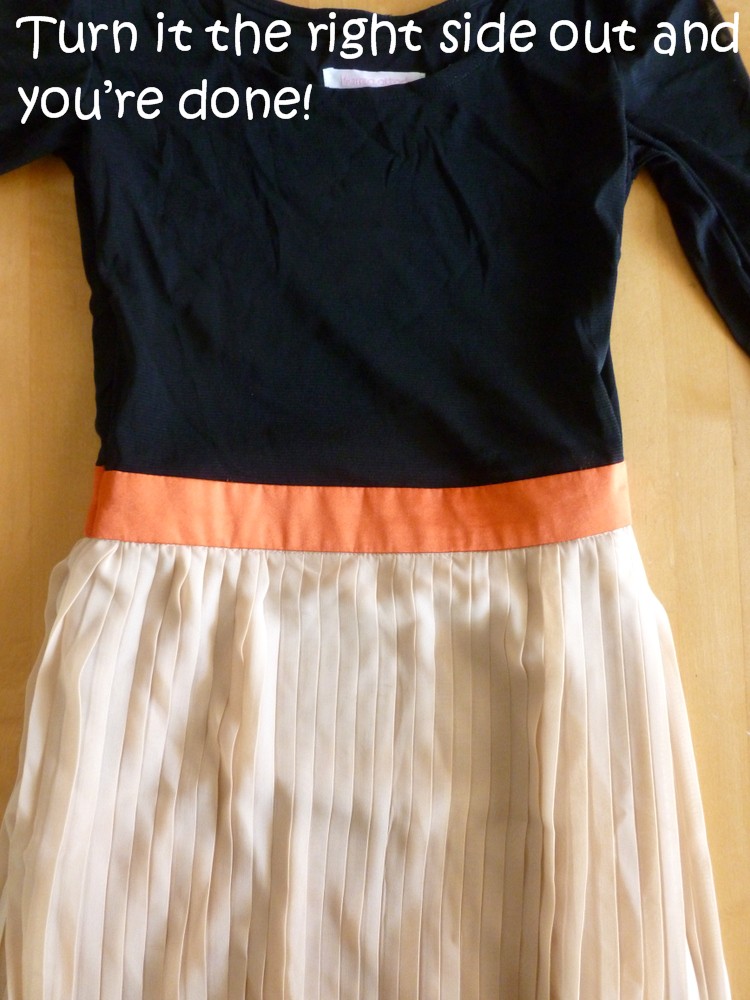
and you’re done!
and me and my girl wore our polka dot outfits to church.
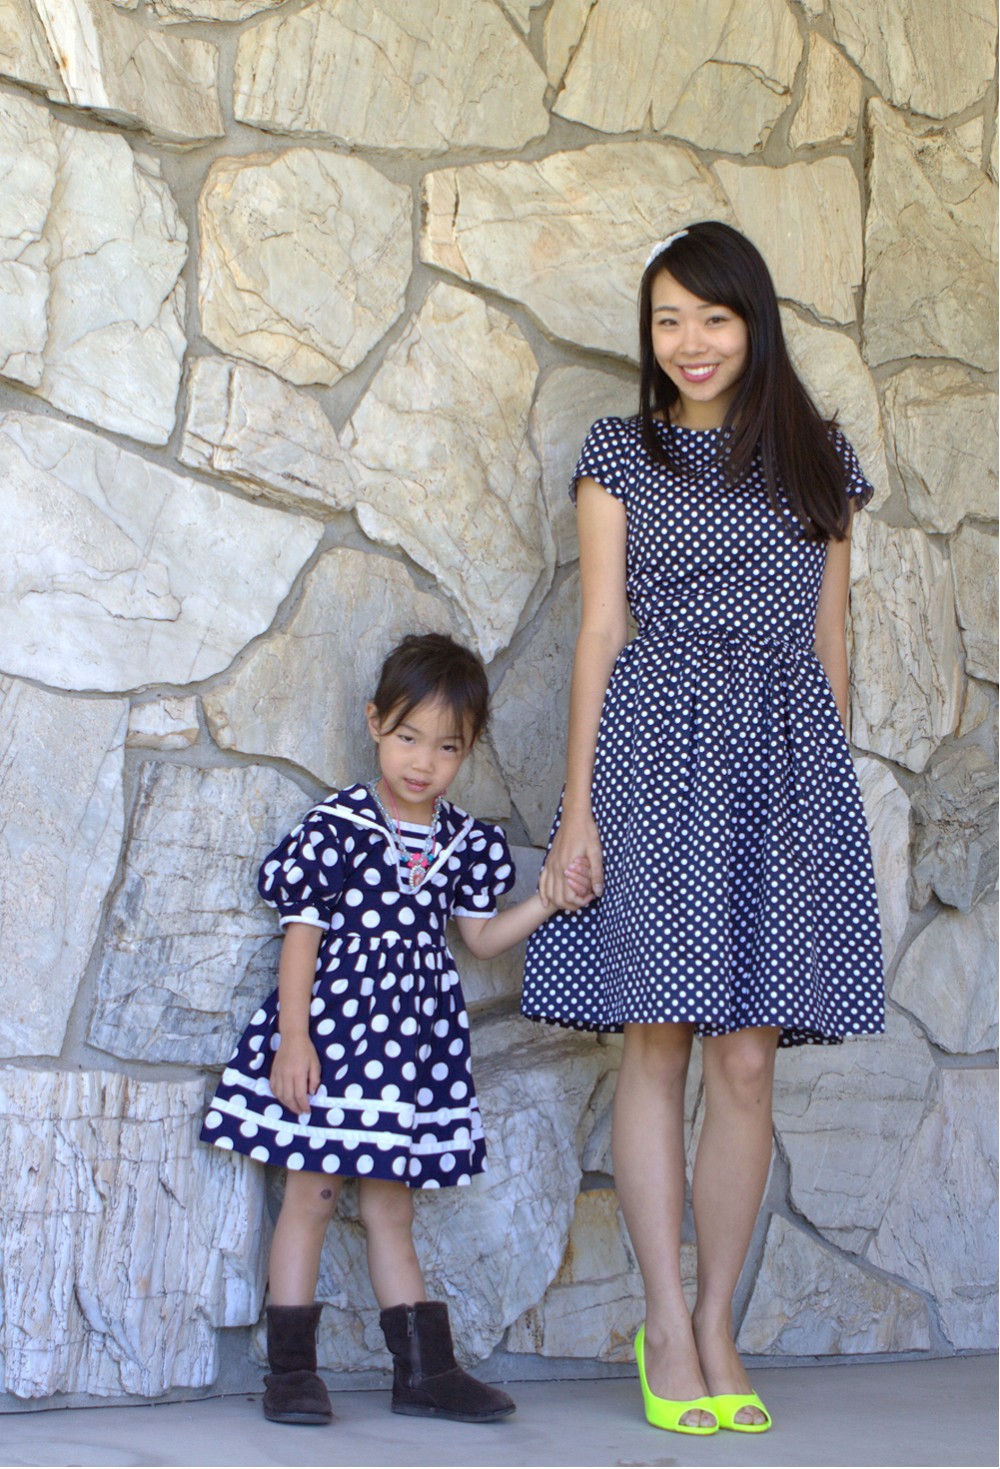
dress & neon shoes c/o Romwe.
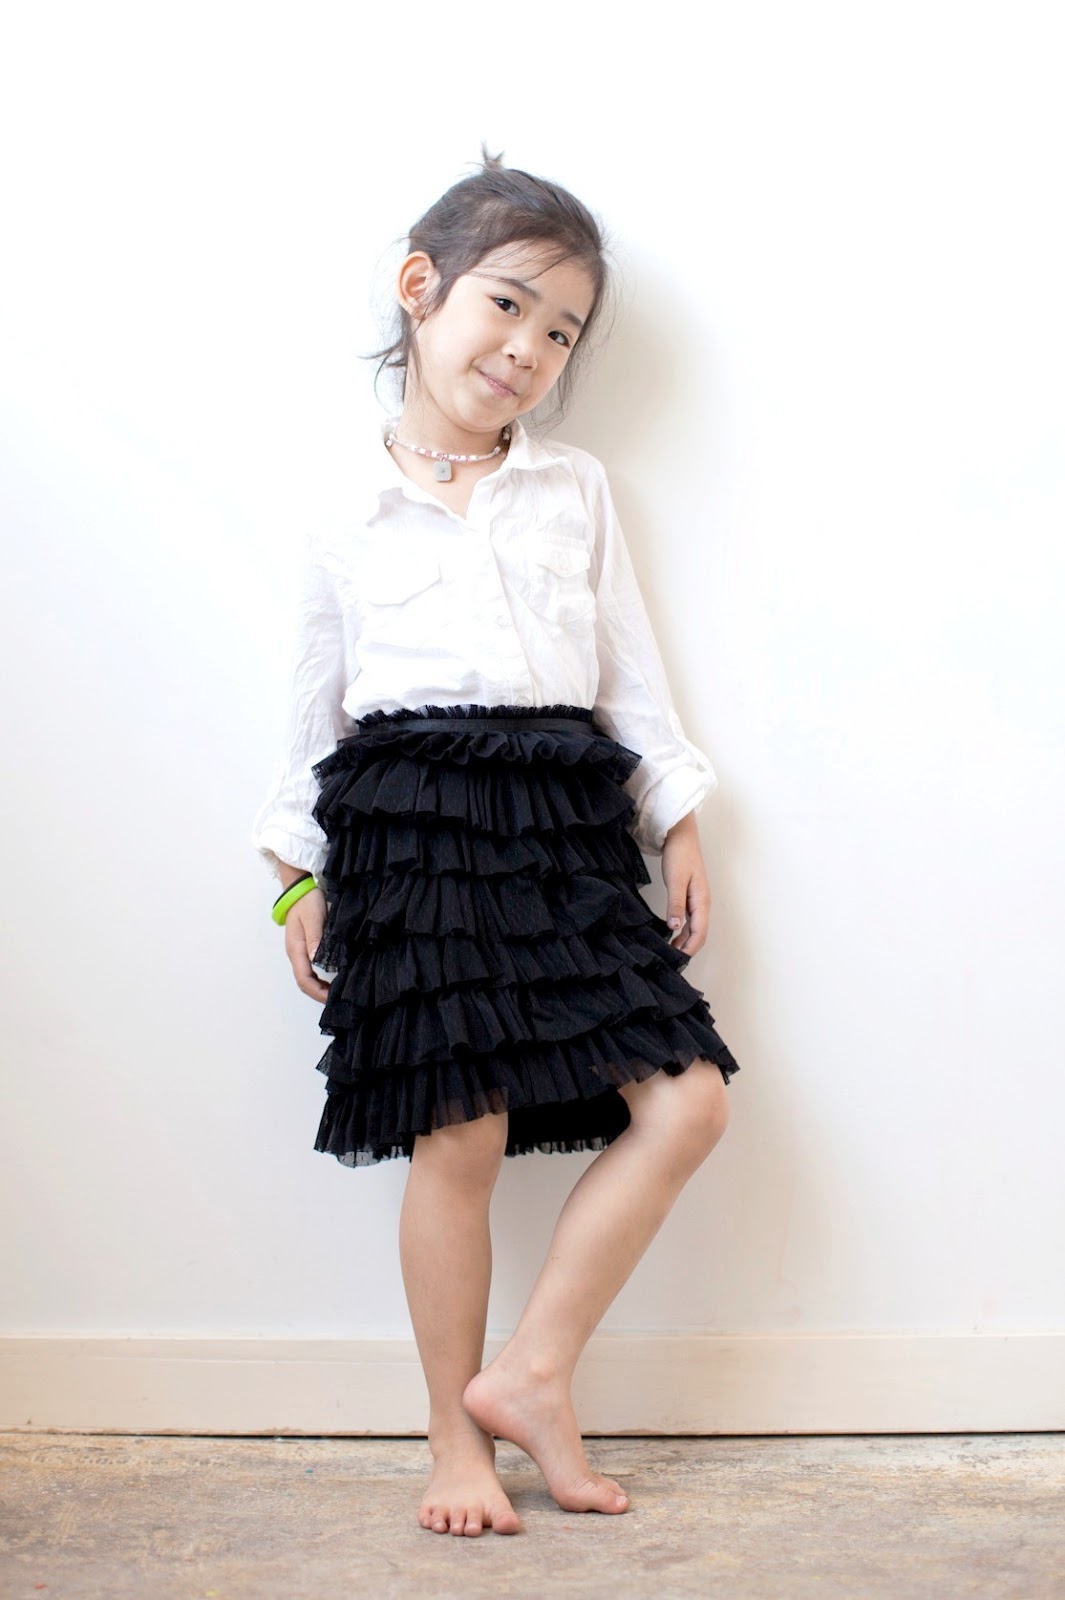
Hmm, I wonder where she got the “bend one foot” pose from…?
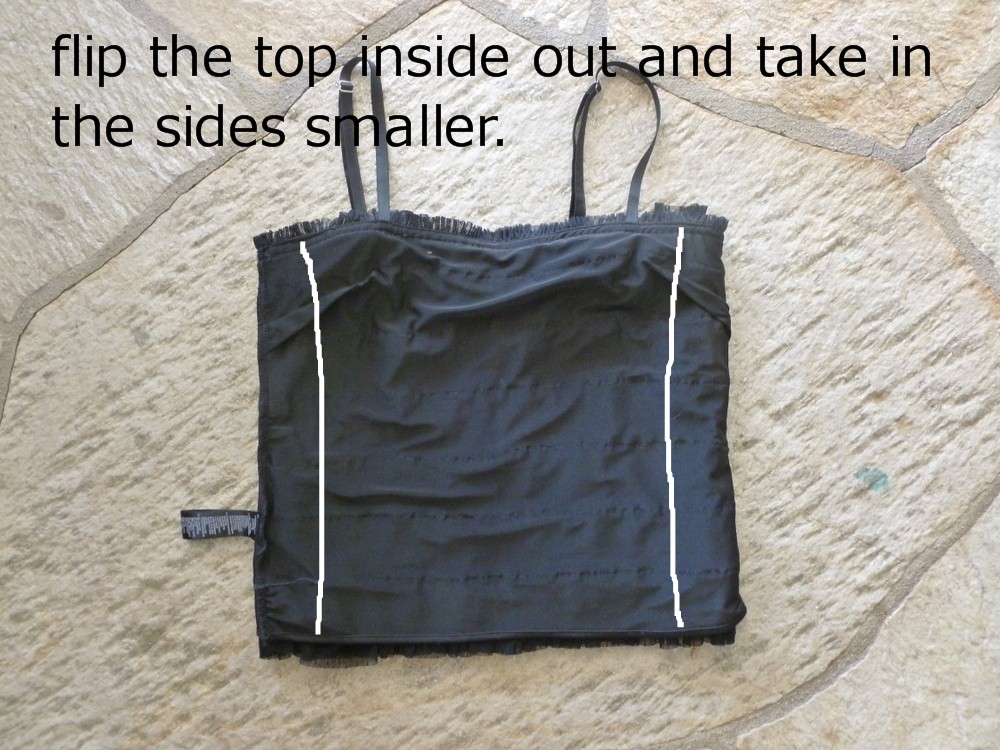
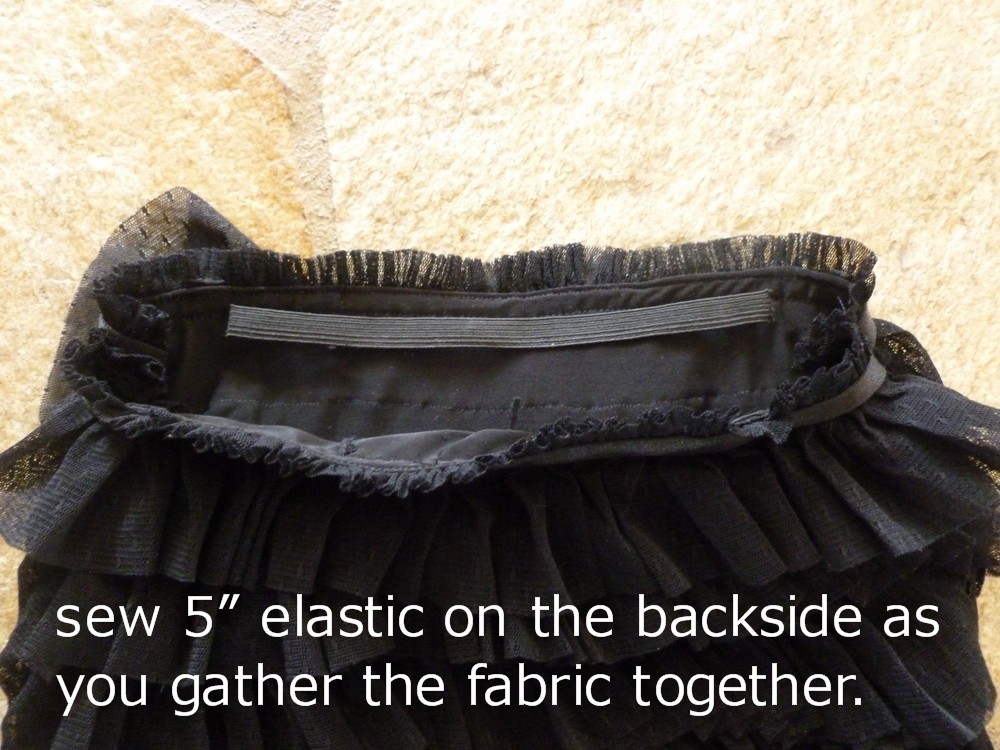
Directions:
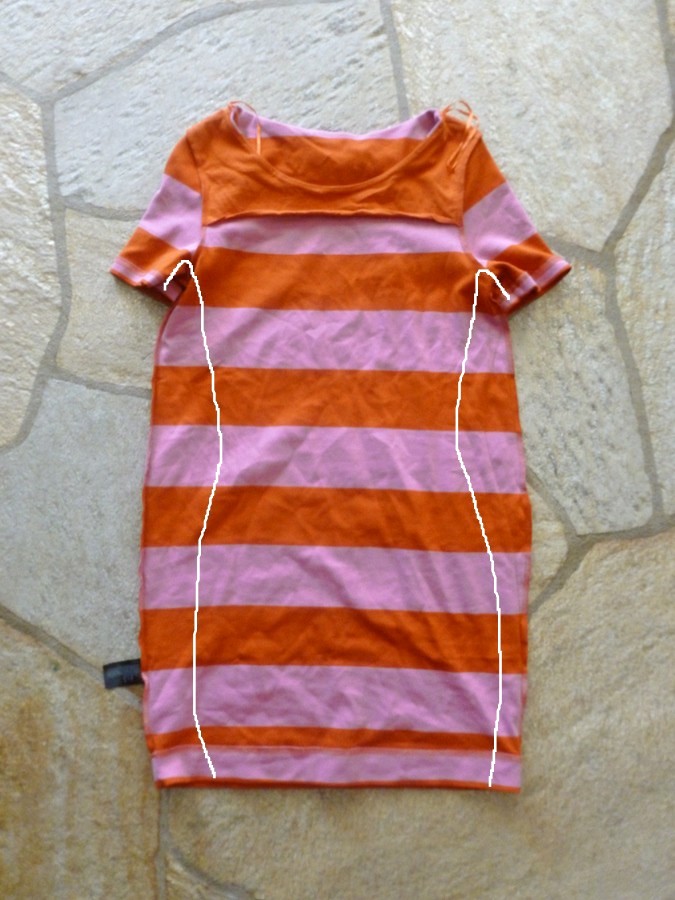
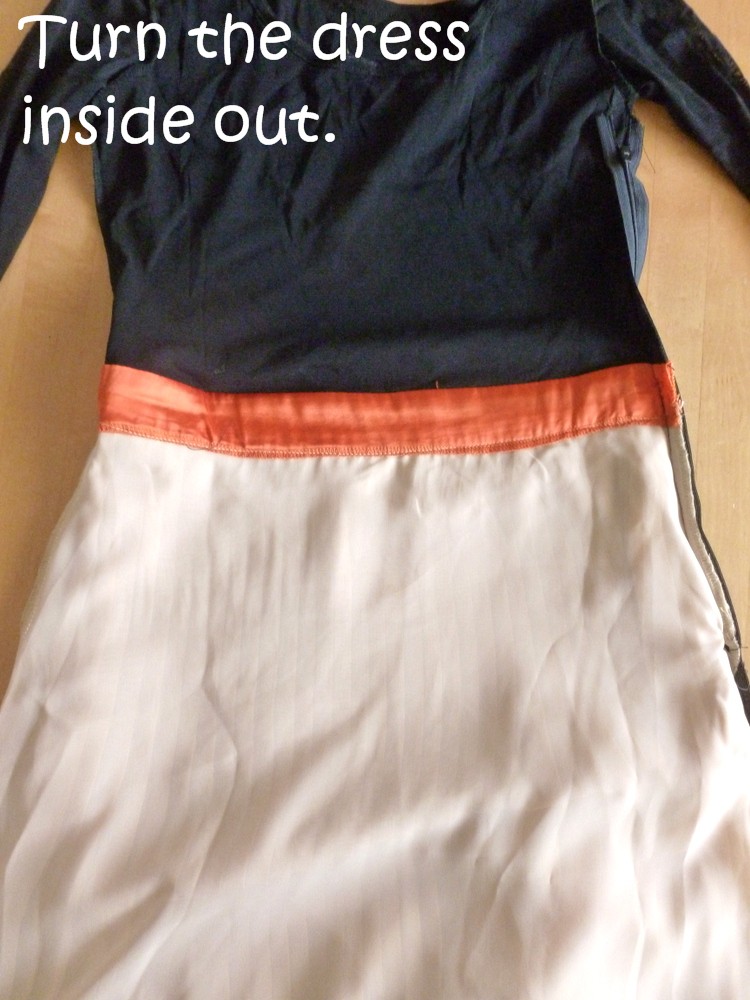
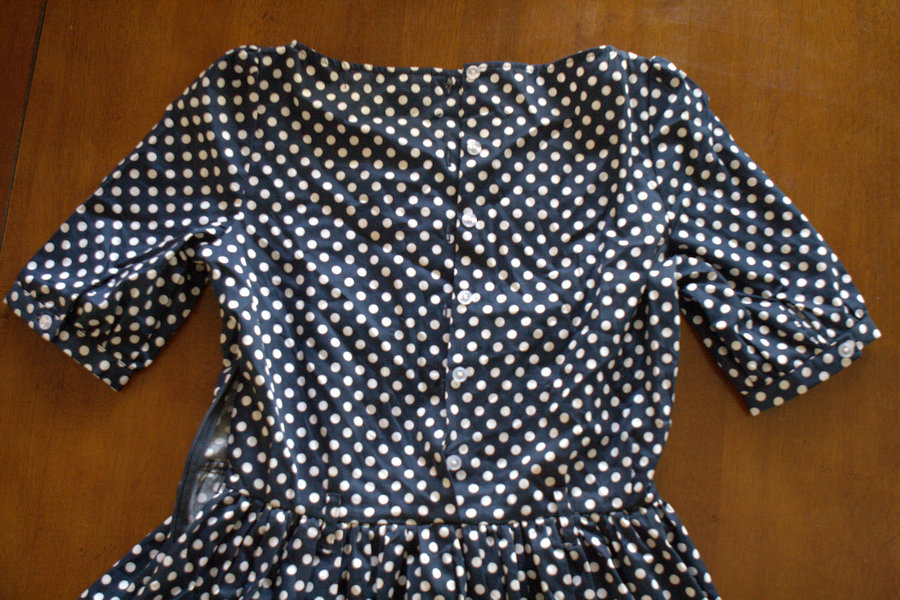
1. Turn the dress inside out and sew a diagonal line along the back middle seam.
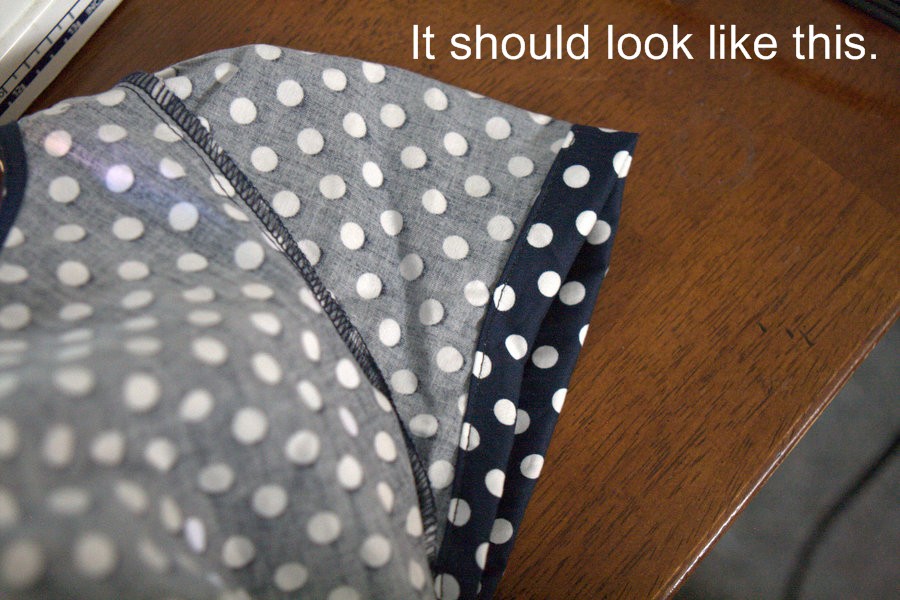
2. Cut the extra length of the sleeves on both sides.
3. Fold 1/2″ of fabric two times on the sleeves and sew.
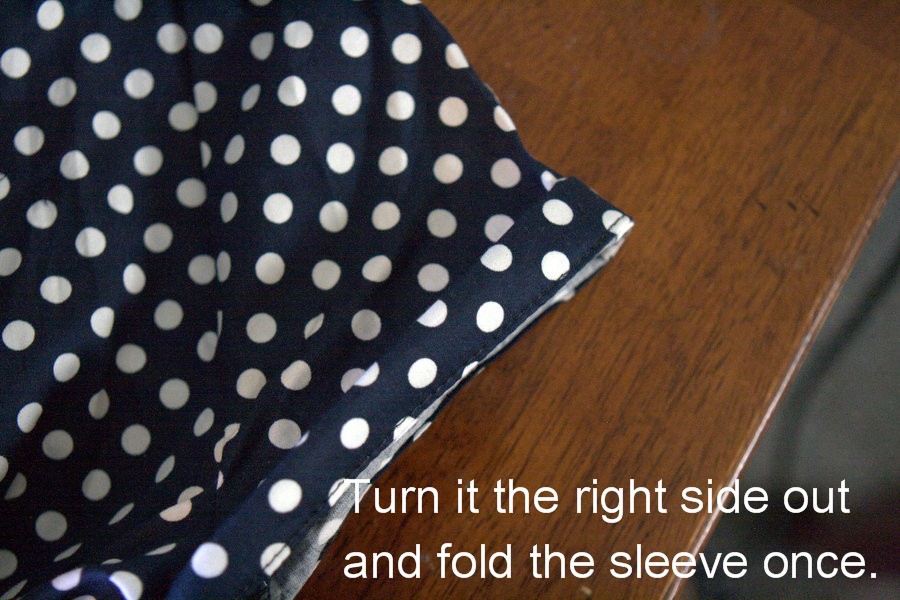
4. Turn it right side out and fold the sleeve once more.
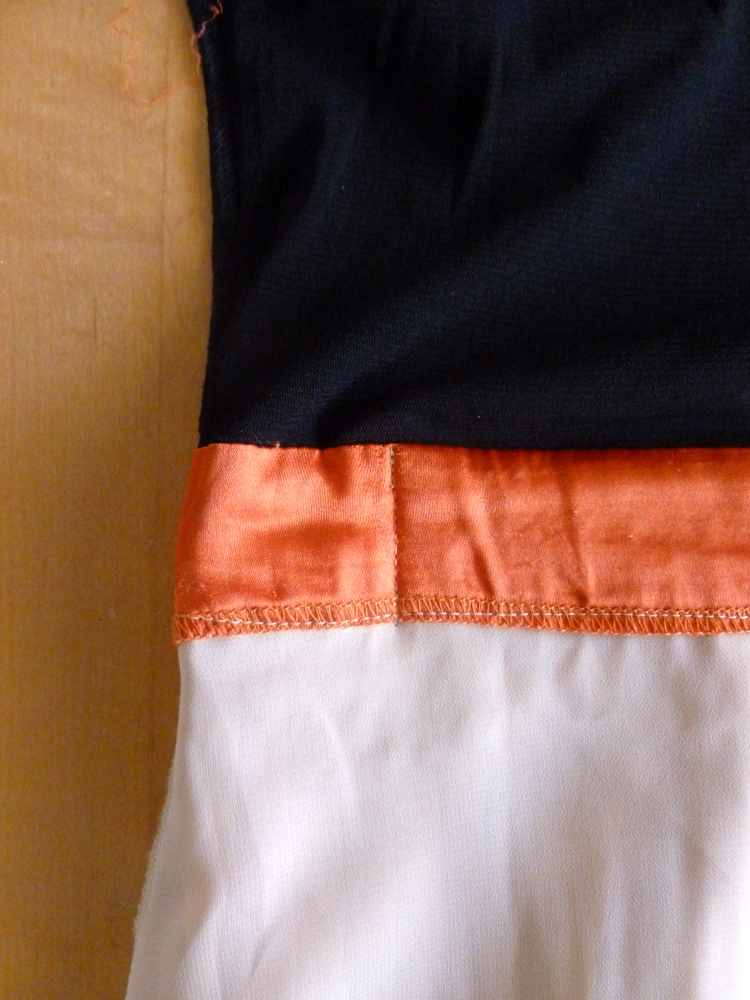
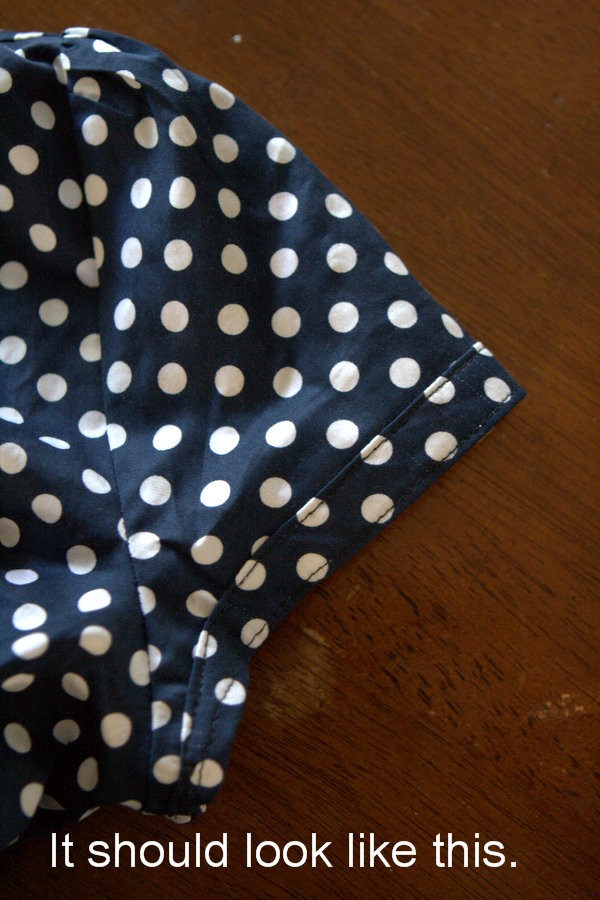
5. Sew along the orange line as pictured above.
Estimated time: 30 mins.
Project cost: FREE
Skill level: a confident beginner
0

TAGGED: DIY, DIY tailoring 25 Comments

DIY: Tailor a baggy dress/tunic top

June 4, 2012~ SEWING

I got this dress from H&M almost a year ago but never wore it since it’s such an unflattering shape(and this is a size small!).  I tailored it not long ago(in just 10 minutes) and I wear it all the time now.  
BEFORE:
AFTER:
TO TAILOR:

There are two ways to sew:

1. Either lay a fit dress on top and trace, then sew,
2. Or try the dress on, pinch the sides and roughly estimate how many inches to take in, turn it inside out, roughly trace it, then sew.  Start at the end of the sleeves, through the armholes, and down the dress.

*The second option is what I did.
*I unpicked the bottom hem of the dress to lengthen it a little longer and I’m wearing an orange cotton skirt underneath.  
Estimated time: 10 mins.
Project cost: FREE
Skill level: beginner
photos by Jessica Peterson.
check out “shop my closet” page!
0

TAGGED: DIY, DIY tailoring 12 Comments

DIY: women’s tank top to a girl’s skirt

May 22, 2012~ SEWING

Turn a women’s top into a little girl’s skirt in these simple steps:
*the next step is optional if the fabric isn’t stretchy.
After:
tuck in the straps to wear as a skirt
or as a tunic/top
What you’ll need:
-a women’s top
-thread/needle or sewing machine
-5″ elastic(1/4″ width)
Instructions:
1. Cut off one strap and move it a few inches closer to the other strap, depending on the shoulder width of the little one.
2. Flip it inside out and take in the sides smaller, depending on the waist measurement of the little one.
3. (*optional if the fabric doesn’t stretch much): Sew a 5″ elastic onto the back.  As you’re sewing the elastic onto the fabric, gather the fabric little by little as you go.
Estimated time: 15 mins.
Project cost: under $1.
Skill level: beginner
after photos by Jessica Peterson.
0

TAGGED: DIY 8 Comments

Alter your own clothes: a maxi dress

May 14, 2012~ SEWING

I think I tailor at least 60% of the clothes I buy.  They’re very simple tailoring, no changes to the design, just to make it more figure flattering.  I’ve only posted it once before, but since I do so many tailoring on my clothes, I thought I’d share one I did recently.

I got this adorable maxi dress from here, and everything fit, except for the waist.  The before/after photo:
*This dress has a side zipper and this alteration will only work for you if you have a side-zipper, pleated dress.
What you’ll need:
-Side-zip pleated dress
-Sewing machine or needle & thread
-Thread. (preferably matching but not necessary since you won’t see it.)
Directions: 
1.  Put the dress on and while looking in the mirror, pinch one side and measure how many inches you need to take in.
2. Turn the dress inside out.
3. On the zipperless side, take in the inches by sewing on the waist part.  Make sure to backstitch.
4. Turn the dress right side out and you’re done!
lovely photographs by Jessica Peterson
Estimated time: 5 minutes
Budget: free!
Skill level: beginner
Would you want me to post more of these series from now on?  
0

TAGGED: DIY, DIY tailoring 39 Comments

DIY: perfect mint color jeans

May 7, 2012~ DIY DREAM HOUSE

DIY mint jeans

I think I am quoting many girls when I say, “I’ve been looking for mint jeans for spring!”  I am very specific and picky about the color of mint I want, not too blue, not too green, not too dark, or not too light, more blue with a tint of green. I finally thought I found the color I was looking for(within my price range) and ordered two pairs of mint pants just to make sure I got the right color, but unfortunately one was a tad darker than I wanted(and too big), and the other one was too green for me.  I’ve learned that in the pictures(in stores and in other blogs), the color always shows up more blue than it actually is.

So I’ve been on the hunt for mint jeans ever since and thought about dyeing my white jeans mint, but I’ve never dyed anything before so I was hesitant to try.  Then I came across this, this, and this tutorial on dyeing your own mint jeans and after seeing others do it, I had the courage to try it.  I decided to follow along the second tutorial since I liked the color her jeans turned out, but from the comments from the post, many people said they tried it and it turned out lime green(hers turned out super cute though:).  So I decided to mix two colors together, green vert and aqua, 1/2 package each.  And it was a FAIL.  It turned out dark green, even though I soaked it for about 2 minutes.  I was so disappointed!  But I was determined to make the perfect mint color jeans, so I took the pants out, ran it in hot water, then soaked it in bleached water, then soaked it in straight up bleach, and the dark green came off and I was left with this light lime green color.

Then I ran a cycle in the washer with hot water + bleach and it got a little lighter.

The color wasn’t bad, but I already own yellow/lime green pants, so I made the dye again but this time using the rest of the package of aqua and about 1/2 tsp. of green vert.
I soaked the lime green pants in it along with a white top I had.  After seeing the color of the white top, I was satisfied with the color so after I took out the lime green pants and the white top, I put in a pair of white jeans.  It looked too blue so I added 1/2 tsp. more of green vert and I ended up with a perfect mint color jeans the second time around!  Not too blue, not too green, not too light, not too dark. 
The jeans on the left is the one I dyed the first try(the lime green ones), and the right one is the one I dyed the second try.  I wish I had gotten it right the first time, now I need to go shopping for some white jeans! 
Mint jeans are so versatile, here are some outfits I put together.
c/o: bird print top, hot pink blazer, peterpan collar, denim shirt, blue flared coat
(enter code: sarah20 for a 20% off from sheinside)
I also like these styles I found online,
1, 2, 3
What you’ll need:

-a pair of white jeans/pants
-1 pkg. of aqua dye and 1 pkg. of green vert dye
-a clean bucket
-1/4 c. salt
-1 gallon of steamy hot water
Directions:

1. Pour 1 gallon of steamy hot water into the bucket.  Pour 1/4 c. salt, 1/2 pkg. of aqua dye, 1/2-1 tsp. green vert dye.  
2. Put the white jeans into the bucket.  Make sure the jeans submerges into the dye water completely.  Mix continuously while checking the color.  Pour more aqua dye or the green vert dye to make it the color you’d like(make sure the dye powder doesn’t touch the clothes directly).  If it’s too dark, then add more water.  
3. Leave it for approximately 45 minutes.  (little or more depending on the color you want)
4. Put the clothes into the washer and run a cycle in cold water.  
5. Let it air dry.
Estimated time: 2 hours
Budget: Low (mine was only $5 since I already had white jeans)
Skill level: Beginner
p.s.  my next dye project? a mint jacket!  I tried to dye it with the dye water that was left overnight from the mint jeans but it only turned it to a very light blue(go figure, it wasn’t hot and the dye probably absorbed into the mint jeans already?)  so I’ll be dyeing it again to make it into a perfect mint jacket. 😉
1

TAGGED: DIY 67 Comments

  • « Previous Page
  • 1
  • …
  • 9
  • 10
  • 11
  • 12
  • 13
  • …
  • 27
  • Next Page »
cutmypic
Hello! My name is Sarah and I am so happy to have you here! Here you'll find DIY sewing, DIY home building & decor, honest and vulnerable posts of motherhood and snippets of my family. We are building our dream house and will update you regularly on our whole process from start to finish and I am also starting a mother-daughter sewing series. So I hope you stay awhile!

BLOG ARCHIVES

SEARCH

JOIN THE LIST

- THEME BY ECLAIR DESIGNS - Web Hosting By RFE Hosting -