
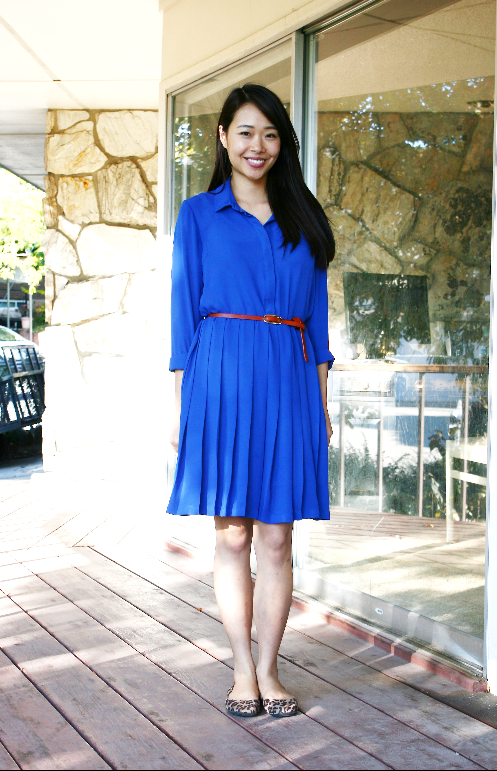
My favorite color right now is royal blue, and you know how much I love pleats, so I had to get this royal blue pleated dress(buy it here)! It came a couple inches below my knee however and it was not flattering, so I altered it to a shorter length.
BEFORE:


I cut the dress at the seams where the shirt and the skirt meet.


then I cut 3.5″ off the shirt and sewed back on the skirt. So simple!
AFTER:


Jay photo bombing on my photo shoot. Somebody please tell him to stop, he won’t listen to me.
What you’ll need:
-Dress
-Matching thread
-Sewing machine or thread & needle
-Scissors
Directions:
1. Cut the dress at the seams where the shirt and the skirt meet.
2. Cut 3.5″ off the bottom of the shirt.
3. With the right sides together, sew the skirt back onto the shirt.
Estimated Time: 15 minutes
Skill Level: a confident beginner
Price: $0.00
I also have a question for you, my wonderful readers. I taught a few classes at my church on how to alter/DIY your clothes several months ago and everyone seemed to really like it. People would bring their clothes that are too big, outdated and want to update, or clothes that were too small but the fabric was too pretty to throw away, etc, and I would give them ideas or simple instructions on how to fix it. Would you be interested in doing something like that with me? You’d simply snap a photo or a video of your clothing item(you wearing the item if it’s an alteration issue) and email it to me, and I will email you with a detailed tip/instructions/ideas. You can even send me an after picture of your finished result and I can post it on the blog! Let me know if that sounds fun, and I’ll start a regular series.
I love this colour too and think that the dress looks a lot more flattering now.
What a simple DIY! I think I would have gone through many more complicated steps to get the same result – now I know I don't need to. Thanks for sharing! The series sounds awesome, I would be interested for sure. 🙂
Yes! I would love to pick your diy brain. I have some pieces that have me stumped. 🙂
Ofcourse, I have been wanting help because I just started sewing and I think Im just scared to mess up on the clothes.
Great idea! I would be interesed too 🙂 Hugs & kisses from Poland :*
Ohmygoodness! I would lovelovelove that idea!! And I love this alteration—genius!! <3
very good
Hi..I just found your blog not long ago…and I love it! I am also totally thrilled that you live near me 🙂 I am right in Orem and I love seeing your stuff all so near and close to home. I really love your stuff and so excited for your help. I love shopping DI and Savers and a lot of times I remake women's shirts into skirts for my girls but have not known/dared projects for me. You give me strength…I am going to try out what I learn from you! Thanks! Natalie at Happyandwell.me
Thank you Mel!
You are so welcome! and thanks for your input!
Feel free to email me! 😉
Sounds great, feel free to email me!
Thanks for your input!
Thank you so much!
thanks for your comment!
Awesome, we are so close! feel free to contact me with any questions about sewing!
I would totally take you up on that if you're still offering the help… It would have to be once I get back from school this summer… I wasn't able to convince my mom I should pack my sewing machine and take it to England 😉
Yes, I am! Ask away! 🙂
Sarah
I want it to be one of the beautiful vintage ones from Surrender Dorthy's shop. Meanwhile I'll take it easy on my own machine, it still has a few projects left in it. Lisa W. Degregorio