here is the tutorial you’ve requested for!
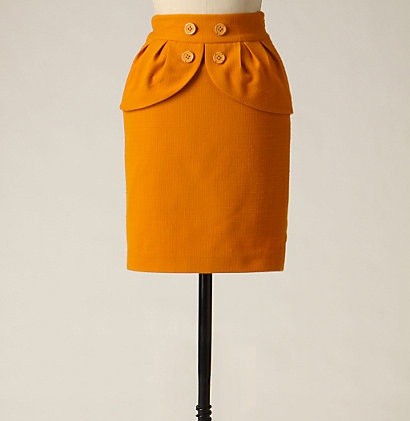
inspiration: honeyed peplum skirt by anthropologie $258.
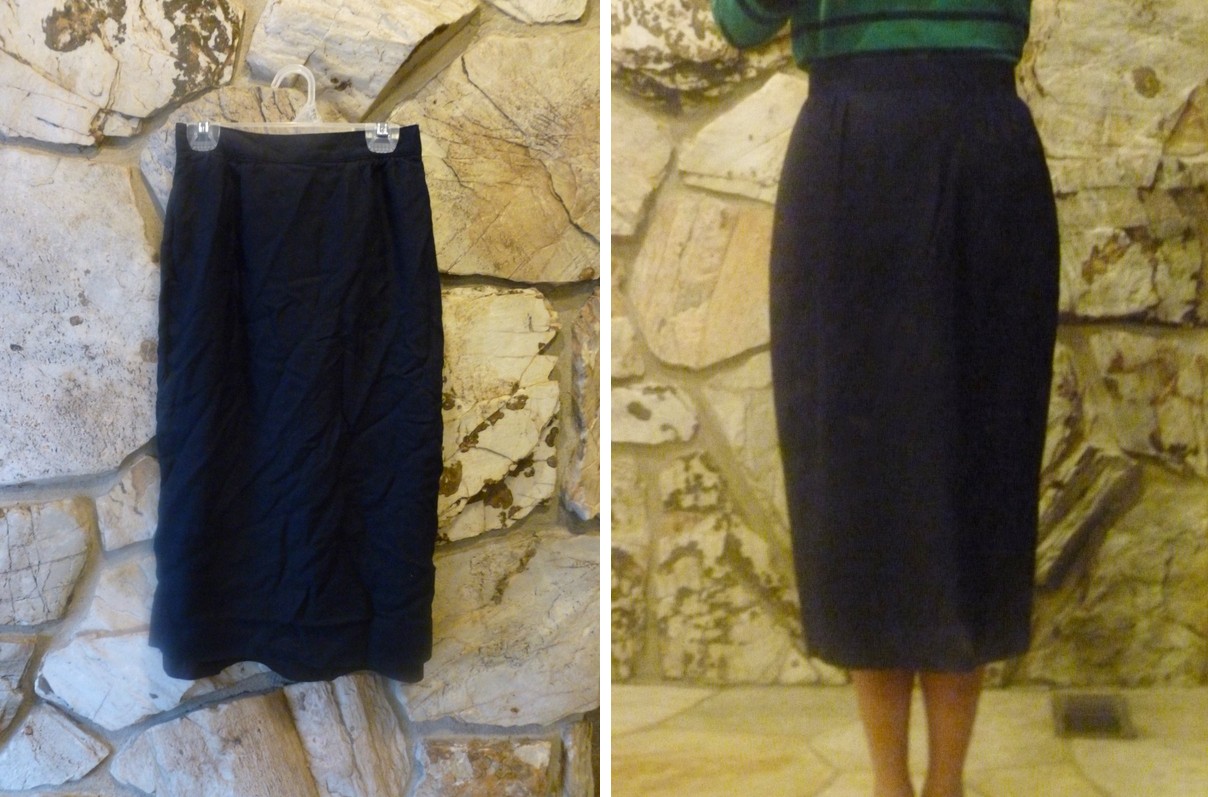
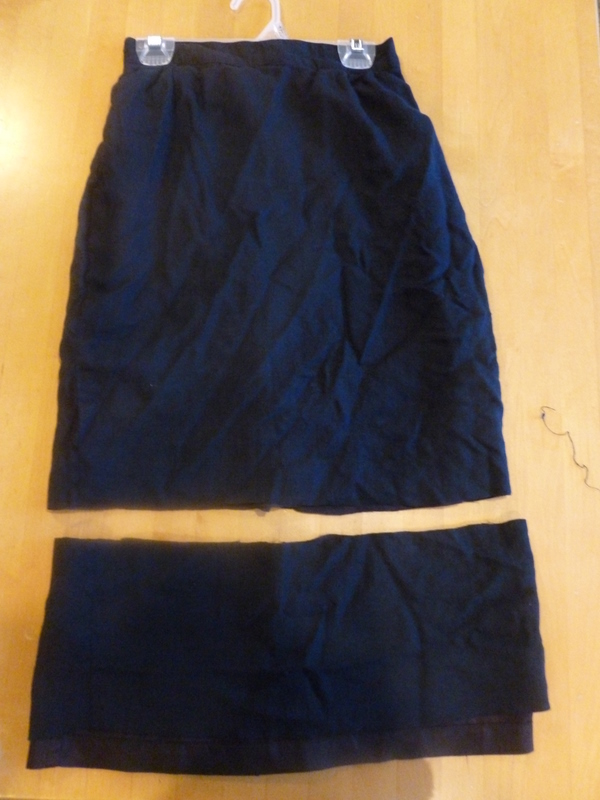
savers was having a 50% off sale on MLK day so i got this navy blue pencil skirt for $2.50. i knew i could do something with the extra length so i bought it and the honeyed peplum skirt came to mind.
before
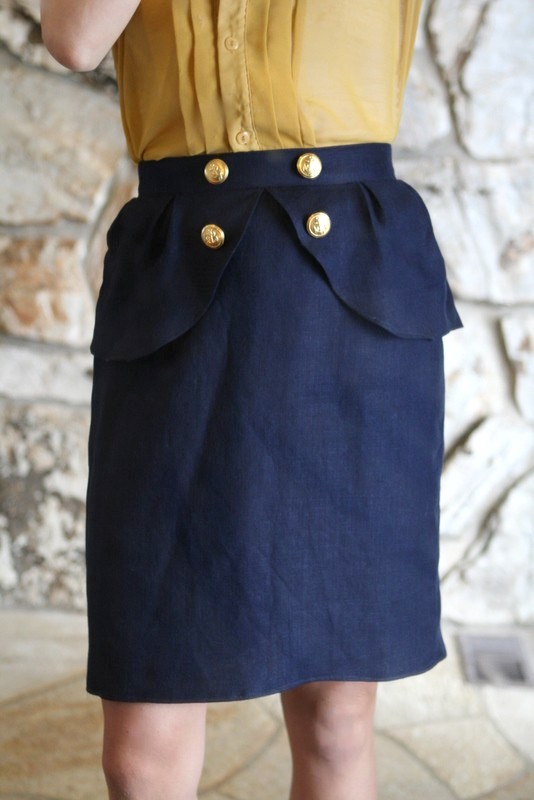
after

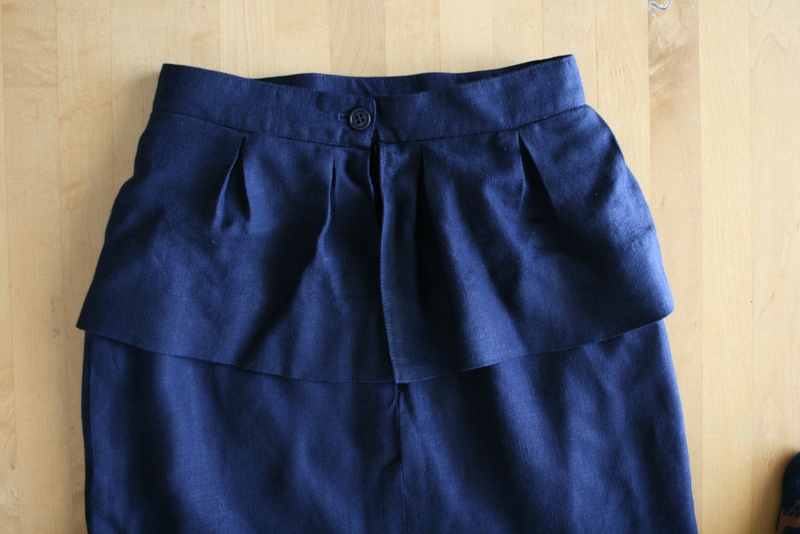
the back
let’s make it!
what you’ll need:
a mid-calf or longer skirt
4 buttons
scissors
matching thread
sewing machine
hand needle
estimated time: 45 mins.
skill level: a confident beginner or intermediate
budget: very low.
1. try the skirt on and see how much you want to cut the bottom and cut.

2. cut off the lining(if it has one).
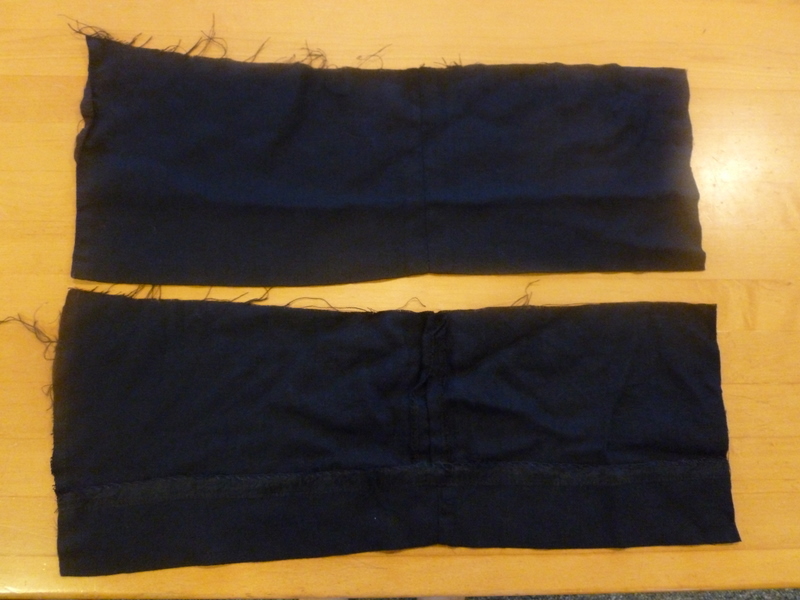
3. cut the strip in half.
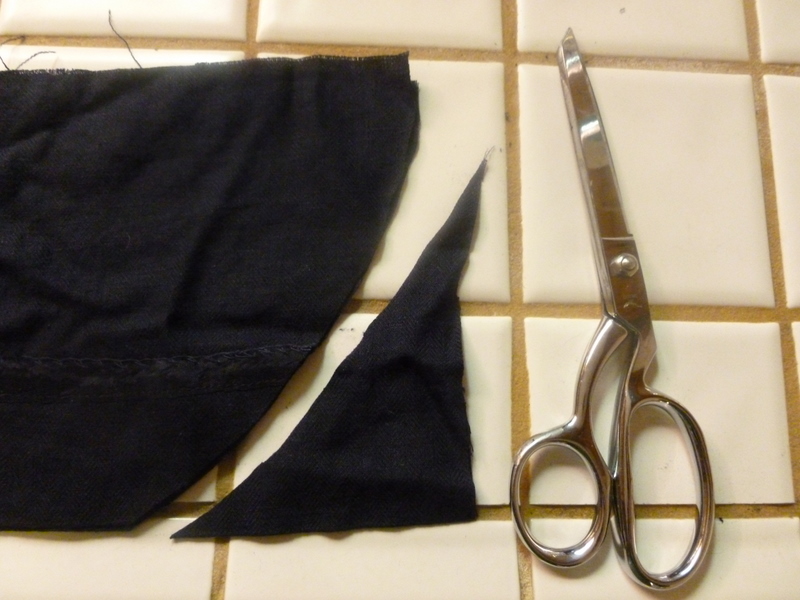
4. cut a rounded shape on one side of the strip.
repeat with the other strip to mirror the shape.

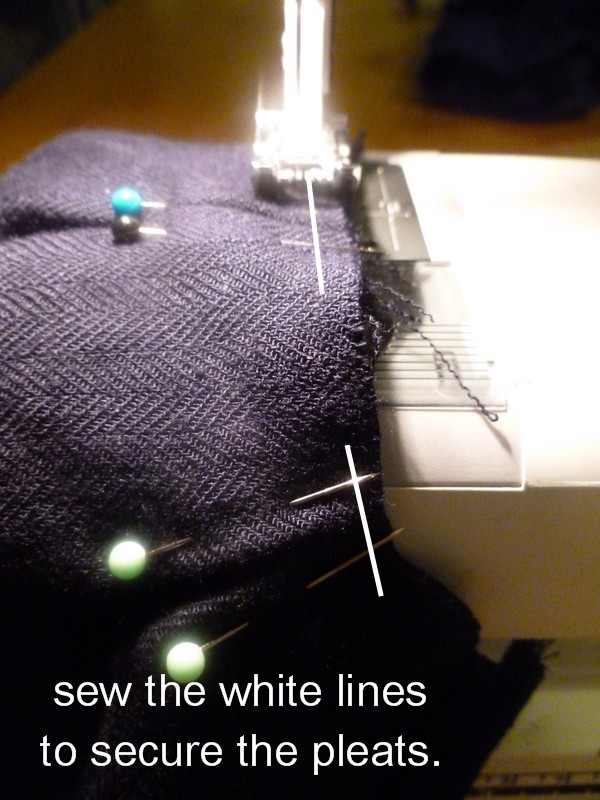
5. sew the bottom edges secure.
6.
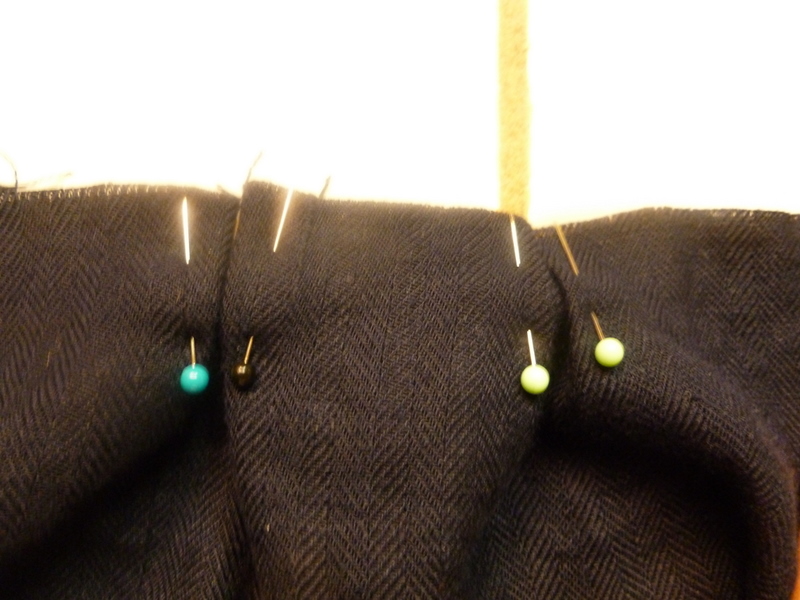
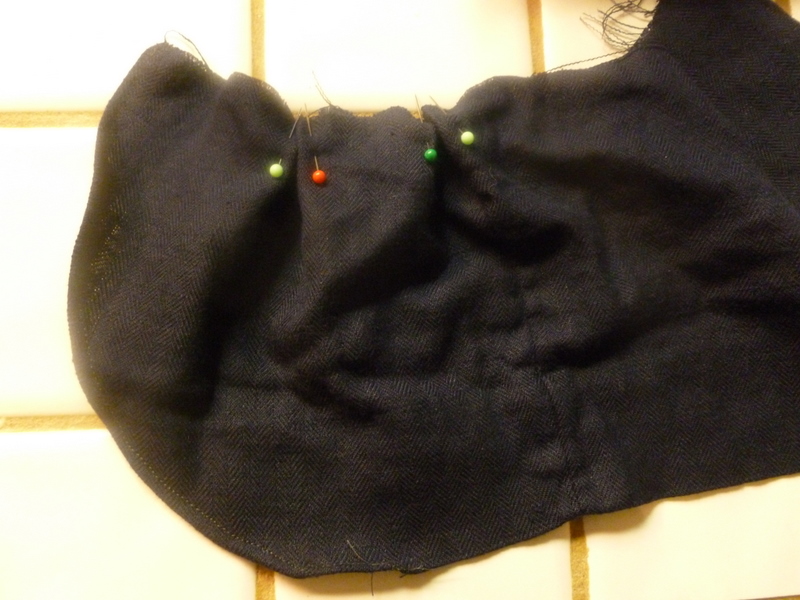
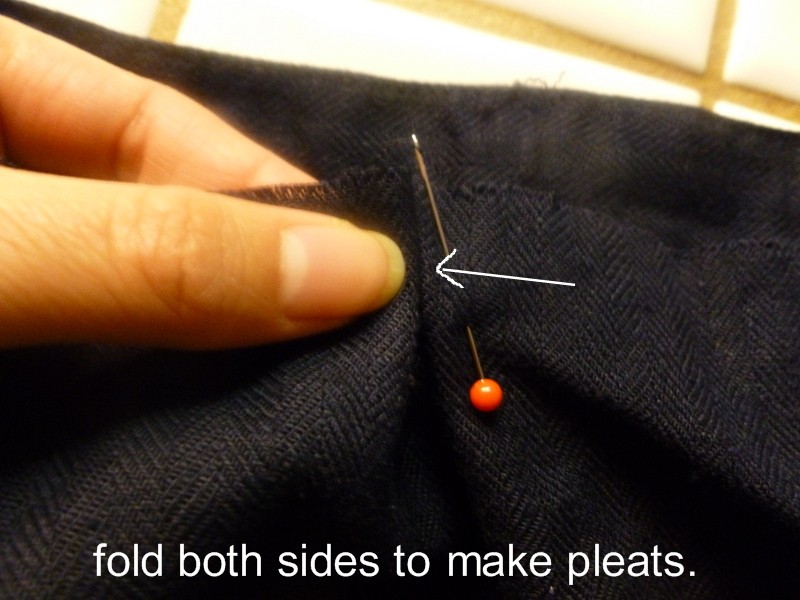
7. make two pleats in the front and two in the back. repeat with the other strip.
(see the pictures to know how much to space out in between the pleats)
8.
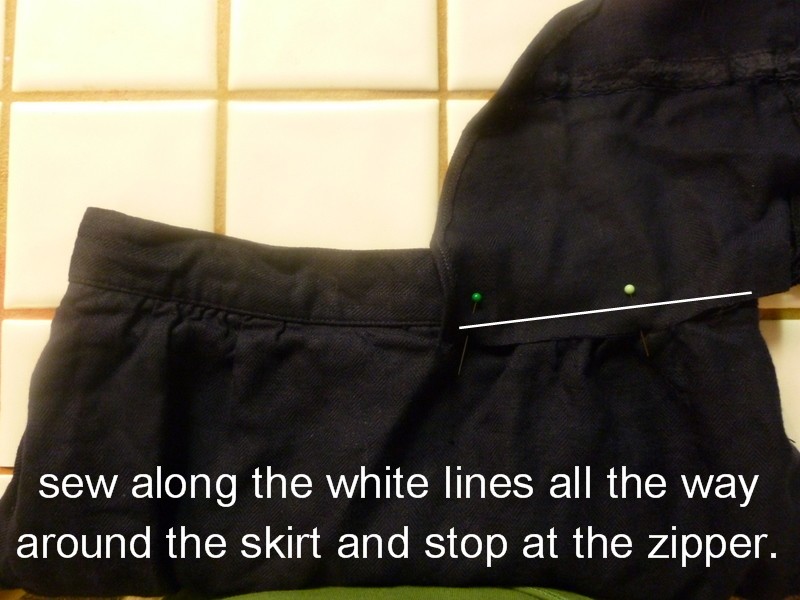
9. *pin the strip around the skirt first to make sure it goes all the way to the zipper.
adjust the pleats accordingly so it goes around the skirt.
10. flip the pleated peplum part down and iron.
you’re done!

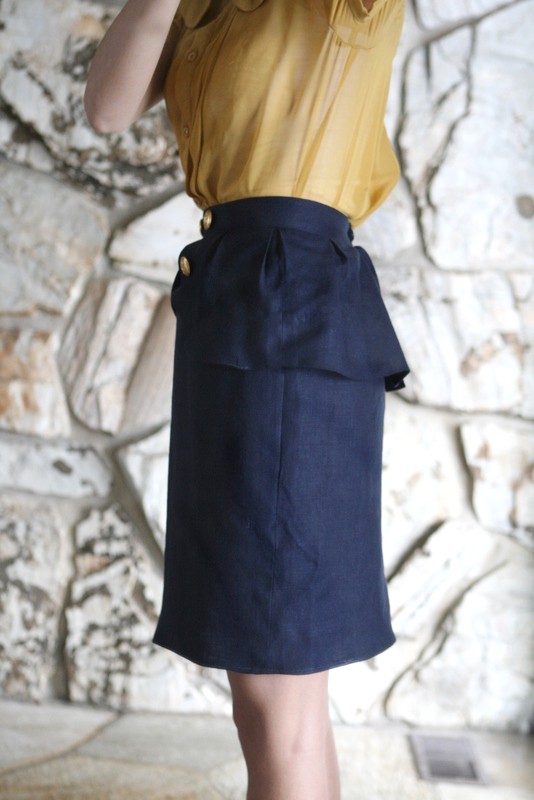

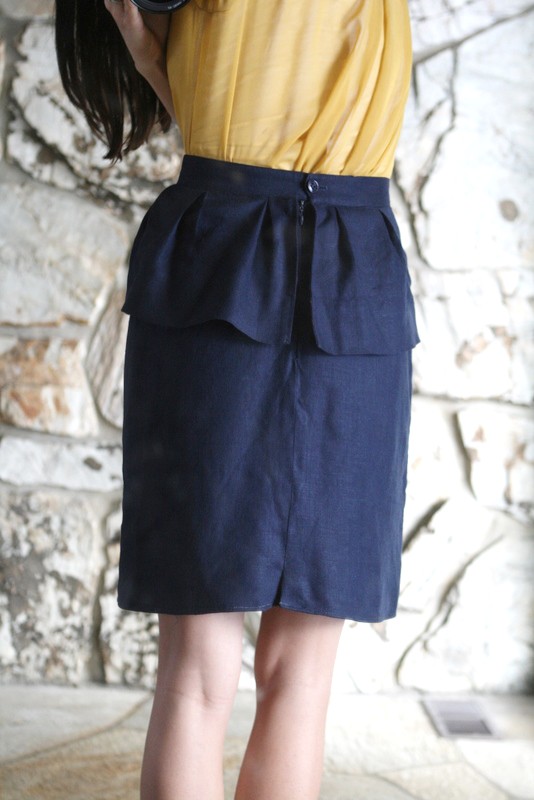

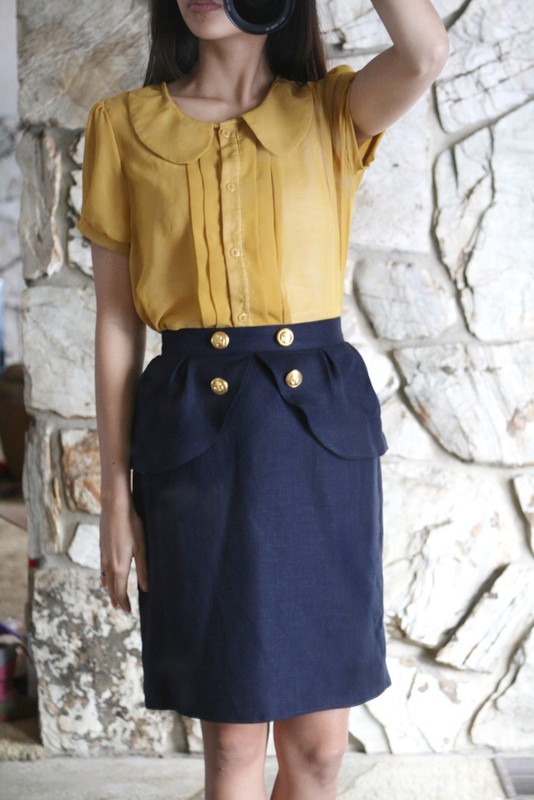
two things i did differently than the anthropologie version is that instead of the ruffles going all the way around in the back, it cuts off in the middle back.(which i had to do due to the zipper back), and then the more obvious, the buttons! i attached the sailor-inspired buttons which i think gives it a more personality. 🙂
skirt($2.50) + buttons($6) = $.8.50. i saved over $250!
SUPER AWESOME! Thanks for the diy ^^ xx
Brilliant, thanks so much for this!
oh gosh! I cannot believe you made that. i am going to have to try this!!
how cute! Thanks for sharing such a great and simple tutorial, the look-alike looks alike! 😛
heheh_ ^___^
This is an awesome tutorial! Thanks heaps 🙂
Now I need to hunt down an extra long skirt hehe
Talitha xx
Super cute, I love it. Great tutorial.
I love this, and the gold buttons are a great touch 🙂
xx
http://www.queenoffunkydiy.blogspot.com
İ love this DİY and i Will try it thx and big hugs from Turkey
this is so cute! i'm definitely going to try it over thanksgiving when i'm around a sewing machine 🙂
🙂 I know this is an old post, but it inspired me so much that I just posted my own version of it on my blog. Thanks so much for this tut – it was a success!
ps. I really love your blog! I'm a big fan!!!