• ABOUT
  • COLLABORATE
  • CONTACT

Life is Beautiful

Motherhood, Sewing, Family

  • SEW
  • HOME
  • PARTY
  • TRAVEL
  • SHARING MY HEART
  • SHOP

DIY: Gold sequin circle skirt; midi and maxi

December 29, 2014~ SEWING

DIY: Gold sequin circle midi skirt
DIY: Gold sequin circle maxi skirt
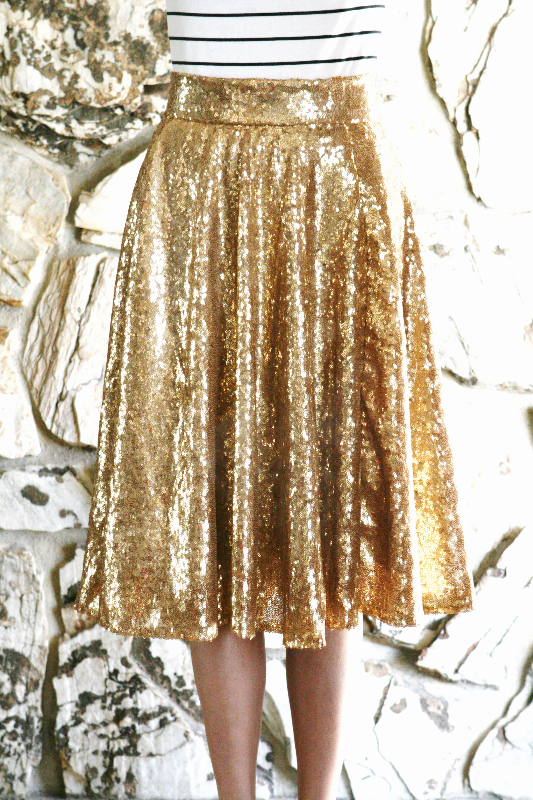
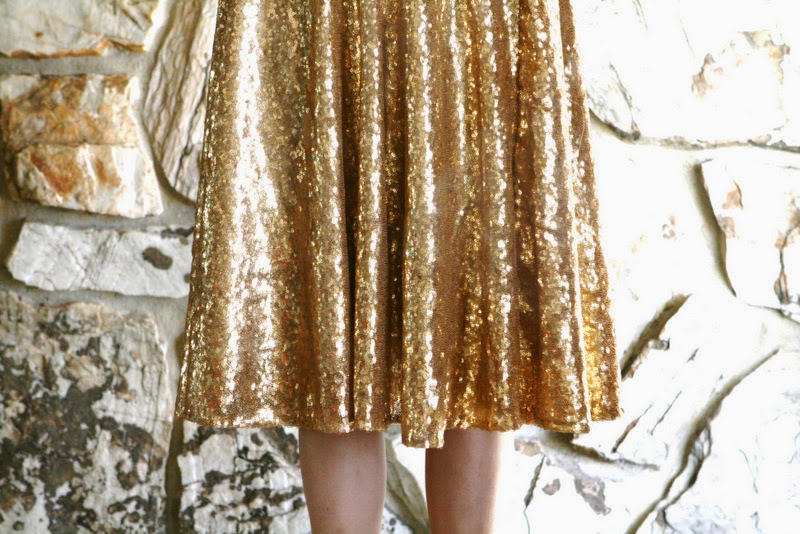
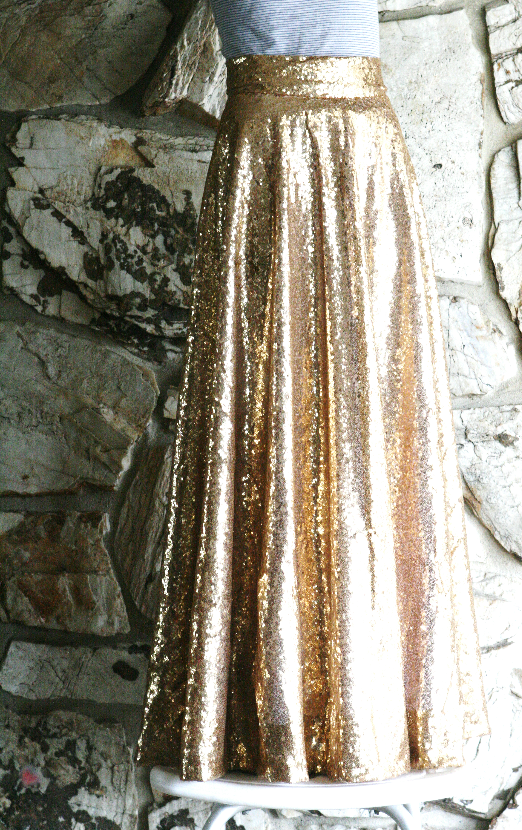
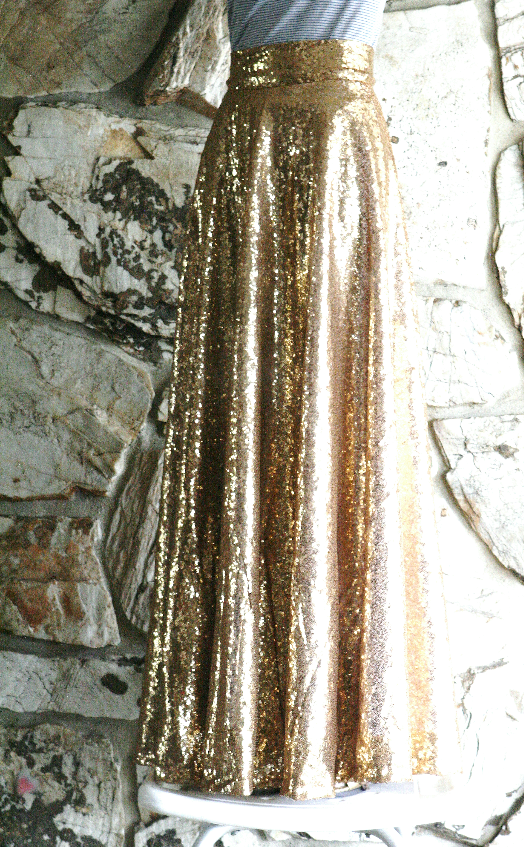
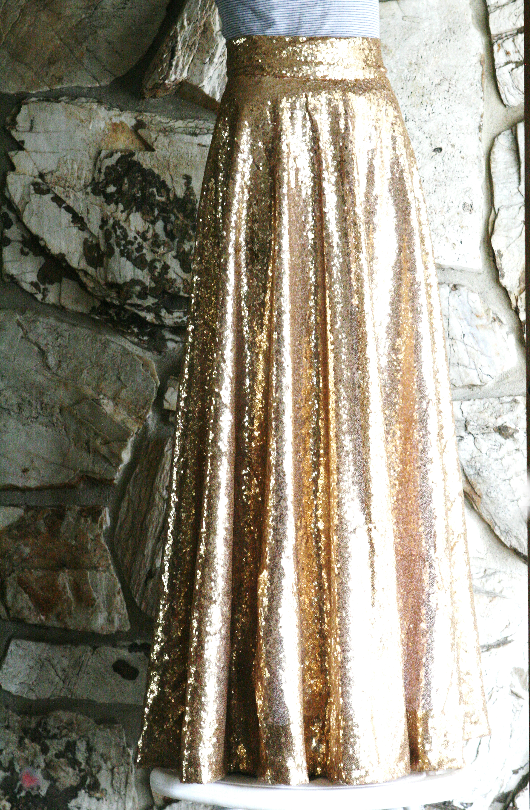
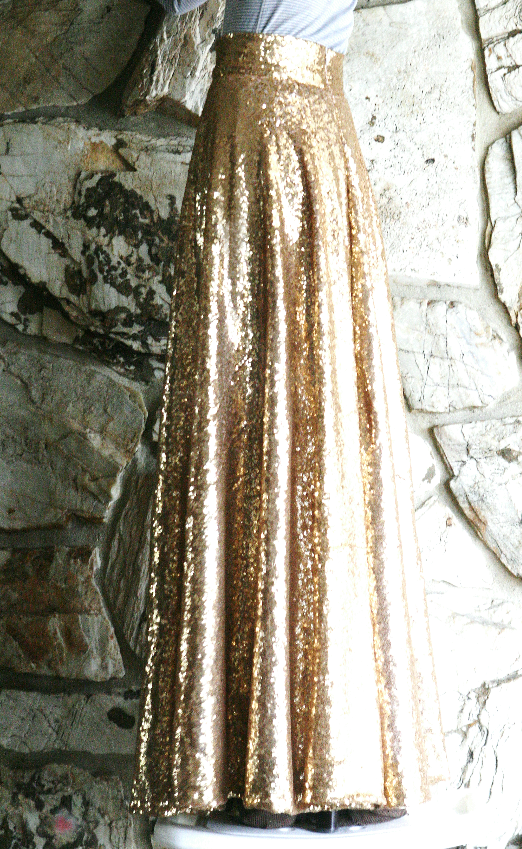
I wanted a gold sequin midi skirt and searched online for one but couldn’t find one I loved.  This fabric I used is between a gold and a rose gold, it’s a beautiful rich gold tone, darker than champagne and I personally like it much better than just gold or champagne gold, it looks more sophisticated and expensive.  The closest one I could find was a pleated skirt but I wanted a circle skirt and more of a true gold tone instead of a champagne, light gold I’ve seen online.  Some had black seams and lining on the top and the bottom of the skirt which I didn’t like.  Other ones were elastic waist which I think makes it look a little cheap and/or it wasn’t the midi length I wanted.  So I thought, why not just make one?  So I did and I love it!  I also posted on my Instagram and took orders and made a maxi skirt for a customer as well. Guess who the first customer was? Courtney Brown, the owner of Cents of Style! Talk about pressure! haha
Ideally, I would’ve liked to have taken better photos of the skirt and how I styled the skirts, but you know, 3 kids and all, I ain’t got time for that!  So self-shot images through the mirror is the best I could do for now.

DIY: Gold sequin circle maxi skirt


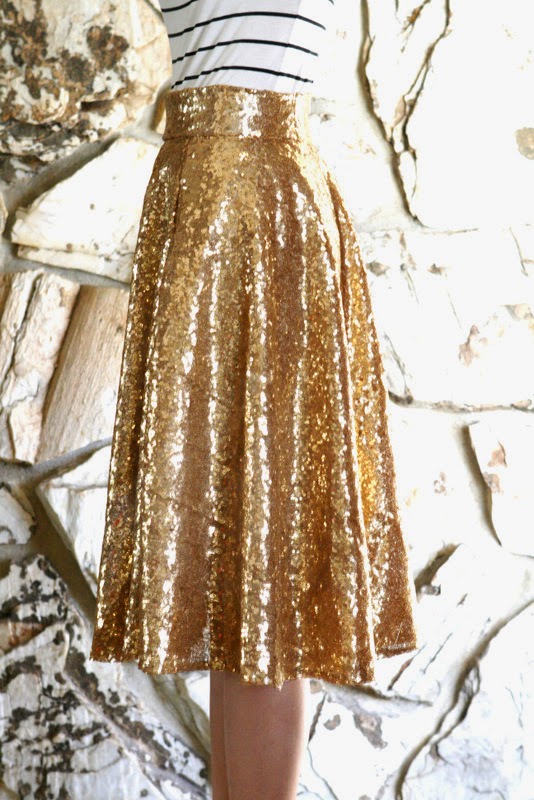
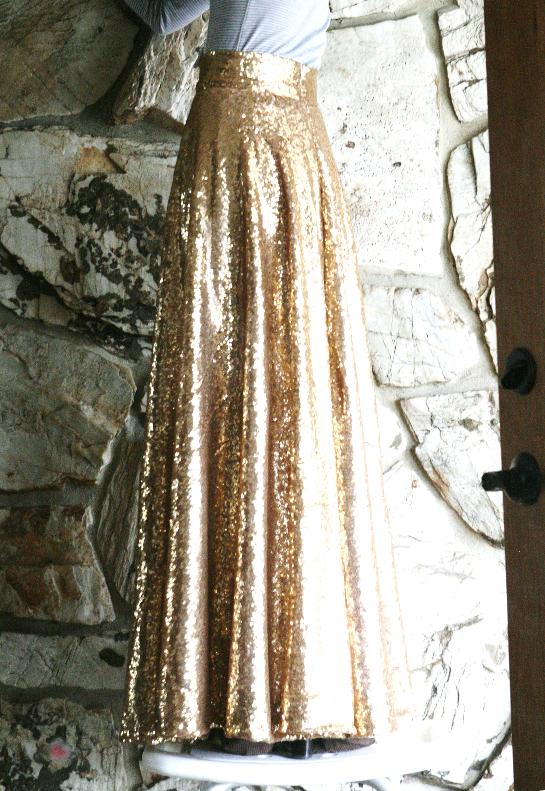
I am such a perfectionist so it took me about 6 hours to make the midi skirt and about 10 hrs. to make the maxi skirt.  I used to sell stuff I sewed online several years ago but stopped because my hobby became work and I didn’t enjoy it, especially since I’m such a perfectionist.  I think I would enjoy sewing so much more if I was more skilled, I am planning on taking some sewing classes to learn pattern making and such, my skills are so basic!  And I’m not saying this to be humble, I’m just telling the truth.  My creativity and my fearless attempts make up for my projects but my sewing skills are very, very basic, and that is why 90% of my DIY’s only require straight stitching and hemming and no zippers, button holes, or anything else!  So if any of you are intimidated to start sewing, I say just do it.  What’s the worst that could happen?  To unstitch what you’ve just sewed, right?
 My goal from now on for the rest of my life is to always continue to learn skills and to not let fear stop me from trying new things.  Before, I was always so scared of failing but what’s more embarrassing than failing is to live my life without trying because I was too scared, and look back in my life and have regrets.  What’s a better way to live, to be a coward and not have done the best I could in pursuing my dreams and then look back with regrets, or have tried to pursue and fail, but to look back on my life knowing that I’ve tried all the things I wanted to do and have no regrets?  I don’t believe there’s such a thing as failing while pursuing my goals and dreams, because I learn so much from failing and I’m that much more wiser and better from that experience.

Anyway, didn’t mean to go off on a tangent there, what I wanted to say was, this is my skirt I made, do you like it?  And what are some things you haven’t tried yet because you’re scared to fail? 

*UPDATE I no longer sell these skirts. I had to return them due to a manufacturing error. And since I do plan on selling them in the future, I do not give out the pattern nor the fabric info. Thank you for your understanding!
0

TAGGED: DIY 20 Comments

DIY: Men’s XL shirt into a little girl’s dress

October 20, 2014~ SEWING


Hi guys! I have exciting news, I am launching a new sewing YouTube channel!


Subscribe to my YouTube Channel to tune in every Thursdays at 4 p.m. MST for a new sewing video!

For behind the scenes and sneak peeks of my next refashion follow @sarahtyau on Instagram

See all of my DIY: Sewing projects

We are starting a mother-daughter sewing series! Watch “6 Reasons Why You Should Learn to Sew” and subscribe to our channel to learn to sew along with us!


Now on to this DIY:
This is one of 4 DIY sewing projects of making a large shirt into a little girls dress! Check out the other posts, one(this won a Refashion Runway contest!), two, three!
Men's XL shirt into a girl's dress DIY


Men's XL shirt into a girl's dress DIY
Before
I bought this men’s shirt at Target clearance section for $10 in size XL.  I loved the sailor boat pattern and also the fabric, the fabric is a thick, sturdy, high quality fabric which I liked.  I’ve had this project in my mind for a few months and wanted to do a turn a XL shirt into a girl’s dress part two(see part one here) so when I saw this shirt I immediately thought of turning it into a girl’s dress.
Instructions:
1. Lay the shirt down on a flat surface.
2. Using a girl’s dress as a reference, cut the sleeves off and the top body piece, and take out the pocket.  Cut and discard the extra fabric in between the shoulder area.
3. Sew the sides of the top piece together(shown in pink line).  Make sure you turned it inside out first(sorry it’s not pictured).
4. After cutting off the excess fabric on the shoulder area, you should now have a straight across skirt piece.  Baste stitch 1/2″ to the edge(shown in pink line) and pulling one side of the string, gather it together.  Sew the skirt onto the top piece.
5. Cut the sleeves smaller.


6. Sew along the pink line.
7. Sew the sleeves onto the top piece.
8. *I made a button hole and sewed the button on right below the waistline.
9. Serge the unfinished seams.


After
Men's XL shirt into a girl's dress DIY
What you’ll need:
-An oversized shirt(mine from Target)
-matching thread
-needle or sewing machine
-scissors
Directions:
1. Lay the shirt down on a flat surface.
2. Using a girl’s dress as a reference, cut the sleeves off and the top body piece, and take out the pocket.  Cut and discard the extra fabric in between the shoulder area.
3. Sew the sides of the top piece together(shown in pink line).  Make sure you turned it inside out first.
4. After cutting off the excess fabric on the shoulder area, you should now have a straight across skirt piece.  Baste stitch 1/2″ to the edge(shown in pink line) and pulling one side of the string, gather it together.  Sew the skirt onto the top piece.
5. Cut the sleeves smaller.
6. Sew along the pink line.
7. Sew the sleeves onto the top piece.
8. *I made a button hole and sewed the button on right below the waistline(when I cut the shirt diagonally along the waistline, I had to cut right over the button & the button hole so I had to make new ones).
Estimated time: 1.5 hours
Budget: cost of the shirt(mine was $10)
Skill level: a very confident beginner to intermediate

and to show you what I have to deal with while trying to take pictures…

My husband does this every time I really don’t want him in the pictures.  Sigh.  Why can’t he be so eager to be in pictures when I actually want him to be in pictures???
201

TAGGED: DIY 51 Comments

Come refashion with me at Tag’s Redux!

September 30, 2014~ SEWING

My refashion DIY won 1st place for the Tag’s competition, I am so excited!  Thank you so much for your support.  
Come join me this Friday at Tag’s thrift store from 3-5 pm where I’ll be answering all your DIY, sewing questions!   Bring any of your outdated clothes you have that doesn’t fit you right, needs an update, is just plain ugly to the event and I will give you tips and ideas on how to make it into a piece you love.  Basically, you’ll get free consultation with me as you use my brain for a bit! 
When: October 3rd, 2014
Where: Tag’s 710 South 500 East, American Fork, Utah 84003
Free for everyone, kids are welcome!
I hope to meet you there!
Click here to view the event on Facebook.
0

2 Comments

DIY: Grandma vintage dress refashion

September 19, 2014~ SEWING

BEFORE:
What I look for when I’m shopping at thrift stores with the intent to refashion, is the color of the fabric, the fabric itself, and features that I really like, such as pleats on the skirt part of this dress.  I really like this teal green color and don’t have any dresses this color, and the fabric seemed sturdy and easy to work with, and the pleats & lace I loved the details of.  Shoulder pads, giant collars, and the old buttons were not on the list. 😉
Directions:
I took out the collar, the lace, the buttons.
Separated the front and the back piece to get rid of the waste part of the dress.
cut the sleeves off and made it into short sleeves.
cut off the tear drop part of the lace.
sewed the lace onto the hem of the sleeves.  It was the perfect length!
The After:
dress: DIY
necklace: ChloeDavidLA c/o
heels: Thredup


What you’ll need:
– outdated dress
– matching thread
– needle or sewing machine
– scissors
– pins


Directions:
1. Take off the lace, the collars, and the buttons.
2. Separate the front and back piece of the dress.
3. Cut off the waist part and sew the top & bottom back on.
4. Sew the front and the back piece back together.
5. Take off 3″ from both sides of the dress.
6. Cut the bottom of the dress to make it knee length.  Hem the bottom.
7. Cut the sleeves off, cut it into short sleeves, pleat the shoulder part of the sleeves, and sew the sleeves on.
8. Sew on the lace onto the bottom part of the sleeves.
9. Sew the v-neck line higher.


Estimated time: 2 hrs.
Budget: very low(mine was $9).
Skill level: A confident beginner to intermediate .


Subscribe to my new YouTube channel for a new sewing video every Thursday!

For behind the scenes and sneak peeks of my next refashion follow @sarahtyau on Instagram

Watch my other Refashion Revision episodes

We are starting a mother-daughter sewing series! Watch “6 Reasons Why You Should Learn to Sew” and subscribe to our channel to learn to sew along with us!

1

TAGGED: DIY 32 Comments

About to tackle this DIY

September 17, 2014~ SEWING

Isn’t this dress the cutest dress you’ve ever seen? ;). A couple days ago I was invited to a blogger party at Tags thrift store where we got to pick out any 2 items we wanted.  Using the items we picked out, we are to use it in any way we want and enter in a competition.  The winner will get to collaborate with Tags in the near future and win some cash.  So of course I picked out the cutest, most fashion forward piece I could find.  So of course all the other bloggers wanted this piece and after some cat fights and dog piling, I came out on top and was able to snatch it.  I’ll be tackling this beast, I mean beauty tonight and will be posting the after tomorrow.  So wish me luck! 
0

TAGGED: DIY 3 Comments

  • « Previous Page
  • 1
  • …
  • 14
  • 15
  • 16
  • 17
  • 18
  • …
  • 31
  • Next Page »
cutmypic
Hello! My name is Sarah and I am so happy to have you here! Here you'll find DIY sewing, DIY home building & decor, honest and vulnerable posts of motherhood and snippets of my family. We are building our dream house and will update you regularly on our whole process from start to finish and I am also starting a mother-daughter sewing series. So I hope you stay awhile!

BLOG ARCHIVES

SEARCH

JOIN THE LIST

- THEME BY ECLAIR DESIGNS - Web Hosting By RFE Hosting -