![]() but I hope everyone had a great weekend! besides listening to christmas music on the radio(yes! they started playing it a few days ago! i’m so happy about it!) mine was filled with my daughter’s 3rd b-day party planning, stressing, staying up late baking/sewing/crafting for the party, and celebrating the special day and can I just tell you I’m SO glad it’s over? Her 1st and 2nd birthday she was so young that we didn’t need to have any entertainment really, just great food and mingling but now that she’s older and there actually needs to be entertainment, games, prizes, etc., it was so stressful! Do you other mothers stress about planning birthday parties too? so i came up with a simple solution. my husband’s going to plan the whole party for my other daughter’s birthday in march. genius right?
but I hope everyone had a great weekend! besides listening to christmas music on the radio(yes! they started playing it a few days ago! i’m so happy about it!) mine was filled with my daughter’s 3rd b-day party planning, stressing, staying up late baking/sewing/crafting for the party, and celebrating the special day and can I just tell you I’m SO glad it’s over? Her 1st and 2nd birthday she was so young that we didn’t need to have any entertainment really, just great food and mingling but now that she’s older and there actually needs to be entertainment, games, prizes, etc., it was so stressful! Do you other mothers stress about planning birthday parties too? so i came up with a simple solution. my husband’s going to plan the whole party for my other daughter’s birthday in march. genius right?
anyway, here is my inspiration:
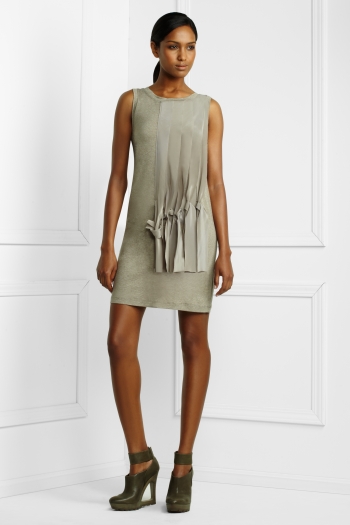 BCBG Maxazria knotted panel dress
(i came across this store this past may when i went to vegas to celebrate weaning my baby. my friends wanted to go in and once i stepped inside i was like, “whoa, look at this! look at this! WHAT STORE IS THIS???” and my friends were surprised i’ve never heard of this store! which comes as no surprise however since i’ve never heard of chanel, dolce and gabanna, louis vuitton, etc., until i was 20 yrs.old and went to korea. where have i been all my life right? in the bubble of course. anyway, i loved almost everything in the store. except for the price tag… )
eh hem, moving on from my tangent…
in my closet i found
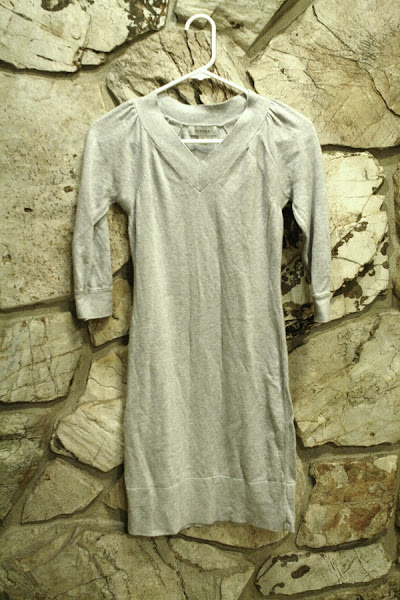 a gray sweater dress
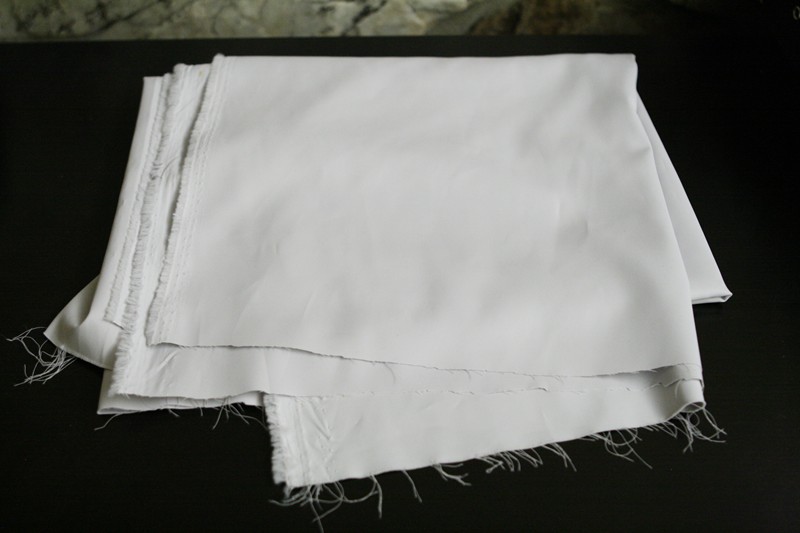 and i bought a yard of gray silky fabric from walmart for $1.50
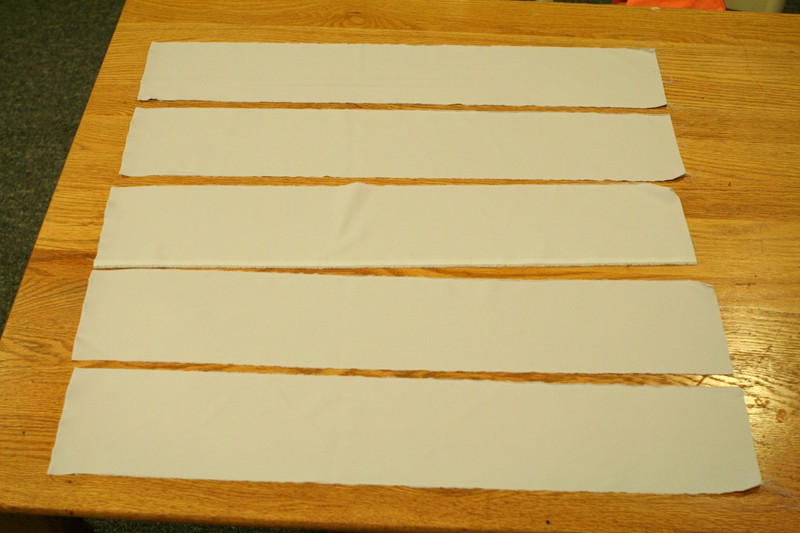 1. cut the fabric in 5 strips, about 5.5″ wide and however length you’d like it to be.
 2. sew the right sides together(which means the side you want it to show touches each other on both sides and you can’t see it but is on the inside when sewing like this)
*and yes, i have the most ghetto sewing machine due to my girls drawing on it with a permanent marker.
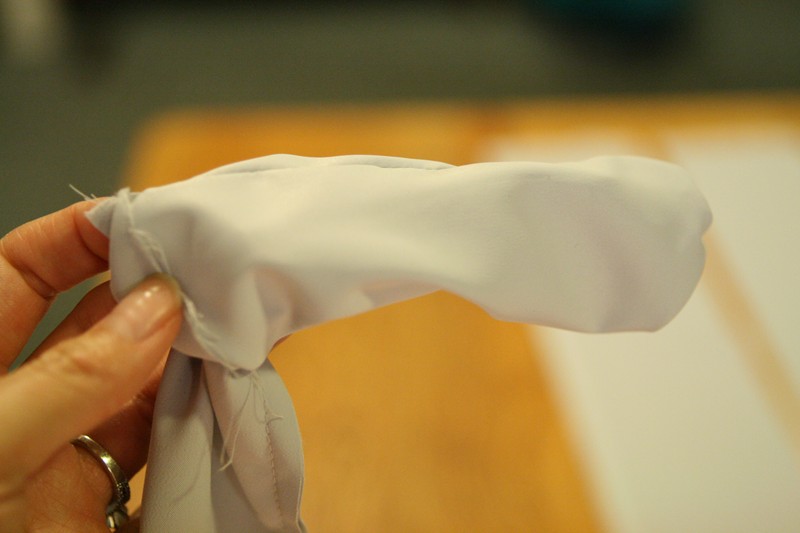 3. flip it inside out. i didn’t need a safety pin since the strip was wide enough for my fingers to go in and pull.)
 it looks like this.
 4. iron it flat.
 5. safety pin the strips along the neckline.
*after many trial and error, this was the only way that worked for me.
i tried sewing the neckline first,then the strips vertically,but it would bunch up,
it wouldn’t come out straight, so after many attempts and unstitching many times,
i felt like giving up for the night but then i thought of you(yes you!) and so i continued and finished! aren’t you proud of me?
 6. let the strips hang straight down and with liquid stitch glue the strips down to about 2″ below your belly button. leave about 1″ space on the very top of the strips so you can sew it easily later on.
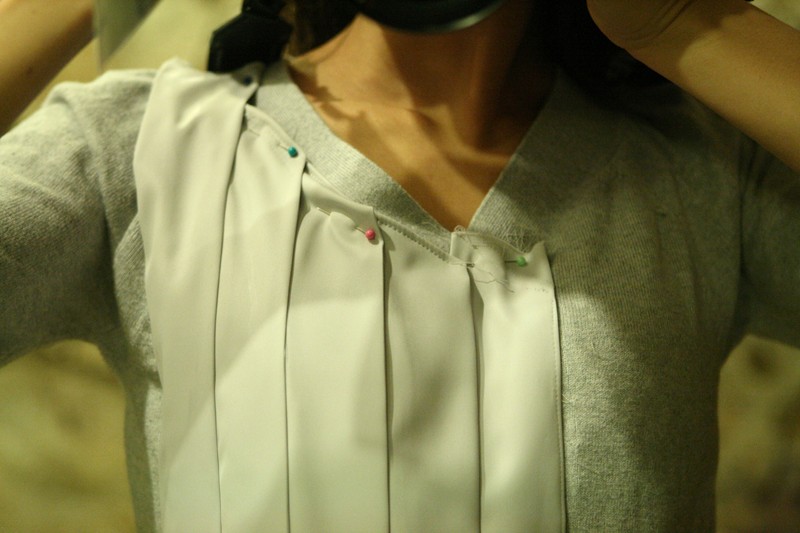
 7. take the safety pins out and safety pin again, this time so the neckline is clean and the strips below are straight and unwrinkled.
 it should look like this.
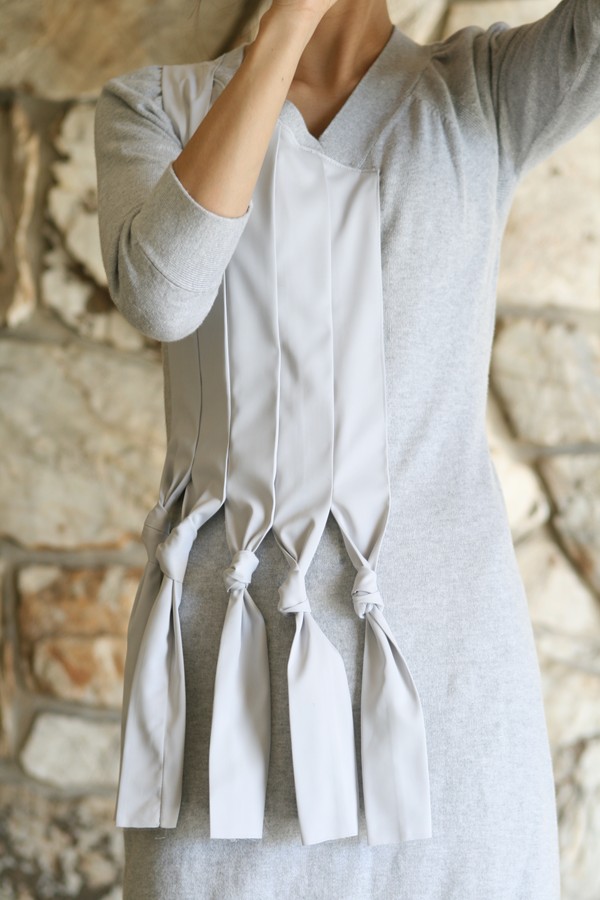
 8. tie 5 knots.
 9. cut all the strips the same length in a straight horizontal line.
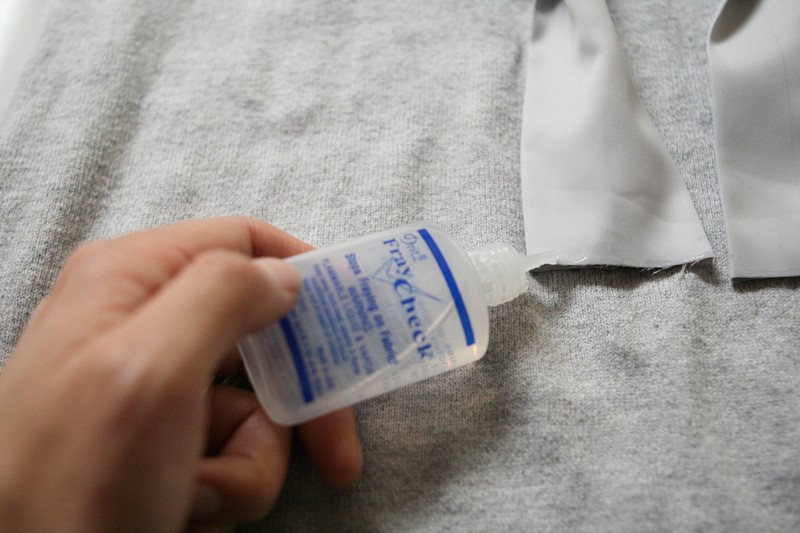 10. use fray check on the ends of the strips.
*i knotted first then cut since i wanted some knots bigger than the others but still the same length.
and after:


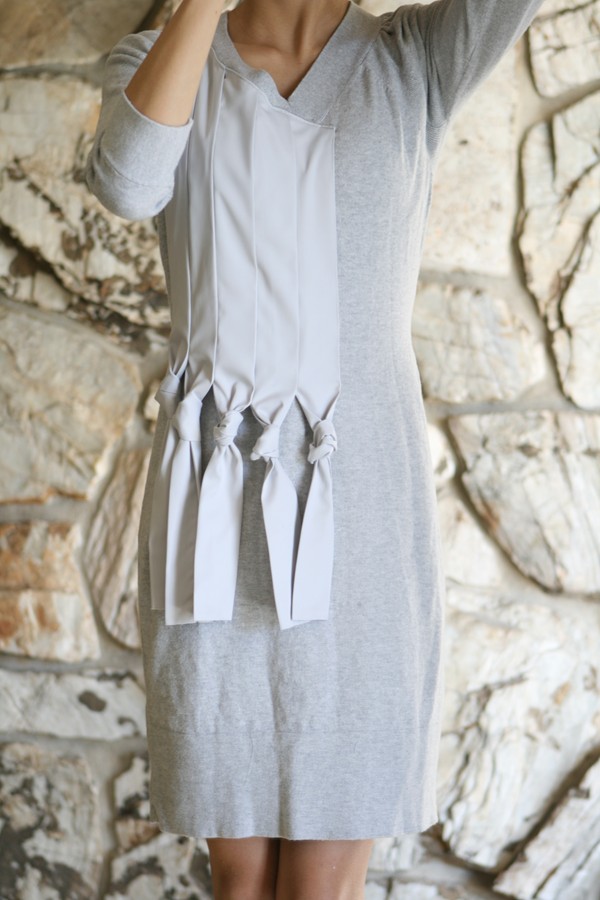
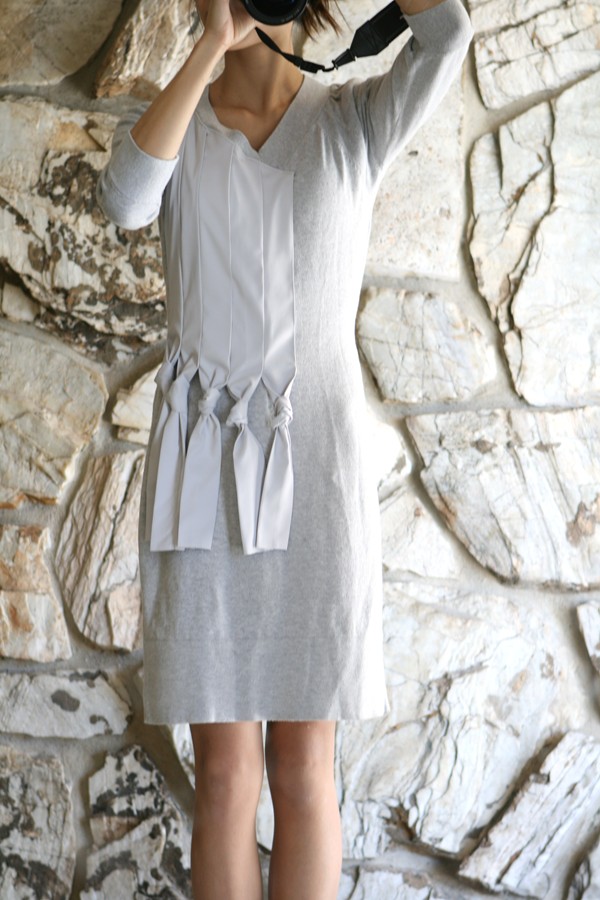 i wish i had the strips a little longer like the original dress but i had to match the other strips to the length of the strip on the shoulder. oh well.

 (keep in mind the strips are on the right side just like the inspiration dress
but since it’s taken through the mirror, it’s shown the opposite way.)
 i like it without the knots too. (w/o the wrinkles of course.;)
i saved over $200!
Oh I must seek a grey dress first
What a fantastic job you did, you should set up for real as a shop and give courses- your tutorial is awesome !!!
I love the different textures in fabrics you used! Such a trendy dress for an amazing pricetag 🙂 Please add this to my linky party and giveaway http://www.seaminglysmitten.blogspot.com
Jenny
That turned out so nice! A dress to be proud of for sure!
http://wiccanmakesometoo.blogspot.com/
Very creative Love it!
New follower via Keep it simple link party! LOVE this dress!!
Very well done DIY. I also love the shoes the max Azria girl is wearing!
Awesome job sarah! Not my style but you did a great DIY. By the way, what is fray check and liquid stitch??? I think I kind of know what it might be from the names, but what exactly and how exactly do you use it?
thank you so much everyone! @flora: fray check is a clear type liquid that you put on the edges of the fabric from fraying. and liquid stitch is basically sewing the fabric with the liquid adhesive. both machine washable, dries clear, and works great! you just squeeze a little on the fabric like you would a elmers glue. hope that helped! 🙂
So fun! Link it up at my new linky party, http://gigglesglitzandglam.blogspot.com/2010/11/glam-party.html
that rocks!
That dress is so pretty the satin ribbons really change the look.
Love the dress. In reference to your permanent marker "issue", have you tried taking a dry erase marker and coloring over the permanent marker? This is how I've gotten sharpie off of my dry erase board at work before.
Hope that helps. 🙂
This is so cute! I think I like it better than the store bought one to!
Looks great! Good luck on the Shabby Apple contest! I'm a new follower via TRH link-up too.
sabrinaalery.blogspot.com
Adorable! You even look better in yours than the model wearing the BCBG!
Take care,
Lisa
Just posted about this on my blog as a favorite from last week. Link up a new project if you get a chance!
http://www.seaminglysmitten.blogspot.com
Jenny
I admire your sewing skills (and creativity!). It turned out really cute.
Just a tip.. you should be able to get the permanent marker off your machine with alcohol, but if that doesn't work, Goo be gone usually does. 🙂