Before:
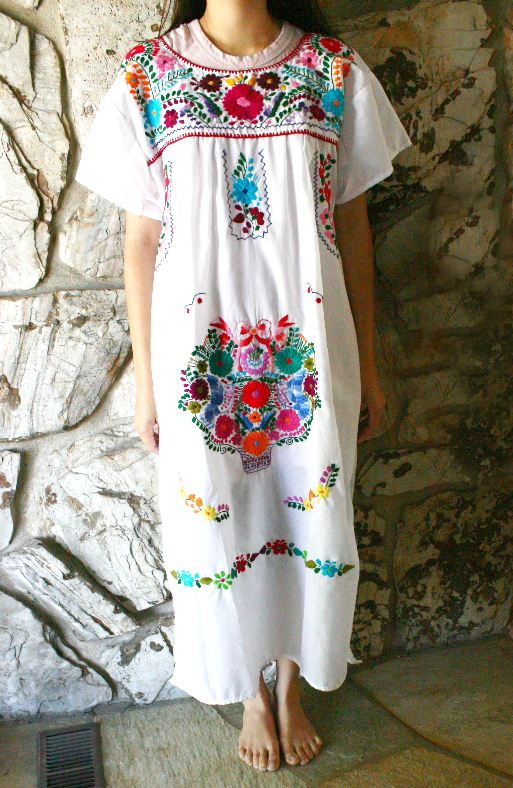
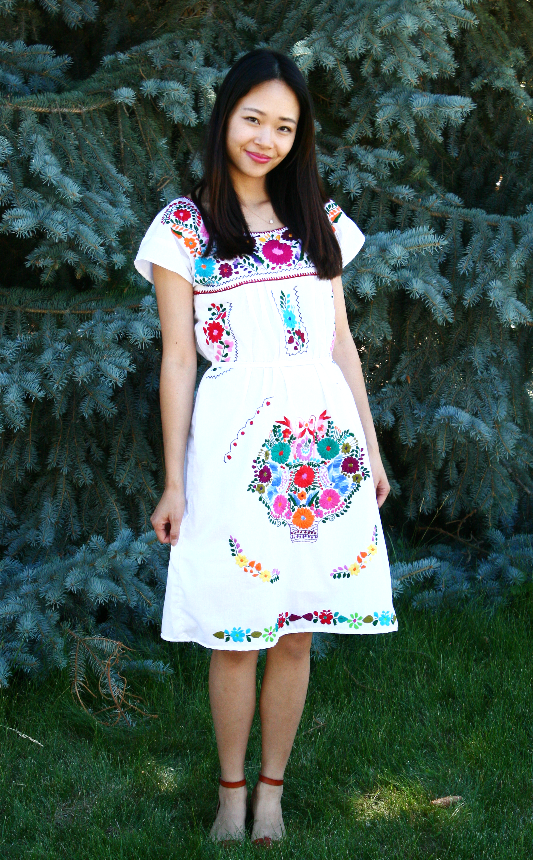
I got this cute dress from the Flor De Luz Shop and I think it’s cute without any alterations. But being petite, the length wasn’t the most flattering on my body shape or height. So I altered it to make it more flattering.
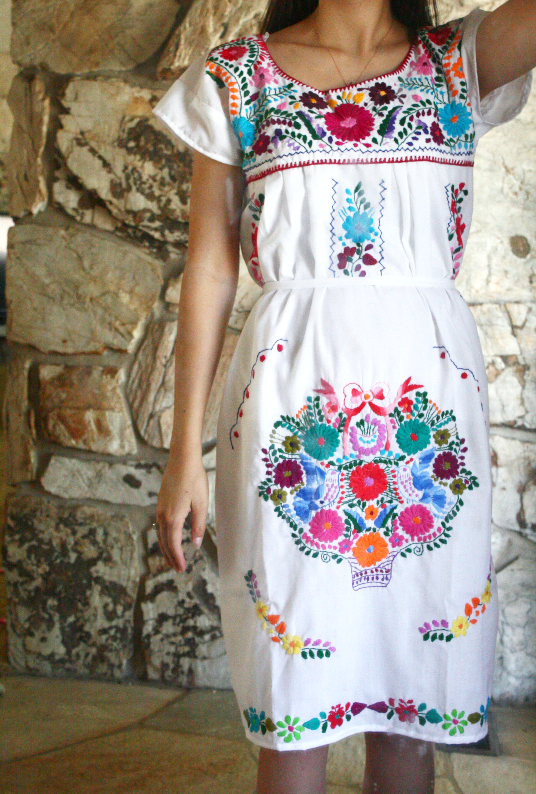
After:
Instructions:
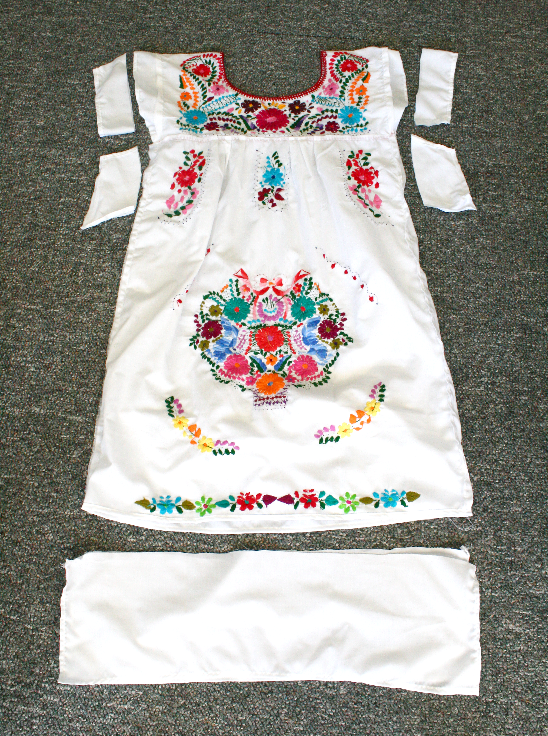
1. Cut off the extra fabric on the sleeves and the bottom of the dress. Hem the bottom.
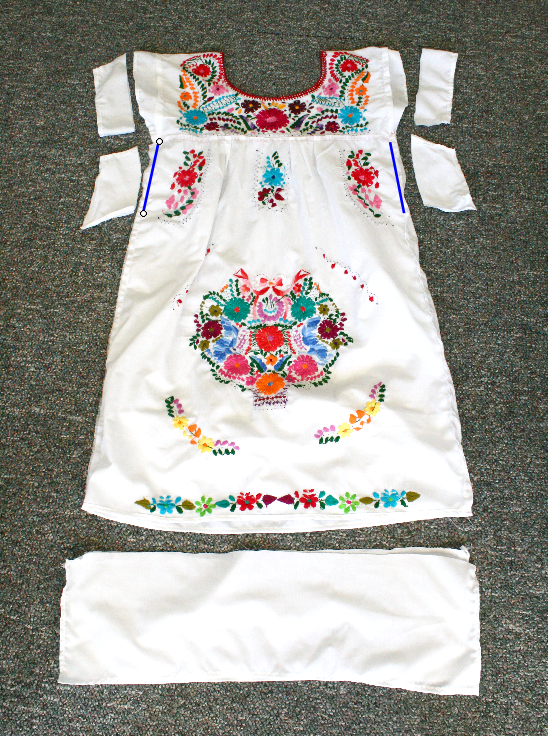
2. Sew the area right below the arm hole(lined in blue) closed. Hem the sleeves.
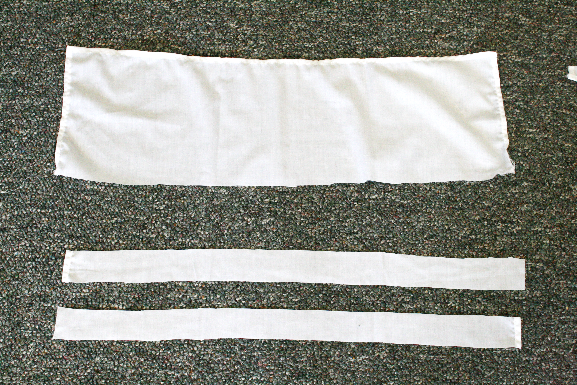
3. Using the extra fabric that you cut off from the bottom of the dress, cut two 1 1/2″ wide strips.
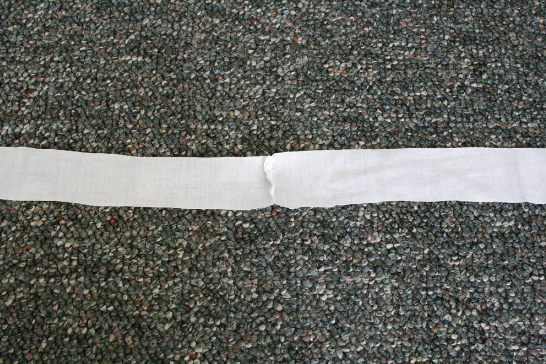
4. Sew the right sides of the strips together to make one long strip.

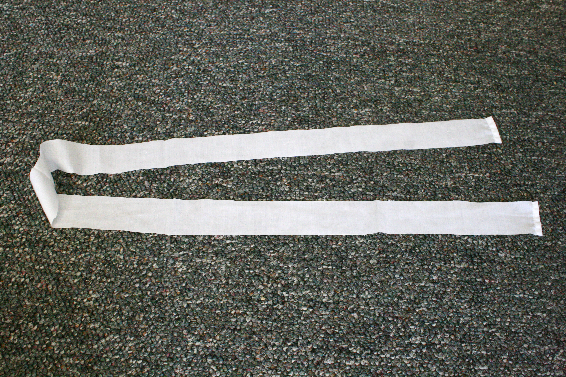
5. Fold the strip in half width-wise and sew the edge together.
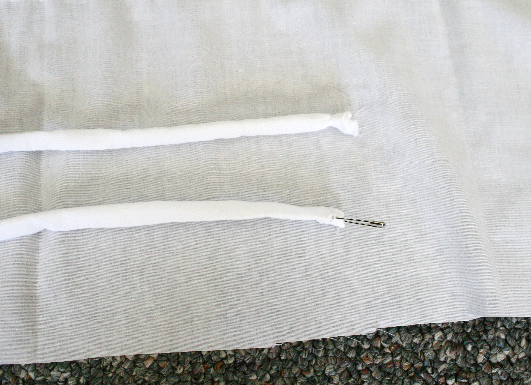
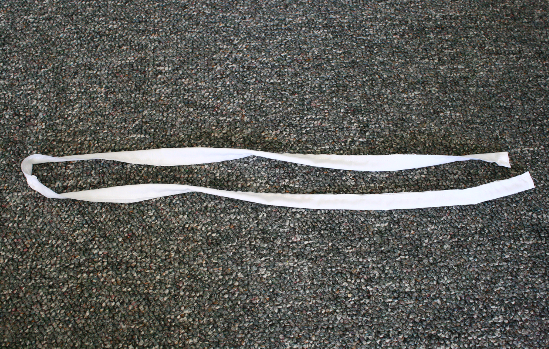
6. Safety pin one edge of the strip and put it inside the strip.
Push the safety pin all the way across to the other side to flip the strip inside out.
Now you have your belt!


What you’ll need:
-A dress
-matching thread
-needle or sewing machine
-scissors
-safety pin
Directions:
1. Cut off the extra fabric on the sleeves and the bottom of the dress. Hem the bottom.
2. Sew the area right below the arm hole(lined in blue) closed. Hem the sleeves.
3. Using the extra fabric that you cut off from the bottom of the dress, cut two 1 1/2″ wide strips.
4. Sew the right sides of the strips together to make one long strip.
5. Fold the strip in half width-wise and sew the edge together.
6. Safety pin one edge of the strip and put it inside the strip. Push the safety pin all the way across to the other side to flip the strip inside out. Now you have your belt!
Estimated time: 35 minutes
Budget: just the cost of the dress
Skill level: beginner
Cutting off the bottom fabric really made tha pattern pop. So cute on you!
So cute! I've had my eye on a few of these dresses lately, but I wasn't sure I'd be able to alter them the way I envisioned it in my head since I'm petite as well. This post is EXACTLY what I needed to give me the confidence to do it! Thanks so much for linking up at Inspire Me Wednesday! 🙂
SUCH good suggestions! I have a shorter body type, too, so these dresses don't always look the best on me. Now I know how I can fix them!
Absolutely gorgeous. I often buy dresses that are too big in Charity shops because the fabric is beautiful and then try to make them fit. Your tips will come in really handy thanks.
You are amazing! That looks gorgeous!!!
Fantastic – such a small change, but a huge difference! Thanks for linking to the Craftastic Monday party at Sew Can Do – would love to feature this if you could add a party button or link somewhere (couldn't find if you have a link-up page) 🙂
Amazing! Such a cute transformation. Saw this at A Round Tuit :-).
Hi Sarah! You're a genius! I love reading your DIY on sewing, you make it seem so easy. I was wondering if you could give me a tip… I have long pleated skirt that is too long for me, do you have any tips on shortening it? I am a little intimidated by it because of the tiny pleats, have you ever done a DIY on one?. If you do please let me know! Thanks!
SO CUTE! Love your taste!
igetmycraftyfrommymama.blogspot.com
I know what you mean, hmmm I've never tried it before but can totally see the hesitancy in cutting it. I would say don't cut it with the scissors but cut it with the roller(is that what you call it? haha) so it cuts smoothly all around. I would flatten it as you roll/cut. Also mark it with a straight line before cut/rolling it. Hope that helps! Let me know how it turns out!
I thought I had gotten rid of my muumuu dress a friend got me in Mexico a couple years ago, but I just found it in my closet tonight so I'm going to try this later this week! I've never altered clothes before, so wish me luck! Thanks for the tutorial.
This is a Mexican peasant dress from Chiapas. The waist isn’t meant to be cinched in. It’s a cultural thing.
I absolutely love this makeover! So simple, it gives me hope that I can redo some of my embroidered dresses. Thanks for posting this!