I apologize for the lack of posts. The charger to my laptop is broken so the only access I get is through my phone or at my parents’ house. Not to mention I went to Vegas for the weekend with my girlfriends with NO kids WOO HOO!
Not using the internet has been pretty nice though I gotta admit, and I realized I’ve been using the computer way too much and that I should focus on what’s more important like relationships with my family. So I don’t think I’ll be blogging everyday, maybe every other day or so.
But guess what!? I did work on a DIY project to not disappoint you readers out there. 🙂
 I bought this shirt for $5 at Old Navy in XL. I’m in love with light blue these days so I knew I had to buy it in hopes of making it into something cute.
 My inspiration came from this Climbing Cowlneck top from Anthropologie. after a few hours and a few days later:


*I had so many requests for a tutorial for this one that I couldn’t resist. 😉 The only problem is the shirt is already made so there are n0 step by step pictures. But I can take detailed pictures of the after and explain the how-to’s as best as I could, does that sound good? good, here it is!
I altered the XL shirt into a XS first. I did that by putting a xs shirt on top of the shirt and then roughly measuring how much to cut. Then I cut up the sleeves into a cap sleeve, and cut up the sides. I sewed up the sides and left the sleeves alone. I also cut up the neckline hem so it’s just a open hem. One important thing to note is that the front of this shirt will end up to be the back of the shirt and the back will be the front of the shirt. This was necessary since the neckline has to be pretty high enough to be able to create the draping for the cowlneck effect.
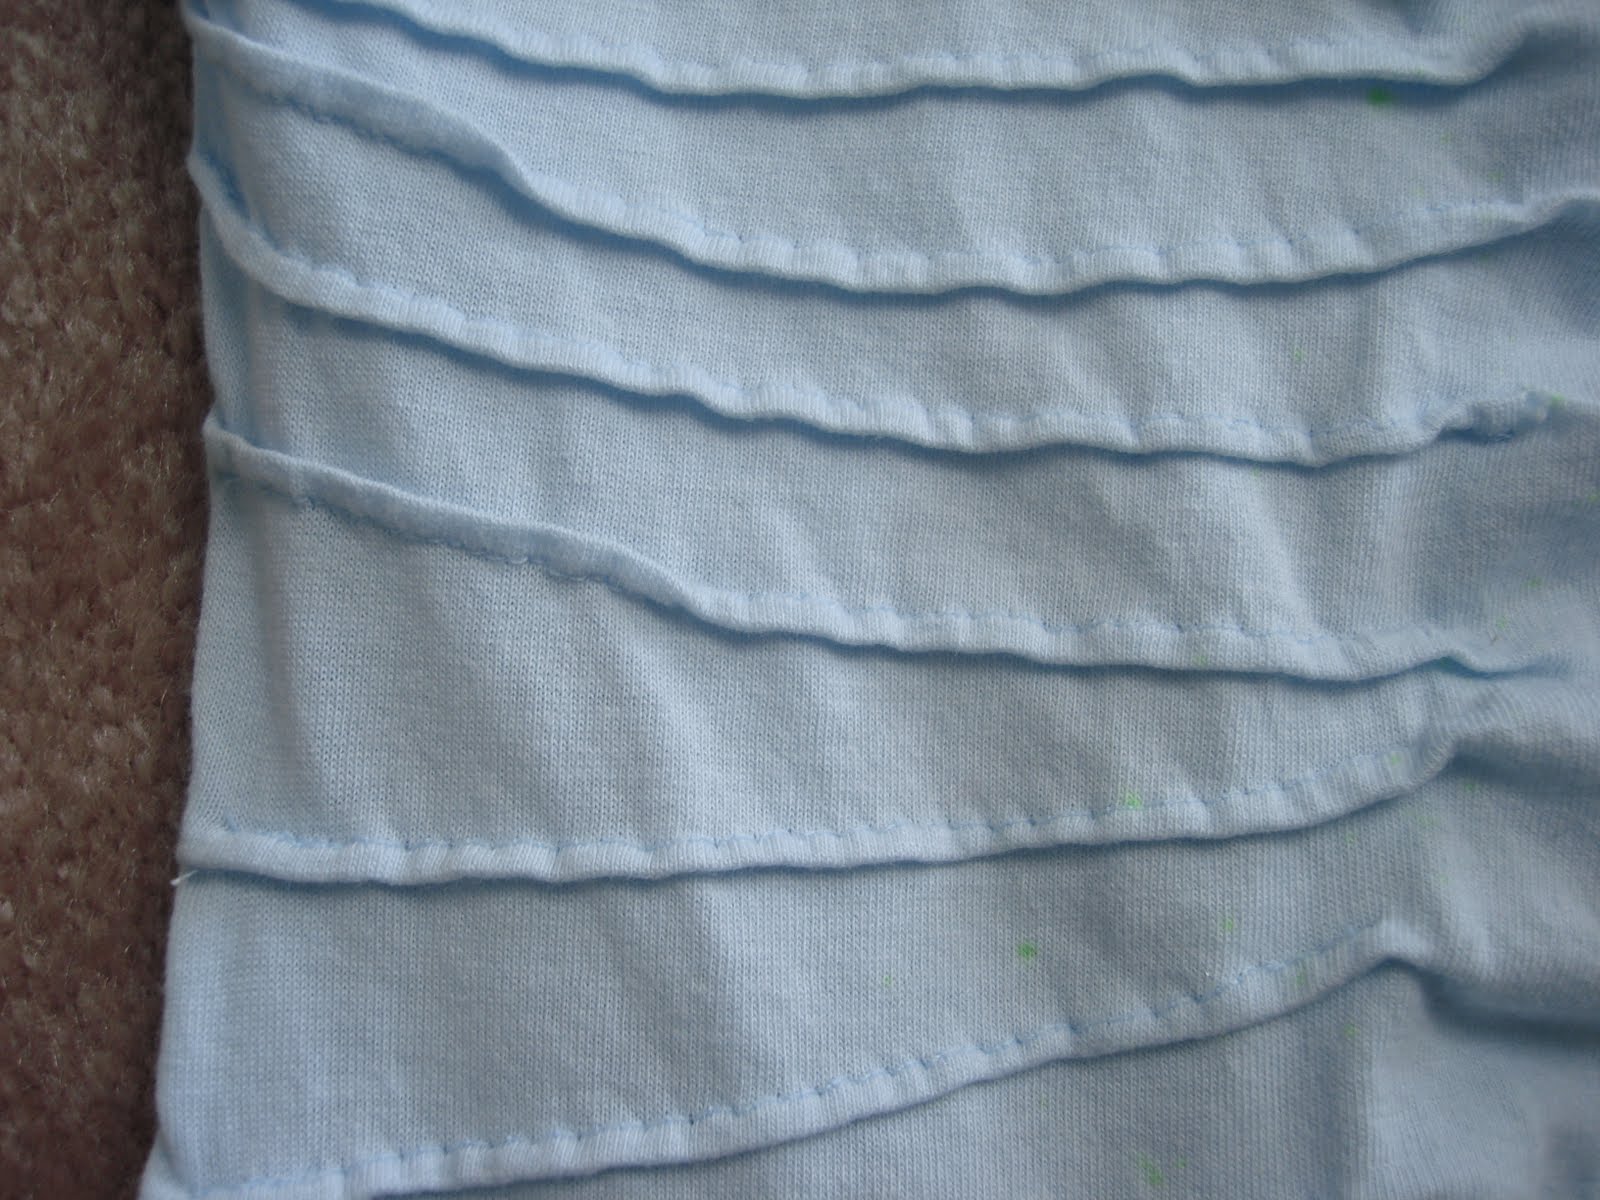
 after the shirt is altered, I worked on the sleeves. you pinch about 1/6″ inch of the fabric and sew it straight line horizontally, from the start of the neckline to the end of the sleeves. reverse a few times to make sure the stitches are in place. (sorry i don’t know the term for it, I’m not an expert seamstress!) I did 17 lines in the front and 16 lines in the back. (the only reason why I did so many in the back was because since it was a XL, the neckline was very low. You don’t have to do the back at all if the fit is just fine.) the spacings between the lines are roughly 1/2″ apart.
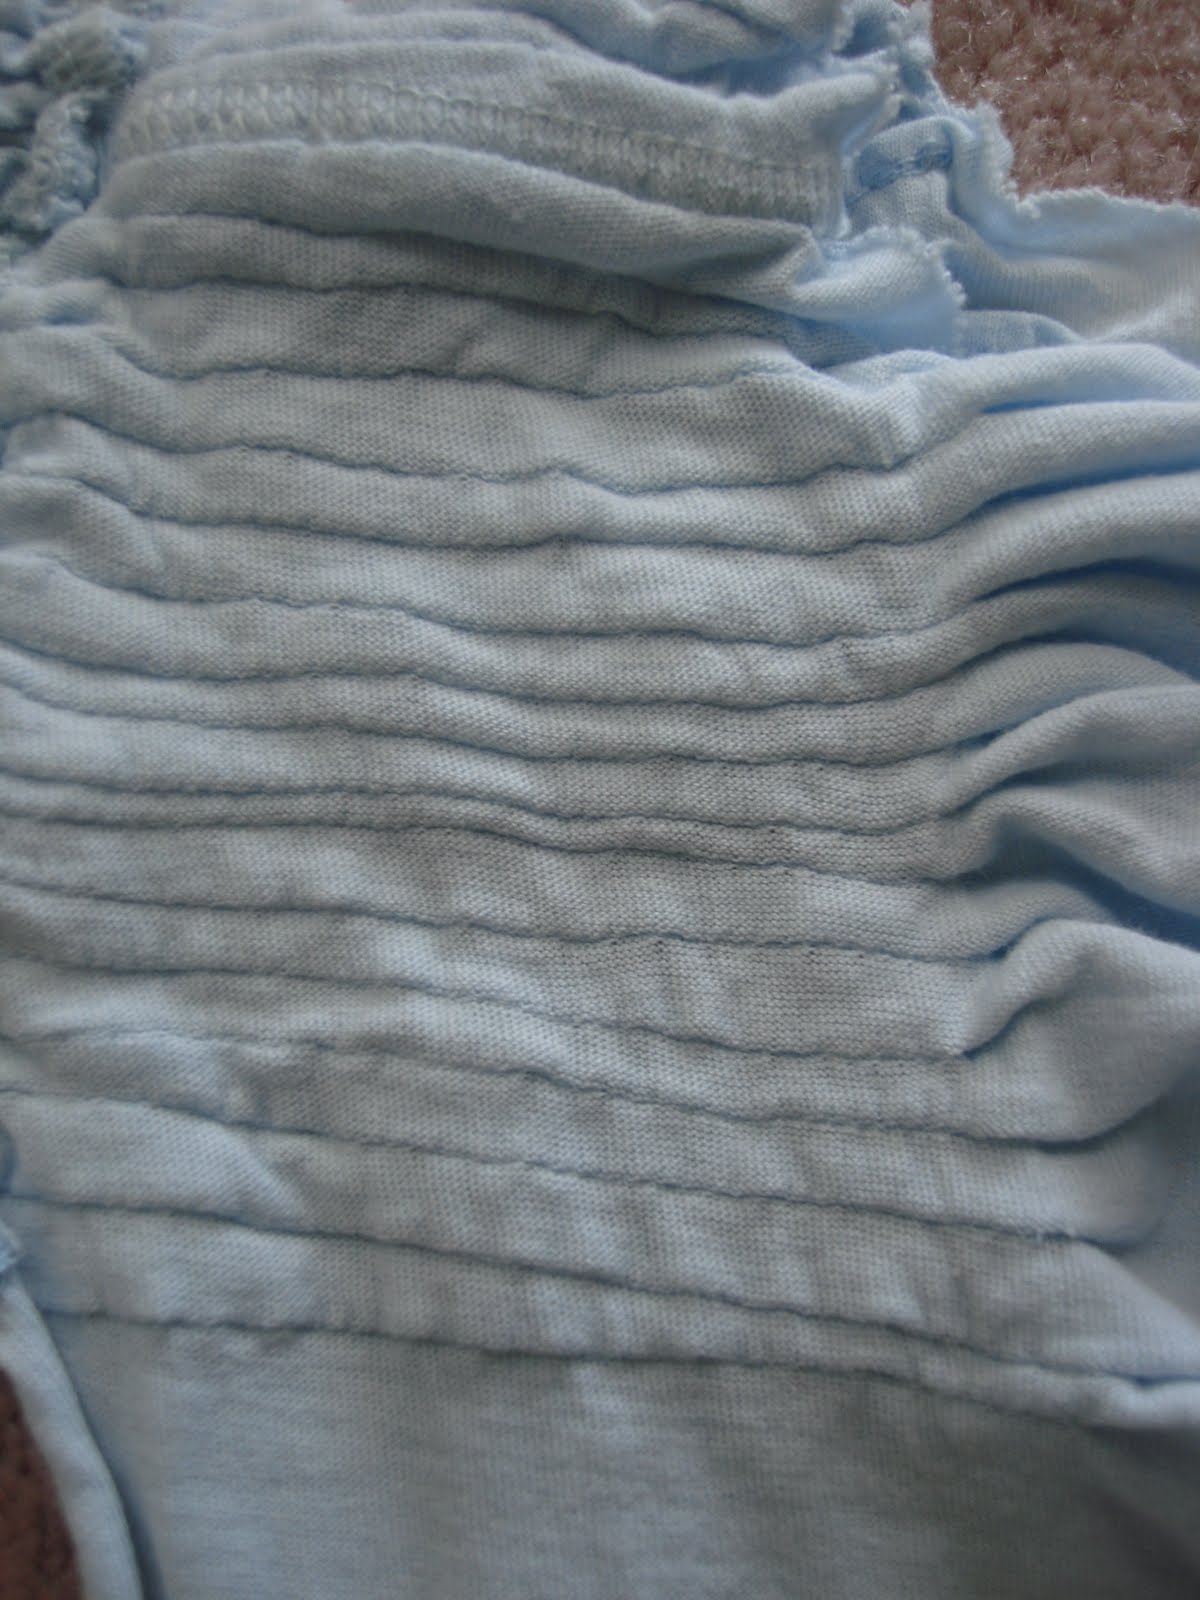 this is how the back should look. now repeat on the other sleeve.
 for the sleeves to be not so futuristic looking and stick out straight on the shoulders, I gathered the end of the sleeves by sewing on stitch length 5 and pulling it together to give it a “curved, round” look.
 then right on the back part of the shirt, I did the same as I did on the sleeves but only 8 lines VERTICALLY. I only did this because the XL shirt was too wide for me.
 the back of the seam
 the view of the back of the shirt. (remember this is actually the front of the shirt when no alterations were done.)
 then on the right side of the shirt, I did the same technique I did to the sleeves except it gradually gets longer per line, the longest line being the middle of the shirt. One line after the other is about 1/3″ shorter or longer.
 and you’re done! I hope I made sense! 🙂
That is sooo Cute! Would love a tutorial….
Insane! You are adorable, the shirt is adorable. I <3 everything!
You are SOOOO creative!
lovely! a tutorial would be great.
That is gorgeous! I'm in awe! Wish I create like you do!
thats brilliant work!
i really like your sewing posts. You should come check out http://www.sewingmamas.com. They'd love your creations too!
This is AMAZING! You are the best refashioner around! Seriously!
Erin
http://www.frundy.com
That is amazing. Truly. Great work! I hope you'll link this up today for Make It Wear It @ TheTrainToCrazy.com
That is great, I wish I was as creative as you…..beautiful.
You have such vision!! & you're very inspiring too : )
Wow, that looks great.
Looks really wonderful. Good job!
Totally love how this came out! And for those of us who are a little lumpier than you (lol) the pleating is very forgiving. How did you finish the neckline? Hemmed? Raw edge? Did you use a dress form or lay this out flat and go for it? A tutorial would shut me up. Just sayin'. Love your creativity!
This is beautiful, you are very talented! 🙂
Oh my goodness, I was just looking at your family's pics and the mini descriptions underneath them…soooo cute!! I love that you guys have a family blog. Your little girls are too precious!
You did such a great job on the t-shirt, too. I would have no clue how to do that on a sewing machine! I found you over at Transformation Thursday @ Shabby Chic Cottage–so glad I did.
I am most definitely becoming a follower right NOW. Looking forward to following your blog.
Lot's of love,
Laura
Just watched your video for Oprah–girl, you are like the sweetest thing ever. LOVE you show idea and all of your talent!
I voted a bunch of times for you. Hope you win : )
awesome jb on this T!!!! I love the collar!
You really should share with us how you did that!! Beautiful!
cool – how did you do that? Happy Transformation Thursday <3
Your top is beautiful! I love the colour.I'm visiting with syst.
Seriously. Gorgeous!! Thanks for sharing!
That's incredible…..where did you learn to do these transformations?
You are so talented and have great vision.
Yes, tutorial please!! That's quite a transformation, it turned out sooo cute. I want to make one:)
Visiting from justsewsassy.com
I 2nd, 3rd, 4th…a tutorial! Your shirt is great! Thanks for sharing. Happy Sewing! :o)
Another great DIY! Thanks for sharing! This one is my favorite. Love, love, love it!
Fabulous job!
I saw this on A Few of my Favorite Things. I can't believe this is the same shirt! You have great talent.
P.S. I'm a new follower!
Every single week I am totally amazed at what you do!
Wow! Awesome! So creative and talented! It's beautiful.
You rock that blouse! Anthropologie had nothing on you girl…
thank you so so much, you are all too kind! 🙂 and ann, it was a raw edge, and renee I started refashioning about 6 months ago, i just look at what I wanna make and copy it…i don't know how else to explain it.
but yes I will do my best to do a tutorial and a picture of the back of the shirt for more details soon. I'm now regretting I didn't take step by step pictures along the way! sorry!
Wow this looks exactly like the higher priced one! I started refashioning clothes lately too. I find it much easier than starting from scratch:)
Old Navy clearance is one of my favorite places for refashioning finds. So cute!!
This caught my eye at Tatertots and Jello. LOVE it!
hi, this is royal!! you did an amazing make-over here. i love your new shirt, and i 'recognise' your old shirt as one of many in the closet… lovely, simply love it.
do get our readers to know about you and link this excellent craft tutorial up to our weekly DIY Craft Linky Party, here:
http://www.finecraftguild.com/diy-tutorial-linky-party-4/
, okay?!!
it gives you a link back from our pr3-4 site and well, you'll find a 'pot of gold' in terms of fun free craft tutorials when you get there, no doubt!
Hope to see you soon!
Rose
That's amazing! You're so talented! I hope you get on the Oprah show. 🙂
Very clever…Love the color
Incredible! You did a great job and I love the color!
Wow…you did a really great job. This is so cute on you!
That is so cute! Great job! :o)
Oh my you have me looking at all the different size racks these days with your fantastic creations!! Do hope you will show us how you made this lovely!!
bee blessed
mary
Such a cute shirt. Fabulous job!
Wow you are so creative, I can't even believe it's the same T shirt!
This is seriously so amazing!! Wow!!!!
Thanks so much for linking up!
Beautiful. How did you do it?
I too want to know the secret! That is amazing!
suchakingdom.blogspot.com
Adorable….as always!! Thanks for linking @Creative Itch's "Sew Cute Tuesday"!
WOW! This is awesome! It's look great, I need a tutorial on how you did it!
tutorial please! That is awesome! I have a bunch of shirts that are too big for me and would love to do this to some of them.
Love the idea! What a great shirt. I love being able to sew and change things that are too large at the store to fit me for a fraction of the cost! I love blue as well.
I love this!!
Great job! I tried on that very shirt in Anthropologie and loved it. Would have bought it, in fact, if there hadn't been a stain. Yours looks just like it!
http://sourkrautkrafts.blogspot.com/
Wow!
I am amazed! How did you do that? It looks astonishing!
Wow! I found you on Tea Rose Home. I think your finished product may look better than your inspiration! Great job. I'd love to see a tutorial if you have a chance. Seriously – amazing!
I love this top, it turned out lovely!! I hope you do a tutorial 🙂
Once again, great job! I featured you today — Mandy, http://www.craftedition.blogspot.com
Whoa! Which is yours and which is the Anthro, I can't even tell. Great job, this turned out gorgeous! New follower.
-Ann Marie
Wow! You did an awesome job! I don't think I have enough inspiration to tackle a project like this, so I really admire when someone else does!
That is amazing! I can't believe you did that with your 2 hands…I'm not worthy! That would really make my hubby happy seeing as I have an anthro addiction and no money!
Awesome! I love it. I started a new link party today. This would be prefect for it. Come link up!
http://beckywaldrop.blogspot.com/2010/07/knock-it-off.html
I love what you did with the top!!
I featured you today on Make It Wear It! Feel free to grab my featured button if you'd like!
Andrea @ TheTrainToCrazy.com
WOW! You are awesome! Not only does it look great but you are a AMAZING for being able to do that! Thanks for joining us for Anything Related #14!! ~Bridgette
I really love that! The blue color is adorable too.
Thanks for linking up to We Did It! Wednesday!
p.s. Is it funny that I know which your projects are each week just by seeing the thumbnail picture? You always do the best clothing makeovers :).
I love this project and your humble attitude is so refreshing. To quote you "I am not an expert seamstress." But you are making beautiful things! I did have a question about this project…it seems essential that the shirt is bigger than the size you actually need it to be. How much bigger do you think? Or is there a way to alter it so you could use a shirt size closer to your own?
This is amazing! I love it!
I featured you here:
http://firefliesandjellybeans.blogspot.com/2010/07/sunday-spotlight-soys-35-favorites.html
Truly amazing! I'd love to make a shirt like that! You have such vision.
I have that shirt in a bag on top of my craft pile waiting for me to figure out how to rip it off before returning it. Thanks for the ideas!
thank you so much everyone!
megan: yes it does need to be bigger, this was a XL shirt. I think it does need to be significantly larger since the little pleats will shorten the length greatly. but if it's already a longer length shirt, then I would say medium into a XS would work as well.
OMGoodness I want your shirt. Would you be making anymore in the future for sale? Just beautiful and I love the color.
you are very talented.
This is so cool. You know I have the exact same top from Old Navy. I tried to refashion it differently, with limited success. I wish I stumbled upon this tutorial before I did that. Now submitting this tut to stumbleupon and pinterest.
Muy bonito.
Very nice! When you sew backwards a few stitches at the beginning and end of a seam so the stitching doesn't ravel, it is called back stitch. 🙂
You are very talented.
Just watched your tutorial and was so happy I did. Wanted to do something similar with a favorite tee that had small pin holes here and there but was still hedging. I hated to toss it but wasn't sure of the outcome – Now I know ! Thanks so much