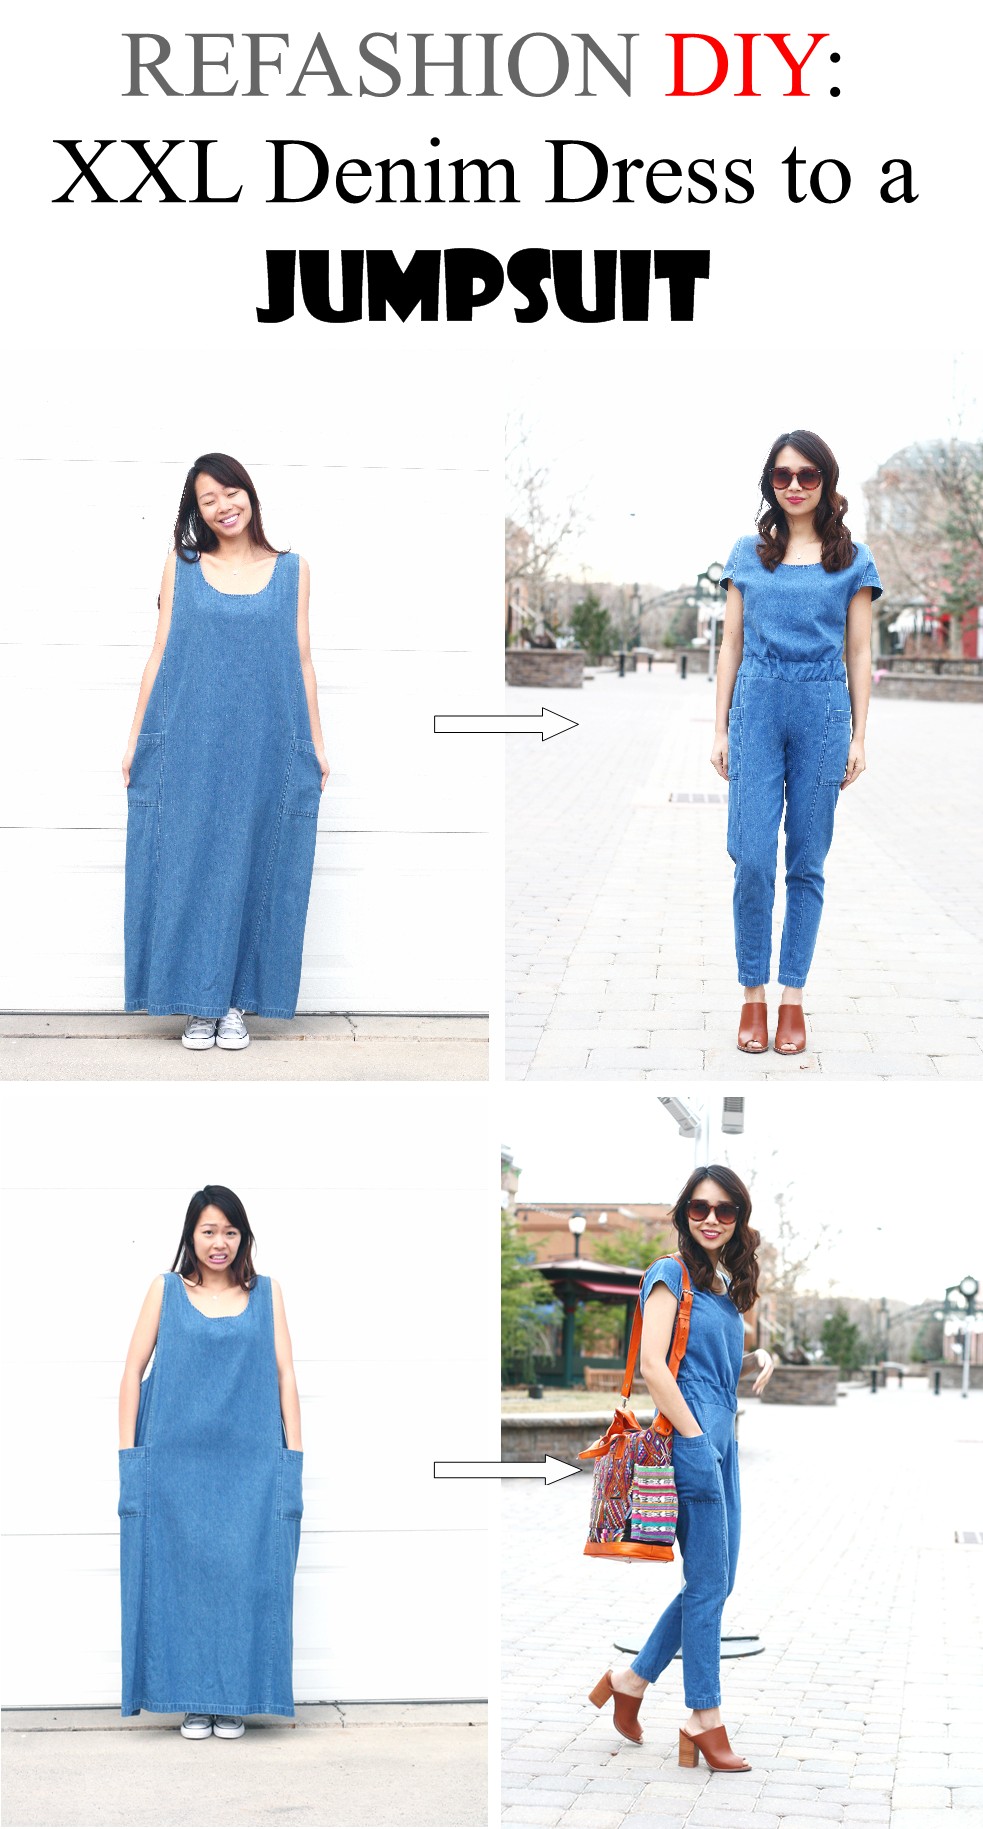
I am excited to share with you this tutorial on how to make a maxi dress into a jumpsuit! If you are taller(I am 5’4″), then the length will be shorter unless you can find a tall size maxi dress. But this is pretty easy, I’ve only made pants one time when I was 12 years old and it was pajama pants, but making pants is much easier than I thought, so don’t be afraid to try it!
BEFORE:


PHOTO INSTRUCTIONS:
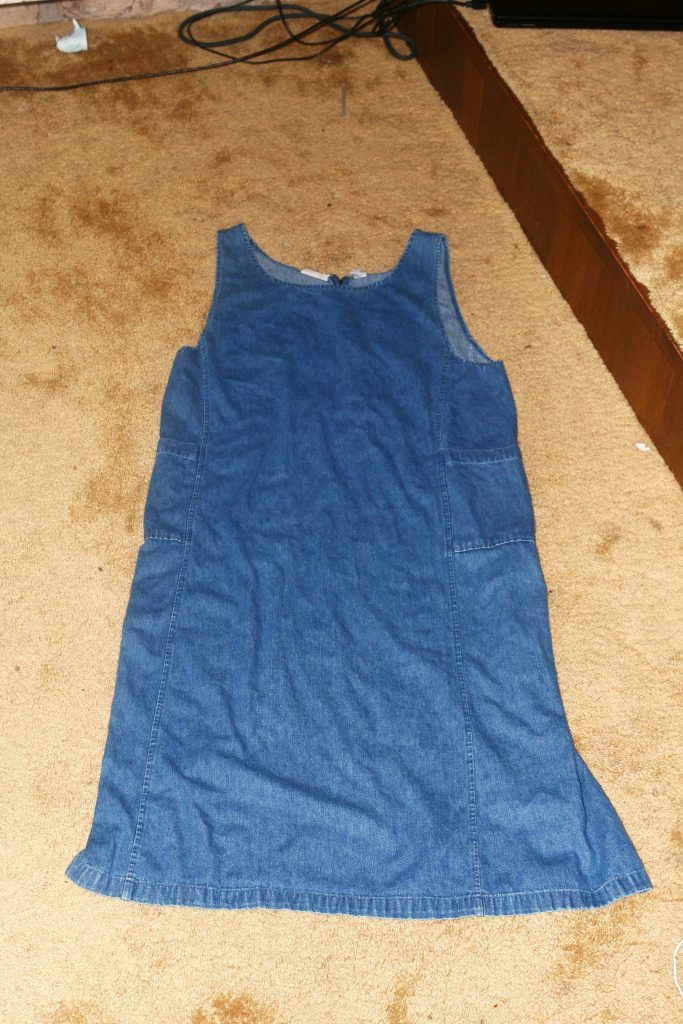
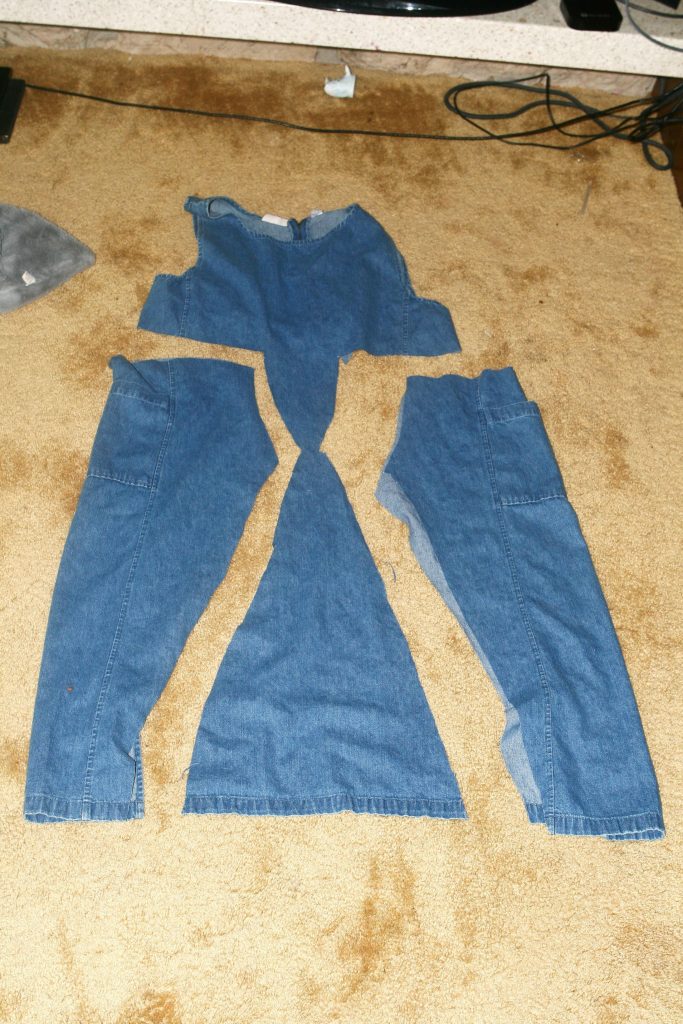
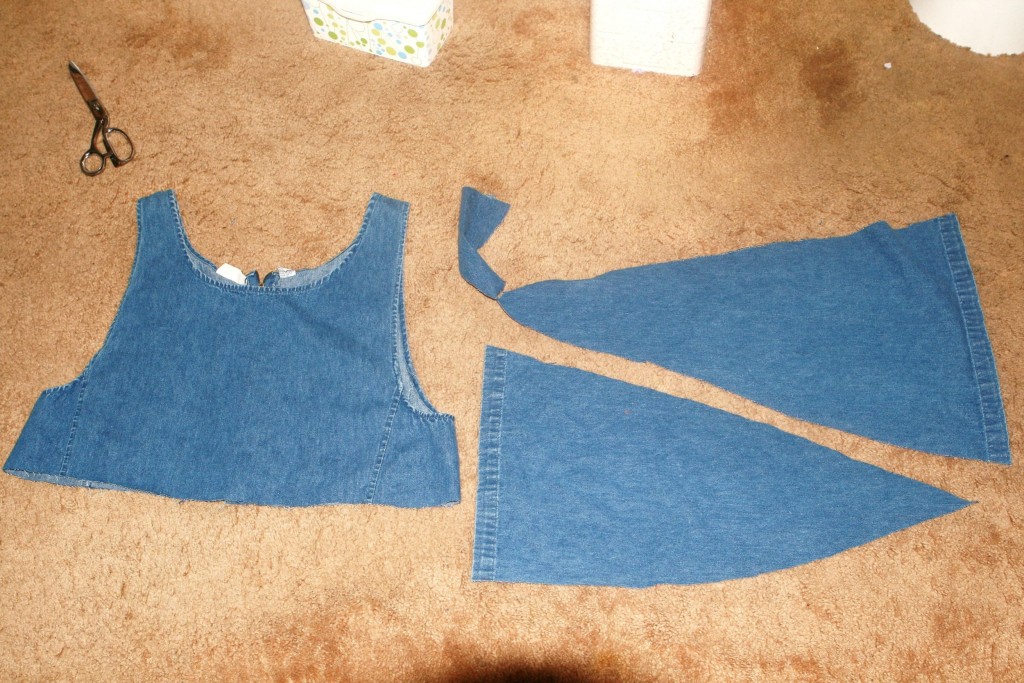
1. Lay the dress flat.
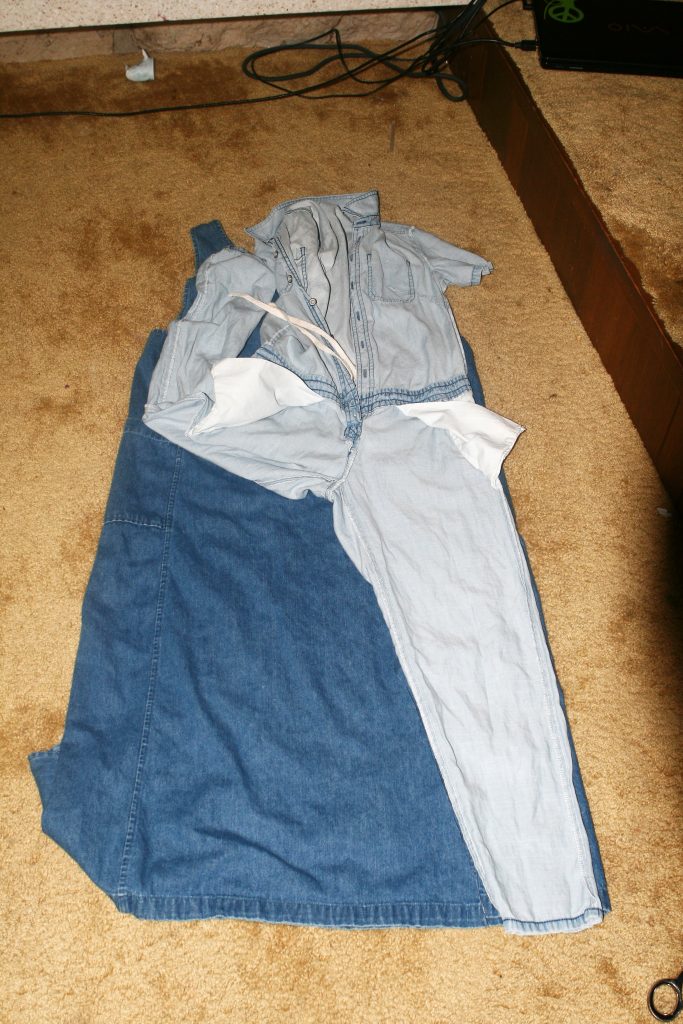
2. Using a jumpsuit you own, trace the pants pattern.
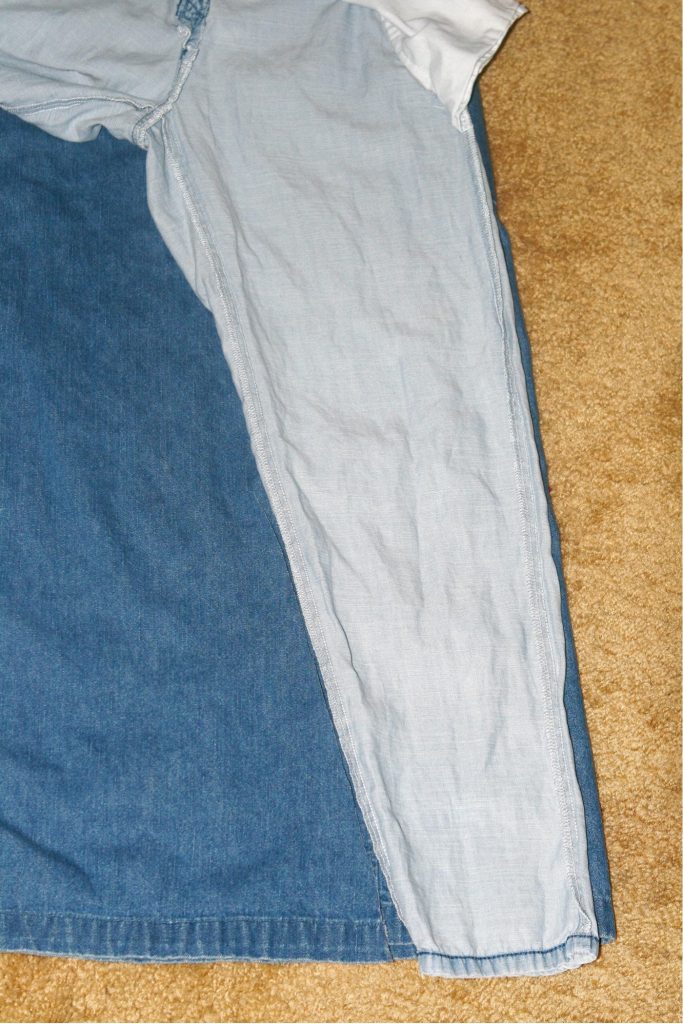
3. Make sure to leave a 1/2″ extra when cutting out the pattern.
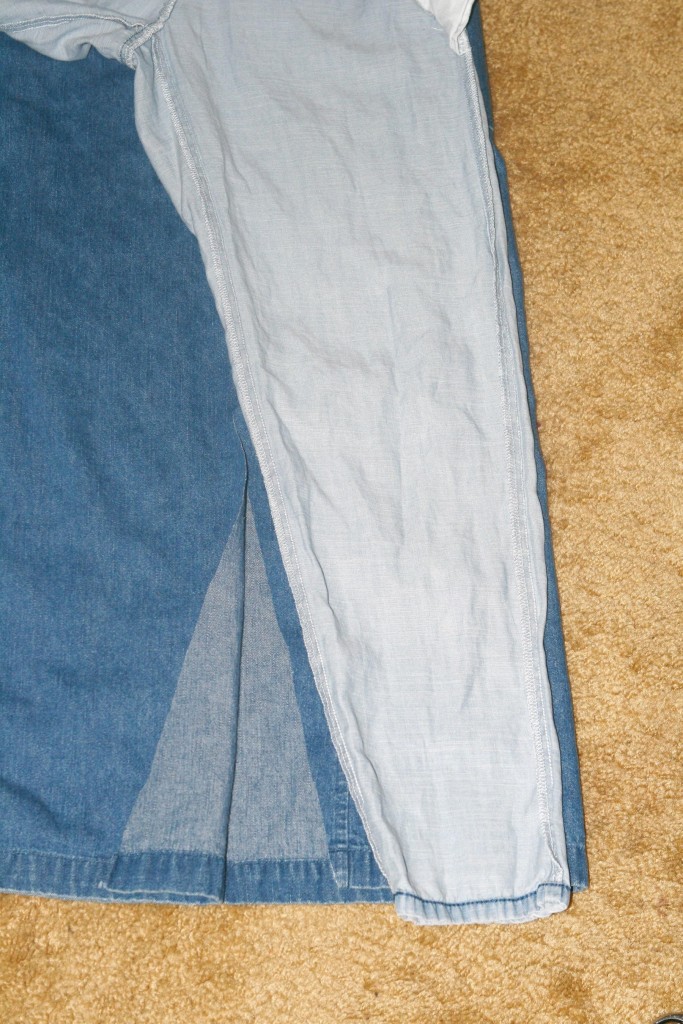
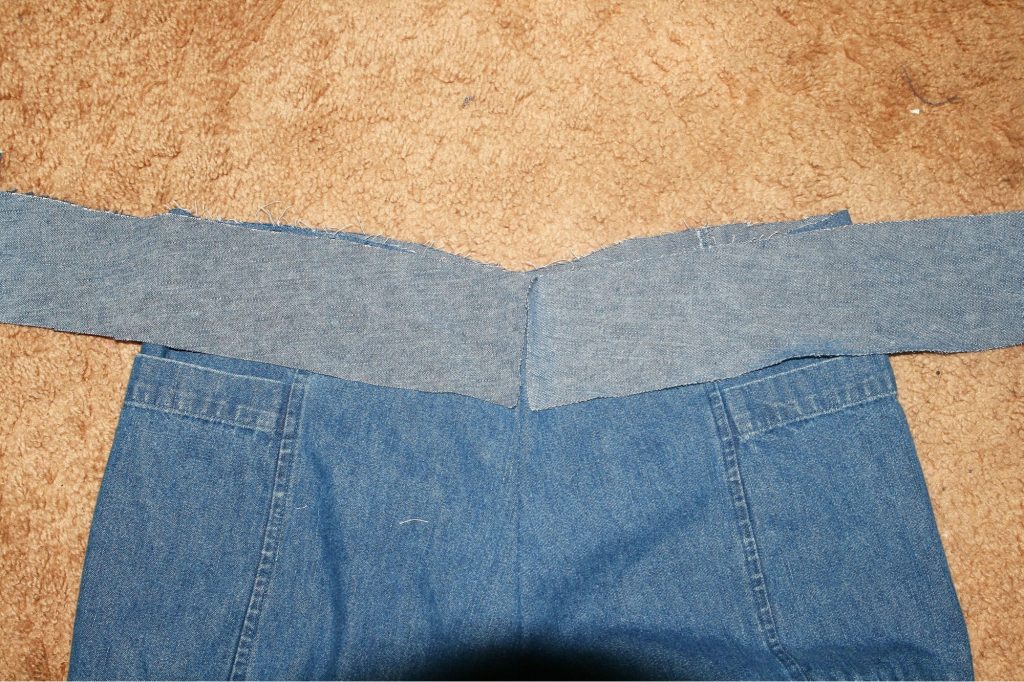
4. The length of the pants was 2″ shorter than the length I’d like it to be. So I used the extra fabric to make a 2.5″ waistband, to give it extra length.

5. Using the extra fabric, cut out a 2.5″, the width your waist + 2″. If you look at the first strip on the top, it wasn’t long enough so I cut out a small fabric to add to the waistband.
6. Sew the waistband right sides together, the bottom of the waistband sewn unto the pants, the top of the waistband sewn unto the top bodice.
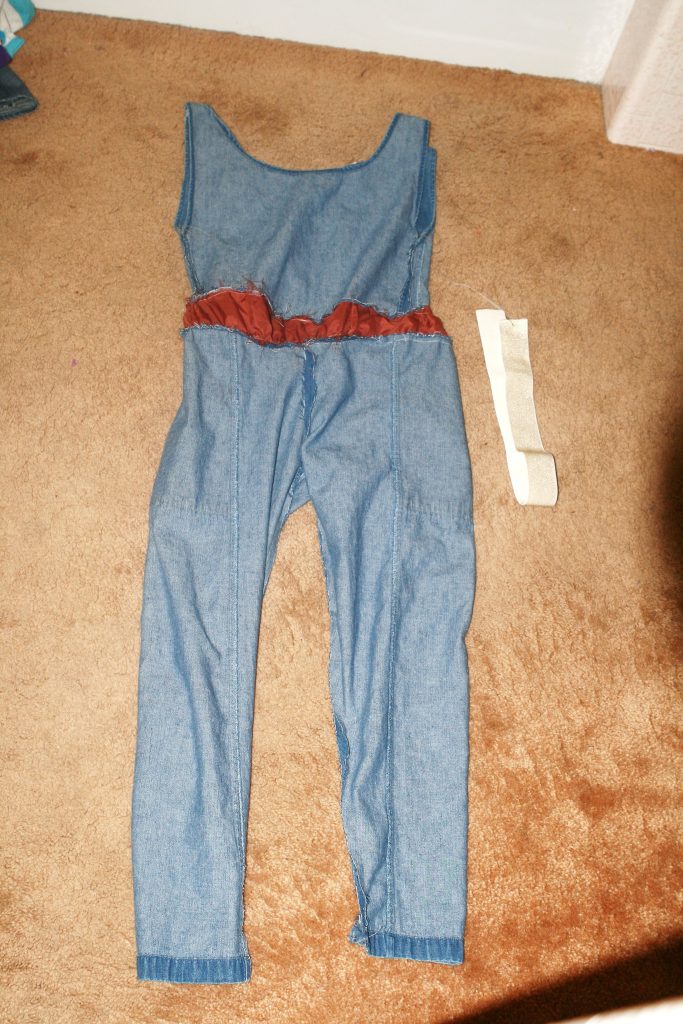
7. I used a scrap fabric for the other side of the waistband since I didn’t have enough of the denim fabric to make the waistband. But it doesn’t matter since it’ll be on the inside and no one will see it. 😉
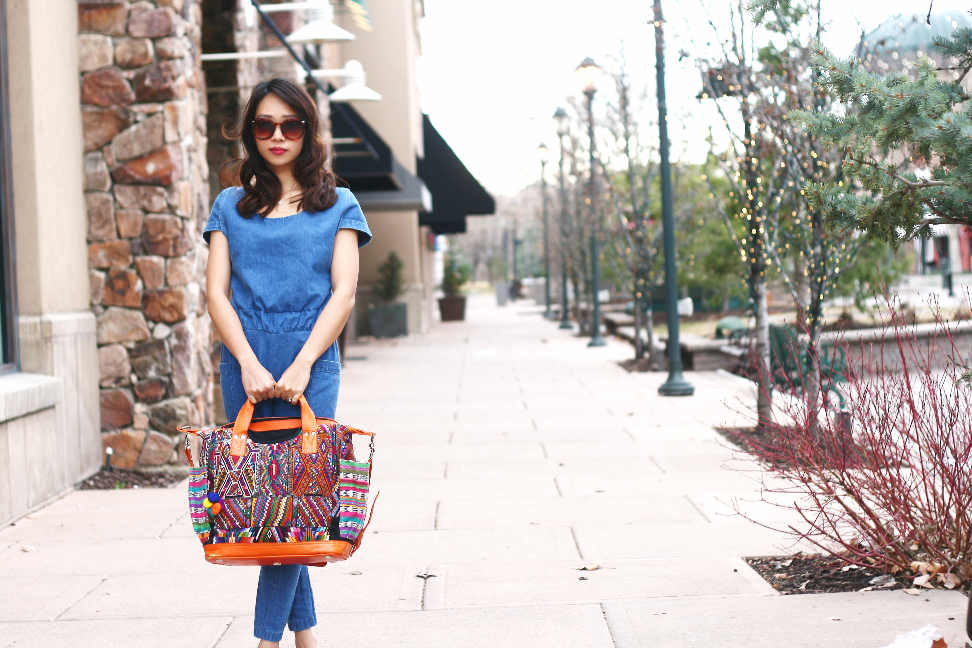
AFTER:
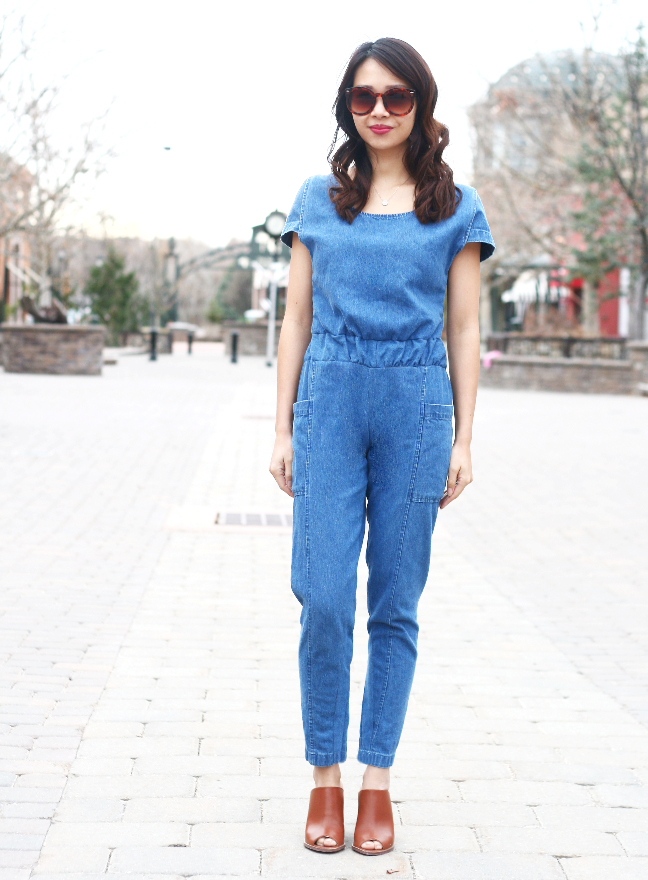

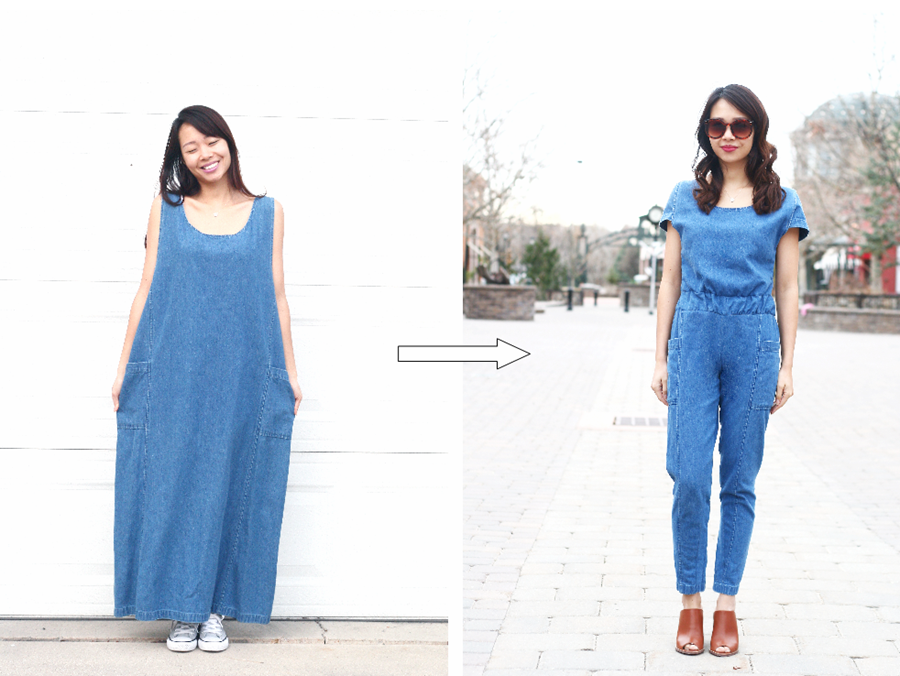
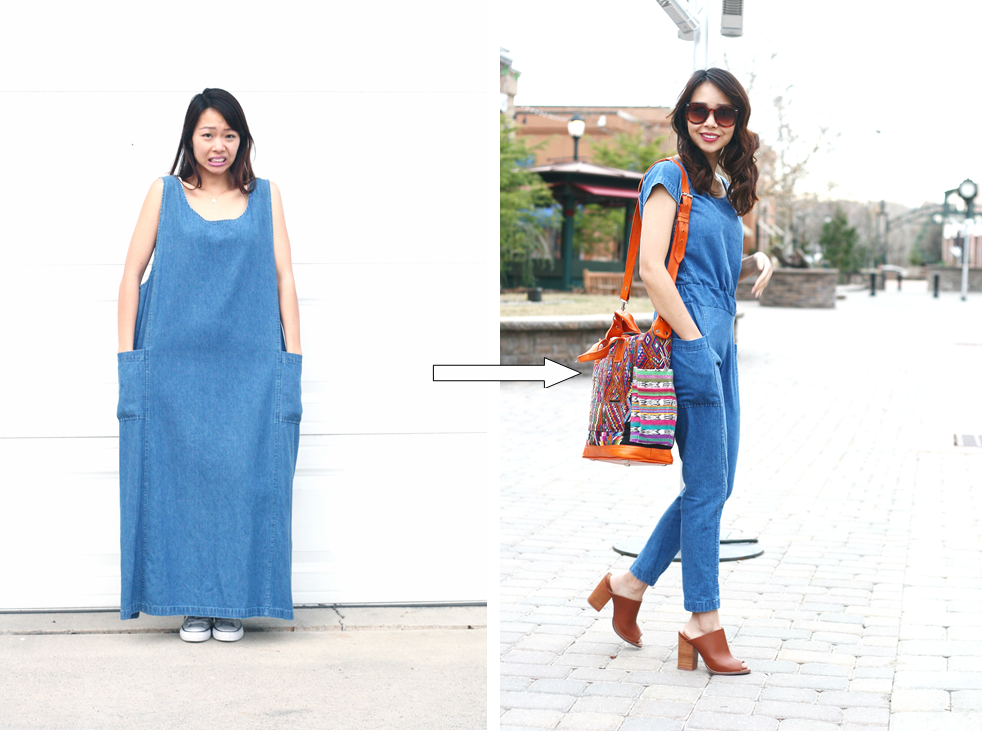
I was pretty nervous to start on this refashion. At first I planned on making an overall skirt which I would have had plenty of fabric to make, but then last minute changed my mind to make a jumpsuit, I knew I barely had enough fabric, or maybe not enough, so you can imagine my nervousness as I cut into the dress! I had just enough fabric, after using scrap fabric to make the inside part of the waistband. If I had more fabric left, I would have loved to have attached a thick waist-tie in the front, wouldn’t it look adorable with a cute bow tied in the front?
For behind the scenes and sneak peeks of my next refashion follow @sarahtyau on Instagram
Watch my other Refashion Revision episodes
We are starting a mother-daughter sewing series! Watch “6 Reasons Why You Should Learn to Sew” and subscribe to our channel to learn to sew along with us!
I totally loved it, Sarah!! I’m always afraid to try some refashion like this, but you’re inspiring me to give it a try! 🙂
Thanks a lot for this!
Greetings from Brazil! ❤
I am so happy that i found your blog! you’re creating something amazing! as a complete beginner i know i have to learn more and more, but after finishing school i just found out that sewing is what i love 🙂 thank you once again!
greetings from Poland! <3
The photos of you in the “before” are hysterical! You did a great job.
You are so clever! I loved the before photos! haha!! Thanks for sharing at Thursday Favorite Things Blog Hop!
How adorable! what an amazing transformation! 🙂
Amazing! I am going to try making it! Am going to find me a maxi dress from a thrift store! Thanks for inspiring us.
Looks amazing would love to try it!!
How did you do the sleeves?
Karen
tHIS IS AWESOME! i TRIED TO DO THIS RECENTLY W/ A MAXI DRESS THAT WAS TOO BIG, BUT SOMEHOW i GOT THE CROTCH WRONG AND IT DIDN’T FIT RIGHT…PROB BECAUSE i DIDN’T TRACE PANTS LIKE YOU DID! i WILL TRY AGAIN W/ YOUR INSTRUCTIONS- THANKS!
hi! How did you add the sleeves? I never really know how to add them without them being too tight..also, do you have a zipper down the back of the jumper? Or do you just fit through the neck hole? It’s such a cute jumper + I’m feeling like I need to take a trip to d.i. Soon 😉 also, I just found your Instagram + blog and reallyyyy appreciate your honestly with all of your words! You inspire me to be more down to earth + “real” with my own blog.
Best of luck!
Kaylee jo
There is a zipper, the zipper was there before. 🙂 and the sleeves are just cap sleeves, with no sleeves underneath the arm pit, it’s just a sleeve that covers the upper arm, does that make sense?
And you are so so sweet, your words mean so much to me! Thank you so so much!
I am so sorry for a late reply! The sleeves are just a upper sleeve, it’s like a wide U-shape fabric that I bunch up in the middle and sew on the shoulders. Does that make sense?